Tuesday, May 31, 2022

Sweet Floral Thinking of You Card with Coloring Stencils

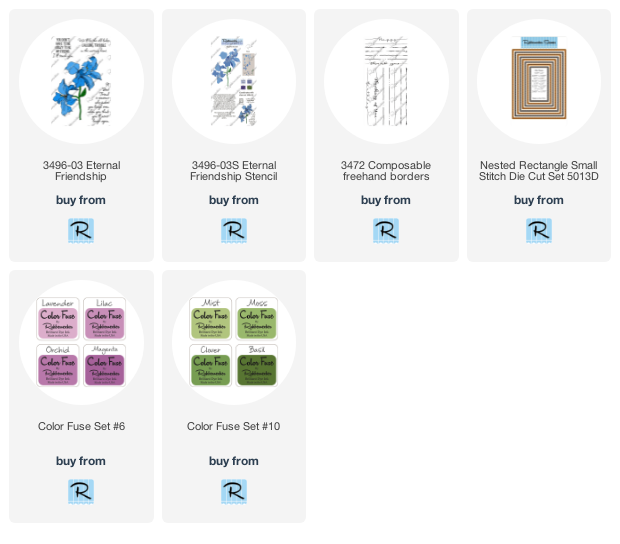
 Hello friends!  Today I'm sharing a card I made with another Rubbernecker Stamps new floral image and coordinating coloring stencil.  This set is called Eternal Friendship Set and it has one beautiful floral stamp and three fun sentiments.  Instead of using one of those, I chose one from the new Composable Freehand Borders set.  This was a fun and quick card to make!

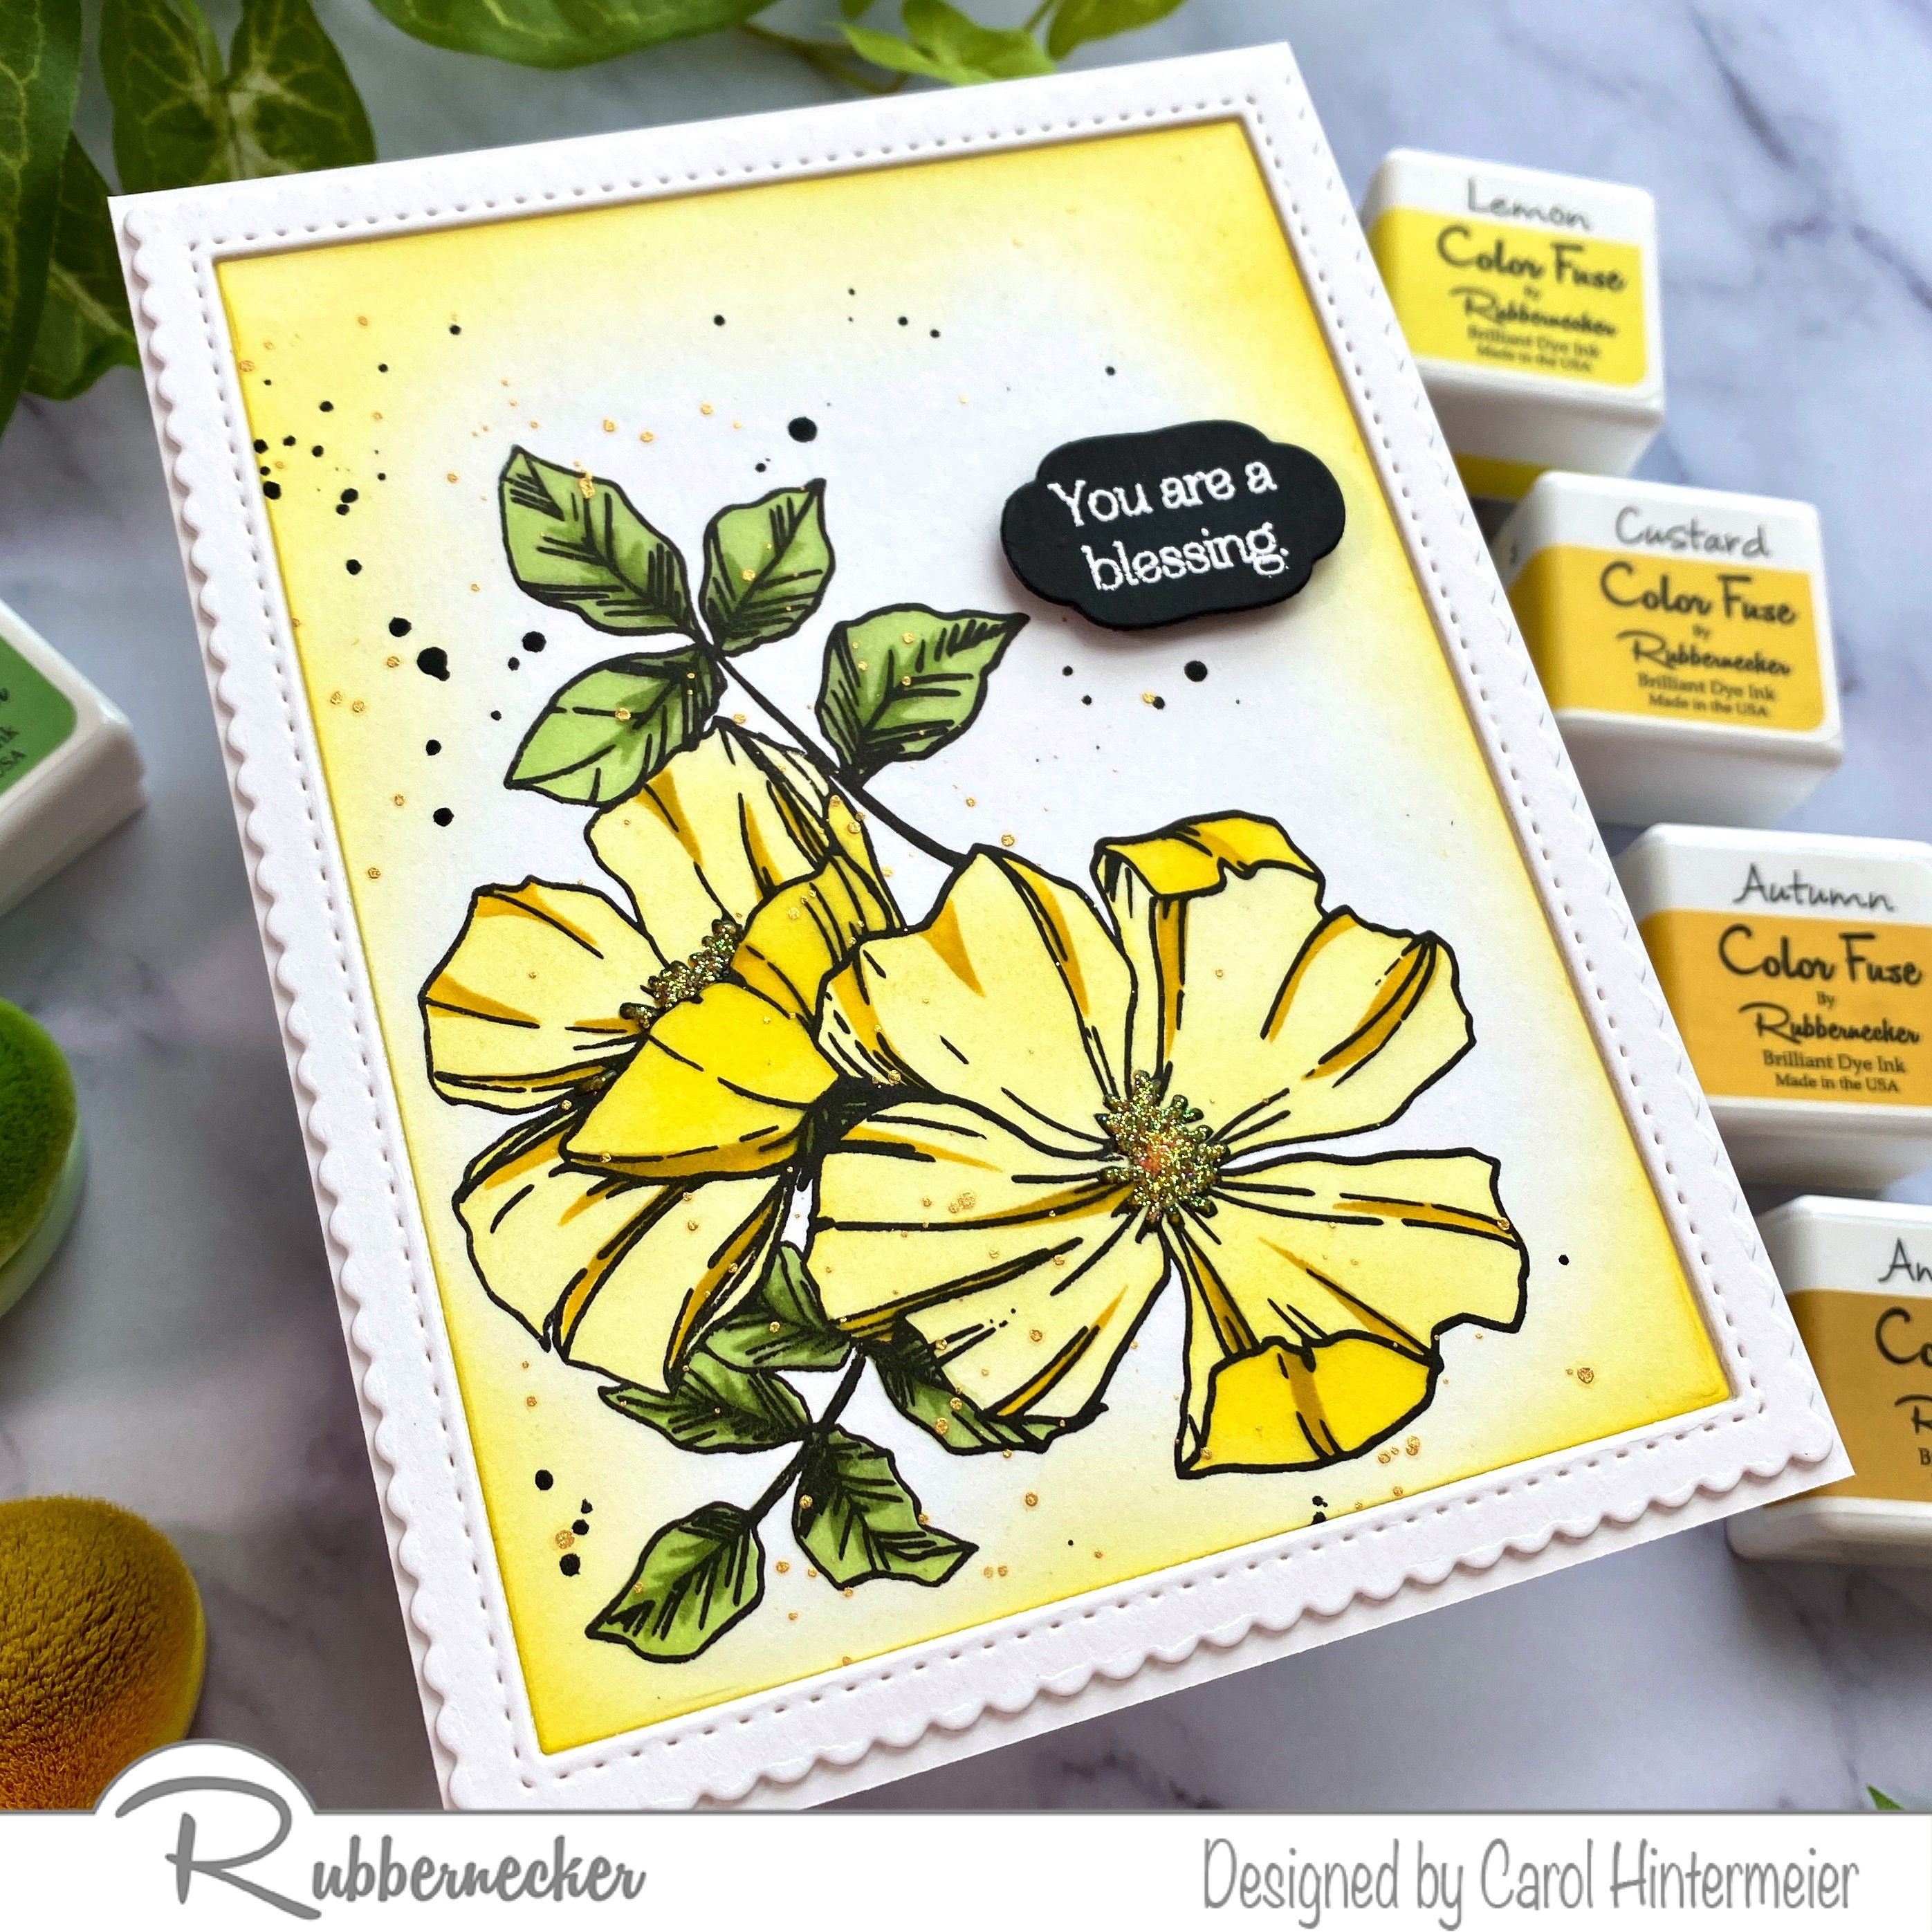
First I stamped the Eternal Friendship Set flower with black ink.  I stamped it twice, offset at the top and bottom of my card for a different look.  I made sure to dry the ink a bit with my heat tool before I stenciled on the inks.

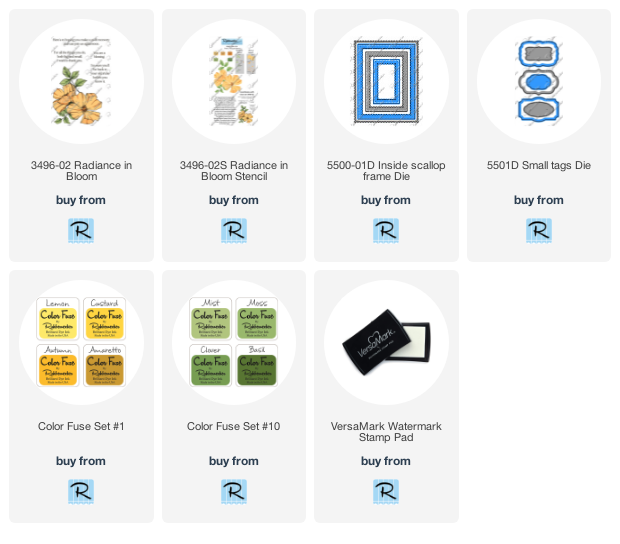
Next I used the coordinating Eternal Friendship stencil and the purple inks in Color Fuse #6:  Lavender, Orchid, and Magenta.  I used Clover ink from Color Fuse #10 for the leaf and stem.

I used the largest nested Rectangle Small Stitch die to cut the panel.  Then I added a coordinating purple cardstock layer and adhered it to my A2 card with glue.

I stamped the sentiment from the Composable Freehand Borders set with Magenta ink.  Then I trimmed it into a strip, added a purple cardstock layer, and popped it up with foam tape.

For a bit of shine I added Dandelion Yellow Nuvo Crystal Drops on the flower stamens and Honeysuckle Nuvo Jewel Drops here and there on the card.

Thank you much for stopping by!  Have a wonderful day!

Saturday, May 28, 2022

Honey Bee Stamps Rainbow Dreams Release Cards

Happy Saturday, crafty friends!  Have you seen the new mini release by Honey Bee Stamps called Rainbow Dreams!  I just love it, and have had lots of fun making many different styles of rainbow cards!  I thought I'd share all of the cards I made here with a few of the extra details.

I've used these products from the Rainbow Dreams release on these cards:

Rainbow Dreams stamps and Honey Cuts
Look For The Rainbow stamps and Honey Cuts
Rainbow Builder A2 Card Base
Rainbow Accents Honey Cuts
Rainbow A2 Pierced Cover Plate die
Rainbow Hot Foil Plates
Geotrellis Background stencil
Rainbow Birthday paper pad
Bee Creative Wax Stamper - Rainbow
Bee Creative Honeycomb Wax Melts - Rainbow Birthday

This first card is one I'm sharing that's part of our Instagram hop beginning today!  When you are finished here, be sure to join us on the hop (there are prizes!)

I ink blended some Distress Inks onto my die cut pieces for this card.  I've linked the colors I used in the product list below.  I also used some dies from the Horizon Slimline Border set and the bee is from the Sweet Honey Bee stamp set.  It also has coordinating dies!

Yes!  There are new wax melts and an adorable rainbow wax stamper!!

These next cards are ones I shared on Instagram for the sneak peeks.  I also have a couple of reels I shared on my grid--check them out on my Instagram!  I pulled out my stash of glitter paper and foam for this rainbow shaped card.  So fun!!!


I made a super fun infinity edge shaker card here!  If you have questions, please use the contact me box in the left column of my blog so I can answer you.  Also, click here for my Instagram reel!


I used Distress Oxides with the Geotrellis Background stencil here.  I used Saltwater Taffy, Squeezed Lemonade, Salvaged Patina, and Wilted Violet.


And my final card is one I had visualized as a nighttime rainbow scene.  My thoughts were sometimes it seems dark, but there's always a rainbow, and I am here for you!  Plus, I had lots of fun with the Rainbow Hot Foil Plates!


Thank you so much for stopping by!  I hope you have a wonderful weekend!!

Check out the Rainbow Dreams release:

Wednesday, May 25, 2022

Rainbow Dreams - Hot Foiling Rainbow Sneak Peeks

 Hi crafty friends!  Today I'm sharing two cards I made for Honey Bee Stamps' Rainbow Dreams release sneak peek!  This release is full of stamps, dies, hot foiling, and all of the rainbow goodness!  This release will be available this Friday, May 27, at 10 pm CST.  My first card is all about the hot foiling!

I made a non-traditional colored rainbow after I was inspired by the piece of patterned paper I saw in the new paper pad.  It reminded me of a night sky and I thought the sentiments kind of tied it all together.  I think this would be a sweet card for someone going through challenging times.  The links for these new products I've used will be active on Friday when the release is available:

These are the foils I used for my oh, so shiny card:

I used a piece of paper from the new Rainbow Birthday Paper Pad.  After I die cut it with the largest Deckle Edge A2 die, I adhered it to my card base.  After I used my Glimmer Hot Foil machine to foil the Rainbow Hot Foil Plates, I used Bee Creative glue and foam dots to adhere the elements to the card.  Then I stamped the sentiments from the new Look For The Rainbow stamp set in Intense Black ink and die cut them with the coordinating dies.

My second card features the soon to be available beautiful Geotrellis Background Stencil.

I used ink blending brushes to add some Distress Oxide inks through the stencil.  I did spray the back of the stencil with Pixie Spray before I used it.  I used Gold Speckled Aura foil for the sun and Rainbow foil from the Rainbow Hot Foil plates set.

These sentiments are also from the Look For The Rainbow stamp set.  There are SO many sentiments in this set, some complete, and other individual words/phrases to build your own!  I counted 27 in all!

I hope my photos give you some idea of the beautiful sparkle and shine from the foiling.  I practically stood on my head to get a decent shot of these!  LOL!  If you've ever tried photographing anything reflective, you know what I mean! 😁  Be sure to check out Honey Bee's shop on Friday evening to see all of the beautiful rainbow goodies!

Product links for current items I used:

Monday, May 23, 2022

Altenew May 2022 Lovely In Lace Collection Release Blog Hop + Giveaway ($300 in Total Prizes)

Hello friends, and welcome to Altenew's blog hop for the Lovely In Lace Collection release!  You should have arrived here from the blog of Nathalie DeSousa.  If you'd like to start from the beginning, head on over the the Altenew Card Blog.

For my card, I used two products from this release.  I used the Vintage Lace 3D Embossing Folder and the coordinating Simple Coloring Stencils to create an easy to make, but beautiful, card.  Read on for the details!

Before I ran my white cardstock and the Vintage Lace 3D embossing folder through my machine, I swiped a metallic gold pigment ink pad over the flat side of the embossing folder.  This gave the background a subtle metallic shine.  I wish photos could capture it!

Next I used the Vintage Lace Simple Coloring Stencils to color each layer.  I used ink blending brushes and the Shades of Purple Crisp Dye inks to color the flowers and leaves.  Then I used Midnight Violet ink to stencil in the "hugs" sentiment.  There is a layering guide included with the stencils to make your coloring very easy to do!

I trimmed the panel to 4" x 5-¼" and added gold metallic splatters.  I used Enchanted Gold from the Metallic Watercolor 14 Pan Set.

I added some foam tape to the back of the panel to adhere it to an A2 card base.  I used a sentiment from the Bountiful Bouquet stamp set and stamped it in black ink and then popped it up on the card.

Thanks so much for taking a look at my stop on the hop!  Be sure to leave a comment here to increase your chance for an awesome prize!

Your next stop on the hop is the beautiful blog of Virginia Lu!


Giveaway Prizes

$300 in total prizes! To celebrate this release, Altenew is giving away a $50 gift certificate to 2 lucky winners and a $25 gift certificate to 8 winners! Please leave a comment on the Altenew Card Blog and/or each designer’s blog post on the blog hop list below by 05/29/2022 for a chance to win. 

Altenew will draw 10 random winners from the comments left on each stop of this blog hop and announce the winners on the Altenew Winners Page on 05/31/2022.

Blog Hop Order:

Altenew Blog

Jaycee Gaspar

Mindy Eggen

Jenny Colacicco

Angela Brennan

Tenia Nelson

LauraJane

Nathalie DeSousa

Carol Hintermeier

Virginia Lu

Nenette S. Madero

Terri Koszler

Katrina Howe

Reiko Tsuchida

Linda Westfall

Bridget Casey

Ann Taylor

Colleen Balija

SathyaKala Sankaran

Eva Bussom

Natasha Davies

Sande Woodson

Susan Stagno

Nichol Spohr

Hussena Calcuttawala

Nandini Karmarkar

Preeti Chandran

Sunday, May 22, 2022

Altenew Paint-A-Flower: Magnolia Rustica Outline Stamp Set Release Blog Hop + Giveaway ($200 in Total Prizes)


Hello, and welcome to my stop of the blog hop celebrating Altenew's release of the gorgeous Paint-A-Flower: Magnolia Rustica Outline Stamp!  You should have arrived here from the blog of Nathalie DeSousa.  If you'd like to start at the beginning, head on over to the Altenew Card Blog.

If you love the Paint-A-Flower sets, like I do, check out the subscription plan for a monthly savings.  Click the image for more details.

************************************************

It's been quite a while since I did some no-line coloring, and this beautiful Paint-A-Flower: Magnolia Rustica Rubra was perfect for me to color and jump back into this technique!  I stamped the floral image with some no-line coloring ink.  Then I used my Copic markers to color the petals.  I used R56, RV34, R83, and R81.  I colored the leaves with G07, YG17, YG25, and YG13.  The flower center is YR27, Y18, and Y06.

I trimmed the piece to 4" x 5-¼" and adhered it to a black cardstock layer, then added it to an A2 card base.

I probably should have added my black spatters before adhering it to my card!  However, I used the clear stamp as my mask and carefully splattered on diluted black acrylic paint.  I stamped the sentiment from the Paint-A-Flower: Magnolia Rustica Rubra set in black ink and popped it up with foam tape.

Thank you so much for stopping by!  Be sure to leave me a comment here to increase your chance to win an awesome prize!

Your next stop on the hop is the blog of Jenny Colacicco!

Giveaway Prizes:

$200 in total prizes! To celebrate this release, Altenew is giving away a $50 gift certificate to 2 lucky winners and a $20 gift certificate to 5 winners! Please leave a comment on the Altenew Card Blog and/or each designer’s blog post on the blog hop list below by 05/28/2022 for a chance to win. 

Altenew will draw 7 random winners from the comments left on each stop of this blog hop and announce the winners on the Altenew Winners Page on 05/30/2022.

Blog Hop Order:

Altenew Card Blog

Emily Midgett

Ann Taylor

Nathalie DeSousa

Carol Hintermeier <<< that's me!

Jenny Colacicco

Angela Brennan

Tenia Nelson

Nenette S. Madero

Virginia Lu

Natasha Davies

Amy Hill

Terri Koszler

Nandini Karmarkar

SathyaKala Sankaran

Colleen Balija

LauraJane

Bridget Casey

Linda Westfall

Rosie Neustaedter

Preeti Chandran

Hussena Calcuttawala

Eva Bussom

Daniel Diaz

Sande Woodson

Wednesday, May 18, 2022

Vintage Hive All-Occasion Card

Happy Wednesday! I love making cards that are suitable for lots of occasions, and my card featuring Honey Bee Stamps new Vintage Hive stamps and coordinating Honey Cuts is another one for my stash! I decided to step outside my usual color comfort zone and play with colors I don't normally. Read on for the details!

First I stamped all of the Vintage Hive stamp set images with Intense Black ink. This is a fabulous ink for Copic coloring, which I did next. I created the look of a worn painted wooden stand by adding in some brown Copics, then finishing it with blue-green colors. For the hive I used markers that were much less of a bright yellow, as I might have typically used. This time I colored it with YR27, YR24, YR23, and YR12. I stamped the grass pieces with green ink, and then I used the coordinating Honey Cuts to cut them out.

I began to plan my arrangement for the images on an A2 card base. I quickly realized I needed more room!! So I went with an A7 card base made from 80# Neenah. Then I die cut a black layer with the largest A7 Double Stitched Frames die. I adhered it to the card with Bee Creative glue. Then I used some patterned paper from the new Bee Bliss paper pad (I love the little bees on this paper!) and gingham piece from the Back to Basics paper pad. I added a narrow black card stock strip between the two pieces. This layer measures 5-7/8" x 4".

I adhered the images to the card with foam dots and Bee Creative glue. I tied a little gingham bow and adhered it to the hive with a glue dot. The sentiment is from the Vintage Hive set and die cut with the coordinating Honey Cut. I absolutely love having coordinating dies for sentiments!

I always appreciate that you've stopped by for an extra look at my cards!  I hope you have a wonderful day!

Tuesday, May 17, 2022

You Are A Blessing -- New Floral Stamps With Coloring Stencils

Hello friends!  Today I'm sharing a card with one of Rubbernecker Stamps' new floral stamps called Radiance In Bloom!  It's such a beautiful set and has something new:  coordinating coloring stencils!!!  I've really enjoyed these coloring stencils--they make for a quick, easy and pretty card!

First I stamped the Radiance In Bloom flowers in black ink.  I made sure it was dry before I began the stenciling, otherwise the ink could smear.  I used the yellow inks in Color Fuse set #1 for the flower.  I just followed the included layering guide as I added the inks with blender brushes.

When I got to the flower centers, I decided to add some Ripened Pumpkin Nuvo Crystal Drops instead of ink.  I spread it through the stencil with a pallet knife and then added a bit of glitter on top.  I washed up the stencil and set the panel aside to dry.

When the piece was dry, I added some black and metallic gold splatters with a watercolor brush.  Before I splattered on the black drops, I set the clear stamp on top of the image to mask it.  I didn't want black splatters on the flowers, but I did want some of the gold ones and removed the stamp for that part.  Be sure to wash your stamp to remove the black drops before it dries!

Next I die cut the largest Outside Scallop Frame die three times and glue them together.  I adhered the stacked frame to an A2 card base.  Then I used the same die to cut the floral piece so it would fit perfectly inside the frame.

I die cut one of the tags from the Small Tags die set from black cardstock.  Then I stamped the sentiment from the Radiance in Bloom set with Versamark ink, added white embossing powder, and heat set it.  I added some foam tape to the back to pop up the sentiment.

Rubbernecker has several new floral sets that are in this release that are so beautiful!  There's another set with a coordinating stencil too.  I'll be sharing that soon!  Thank you so much for stopping by today!

Sunday, May 15, 2022

You Are Kind Hearted -- Stitching and Foiling on Cards

Happy Sunday friends!  Today I'm sharing a fun card featuring Spellbinders new Stitched Alphabet collection.  The collection includes every letter of the alphabet and die cuts holes for stitching!  Each letter is sold separately for you to choose just the ones you want.  I have quite a collection of embroidery thread as I used to do cross stitching and crewel embroidery, so it's fun to be able to use my thread again!

First I die cut the top layer of the letters Y, O, and U from 120# cardstock.  I like the heavier weight for stitching as the letters hold their shape easily while stitching.  I used DMC 445 to stitch the flowers and DMC 959 for the french knots in the centers.  I die cut the shadow layers from teal cardstock.  To adhere the letters to the shadow layer, I cut foam tape into very thin strips.

I used Moondust foil and the Essential Duo Lines Glimmer Rectangles hot foil plates to create the top layer of my card.  I adhered this and a teal cardstock layer to my card base.

Next I die cut flowers and leaves from the Forget-Me-Not and Ladybugs die set.  I used two shades of teal card stock and yellow for the flower centers.  I love adding dimension to die cut flowers and leaves and used tools from the Ultimate Tool Kit for shaping each one.

I chose a couple sentiments from the new Stitched Alphabet Glimmer Descriptors set and hot foiled them with Moonstone foil.  There 26 awesome words/phrases in this set to go along with all of the Stitched Alphabet letters.

Have you tried any of the stitching dies yet?  This is one of my first ones, and I have to say that I really enjoyed doing a bit of easy stitching to add an extra special touch to my card!  Thanks so very much for stopping by.  I hope you have a wonderful, and crafty, week!


Wednesday, May 11, 2022

Hot Foiled See-Through Birthday Card with Peonies

Hello crafty friends! Today I'm sharing a see-through birthday card with a foiled acetate front using Honey Bee Stamps Ombré Dots Hot Foil Plate.  I'm also using the gorgeous Lovely Layers: Peony Honey Cuts to create a very special birthday card. Keep reading for all the details!

I followed the directions for my hot foil machine (which is on sale, as of this blog post date, at a very good price HERE) to add Aura gold foil to my acetate with the Ombré Dots Hot Foil Plate. This acetate is a specialty product that is thicker than the acetate sold for creating windows for your shaker cards and it is called Spellbinders Glimmer Specialty Clear Film Sheets.  This product works beautifully with your hot foil plates!

Next I took an A2 card base and trimmed the front off, leaving about 3/8" at the top. On the inside of the flap, I added some double-sided adhesive and adhered the foiled acetate. Then I cut three 3/8" x 4-¼" strips of white cardstock and adhered two at the bottom of the acetate--one on the front and the other on the back. I adhered the other strip on the top inside edge. This gives a clean look with the card is opened.

Next I die cut three Double Stitched Ovals and adhered them to the card. I adhered one on the card front, the other behind that one, and the third, to the card inside directly behind the first two.

I created a sentiment for the inside of the card using two sentiments from the Inside: Birthday Sentiments stamp set. I heat embossed one with gold embossing powder and die cut it with the coordinating die. I adhered that to the oval and stamped the other sentiment with Intense Black ink.

I die cut all of the pieces of the Lovely Layers: Peony Honey Cuts from white cardstock. Then I used some Copic markers to color each one. For the peony I used: Y13, Y00, RV02, and RV10. The leaves are colored with G28, G46, G24, and G43.

If you go to the Lovely Layers: Peony in the Honey Bee shop, there is a link for a downloadable layering guide to assist in getting those layers just right! You can use glue to adhere the layers together, or use foam tape, as I did, to create even more dimension!

I stamped the sentiment from the Squeeze The Day stamp set with clear embossing ink, sprinkled on gold embossing powder and heat set it. Then I used the coordinating Honey Cut to die cut it out. I used more foam to pop it up on the card.

I absolutely love how this turned out! Trying something new, like hot foiling onto acetate, just gets my creative mojo going! Thank you for stopping by and I hope you have a beautiful day!