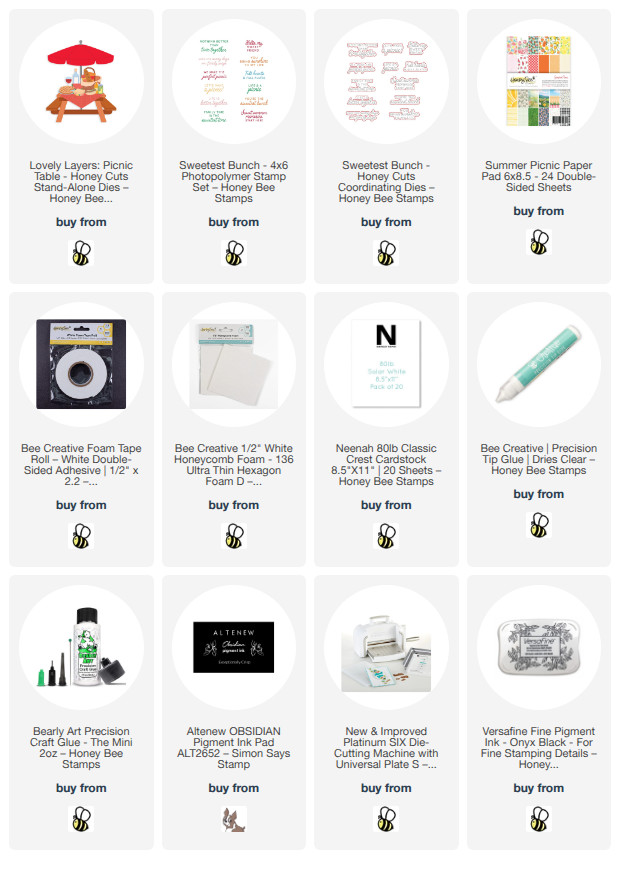
Wednesday, May 6, 2026

Let's Celebrate -- How To Make A Shaker Card

Hello crafty friends!  Today I am sharing my shaker card that features Honey Bee Stamps beautiful Every Happiness stamp and coordinating dies with a fabulous textured layer!  Check it out below.

First I stamped this beautiful floral image that is one of two in the Every Happiness stamp set.  After I stamped it in Intense black ink, I colored it with my Copic markers.  Then I cut it out with the coordinating Every Happiness die.

Next I used the two frame dies (Every Happiness Honey Cuts) to cut from white cardstock.  Just place a few bits of removable tape to hold them together for die cutting.  Then I used the smallest of these frame dies to cut an opening in an A2 white cardstock panel.

Next I ran the die cut panel through the Tooled Leather 3D embossing folder.  I glued the die cut frame around the front of the opening.

I turned over this panel and ran some glue tape along the edges of the opening to adhere a piece of acetate.  I placed foam tape around the opening and the edges.  Then I added some Bokeh Lights sequins to the window, removed the backing of the foam tape around the opening, and adhered another piece of acetate to close the opening.

I removed the backing from the rest of the foam tape to adhere the shaker panel to an A2 card base.

The sentiment is also in the Every Happiness stamp set.  After I stamped it with black pigment ink, I cut it out with the coordinating die.  It's popped up on the card with a foam tape strip.

I couldn't resist adding the sweet bee from the Bee Well stamps, cut out with the Bee Well die, for a bit of whimsy.  I glued on a few more Bokeh Lights sequins around the sentiment for a bit of sparkle.

This was an easy-to-make shaker card!  Soon I will have a reel posted on my Instagram to show more of the process for you!

Thanks so much for stopping by!  I hope your day is a good and crafty one!

You are so awesome, and I thank you very much, for using my affiliate links to shop (never any additional cost to you)!

Wednesday, April 29, 2026

Just For You — A Beautiful 3D Floral Gift Card Bag

Hello crafty friends!  Today I’m sharing this super adorable gift card holder that features Honey Bee Stamps NEW 3D Pop-Up Bag and the Lovely Layers: Mini Spring Florals!

Apologies if anything looks “off” with this post!  We had a storm on Saturday evening with TONS of lightening!  We must’ve had a strike very close to our home.  I am using my iPad to write this!  Ugh!!  Had to order a new Logic Board for my not one-year-old iMac, our main TV is out, garage door wouldn’t open (but got that figured out, thankfully).  Once I get my computer up and running, I will come back to check this out and correct anything that should be.


The first thing I made is the 3D Pop-Up Bag using the NEW gorgeous Garden Party paper pad!  The papers in this pack are so beautiful, I had a difficult time choosing just one!  To make my bag more sturdy, I layered the patterned paper with 80# Neenah with some double sided adhesive

Then I used the dies in the 3D Pop-Up Bag to cut out the pieces.  I die cut the handles from some brown cardstock in my stash.  I folded the die cut pieces on the score lines using a bone folder to help get a good crease.  Next I used Bee Creative glue to adhere the pieces together. Be sure to give the glue time to set up before moving on.

I added a little tag sentiment by stamping a in black pigment ink from the Tag You’re It: Luxury stamp set.  Then I chose on of the tag dies from the Accessorize It: Tagged to cut out the sentiment.  I glued the tag to the bag.  I used some twine I have and tied it into a little bow to glue at the top of the tag. 

I think this turned out to be so pretty!  How awesome would it be to receive a gift card inside this sweet package?!!

Thank you so very much for stopping by today!  I hope you have a wonderful and crafty day!!

Thank you so much for using my affiliate links to shop (never any additional cost to you)!

Saturday, April 25, 2026

Thinking Of You Essentially Yours Sentiments Collection

Happy Saturday, crafty friends!  Today I'm sharing this card that features one of the eight sentiments in Spellbinders new Essentially Yours Sentiments Collection.

All of the Essentially Yours Sentiments die sets have two layers with one being a shadow layer.  I inked some scrap paper with Picked Raspberry Distress ink and cut the shadow layer of the Thinking Of You sentiment.  I die cut three of the top layer from white cardstock and glued those all together.

The Magical Fuchsias Collection by Alex Syberia makes a beautiful complimentary focal point for this sentiment.

I embossed the white panel with the Magical Fuchsia 3D embossing folder twice onto the edges of both sides of the cardstock.

The main image is made by pressing the Magical Fuchsia Press + Foil plate with BetterPress black ink onto white cardstock with my BetterPress Letterpress System.

I used the Magical Fuchsia stencils to ink on pink and green inks using blending brushes.  The inks I used are in the list below.  I love that there is a coordinating die in the Magical Fuchsia Press plate set!

I trimmed the embossed panel to 5-¼" x 4" and glued it to a coordinating pink panel and then to my A2 card base.  I added some foam tape to the stenciled fuchsia to adhere it to the card.

Be sure to check out all of the Essentially Yours Sentiments collection!  This is a great basic set to have on hand for all of your card making!

Thank you for stopping by today!  I hope you have a wonderful and crafty weekend!

Thanks so very much for using my affiliate links to shop (never any additional cost to you)!

Wednesday, April 22, 2026

The World Is Brighter Because You're In It

Hello, crafty friends!!  Today I am sharing my card that features some of the awesome products from Honey Bee Stamps new Style In Bloom release!

This card features a beautiful rainbow of butterflies I made with the Lovely Layers: Petals & Wings Honey Cuts on top of a background embossed with the Tooled Leather 3D embossing folder.

First I embossed white cardstock with the beautiful Tooled Leather 3D embossing folder and glued it to an A2 card base.

Then I pulled a rainbow of Distress Oxide ink pads in these colors:  Spun Sugar, Squeezed Lemonade, Mowed Lawn, Tumbled Glass, and Milled Lavender.  I used ink blending brushes to blend the inks in rainbow color order onto white cardstock.  I placed the butterfly dies, from the Lovely Layers: Petals & Wings set, onto the ink blended panel and ran it through my die cutting machine.  I die cut three large butterflies and three small butterflies from the inked cardstock.

I used glue to adhere the butterflies layers together.  I added glue just to the center of the wings so I could "fluff" them up.

The hardest part of making this card was deciding how to arrange the butterflies!!  Haha!  As much as I tried, I could not fit that third large butterfly on the card in a way I was happy with.  Hopefully I'll find a use for it on another project!  Once I finally decided on a layout, I used glue to adhere the butterflies to the card.

I stamped two sentiments from the awesome Heart Of Our Family Stamp set.  There are SO MANY wonderful sentiments in this set, not only for friends, but also moms, sisters, grandmothers, and more!  Then I cut them out with the coordinating Honey Cuts.  To adhere the sentiments to the card, I added foam strips to the back of each sentiment.

For a bit of sparkle, I added some gems from the Let's Party Gem Stickers to the butterflies antennas.

I can see using the three adorable flowers in the Petals & Wings set in this same fashion!  What do you think?

I really do appreciate you stopping by today!  Have a wonderful and crafty day!

Thank you for using my affiliate links to shop (never any additional cost to you)!

Saturday, April 18, 2026

House Mouse Party Parade -- It's Time To Celebrate

Happy Saturday, crafty friends!  So, I was cleaning up (finally!) my craft room and I found this sneaky little House Mouse Party Parade stamp set!!  Yep, buried!  I should have posted this last month, but here we are.  LOL!

These House Mouse sets are totally adorable and I do enjoy the simplicity of coloring the sweet mice.  I stamped the Party Parade image in a Copic safe black ink and colored it with my markers.

I used the A2 Matting Basics A and A2 Matting Basics B dies to trim the Party Parade panel, black cardstock, and white cardstock for the layers.  I glued the black panel to the back of the colored image and then added foam tape to the layered piece.

After I glued the die cut white panel to an A2 card base, I adhered the Party Parade image.

I chose one of the three sentiments in the Party Parade set and stamped it in black pigment ink.  I used the long narrow rectangle die in the A2 Matting Basics B to cut the sentiment in the strip.  Of course, this die is a good bit longer than the stamped sentiment.  I just shifted the die, held it in place with removable tape, and ran it through my die cutting machine again.

If you'd like to check out the other sets in this adorable collection, please click the link below.  Thank you for stopping by today!  I hope it's a great weekend for you!

Thank you for using my affiliate links to shop (never any additional cost to you)!

Friday, April 17, 2026

The Beautiful Magical Fuchsia Collection By Alex Syberia For Spellbinders

Hi, crafty friends!  Today I am happy to share two cards with you that I made featuring Spellbinders' gorgeous Magical Fuchsia Collection by Alex Syberia!  This collection has all of my favorites:  a 3D embossing folder, layered stencils, stand-alone die set, and a press + foil plate + die set!  Everything you need to make an assortment of gorgeous cards!!

For this first card I used the Layered Magical Fuchsia stencils and the Magical Fuchsia 3D Embossing Folder.

To begin, I first cut white cardstock with the outline die in the Magical Fuchsia Press + Foil + Die set.  This die not only cuts out the BetterPress image!  The cut shape also works with the Layered Magical Fuchsia stencils and can then be placed in the Magical Fuchsia 3D embossing folder!!

So I used the stencils to add various inks with blending brushes through each layer.  Then I placed the colored piece into the 3D Embossing Folder and secured it with small pieces of removable tape.  I ran it through my Platinum 6 die cutting machine.

This Fuchsia piece is so beautiful with all of the dimension added from the embossing folder!  I wish photos showed that better.

I wanted a bold dramatic background that wasn't too busy.  So I embossed Violet cardstock with the Tufted 3D embossing folder, one of my favorites.

The sentiment is one of three included with the Magical Fuchsia Press and Foil set.  Both elements are popped up on the card front with foam adhesive.

------------------------------------------------------------------------------

This second card features the Magical Fuchsia die set along with a background pressed from the Magical Fuchsia Press and Foil plate.

I die cut various ColorWheel cardstocks (in the list below) with the dies in the Magical Fuchsia die set.  I didn't worry about making these flowers realistic, but just arranged the layers how I liked.  A bit of an abstract look, maybe?

I do love a white background to make a focal point pop!  I really love this subtle interest I added by simply using my BetterPress Letter Press system to press the Magical Fuchsia press plate twice into white cardstock.  In real life, this adds not only beautiful visual details, but also tactile interest!  (I really hope to make a card using this with foil and my Glimmer Hot Foil System!)

Be sure to check out the entire Magical Fuchsia Collection!  Each item is also available to purchase separately at the Spellbinders' website.

I am thankful for you all that stop by for a look.  I hope your Friday, and weekend, are filled with rest, relaxation, and lots of crafty time!!

Thank you so much for using my affiliate links to shop (never any additional cost to you)!

Thursday, April 16, 2026

A Little Something For You

Hello friends!  Today I'm sharing this card that is part of Honey Bee Stamps' Instagram Hop to celebrate their new Style In Bloom release!!  This card features the beautiful, and so very versatile, Lovely Layers: Wrap It Up die set.

If you came here from the hop, thank you!!  If you'd like to join in to see more awesome inspiration, and your chance for a prize, hop on over to my Instagram!!

I created a heat embossed panel using the floral from the Bloom and Buzz stamp set.  The embossing is a pretty pale sparkling pink, and unfortunately, the sparkle doesn't show in the photos.

This panel is adhered to an A2 card base with glue.

I die cut some pretty checked patterned paper from the Gingham Happy Hearts paper pad with the dies from the Lovely Layers: Wrap It Up dies.  These dies make the cutest bow!!!!!  There are also dies that cut the same bow but without scalloped edges.

For the sentiment, I first die cut a tag from the Accessorize It: Tagged die set.  Then I stamped the sentiment from the Luxurious Friend stamp set in black pigment ink.

I used the ½" Honeycomb foam adhesive dots to adhere the tag, tucking the edge just under the bow.

This sweet Lovely Layers: Wrap It Up bow dies can be used for any occasion!  How pretty this would be in a mirror cardstock for the holidays?!

I'm so happy you stopped by today.  I hope you will join me over on my Instagram to check out the details of the hop!

Thank you so much for using my affiliate links to shop (never any additional cost to you)!