Wednesday, March 29, 2023

You're Eggstra Special!

Hello crafty friends! Easter is almost here so I made this beautiful pastel card featuring Honey Bee Stamps' Egg Crate Honey Cuts along with other new sets from their Simply Spring release! I had so much fun coloring these eggs--read on for the details!  And, if you are on Instagram, check out my fun reel showing some of the card making process--click HERE.

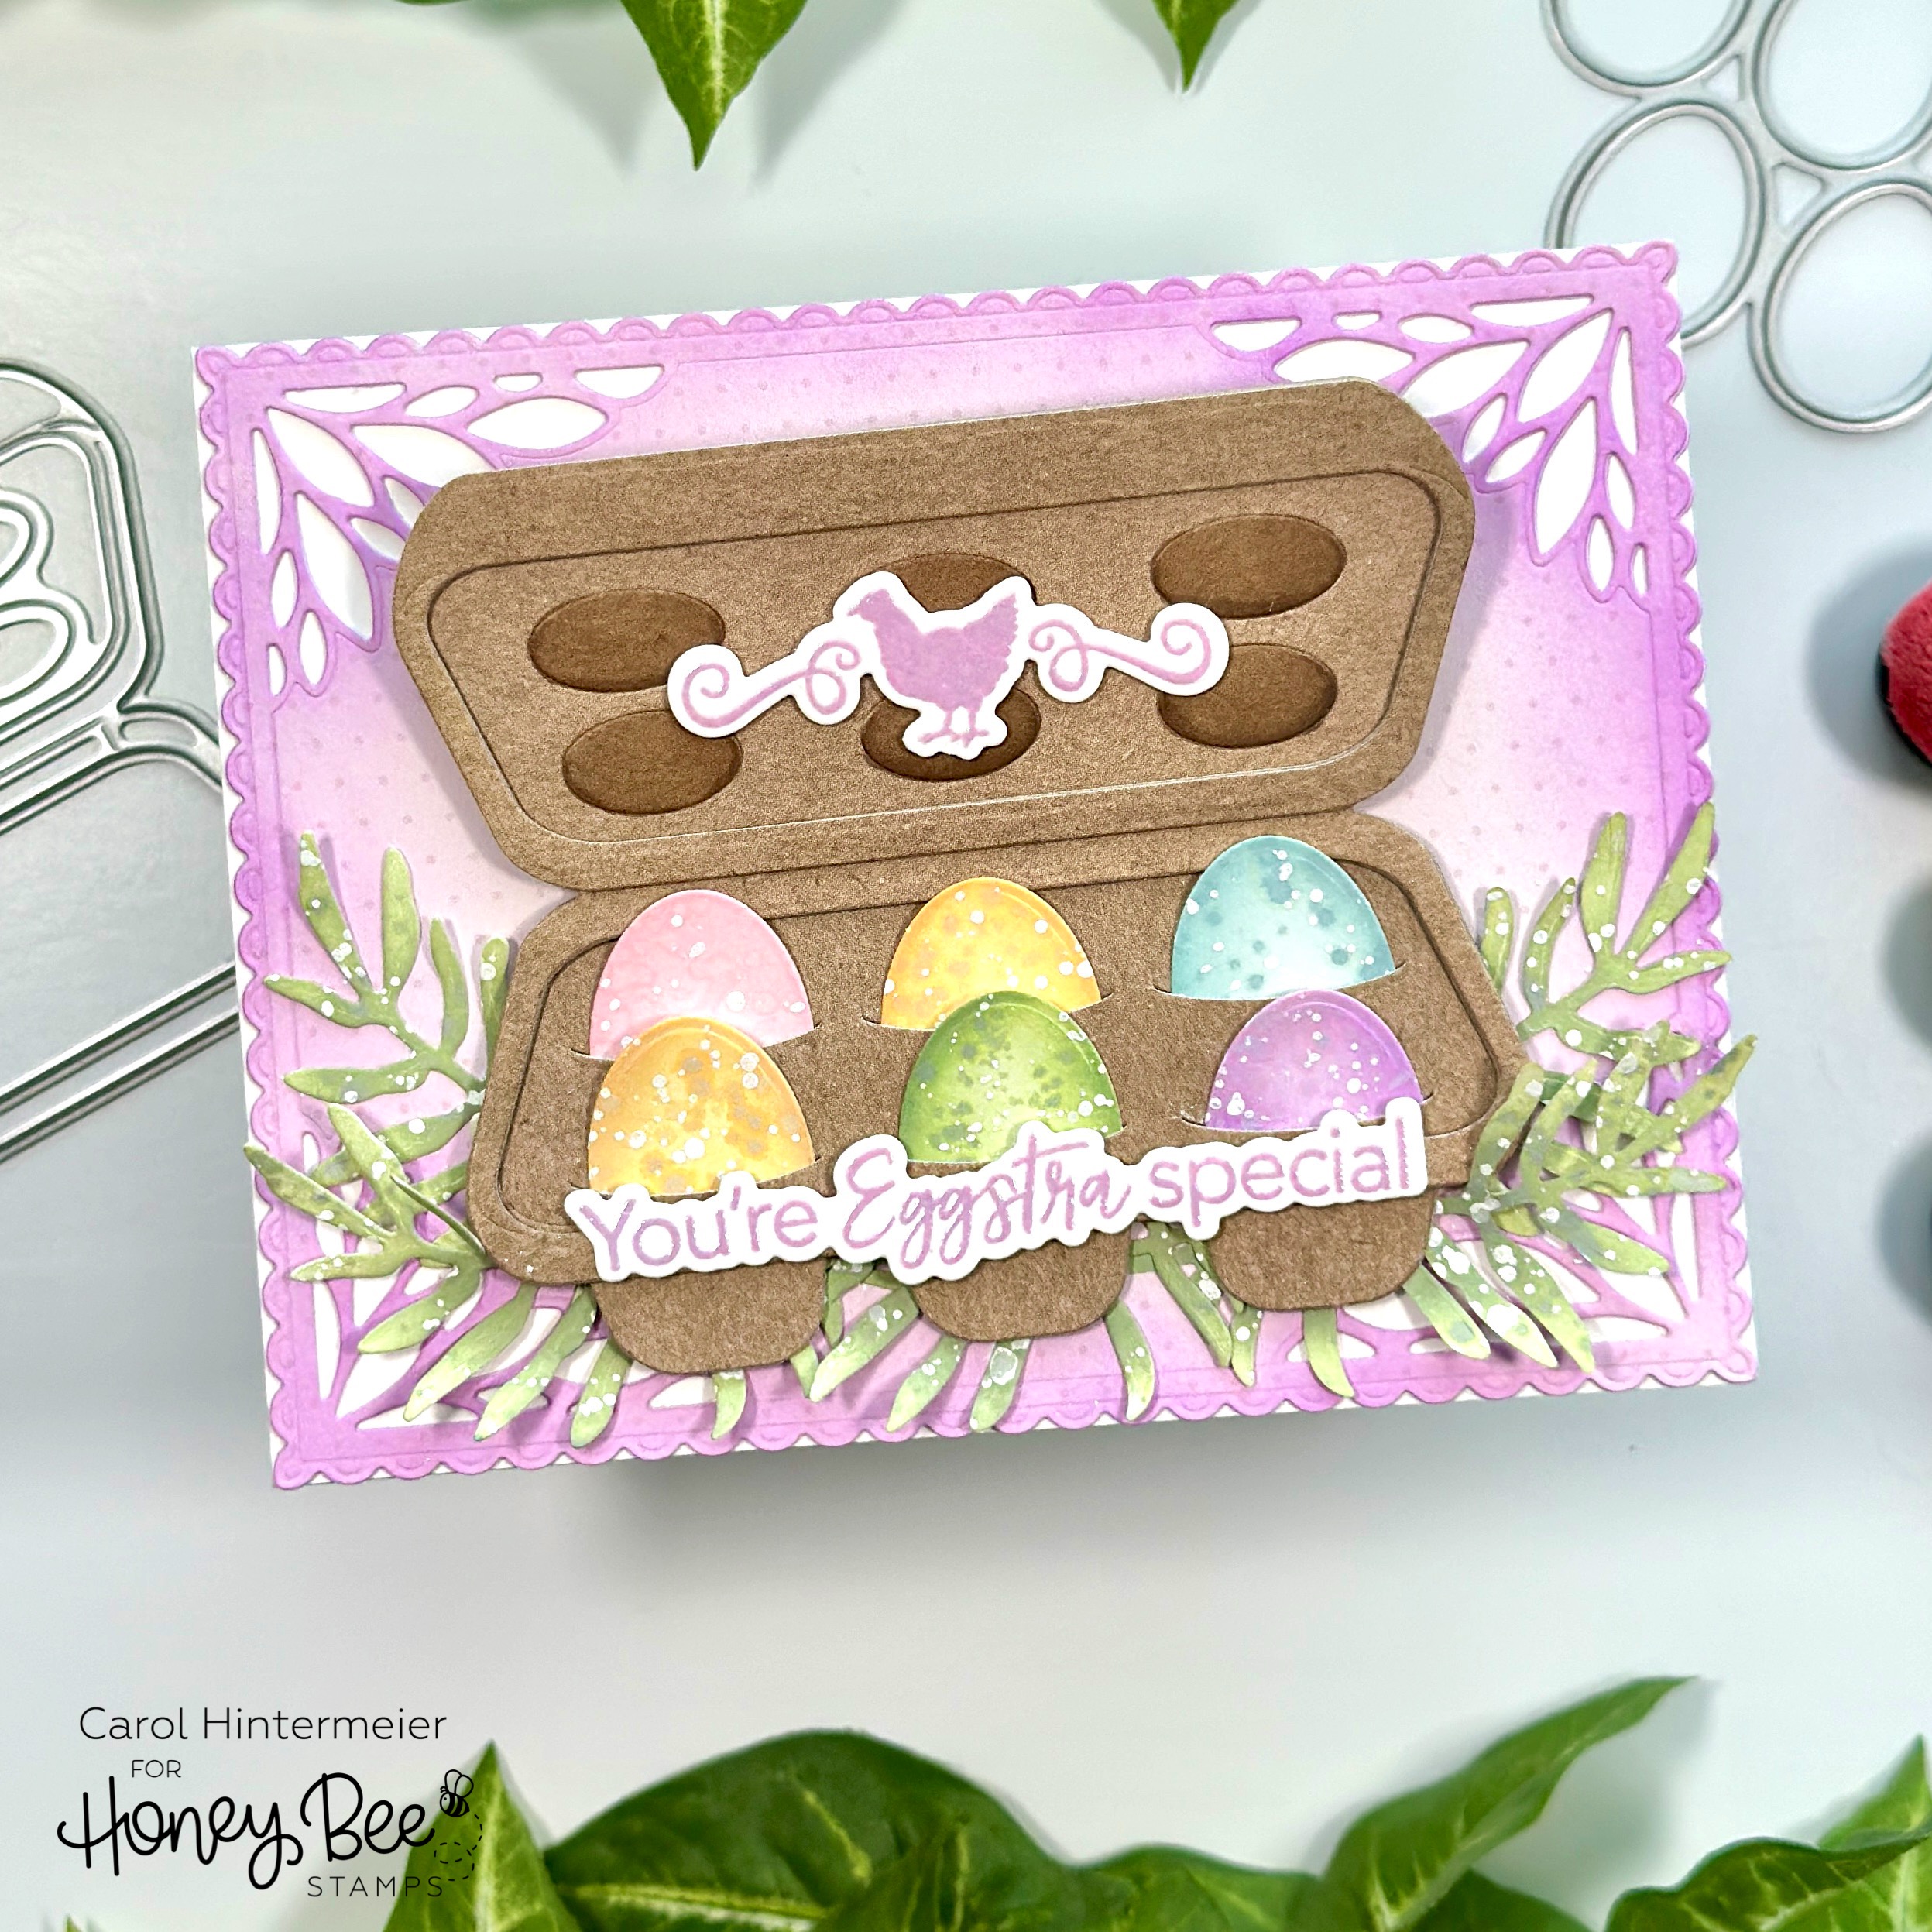
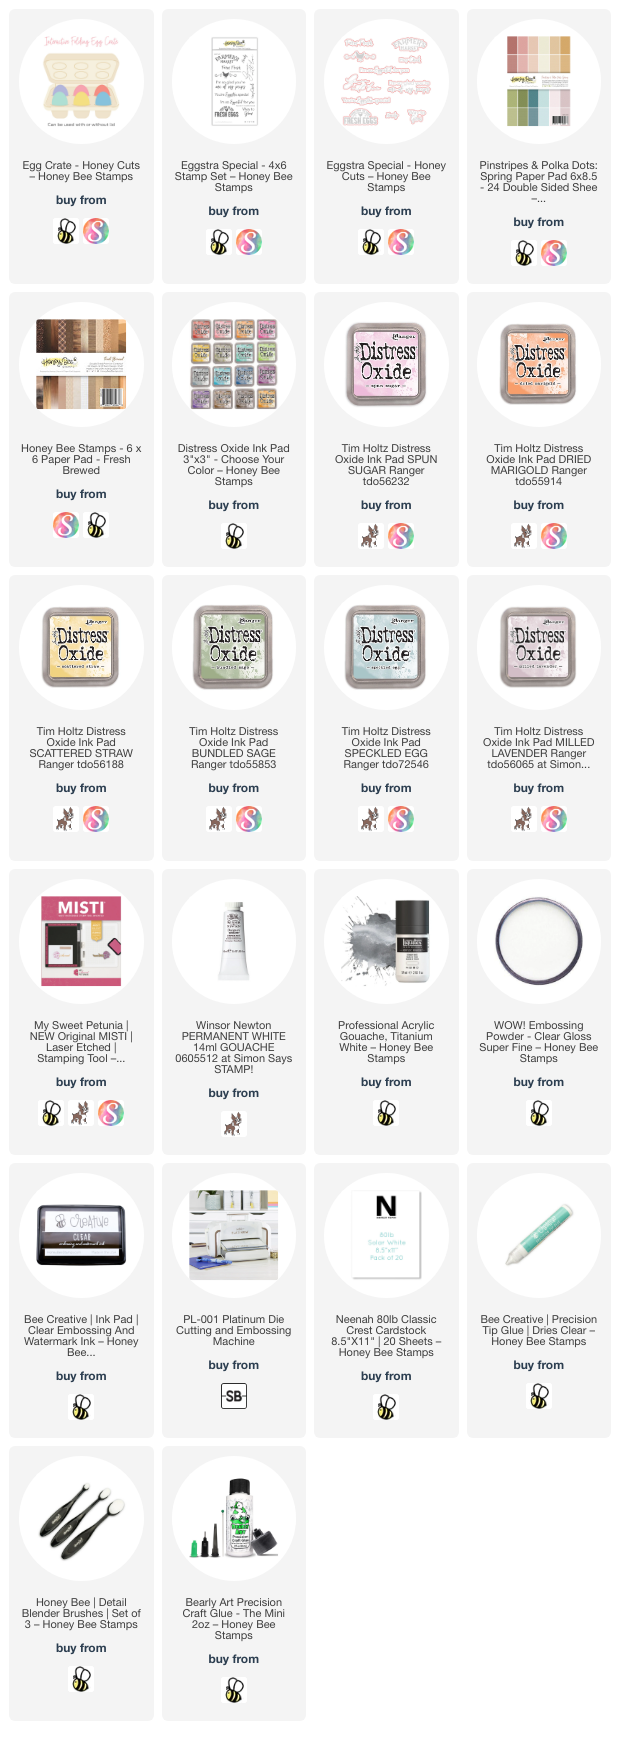
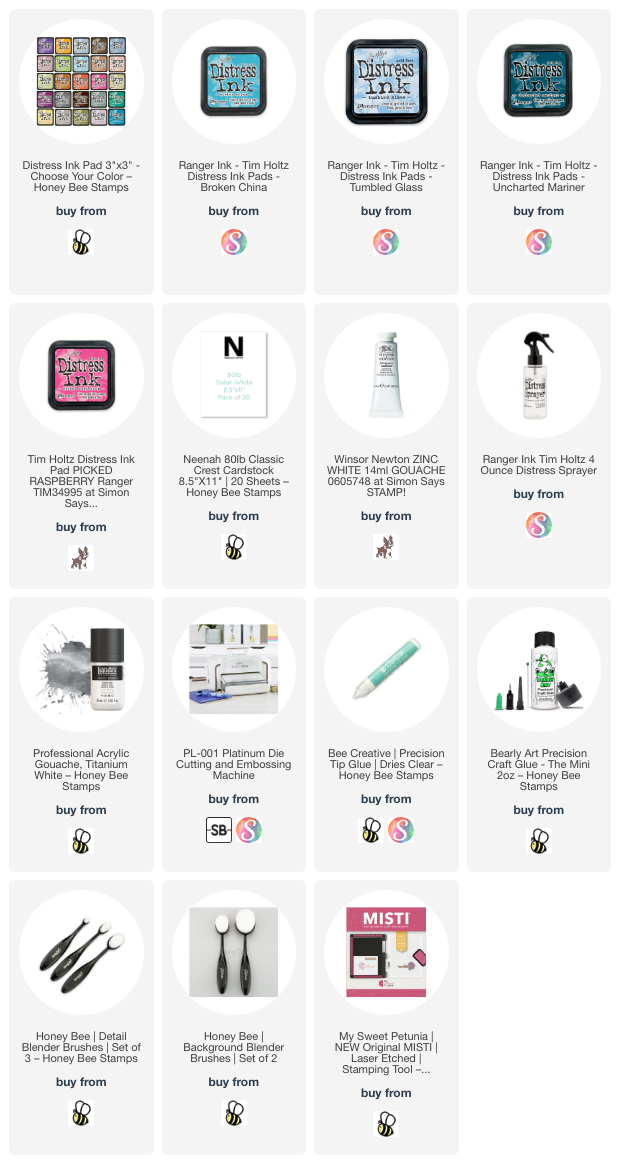
After I die cut the eggs in the Egg Crate set from 80# Neenah, I colored them with Distress Oxides using Detail Blender brushes. The Oxide colors I used are: Spun Sugar, Scattered Straw, Dried Marigold, Speckled Egg, Milled Lavender, and Bundled Sage. After I had each egg colored I smooshed that egg's color of Oxide ink onto my craft mat.

Then I spritzed the ink with just a bit of water, dipped a paintbrush into the diluted ink, and added splatters to the egg. I repeated this for each color. When the ink splatters were dry, I diluted some white acrylic paint and added white splatters. I love how these turned out!

Next I built the Egg Crate by die cutting paper found in the Fresh Brewed paper pad. Be sure to check out the Layering Guide found in the product description for the Egg Crate. I wanted extra dimension for the rim of the Egg Crate so I die cut two more of Layer 3 and Layer 4 from brown cardstock. I trimmed off the top piece of Layer 3 before adhering the layers together. Bee Creative glue is the best for adhering these pieces. It has a bit more "wiggle" time before it totally sets up!

I used two Copic markers (E43 and E44) to color in the circles on the Egg Crate lid.

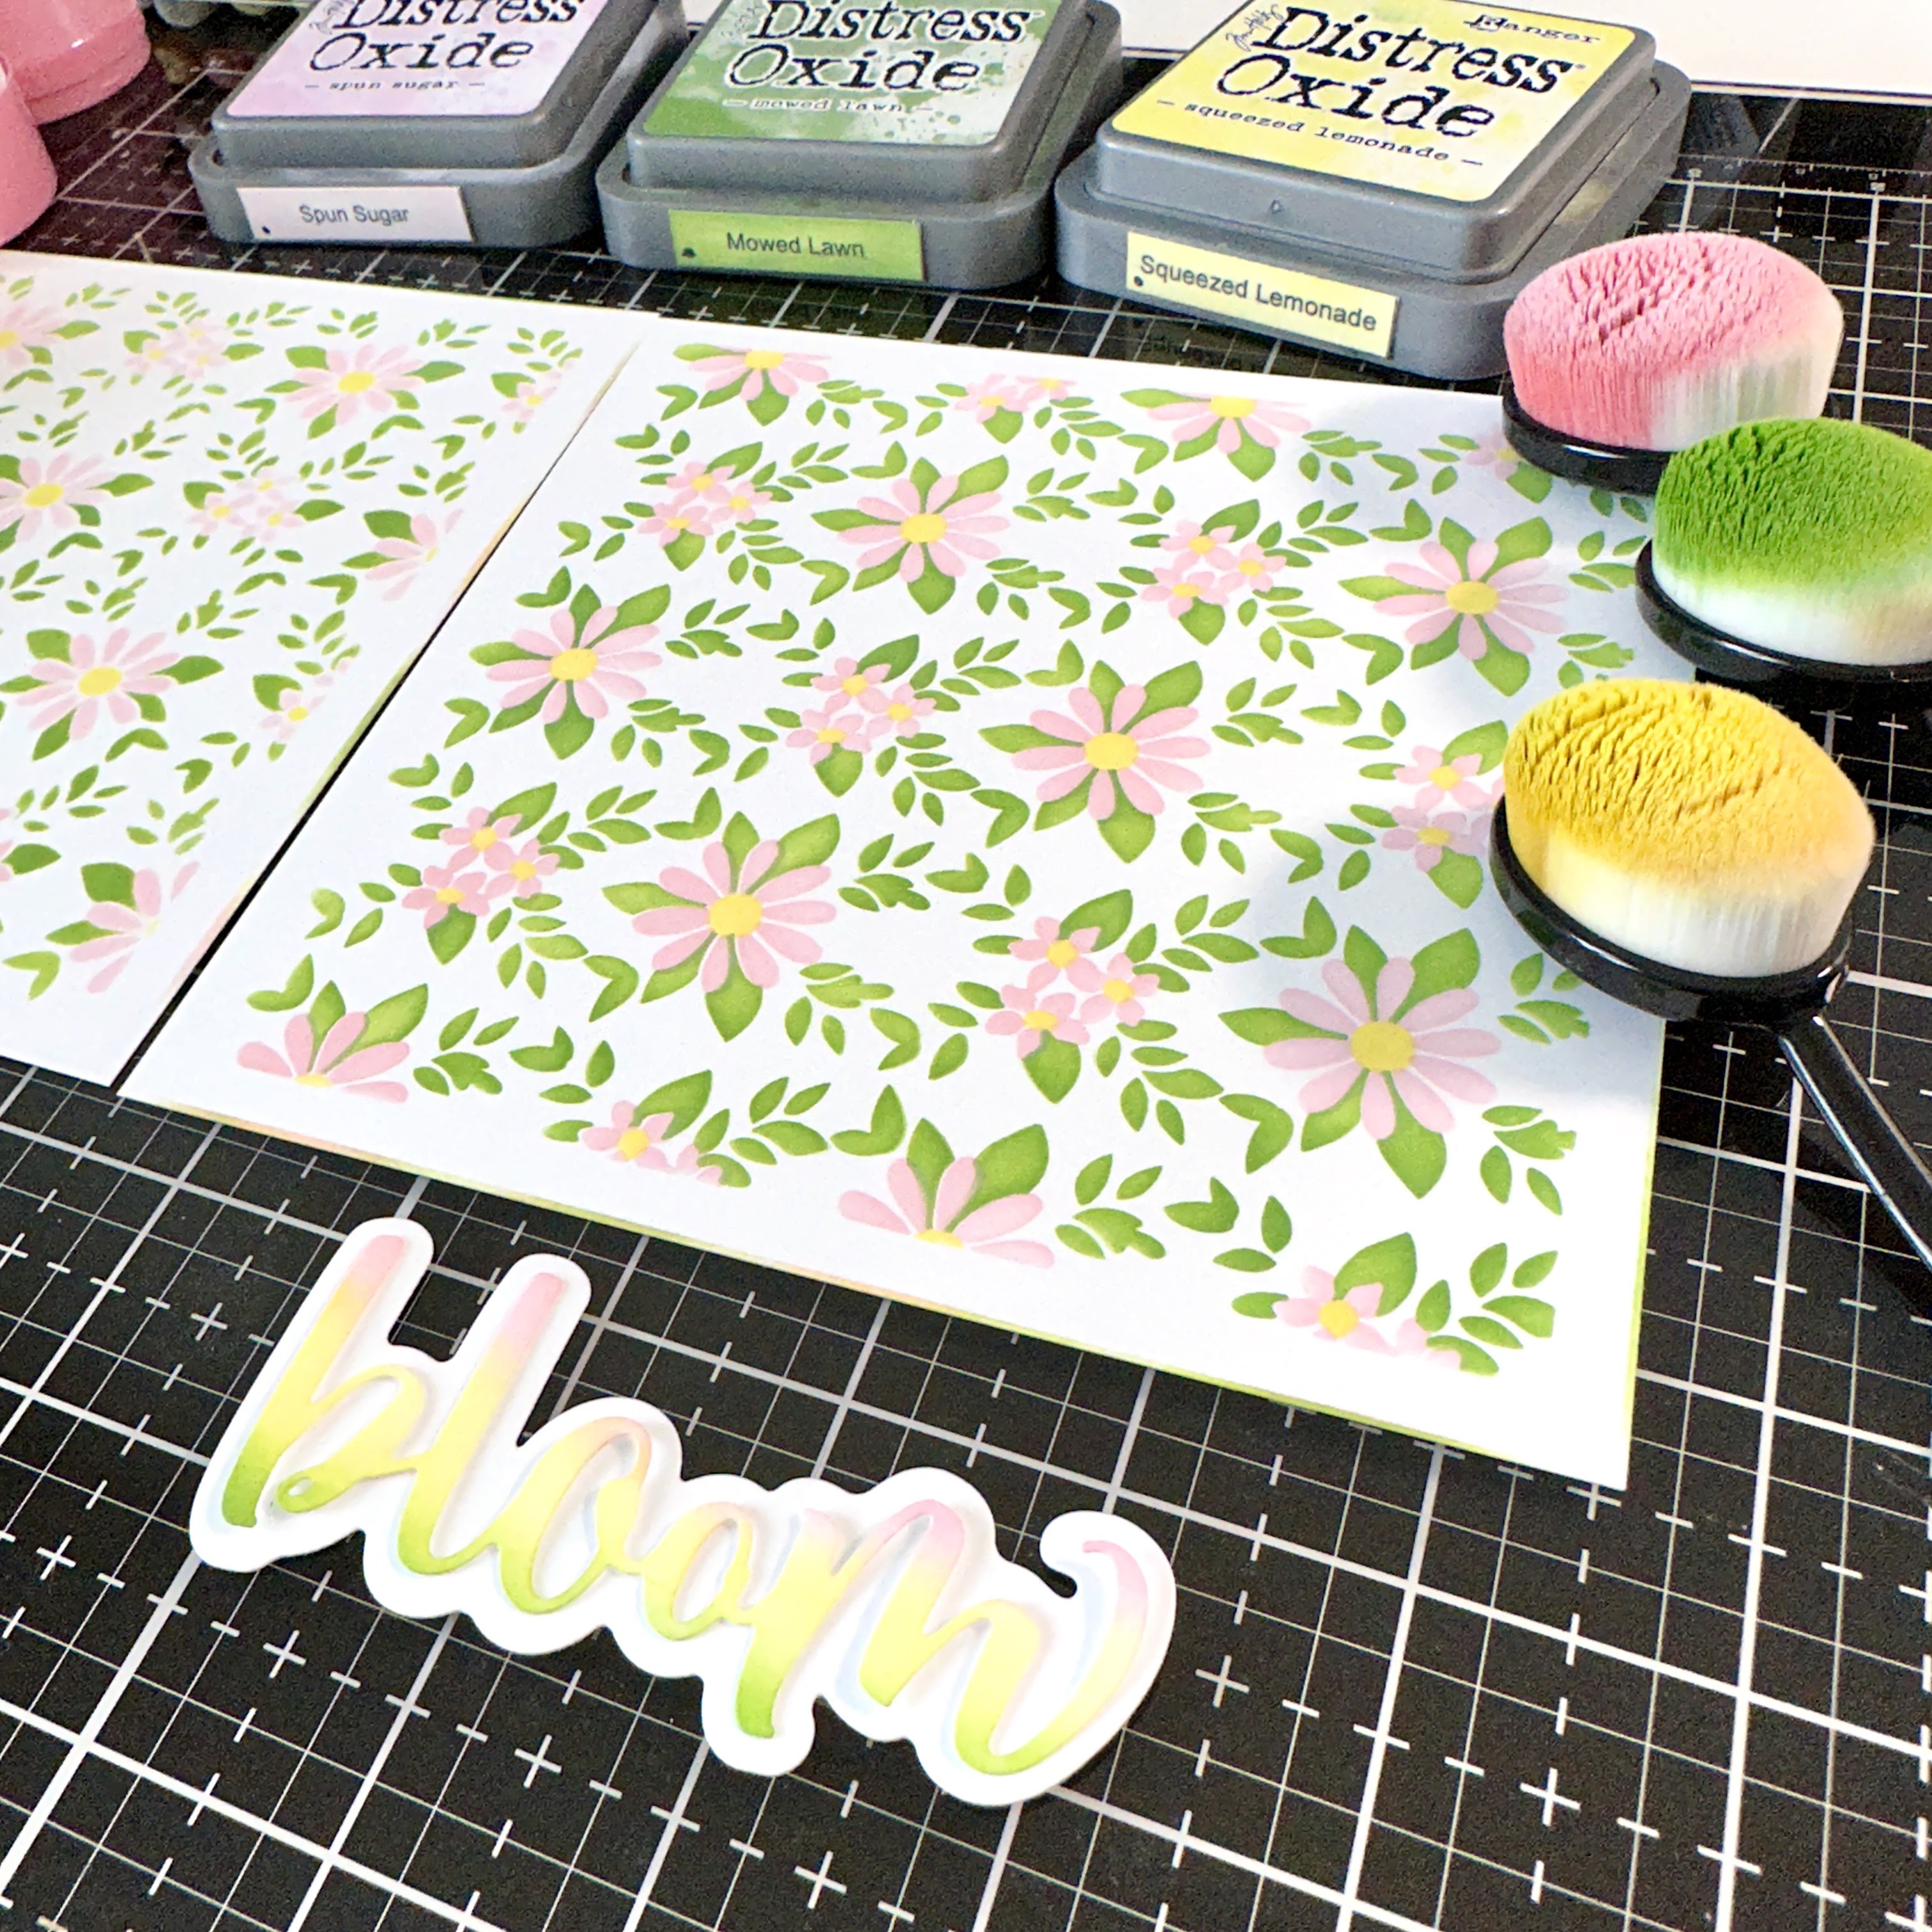
For the card background layer I die cut the largest Spring Vine Layering Frames from paper in the Pinstripes and Polka Dots: Spring paper pad. I die cut one more from white cardstock and glued the layers together. I used some Milled Lavender Distress Oxide to ink up the edges of the die cut with a Detail Blender Brush.

The sentiments are from the Eggstra Special stamp set. I first stamped it with Milled Lavender Oxide ink and then stamped it again with Clear Embossing ink. My MISTI made this very easy! I added clear embossing powder and heat set them. I cut them out with the coordinating Honey Cuts and adhered them to the Egg Crate.

The greenery is a die from the Lovely Layers: Spring Greenery and inked up with Bundled Sage Distress Oxide ink. I repeated the steps of adding ink and white gouache splatters.

I hope you enjoyed coloring Easter eggs with me today!  Have a wonderful and crafty day!

Thank you for choosing to use my affiliate links (never any additional cost to you)!

Tuesday, March 28, 2023

You Are The Very Best!!

Hello friends!  Today I'm sharing my card that features Rubbernecker Stamps beautiful Spring Wreath Die set.  I'm so happy it's finally feeling like spring that I want to make nothing but spring time cards!  Haha!

First I created the card base and layers by die cutting pieces of 80# Neenah with the Deckle Frame Die and the Diamond Pierced Cover die.  I adhered the Diamond Pierced layer to an A2 card base.  Then I added foam tape to the Deckle Frame and adhered it to my card.

Next I stamped the sentiment from the Best Friends Stamp Set with Versamark ink and heat set it with black embossing powder.  I trimmed it into a banner and popped it up with foam tape.

Next I die cut green cardstock using the leafy stems, branches, and base from the Spring Wreath Die set.  I die cut 12 each of the leaves and branches so the wreath would be full and fluffy.

I added a bit of shape and dimension to the leaves by pressing a small tipped stylus onto the back of them.  I have linked a few flower shaping tool kits below for you to check out.  Then I used glue to adhere the leaves and branches around the base.  I trimmed some of the long stems at the bases to make for easier placement.  Just start with a single layer of leaves and then continue inserting and gluing additional pieces until you like it!

Instead of trying to die for the exact colors I wanted of cardstock scraps, I used Copic markers to make my own cardstock to die cut the flowers from.  I did change the orange and purple flowers with different markers than you see in the next photo.  I wanted more contrast and I just colored over those flowers with a YR16 and V15 marker.

There are two dies for the flowers in the Spring Wreath Die set and I die cut both two times from each color.  The die does cut tiny centers for the larger flowers, but I decided to save a bit of time and used yellow and green gel pens to dot the centers.  After the gel pen dots were dry, I used a small tipped stylus to quickly shape the flowers.

Reverse tweezers and a fine tipped glue bottle made adhering the pretty little flowers in a rainbow order super easy!  I let those dry and then added a few more for fullness.

After I glued the wreath to my card, I tied a double bow of jute twine and used more glue to stick it on.

I'm totally loving how this card turned out and I hope you do too!!  I always appreciate you stopping by!  It means a lot to me!!

Check out the products I used here (affiliate links--never any additional cost to you)!

Thursday, March 23, 2023

Two Pretty Spring Cards with Pretty Pink Posh March Release

Today I'm sharing two cards I made with Pretty Pink Posh's March 2023 release!  One was super quick and the other is a fun shaker card!

This card has a background I quickly made by spritzing 80# Neenah with Kitsch Flamingo Distress Oxide spray!  Such a pretty and so easy way to make the base layer!  After trimming it to 4" x 5-¼" I adhered it to an A2 card base.

I sprayed some scrap cardstock with the Oxide Spray, let it dry and used the sentiment in the Happy Spring Shadow die set to cut it out.  I die cut the shadow and two more sentiments from white cardstock and adhered the layers together with glue.  I set it aside to dry.

Next I stamped the wreath, flowers, and bow from the Leafy Spring Wreath stamp set with marker safe ink.  After I colored the wreath, flowers, and bow I cut them out with the coordinating dies.

After gluing the wreath to the card base, I popped up the flowers, bow and sentiment with some foam tape.


My next card uses the Umbrella Shaker die set and the Layered Umbrellas stencil set.  I just love these new stencil sets!  Each one can make a card by itself--just add a sentiment!

I used a rainbow of Distress Oxide inks to add the colors through each layer of the Layered Umbrellas stencil set.  For the final stencil layer, I spread some pretty blue glitter gel through the openings.  When it was dry, I adhered it to a green A2 card base.

Next I created the umbrella shaker.  I die cut the Umbrella Shaker dies from 80# Neenah.  I used the included die to cut out the window openings.  The umbrella stem and button on the top is die cut from silver cardstock.  For the base of the shaker I inked on Distress Oxides in a rainbow order and die cut it.  Before I assembled the shaker, I inked Kitsch Flamingo Oxide onto the top layer.  Then I adhered some acetate to the back.  After I added thin strips of thick foam tape to the back of the umbrella (or add a double layer of regular foam tape) to give the clay pieces room to move around.

I finished assembling the umbrella and glued it to the card.  I stamped the sentiment from the Easter Sentiments stamp set and popped it up on my card.

I have really enjoyed making these cards with all the spring time colors!!  And if you haven't checked out the new release, be sure to click one of the links below.  There's something for all of us in this awesome release!  Thank you so much for stopping by today!

Thank you for using my affiliate links (never any additional cost to you)!

Wednesday, March 22, 2023

Sending You Big Hugs with Cherry Blossoms

Hello crafty friends! Happy spring, and I hope it's feeling like spring where you're at! Today I'm sharing my card featuring the beautiful new Lovely Layers: Cherry Blossom Honey Cuts. I've made this with a vintage chic style featuring patterned paper and lots of fun layers!

Let's start with the card base and layers:

  • Trim a piece of dotted paper from the Pinstripes & Polka Dots: Spring paper pad to A2 size. Adhere to an A2 card base.
  • Die cut the rectangle piece in the Spring Vine Layering Frames Honey Cuts twice. Once from floral paper from the Simply Spring paper pad and one more from 80# Neenah.
  • Adhere those layers together and glue to the card.
  • Next I trimmed a piece of burlap (I've had in my stash forever!) to 2-5/8" x 5-½". I used Super Sticky Red tape to adhere the burlap to the card.
  • Next I die cut the next largest piece in the Spring Vine Layering Frames with more polka dot paper. After I lightly inked the edges with Antique Linen Distress Ink, I adhered it to the card with more Red Tape.
  • I die cut the next layer from the Spring Vine Layering Frames from coordinating cardstock and glued it to the card.
  • I die cut the circle from the same die set from more polka dot paper and some 80# Neenah. After I inked the edges with Antique Linen Distress Ink, I glued those together I popped it up on the card. 

Next I die cut all the pieces of the Lovely Layers: Cherry Blossom from 80# Neenah.

I used these Copic Markers to color the pieces:

  • Flowers and buds: RV19, RV34, RV32, RV000, R85, R56, R83
  • Branch: E29
  • Leaves: YG95, YG63, G43, YG61

I used the very helpful Layering Guide and Bee Creative glue to assemble the cherry blossom branch. I added a couple of foam dots to the back of the flowers near the bottom of the branch before adding dots of glue to the branch to adhere it to the card. I used thin foam squares behind a couple more buds for more dimension.

The sentiment from the Garden Bouquet stamp set was stamped in clear embossing ink onto a scrap of dotted paper and heat set after adding black embossing powder. I cut the sentiment out with the coordinating Honey Cut. I die cut 80# twice more from the sentiment die and adhered the layers together. I used thin foam tape to adhere the sentiment to my card.

I really enjoyed making this beautiful vintage chic style card--not my normal style, but I think I like it!  Thanks so very much for stopping by!

Thank you so much for using my affiliate links for shopping (never any additional cost to you)!

Monday, March 20, 2023

New Paper Pouncers by Picket Fence Studios Review

Hello friends!  I was recently gifted these new Paper Pouncers by Picket Fence Studios with no expectations at all attached to receiving these.  I finally had time to give them a try this weekend and I thought I'd share my honest thoughts with you, so keep on reading!


This is the description from the Picket Fence website:

Paper Pouncers are a brand-new way to apply ink to die cuts, stencils, and many other paper crafting projects! These top quality super-soft SPONGE applicators are not your momma’s old inking tool! Paper Pouncers were custom designed by Picket Fence Studios to make applying ink easier, faster, and more comfortable on hands. Simply add ink onto the sponge head and pounce away! Two color palettes are available: Bright Rainbow and The Neutrals (3 pack of black, brown, and gray). Use with water-based inks or watercolors, and clean with a damp cloth or wipe. Each Pouncer comes with its own color coordinated holder for simple storage and display. 

Paper Pouncers were developed to add to a new ink application tool on the market for easier and quicker application of water-based inks to paper. They do not replace Life Changing Blender Brushes.

The first thing to keep in mind about the Paper Pouncers is that they are not intended to replace our ink blending brushes.  They aren't intended to be used in the same way as we do the brushes.  When I use the brushes, I go in a circular pattern to add ink to my project.  As the name implies, these are intended to be pounced.

For continuity, I used the same ink:  Spun Sugar, Mowed Lawn, and Squeezed Lemonade Distress Oxide inks on 80# Neenah Solar White cardstock for each technique.   The first thing I wanted to try out was stenciling.

I found that the Pouncers gave me a very pretty, soft stenciled image and definitely think this look is very desirable for certain projects.  The difference between stenciling with these and the brushes is that when you add ink with a brush, the brush catches the edges of the stencil and fills in the opening completely.  The Paper Pouncers do not add ink along the edges of the stencil opening as you can see in the next photo.

The pounced image is on the left and ink blending brushes on the right.


If you have any issues with your hand strength or grip, I would highly recommend these.  I have experienced hand fatigue with the ink blending brushes when I have a lot of things to ink up.  I did not have that happen with the Pouncers.

Where I really thought the Paper Pouncers were a star is using them to ink up intricate die cuts!  Typically I will adhere my die cut in the negative space with removable tape on the back.  That's not hard to do with a sentiment die cut like this one, but the more detailed die cuts like branches with leaves and other florals  can be a bit fiddly.  

I was super surprised that I could easily blend the three ink colors onto the sentiment using the Pouncers!  The lighter you pounce, the smaller the area of ink coverage.  I actually, and shockingly, prefer the pouncers over the brushes for inking this up!  I felt like I had to work the brushes back and forth more to blend the ink.

Next, even though I don't believe the Paper Pouncers are intended to give that smooth blend on ink on a piece of cardstock like the brushes do, I still wanted to try it.

As the photo above shows, especially in the green ink, I wasn't able to achieve a smooth blend with the Paper Pouncers.  Maybe it's me?  I'm not sure.  However, I do think this would be an awesome look for a blue sky, especially with water splatters!

This is my blending with brushes.  It turned out as expected with a good smooth blend of ink.  The next photo is a side-by-side comparison (Pouncers on the left).

All of this leads to the question of will I continue to use these new Paper Pouncers?  I say absolutely yes!  Because I use a lot of die cut elements on my cards that I typically color with inks, these paper pouncers will most certainly be my go-to tool for coloring the die cuts!

If you wanted to give these a try, there is a Neutral Set of three Pouncers that you could try.  The bundle of both the Bright Rainbow and Neutral sets is definitely the most economical way to get these.

Thanks so much for stopping by today!  Let me know in the comments if you found this review helpful!  Have a wonderful day!

Thank you for shopping with my affiliate links (never any additional cost to you).

Thursday, March 16, 2023

Rainbow Birthday Card

The Simon Says Stamp Just For You release is awesome and has so many spring themed crafting goodies!  My card here uses the new Sunshine Background stamp.

It is a unique stamp in that each section of the Sunshine Background stamp is separate!  This made inking up a rainbow of colors super easy!  (I have all of the colors I used linked below.)  Use your MISTI, or other stamp positioning tool, to help get it lined up.

After I inked it all up I placed the Circular Lace stencil over it, and used an ink blending brush to add white pigment ink through the stencil.

Then I die cut the Detailed Rose from white cardstock.  I used some of the same inks to color the rose in a rainbow hue.

I added a sentiment stamped in pink ink from the Big Old Birthday stamp set.  The sentiment and rose are popped up with foam tape.  I die cut two more leaves from vellum to balance it out.

Thanks so very much for stopping by today!

Thank you for using my affiliate links to shop (never any additional cost to you).

Happiness is Springtime Blooms

Hello crafty friends!  If you are here from the Instagram hop, thank you!  If not, I hope you will check it out.  We are celebrating Honey Bee Stamps Simply Spring release today, and if you leave a comment on the stops, you will have a chance at an awesome gift card from Honey Bee!

I had so much fun inking up the die cuts from the Lovely Layers: Spring Greenery Honey Cuts!  I'm keeping this post super brief, but if you have any questions, please use the "contact me" form in the left column here.

For the card layers, I used the gorgeous Delicate Daisy - A2 Cover Plate Top & A2 Cover Plate Base!  I have had this cardstock in my stash forever!  I never thought I'd use it, but you know what they say: "never say never"!  LOL!  I die cut the top and bottom layers from it, then die cut the top layer three more times from 80# Neenah.  After glueing the layers together, I adhered them to an A2 card base.

Next I die cut all of the pieces in the Lovely Layers: Spring Greenery from 80# Neenah.  I used these Distress Oxide inks and sponge daubers to color the pieces (colors are also linked below):

  • Bundled Sage 
  • Shabby Shutters
  • Peeled Paint
  • Forest Moss
  • Victorian Velvet
  • Tattered Rose
  • Milled Lavender
  • Seedless Preserves

Press N Seal was my assist to glue the layers to the card.  (Note:  I did not glue down the flower and greenery tops to add dimension.)  Then I stamped a sentiment from the Garden Bouquet stamp set with Forest Moss Distress Ink.  I cut it out with the coordinating die.

I added some foam squares behind some of the leaves and flowers at the top for dimension.  Yes, I love dimension on my cards!!!

To top off the bouquet, I added a wax seal from the new Cherry Blossom Wax Stamper and the Simply Spring Wax melts.  I added some twine below the wax melt for fun!

I sure do thank you for stopping by today!  If you join me on the Instagram hop, please be sure to say hello, and that you came from here.  Have a wonderful and crafty day!

Thank you so much if you use my affiliate links for shopping (never any additional cost to you)!

Three Vintage Style Cards with Flea Market Finds Collection by Cathe Holden

Hello my crafty friends!  I'm thrilled to be a guest blogger over on the Spellbinders' Blog today!   

I made three cards that feature the beautiful new Flea Market Finds Collection by Cathe Holden!  Check out the entire collection in the Spellbinders shop.

The details for each of these cards are over on the Spellbinders' Blog.  I'd love for you to pop over and leave a comment for me over there!  Have a wonderful and crafty day!


Wednesday, March 15, 2023

Pretty Pink Posh New Release -- Easter Card Stenciling Fun!

Hi crafty friends!  I'm so thrilled to be a Guest Designer for Pretty Pink Posh's March release!  There are so many beautiful new stamps, dies, and stencils from Easter themed to all the spring time flowers!

There's also an Instagram hop happening with prizes too!  Be sure to click here to join and leave a comment for a chance to win!

For my card today, I used the adorable four-piece stencil set called Layered Easter Floral.  I used various inks from my stash with small ink blending brushes to color each layer of the stencil.

For the white bunnies you just need to lightly stencil a shadow around the edges with a neutral color.  I used Lost Shadow Distress Ink.  

The next step for my stenciling was adding the pretty Glitz Glitter Gel through the stencil for the dots and stripes on the eggs!  This adds such a pretty dimensional element to the card!

When the purple glitter gel was dry, I placed the stencil layer with the bunnies' tails back on, and added some white opaque texture paste.  I made sure to make each tail thick and fluffy looking.  I hope you can see it in the photos!  So cute!

Thank you so much for stopping by today!  I hope I'll see you over on my Instagram for the hop!

I so appreciate you using my affiliate links (never any additional cost to you)!

Hey Girl! I Miss You

Hello crafty friends!! Today I'm happy to be sharing another sneak peek of the new Simply Spring release! This release will be available on March 15th, after the LIVE Release Party on Honey Bee's YouTube at 7 pm CST. Be sure to tune in because there are always prizes to those that stop in--just leave a comment or two on the YouTube live for your chance!

Please note: The links to any new products I've used will not be live and available until this evening after the Release Party!  Bookmark this page and come back to use the links!

Now on to my card! This is featuring the gorgeous new Lovely Layers: Dogwood Honey Cuts. I've added it to a background with the new Dogwood Blooms 3D embossing folder with a sentiment from the new Big Time Kindness stamp set.

First I created the background by inking white cardstock in an ombré pattern with Detail Blender brushes and Tumbled Glass, Broken China, and Uncharted Mariner Distress Inks. I used a water mister to add water drops, then blotted up the water with a dry, clean paper towel. When the water was dry, I added splatters of diluted white gouache.

Then I put the panel into the Dogwood Blooms 3D embossing folder and ran it through my die cutting machine. I trimmed it to 3-¾" x 5" and glued it to an A2 card base.

I die cut the Lovely Layers: Dogwood from white cardstock except the leaves and flower centers. I used two shades of green cardstock for those. Next I used a brown Copic marker (E37) to color the stem portion of the branch. Then I used a sponge dauber to add Picked Raspberry Distress ink to the edges of the flowers. I used a stylus and foam pad from the Flower Shaping kit to add a bit of dimension to the buds. Next I followed the Layering Guide (available to download on the product link) and used glue to adhere everything onto the branch.

I stamped the sentiments from the Big Time Kindness stamp set with Broken China Distress Ink. I used my MISTI so that I could stamp it a few times to get it smooth. Then I cut it out with the coordinating Honey Cut and trimmed the other piece into a strip. I added foam tape strips to the back to adhere it to the card. 

Just a bit of bling was added with pink and blue gems from the Simply Spring Gem Stickers set.

Thank you so much for stopping by!!  I hope you've enjoyed this little sneak peek of this awesome new Simply Spring release!  If you'd like to see more of my sneak peek cards, please go to my Instagram!

Thank you so much for using my affiliate links to shop (never any additional cost to you)!