Today I'm sharing two cards I made with Pretty Pink Posh's March 2023 release! One was super quick and the other is a fun shaker card!
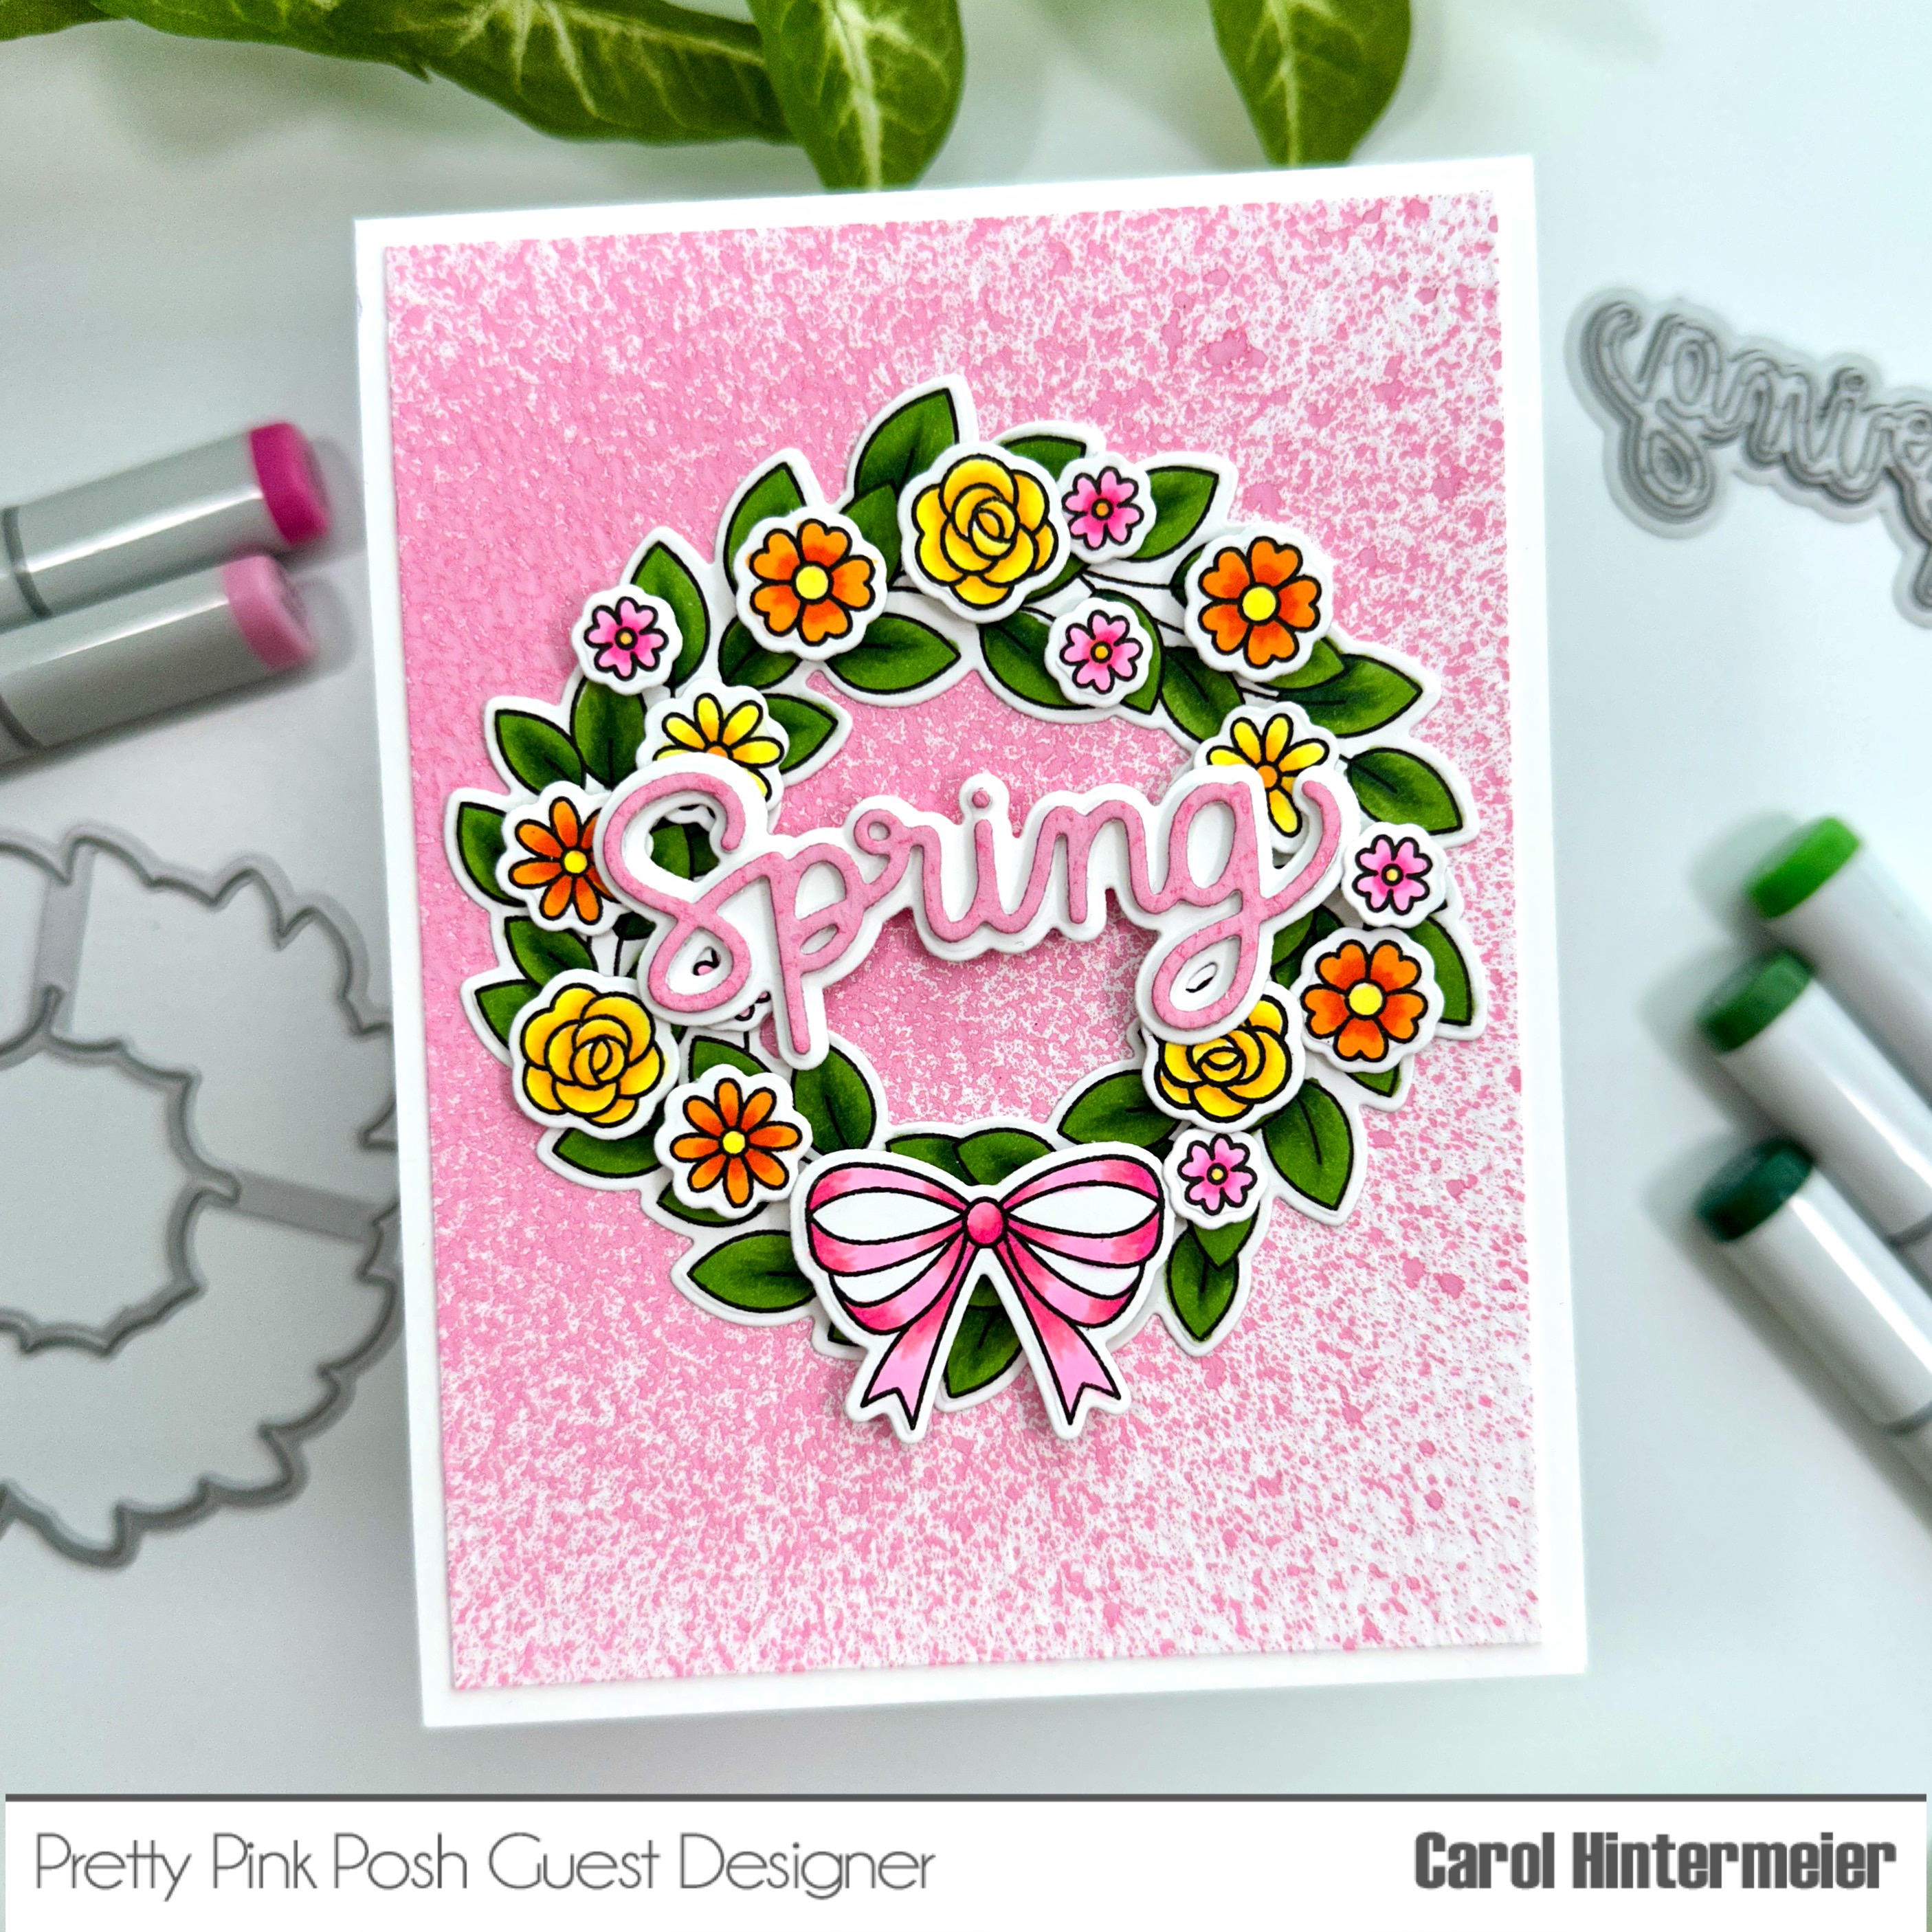
This card has a background I quickly made by spritzing 80# Neenah with Kitsch Flamingo Distress Oxide spray! Such a pretty and so easy way to make the base layer! After trimming it to 4" x 5-¼" I adhered it to an A2 card base.
I sprayed some scrap cardstock with the Oxide Spray, let it dry and used the sentiment in the Happy Spring Shadow die set to cut it out. I die cut the shadow and two more sentiments from white cardstock and adhered the layers together with glue. I set it aside to dry.

Next I stamped the wreath, flowers, and bow from the Leafy Spring Wreath stamp set with marker safe ink. After I colored the wreath, flowers, and bow I cut them out with the coordinating dies.
After gluing the wreath to the card base, I popped up the flowers, bow and sentiment with some foam tape.

My next card uses the Umbrella Shaker die set and the Layered Umbrellas stencil set. I just love these new stencil sets! Each one can make a card by itself--just add a sentiment!

I used a rainbow of Distress Oxide inks to add the colors through each layer of the Layered Umbrellas stencil set. For the final stencil layer, I spread some pretty blue glitter gel through the openings. When it was dry, I adhered it to a green A2 card base.

Next I created the umbrella shaker. I die cut the Umbrella Shaker dies from 80# Neenah. I used the included die to cut out the window openings. The umbrella stem and button on the top is die cut from silver cardstock. For the base of the shaker I inked on Distress Oxides in a rainbow order and die cut it. Before I assembled the shaker, I inked Kitsch Flamingo Oxide onto the top layer. Then I adhered some acetate to the back. After I added thin strips of thick foam tape to the back of the umbrella (or add a double layer of regular foam tape) to give the clay pieces room to move around.
I finished assembling the umbrella and glued it to the card. I stamped the sentiment from the Easter Sentiments stamp set and popped it up on my card.

I have really enjoyed making these cards with all the spring time colors!! And if you haven't checked out the new release, be sure to click one of the links below. There's something for all of us in this awesome release! Thank you so much for stopping by today!
Thank you for using my affiliate links (never any additional cost to you)!