Thursday, April 29, 2021

Altenew Wildflower Paper Crafting Collection Release Blog Hop + Giveaway

Hello crafty friends!  I'm so glad you've stopped by today!  There is so much amazing inspiration for the new Wildflower Collection and I have all of the hop details below!

You should have arrived here from the blog of the so very talented Victoria Calvin!  If you need to begin from the start, head on over to the Altenew Card Blog.

The entire Altenew Wildflower collection is filled with beautiful rich jewel-toned papers and ephemera!  For my cards today I've used the Wildflower 6x6 Paper Pack, the Pink Posy Ephemera and the Bitty Bits Ephemera.  If you'd like more details on these products, click the photos below.


************************************************

I love these beautiful rich colors of this collection!  To save you time, I'm listing the featured products, with a few details, below each card.  If you have questions about my designs, please feel free to use the contact me form on the left column of my blog.

My first card features the beautiful Wildflower 6x6 Paper Pad.  I used ephemera from the Pink Posy Ephemera pack.  I heat embossed a sentiment from Paint-A-Flower: Chamomile with Rose Gold embossing powder.


I embossed the pink paper with the Angled Mosaic 3D embossing folder and paired it with a strip of that gorgeous multi-colored patterned paper!  I used a gold gel pen to add dots on top of the flowers for more sparkle!


For my second card, I used a piece of the Wildflower Collection paper that is similar to the Enchanting Vines 3D embossing folder.

After I embossed the white card stock, I cut both pieces on an angle.  I die cut black card stock three times with the Fancy Thanks Die and adhered them together.  A few sweet flowers from the Bitty Bits Ephemera adds just the right touch!

I love stripes and the striped paper from the Wildflower paper pad was perfect for my final card!


I trimmed the striped paper and added it to a card base that I topped with an embossed Angled Mosaic 3D embossing folder.  (Can you tell I love this embossing folder?!)  I added the Handwritten Hello and some flowers from the Pink Posy Ephemera pack.  This time I used a white gel pen to add stitching lines to the flowers.


Thank you so much for stopping by!  I hope I've given you some inspiration for the beautiful Wildflower Collection!

Your next stop on the hop is Joylita Dsouza!

Giveaway Prizes:

$200 in total prizes! To celebrate this release, Altenew is giving away a $50 gift certificate to 2 lucky winners and a $20 gift certificate to 5 winners! Please leave a comment on the Altenew Card Blog and/or each designer’s blog post on the blog hop list below by 05/05/2021 for a chance to win. 


Altenew will draw 7 random winners from the comments left on each stop of this blog hop and announce the winners on the Altenew Winners Page on 05/07/2021.


Blog hop order:


Altenew Blog

Nathalie DeSousa

LauraJane

Patricia Roebuck

Virginia Lu

Michelle Short

Tenia Nelson

Amanda Baldwin

Karen Brown

Lilith Eeckels

Verity Biddlecombe 

Maryam Perez

Jaycee Gaspar

Jenny Colacicco

Raquel Bowman

Erum Tasneem

Audrey Yeager

Kymona Tracey

Kelly Griglione

Kim Jeffress

Seeka

Zinia Redo

Bridget Casey

Victoria Calvin

Carol Hintermeier << that's me!

Joylita Dsouza

Linda Westfall

Nandini Karmarkar

Sandhya Iyer

Terri Koszler

Helen Kalb

Wednesday, April 28, 2021

You Brighten My Day! | Honey Bee Stamps

 Hello my friends!  Today I have a sweet note card-sized floral card using Honey Bee Stamps beautiful Spring Bouquets and the Wood Frame Builder dies!  I love being able to use my colored card stock scraps and also use some of my (hoarded) patterned paper for a no-coloring, quick-and-easy card!

This card is a bit smaller than an A2 size.  It measures 5-½" x 3-½".   Just score a piece of 5-½" x 7" white card stock at 3-½".  Then I cut the gingham paper from the Playful Pastels paper pad to fit the card and adhered it with Bee Creative Glue.

There are five different lengths of Wood Frame Builder dies in the set.  I chose the two that are 3-½" and two that are 5-½".  I die cut three of each from 110# Neenah Solar White card stock.  Then I adhered them with Bee Creative glue.   I set them aside to dry and set a large stamp block on them to make sure the pieces dried flat.

While the frame pieces were drying, I chose a few of the flowers and branches from the Spring Bouquets Honey Cuts.  I die cut several of the flowers and branches from colored card stock scraps in my stash.  I used a ball stylus from the Flower Shaping Essentials Kit to add just a bit of dimension to the flowers and branches.

Next I adhered the frame pieces to the card base with Bee Creative glue.  I also glued the flowers and leaves to the frames.

I chose a sweet sentiment from the Thanks A Bunch stamp set and stamped it with Versamark clear ink.  (Be sure to use your anti-static powder first!)  Then I sprinkled on black embossing powder and heat set it.  Next I used the coordinating die to cut it out.  I added foam tape to the back and popped it up on the card.

It's not often I make a card that does not involve any type of coloring!  I love how sweet this card is, but also quick and easy to make!  Thank you so much for stopping by!

Tuesday, April 27, 2021

Elegant & Dramatic Peony Birthday Card | Rubbernecker Stamps

Hi my friends!  Today I'm using one of Rubbernecker Stamps' new gorgeous floral stamp set called Poetic Peonies to make my dramatic and elegant birthday card!  I've seen several gorgeous cards over on Instagram that have a dark background and the white die cut edges are colored in to match.  I love this look and decided to give it a try!


First I created my card base.  I cut some dark blue card stock to A2 size and added Sapphire ink just around the edges with a blending brush.  Sapphire is in Color Fuse Set #8.  Once I had the edges to my liking I inked on some black ink just barely on the edges to add more depth.  I adhered the panel to a top-folding A2 card base.

Next I stamped the Poetic Peonies in Copic safe ink onto 80# Neenah Solar White card stock.  I colored them all with my Copic markers (colors are listed at the end).  Next I die cut the flowers with the coordinating dies and fussy cut all of the leaves.

Now, I'll admit to being a tab bit nervous about coloring those white die cut edges after the time I spent coloring the flowers!  I forged ahead though, and I am glad I did!  Look at this photo that shows the before and after.  It makes a huge difference!

So, you may notice that the little berry branches you see on the finished card are not in the photo above.  After I colored the white edges with the dark blue Copic, the black ink stamp branches did not show!  To remedy that (because I really wanted them on the card) I stamped three of them again, this time using Grass ink (Color Fuse #11).  I colored the berries and filled in the stems where needed with a green marker and fussy cut them out.  This time when I added the blue marker around the edges it was much better!


I added foam tape to the back of the three flowers and adhered them to the card front.  (I used my previous unfinished card photo for reference.)  I tucked in the leaves and berries and adhered them with liquid glue.

The sentiment is from the Poetic Peonies set and I stamped it in Versamark, added Ranger Princess Gold embossing powder, and heat set it.  For a finishing touch and a bit of sparkle, I added sparkly gold dots with a gold Pentel Sparkle pen!


I had lots of fun creating this elegant birthday card!  Thank you so much for stopping by!

Copic markers:
flowers/berries: RV17, RV25, RV14, RV13, RV21
leaves: YG67, YG17, YG23, YG03

Click the images to check these out over in Rubbernecker's shop:

Thursday, April 22, 2021

Altenew Paint-A-Flower: Camomile Outline Stamp Set Release Blog Hop + Giveaway

 Hello friends and welcome to my stop in the blog hop to celebrate the release of Altenew's latest in the Paint-A-Flower series!


You should have arrived here from the oh, so talented Norine Borys' blog.  If you need to begin at the start, head over to the Altenew Card Blog.

The Paint-A-Flower: Chamomile is a beautiful outline stamp set with two main images and several sentiments to complement your coloring!  You can purchase the set individually or by joining the monthly subscription plan and save!  Click either image to go to Altenew's shop for more information.


For my card, I chose to use the gorgeous teacup image!

I stamped the Chamomile image onto a 4" x 5-¼" white card stock panel in black ink.  Then I colored it with my Copic markers.  For the teacup I used BG49, BG09, BG15, BG32, and BG11.  For the flowers and leaves I used C3, C1, C00, Y19, Y15, Y02, YG17, YG23, and YG03.  I added light shading around the flowers and cups with B000 and B0000 Copics.

When I finished coloring the image I drew a line with a thin black marker and used the Halftone Stencil to add a table for the cup to sit on.  I created a mask for the bottom of the image and fussy cut it out.  After I added the mask to the cup, I lightly blended some yellow ink through the stencil.  I love the little dotted table!

Next I chose a sentiment from the Paint-A-Flower: Chamomile set and stamped it in black ink.  Then I adhered it to an A2 sized teal card panel and added this to a top-folding A2 card base.

I love how this turned out and I hope I've given you some inspiration on a way to use this gorgeous set!  Thank you for stopping by and enjoy the rest of the hop!

Your next stop on the hop is the amazingly talented Erum Tasneem!

Check out these awesome giveaway prizes!

$200 in total prizes! To celebrate this release, Altenew is giving away a $50 gift certificate to 2 lucky winners and a $20 gift certificate to 5 winners! Please leave a comment on the Altenew Card Blog and/or each designer’s blog post on the blog hop list below by 04/27/2021 for a chance to win. 

Wednesday, April 21, 2021

Busy Bees Slimline Birthday Card with No-line Coloring | Honey Bee Stamps

 Happy Wednesday friends!  Spring is here where I am with lots of flowers blooming and bees buzzing!  I hope you're seeing signs of spring too!  My card today reflects the season with lots of bright flowers and colorful signs of spring!  I've used my well-loved Busy Bees stamps and paired them with the newer Hexi Slimline Cover Plate Top and Base for my cheerful card.

I've been wanting to work on my no-line coloring skills so I began by stamping the flowers, leaves, and bees from the Busy Bees stamp set onto 80# Neenah with some no-line coloring ink.  I used a plethora of Copic markers in all the rainbow colors to color my flowers.  No line coloring does take some practice!  My best tips are to take your time!  Don't do this if you are in a rush as it just causes frustration (at least for me).  Another tip is to use a fine point black marker like a Micron 005 to add in the details on the bees.  Also, take breaks!  I think the time and effort are worth it in the end and love how my flowers and bees turned out.

When I finished coloring I die cut the images with the coordinating Honey Cuts.  For the stems, I just colored a scrip piece of paper with a green Copic and then used the stem die cuts to cut them out.

Next I worked on my card base.  I used a few Background Blender brushes to ink up a strip of card stock with Mowed Lawn and Twisted Citron Distress Oxide Inks.  Then I used the hill dies from the Horizon Slimline Borders Honey Cuts to die cut two hills from the strip.  I layered them and adhered the two pieces together with Bee Creative glue.

I took an 8-½" x 7" piece of 80# Neenah and scored it at 3-½" for my card base.  Then I blended on some Tumbled Glass Distress Oxide ink with a Background Blender brush.  Next I adhered the Hexi Slimline Cover Plate Top and Base pieces that I also die cut with 80# Neenah.  Then I adhered the hills at the bottom of the card base.

I used two stamps from the Buzz stamp set and stamped them in black ink.  I trimmed them and added some thin foam strips to the back.  I arranged my bees, flowers, leaves and stems onto the card front.  It took me a few minutes to decide which ones to pop up with foam squares and which to adhere with Bee Creative glue!  Before I adhered the leaves, I decided I didn't want the white edge from die cutting them, so I just fuzzy cut them out.  Then I shaped the leaves with my fingers, adding a piece of a foam square near the center and a dot of glue at the leaf bases to adhere.  (Tip: I love these foam squares and will often use my non-stick scissors to cut them into smaller squares as I did here!)

I love to get a bit of sparkle and those extra little touches in on a card when I can.  I added sparkle to the bees' wings and the flower centers with a clear glitter pen.  This I used a bright yellow Gel Roll pen to add dots to the flower centers.

I totally love how Honey Bee's products work together, whether they are older ones or new products!  I hope you've enjoyed my bright, springtime card today!  Thank you so much for stopping by!

Monday, April 19, 2021

Altenew Suddenly Spring Stand-alone Dies Release Blog Hop + Giveaway ($300 in Total Prizes!)

 Hello friends!  I'm so happy to be joining this awesome blog hop to celebrate Altenew's Suddenly Spring Stand-alone dies release!

You should have arrived from the blog of very talented Kymona Tracey.  If you'd like to start at the beginning, head over to the Altenew Card Blog.  I have the entire hop list and details on how to win an awesome prize at the end!

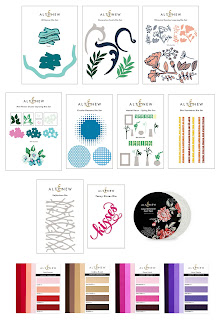
There are many amazing stand-alone dies in this release!  Click THIS link to see them all!  You can also get these dies in two different fabulous bundles.  Raise your hand if you're like me and want it all!  Click the images to go directly to Altenew's shop to see these bundles.

There are also a couple of great free gift promotions.

  • Get a FREE brand-new Suddenly Spring Stand-alone Dies Release Inspiration Guide (worth $5.99) with every order of Suddenly Spring Stand-alone Die Release Bundle. Shop HERE!

  • Get a FREE brand-new Suddenly Spring Stand-alone Dies Release Mini Inspiration Guide with every order from 04/19/2021 through 04/21/2021. Shop HERE!

----------------------------------------------------------------------

For my first card today, I'm featuring the gorgeous Whimsical Garden Layering Die set!

To begin, I die cut all of the layers from 80# Neenah card stock.  Then I used a few purple and green Copic markers to color the pieces that fit inside of the outline die cuts.

After I finished coloring, I used the included layer guide (so helpful!) to layer and adhere the die cuts together.  Next I added a dark purple layer to my card base.  Then I popped up the large flower with foam squares and tucked the remaining pieces around it with liquid glue.  I stamped a sentiment from the Tranquility Rose stamp set, trimmed it and popped it up on the card front.

I added some Nuvo drops to the little berry sprigs and some sparkle with a clear glitter pen to the purple flowers.  I wish it showed up in the photos!!


For my second card, I used the beautiful die cut called Reflections Die.  I used it in a fun way by creating a rainbow of colors!

To ink up the rainbow colors, it was very helpful to leave the die cut in its negative space.  I added some removable tape to the back to hold it in place.  I used a variety of dye inks from my stash and some ink blending brushes to create my rainbow of colors.

After I finished ink blending the Reflections die, I removed it from its negative space and noticed that I still had a lot of pretty ink blending on that space.  So I trimmed two thin strips and adhered them at the top and bottom edges of my card base.  I love how this coordinates with the die cut!

I die cut a sentiment from the Slim Sentiments Die Set four times.  After I used some pink ink to color one layer I adhered them together with liquid glue.  Then I snipped the sentiment into two strips and added them to my card base.  The six sentiments in this set are all about 6-¼" long, but as you can see, these work great when cut apart!

I love bling and thought the rainbow of colored acrylic hearts fit in with the theme of the sentiment perfectly!  


My third card feature features the amazing 3D Banner Die Set.  Never, have I ever, seen a die with this much beautiful dimension!

Let me just admit this now.  I bought this beautiful Teal Shadow Wide Washi Tape just after it was released and had never used it!!!  Gah, horrible, I know!  LOL!   I bought it because I already had the Floral Shadow Die Set that it coordinates with.  It certainly made my card base easy and so very pretty!  It pared perfectly with a layer of Lagoon card stock on my card base.

I die cut the 3D Banner Die from Lagoon card stock.  I white heat embossed some sentiments from the Tranquility Rose stamp set onto the banner.  I could not have done this without my MISTI to position and slightly bend the sentiments to fit the banner shape!  Next I folded the banner on the score lines that are also from the die and adhered it to the shadow I die cut from black card stock.

To finish my card I adhered some more Teal Shadow Washi Tape to some white card stock and used a couple of the Floral Shadow dies to cut the pieces out.  Then I popped them up onto my card base around the sentiment.

I hope I've given you some inspiration using some of the awesome dies from the Suddenly Spring release! Thank you so much for stopping by!

Your next stop on this hop is the amazing Nicole Watt!


Giveaway Prizes

$300 in total prizes! To celebrate this release, Altenew is giving away a $50 gift certificate to 2 lucky winners and a $20 gift certificate to 10 winners! Please leave a comment on the Altenew Card Blog and/or each designer’s blog post on the blog hop list below by 04/25/2021 for a chance to win. Altenew will draw 12 random winners from the comments left on each stop of this blog hop and announce the winners on the Altenew Winners Page on 04/27/2021.


Blog Hop Order:

Altenew Card Blog

Nathalie DeSousa

Emily Midgett

Amanda Baldwin

Amber Rain Davis

Michelle Short

Therese Calvird

Dana Joy

Virginia Lu

Jenny Colacicco

Laurie Willison

Ardyth Percy-Robb

Kymona Tracey

Carol Hintermeier <<< that's me

Nicole Watt

Joylita Dsouza

Keren Baker

LauraJane

Reiko Tsuchida

Sandhya Iyer

Seeka

Agnieszka Małyszek

Teresa Litchfield

Tenia Nelson

Svitlana Shayevich

Terri Koszler

Tricia Schaden

Yoonsun Hur