Thursday, February 24, 2022

Honey Bee Stamps Modern Spring Instagram Hop

Hello friends!  Today we are hopping over on Instagram to celebrate Honey Bee Stamps' new release called Modern Spring.  This release is filled with so many gorgeous sets--from florals, cute mice, hot foil plate sentiments, and more--there's something for everyone!

Before I get to the details of my card, be sure to visit my Instagram when you are finished here to get started on the hop.  The more comments you leave, the more chances you will have to win a $25 gift card to the Honey Bee shop!

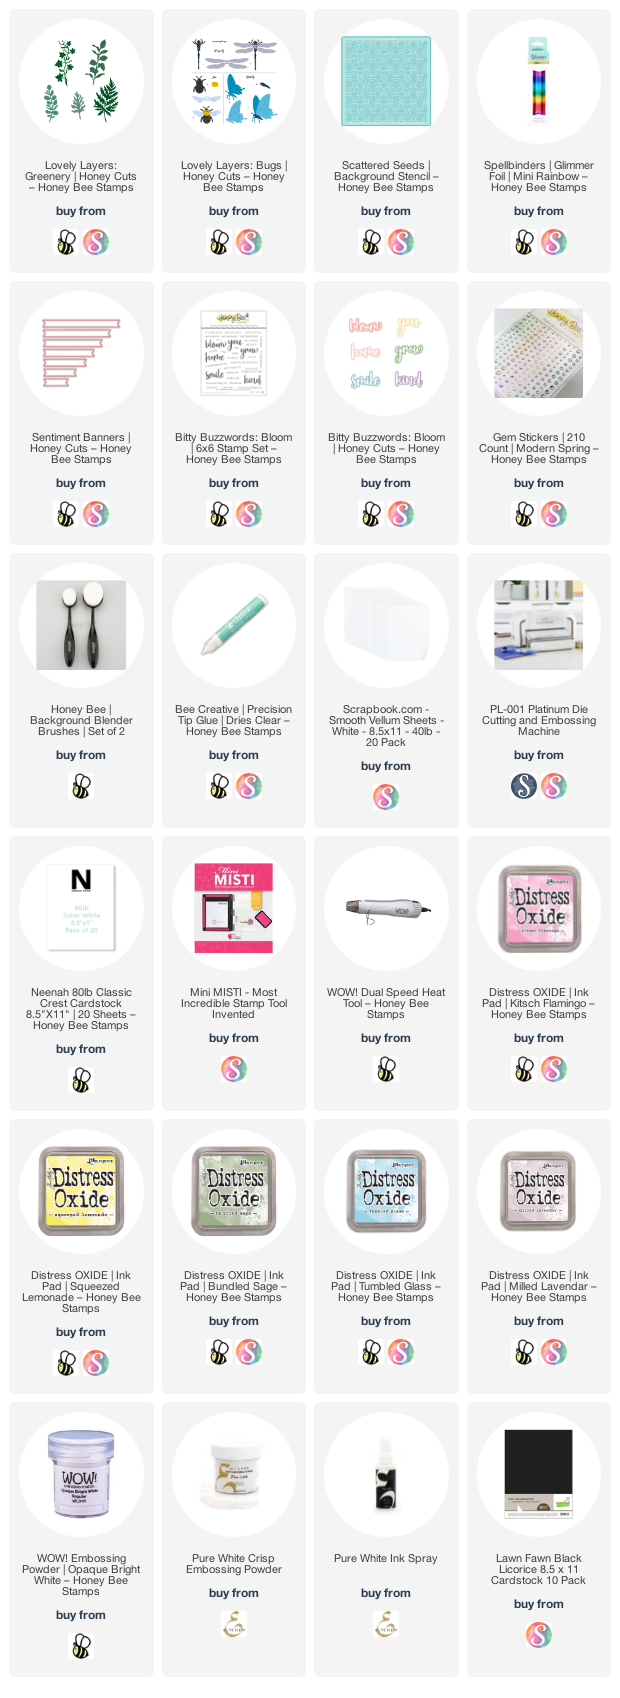
First I stenciled a rainbow of Distress Oxide inks through the Scattered Seeds stencil with Detail Blender brushes.  All the colors I used are in the supply list at the end.  I trimmed the piece to 4" x 5-¼", added a black mat layer, and adhered it to an A2 card base.

Next I worked on the elements for the card.  I used two of the Lovely Layers: Greenery dies and cut one four times and the other twice from white card stock.  I left three of the die cuts in the negative space, taped them on the back with removable tape, and then ink blended the same Distress Oxides over them.  I spritzed water droplets on them and dried it with my heat tool.  Then I added drops of Pure White ink spray and dried that.

For the three remaining pieces of greenery, I spattered some gold (retired) Perfect Pearls Mist over them and let dry.

I die cut the dragonfly wings from the Lovely Layers: Bugs set three times.  Once each from white card stock, rainbow foil (for hot foil plates) and from vellum.  I adhered the rainbow foil to the white layer and adhered the vellum by adding a dot of glue in the center.  I used my fingers to slightly curl up the vellum wings.  I love the effect of the foil through the vellum!!  I used a clear Wink of Stella to add sparkle to the vellum wings.  I die cut the dragonfly body from some pink mirror card stock in my stash and adhered the wings to the body.

I die cut the "kind" sentiment from the Bitty Buzzwords: Bloom die set from black card stock three times.  I adhered the layers together and glued them to the white shadow die cut layer.  Then I stamped the sentiment from the Bitty Buzzwords: Bloom stamp set in Clear Embossing ink onto black card stock.  I sprinkled on white embossing powder and heat set it.  I used a die from the Sentiment Banners die set to cut it out.

I fiddled around (it seemed like forever--LOL!) with the elements to decide on an arrangement.  Once I was happy I popped up the dragonfly and the sentiments with foam squares.  I used Bee Creative glue to adhere the greenery layers.

I adhered some gems from the new Modern Spring Gem Stickers to the card and also the dragonfly body.  I love how iridescent these are and that there are three different sizes in the new sets!

I'm so happy you stopped over for the details of my card!  Thank you!  Be sure to go back over to Instagram where I have the hop list, and check out the other designers' projects!  You will definitely find lots of amazing inspiration for the Modern Spring release; and if you leave a comment, you just may be a winner of that gift card!  Good luck!

Thank you so much should you choose to use my affiliate links for your shopping:  (it's never any extra cost to you) 

Wednesday, February 23, 2022

Someone Like You | Honey Bee Stamps

Hello crafty friends!  I'm super happy to share a card I made using new products from Honey Bee Stamps new Modern Spring release!  I've used Friendship Ladder stamp set along with the coordinating dies to create this sweet card to send to an awesome friend!  I've also added a few plants from the Happy Plants set to complete my plant scene.

First I stamped all of my images from the Friendship Ladder and Happy Plants stamp sets in Intense Black ink.  I colored them with my Copic markers and then used the coordinating Friendship Ladder and Happy Plants dies to cut them out.

Next I selected some patterned paper from the Modern Spring paper pad and trimmed it to 4" x 5-¼".  I trimmed another piece of paper to ¾" x 4".  Then I adhered them to a top-folding A2 card base.

I played around with the ladder and images, and once I decided on an arrangement, I used Bee Creative glue to adhere them to the ladder.  Before adhering the ladder, I decided where I wanted the large plant to go and adhered it with glue leaving the top leaves without glue.  Then I added foam tape to the back of the ladder and adhered it to the card.  I slipped the ladder under one of the larger leaves for more interest.  I popped up the other plant and water bucket with foam squares.

I stamped the sentiment from the Friendship Ladder set in Intense Black ink and cut it out with the coordinating die.  I added foam tape to the back to pop it up on my card.

There is also a wonderful coordinating envelope set with this release.  I've added one of the envelopes from the Modern Spring Envelope set to these last photos.  

There are lots of other images, such as books, a lantern, diffuser, camera and others, to use to create a card with a different theme!  I really do enjoy versatile sets such as this one.  Be sure to check out all of the other fabulous sets in the Modern Spring release over in the Honey Bee shop.  Thank you so much for stopping by, and I hope you have a wonderful day!


Thank you so much should you choose to use my affiliate links: 

Wednesday, February 16, 2022

Sweet Treat Holders & Wax Seals | Honey Bee Stamps

 Hello friends!  Today I'm sharing some fun candy holders I made for my gal friends using Honey Bee Stamps Sweet Notes Card & Envelope die set, and then decorated the outside with the Heart Wax Stamper.  Wax seals are not just for sealing envelopes, as you will see here.

I made these for Valentine's day, but you can just change up the sentiment to fit your occasion!  I have LOTS of photos of my process for these darling envelopes to go with my step-by-step list, so read on for the details.


  • First die cut white 80# Neenah cardstock with the note card die in the Sweet Notes Card & Envelope die set.  I die cut several of these, then cut them in half with my paper trimmer.
  • Next stamp the sentiment from the Will You Be My set onto the notecard in a coordinating ink.  I used Candied Apple Distress Oxide ink.
  • Die cut the desired number of Envelopes from Neenah Desert Storm card stock.  Fold each one at the score lines.
  • Next I used clear adhesive dots to adhere these delicious Ghirardelli chocolates on the back of the sentiment card.  These chocolates fit in the envelop perfectly!

  • Gather up all of the pieces and parts, along with some coordinating twine, the Honeycomb Wax Melts, Wax Melting Spoon, and your Wax Stampers.  Honey Bee has this cute heart stamper that I used, and also a pretty rose stamper.  You may be noticing the small silicone spoon in the photo.  I had this in my kitchen and it is the perfect size for pushing out the melted wax from the melting spoon.  It's part of a set that was given to me, so I don't have a link.  It measures about 1-3/8" across if you look for one.
  • Put the sentiment card w/chocolate inside the envelope and close it up.
  • I decided to not put the wax on the envelope closure because I wanted it to be easy for my friends to open them.
  • I wrapped my baker's twine around each box and tied it into a bow.  Then I snipped my pieces of the Lovely Layers: Heart Vines and set them onto the front of the envelope.

  • I put three pieces of the Wax Melts into the Wax Melting Spoon. I used Tuxedo, Pearl, and the Hugs & Kisses Honeycomb Wax Melts.  There are lots of ways to melt the pieces, such as a tea light, a candle, etc, but I'm rather impatient and found that my heat tool does a great job at melting them!  I just held my heat tool under the Wax Melting Spoon and also melted them from above.  Just be sure to keep your fingers on the wooden handle--the metal spoon gets hot!!
  • When the wax was melted, I poured it over the twine and ends of the Lovely Layers pieces.  Then I pressed the Heart Wax Stamper into it.  The wax will harden enough to remove the stamper in about 10 seconds.  The wax will hold your Lovely Layers: Heart Vine pieces very securely!

I love how these turned out!  If you make all the pieces and parts you need first, it's easy to mass produce these assembly-line style!  I hope you've enjoyed these and have found some inspiration on a different way to use these fun wax seal products!

Thank you if you use my affiliate links (at no additional cost to you):

Tuesday, February 15, 2022

Sprinkled With Stardust | Rubbernecker Stamps

 Hello crafty friends!  Today I have a fun shaker birthday card to share.  It's Rubbernecker Stamps birthday month and I've used their new Happy Birthday #1 set for my celebratory card!

Here is a step by step for creating this card:

  • To create the shaker card frame, tape the two largest Mini Slimline Nested with Stitch dies together on the back.  I used a few pieces of removable masking tape.
  • Die cut the frame three times from 80# white card stock, saving at least one of the middle pieces to use in another step.
  • Adhere two of the frames with liquid glue.
  • Cut a piece of acetate to fit the window, just slightly less that 3-½" x 6".  Adhere to the top frame.  Adhere the third frame over the top of the acetate.  Set aside to dry.
  • Using the reserved rectangle from the frame, stamp the Happy Birthday #1 with Versamark clear embossing ink.  Be sure to use your anti-static pouch first.  Sprinkle on gold embossing powder and heat set.
  • Create a mini slimline card base by scoring some 7" x 6" 80# Neenah card stock at 3-½".  Add glue to the back of the Happy Birthday #1 piece and center it onto the card base to adhere.
  • Add foam tape to the back of the frame.  Then add your bling in the center of your card and adhere the framed window over the bling.  I used bling from my stash that I've had FORever!!! Haha!
  • Die cut the Balloons Die twice from two shades of pink card stock and once from gold mirror card stock.  I really like how this one one die that cuts three balloons with strings!
  • Stamp the sentiment from the Happy Birthday #1 set in Versamark ink.  Use the third smallest Nested Square Stitch die to partially cut it out.  (see photo)  Reposition the die to finish the cut.


Finally, arrange the balloons, strings, and sentiment and adhere to the window with liquid glue.

Thank you so much for stopping by!  Have a fabulous, and crafty, week!


Rubbernecker products used for this card:

Wednesday, February 9, 2022

Sending Love -- Inking and Stenciling Fun! | Honey Bee Stamps

 Hi crafty friends!  Today I'm sharing a card featuring some Honey Bee Stamps stamps, dies and stencil set!  This card would be perfect for lots of occasions like Valentine's Day, a birthday, or just to show you care!

First I sprayed the back of one of the three Art Deco Patterns stencil with Pixie Spray to hold it in place on my white cardstock. Then I used a Detail Blending brush to add pink ink through the stencil in an ombré pattern. I left the stencil in place and spattered some white paint on the piece. I let that dry and then spattered some gold paint with my paint brush. I removed the stencil and set the piece aside to dry. When it was dry, I adhered it to a top folding card base.

To avoid coloring with my Copic markers over the gold heat embossing I used my MISTI to stamp the images from the Happy Plants stamp set with No Line Coloring ink. I left the stamps on the MISTI door while I colored the plant and the pot. Then I placed the paper back into the MISTI and re-stamped the images with Clear Embossing ink. I sprinkled on gold embossing powder and heat set it. Next I used the coordinating dies to cut them out.

Next I die cut some gold cardstock and white card stock with two of the Stacking Art Deco Labels dies. I adhered the gold one to the stenciled piece with Bee Creative glue. I added foam tape to the back of the white Art Deco Labels die cut and put it on top of the gold one.

I stamped the sentiment from the Rooting For You set with Clear Embossing ink, sprinkled on gold embossing powder, and heat set it. I used the coordinating Honey Cut to cut the sentiment out and also die cut it four more times from white cardstock. I adhered all of the die cuts with Bee Creative glue and then added it to my card with glue. To finish up, I added foam dots to the back of the flower pot and plant and adhered them to my card.

I sure hope I've given you some inspiration for your stencils and inking fun!  Thanks so very much for stopping by---I always appreciate you so much!

Thank you should you use my links (some affiliate, at no extra cost to you)

Wednesday, February 2, 2022

Three Quick Cards with One Stamp & Die Set! | Honey Bee Stamps

Hello friends!  Today I'm sharing three quick and easy cards I made with Honey Bee Stamps You Buzzword stamp set and coordinating dies.  You just need some patterned paper (I highly recommend the Hugs and Kisses paper pad) and some basic supplies to make these!  In my mind, these are perfect for Valentine's day--just not the super sappy kind!

All of these cards were created in pretty much the same way. I used the Hugs and Kisses paper pad for the patterned paper. I thought about making these into true "eclipse" style cards, but I love that pierced shadow layer of the You Buzzword so much that I didn't want to leave it off. Haha!

All of my cards are on top-folding A2 card bases. I did use the Sweet Stacks: Rectangles Honey Cuts for my layers, but you can just as easily measure and cut them with your paper trimmer. Before I adhered the patterned paper layer, I die cut the You Buzzword top layer from it. The shadow die cut layers totally cover it and no one will know!

The pink paper here is also in the Hugs and Kisses paper pad.  I repeated the same mat layers of colors and patterned paper for the "you". I die cut the black shadow layer of the You Buzzword three times for extra dimension. Bee Creative glue truly is my go-to glue and I used it to adhere all of the layers. This card has a few Sweethearts Clay Hearts on it for a bit of embellishment! The sub sentiment from the You stamp set is stamped with Bee Creative Clear embossing ink onto black card stock. I sprinkled on some white embossing powder and heat set it. Next I added some of these awesome, new foam dots to pop it up on the card.

This next card also has pink paper from the Hugs and Kisses paper pad for a mat layer. I kept the "you" shadow layers all white this time. Also, I die cut extra "you" die cuts from white card stock to add more dimension. This time I stamped the sentiment with Intense Black ink onto some white card stock. I trimmed it with my paper trimmer and popped it up with foam dots (I used these foam dots for each sub sentiment on each card.) The You stamp set is filled with 20 wonderful sentiments to go with the "you" sentiment making this a set you will use a lot!

I added bling to this card by swiping a clear glitter pen over the top layer of "you" and adhering some gems from the Hugs and Kisses gem sticker pack.

For my third card, I went all bold! I think this card would be fine to give to that awesome guy!

For this card I used black and red card stock from my stash for the layers. I heat embossed the sub sentiment on a piece of the same red card stock and popped it up with foam dots. I adhered a few Red Hots acrylic hearts for just a touch of bling.

I love how these cards turned out and now I need to order another Hugs and Kisses paper pad! There are so many occasions that you can use this You stamp set and coordinating Honey Cuts! Thank you so much for stopping by! I hope your day is a wonderful, and crafty, one!


Tuesday, February 1, 2022

Rubbernecker Birthday Celebration Blog Hop

 Hello friends!  Welcome to Rubbernecker Stamps Birthday Celebration Blog Hop!  Be sure to leave a comment blow for your chance to win the four sets pictured below (worth over $60) and then click on the next stop for more inspiration--the full list is at the end!  My mini slimline card for the hop features the beautiful, new Always On My Mind set and a new die and stencil too!


My card today features a few new products:  the gorgeous Always On My Mind stamp set, the Leaf Stencil, and the awesome Mini Slimline Window Cover die!  

First I created my card base:

  • Score a 7" x 6" card at 3-½".  Add a piece of masking tape along the score line on the card front.
  • Spray the Leaf Stencil with Pixie Spray and adhere on the left side of the card front.  (The stencil won't cover the entire mini slimline.)
  • Use an ink blending brush and blend on Clover ink.  I blended it darker at the edge and faded out near the center.
  • Repeat for the right side of the card.  Just be careful to ink very lightly in the center and you really cannot tell that the stencil didn't cover the entire card!
  • Die cut the Mini Slimline Window Cover die three times from 80# Neenah. (Save one of the center pieces for the sentiment!)  Adhere the layers together with glue.
  • Glue the die cut to the card front.

Next stamp the images from the Always On My Mind set with Copic safe black ink.  I colored the flowers with these Copic markers:  Y19, Y15, and Y02.  The leaves are colored with YG17, YG25, YG23, and YG13.  Next I fussy cut the images.

I stamped the sentiment that's in the Always On My Mind set with Versafine Onyx Black ink.  I added black embossing powder and heat set it.  Next I added some foam tape to the back and popped it up on the card.

Then I arranged the flowers and adhered them with glue and foam squares.  I added a few sparkly gems for a bit of bling!

Thank you so much for stopping by!  Be sure to hop to each stop and leave a comment for your chance at some awesome prizes!  The winner will be chose on February 6, 2022.  Happy hopping!

Hop list:

Rubbernecker Stamps

Lisa Bzibziak

Annie Wills

Jamie Martin

Kittie Caracciolo

Jean Manis

Natasha Vacca

Carol Hintermeier << that's me!

Preeti Chandran

Allison Arbour

Julie Warner

Check out these awesome product I used for my card: