Tuesday, August 30, 2022

Autumn is a Second Spring - Loose Watercoloring and Gold Heat Embossing

 Hello crafty friends!  I don't know how we are already at the end of August, but I'm happy it is because I'm so over these hot temperatures!  LOL!  Today I'm sharing a card I made, while thinking of cooler weather to come, with Rubbernecker Stamps beautiful Splatter Leaves set.   I did some loose watercolors for this card and have the details below!

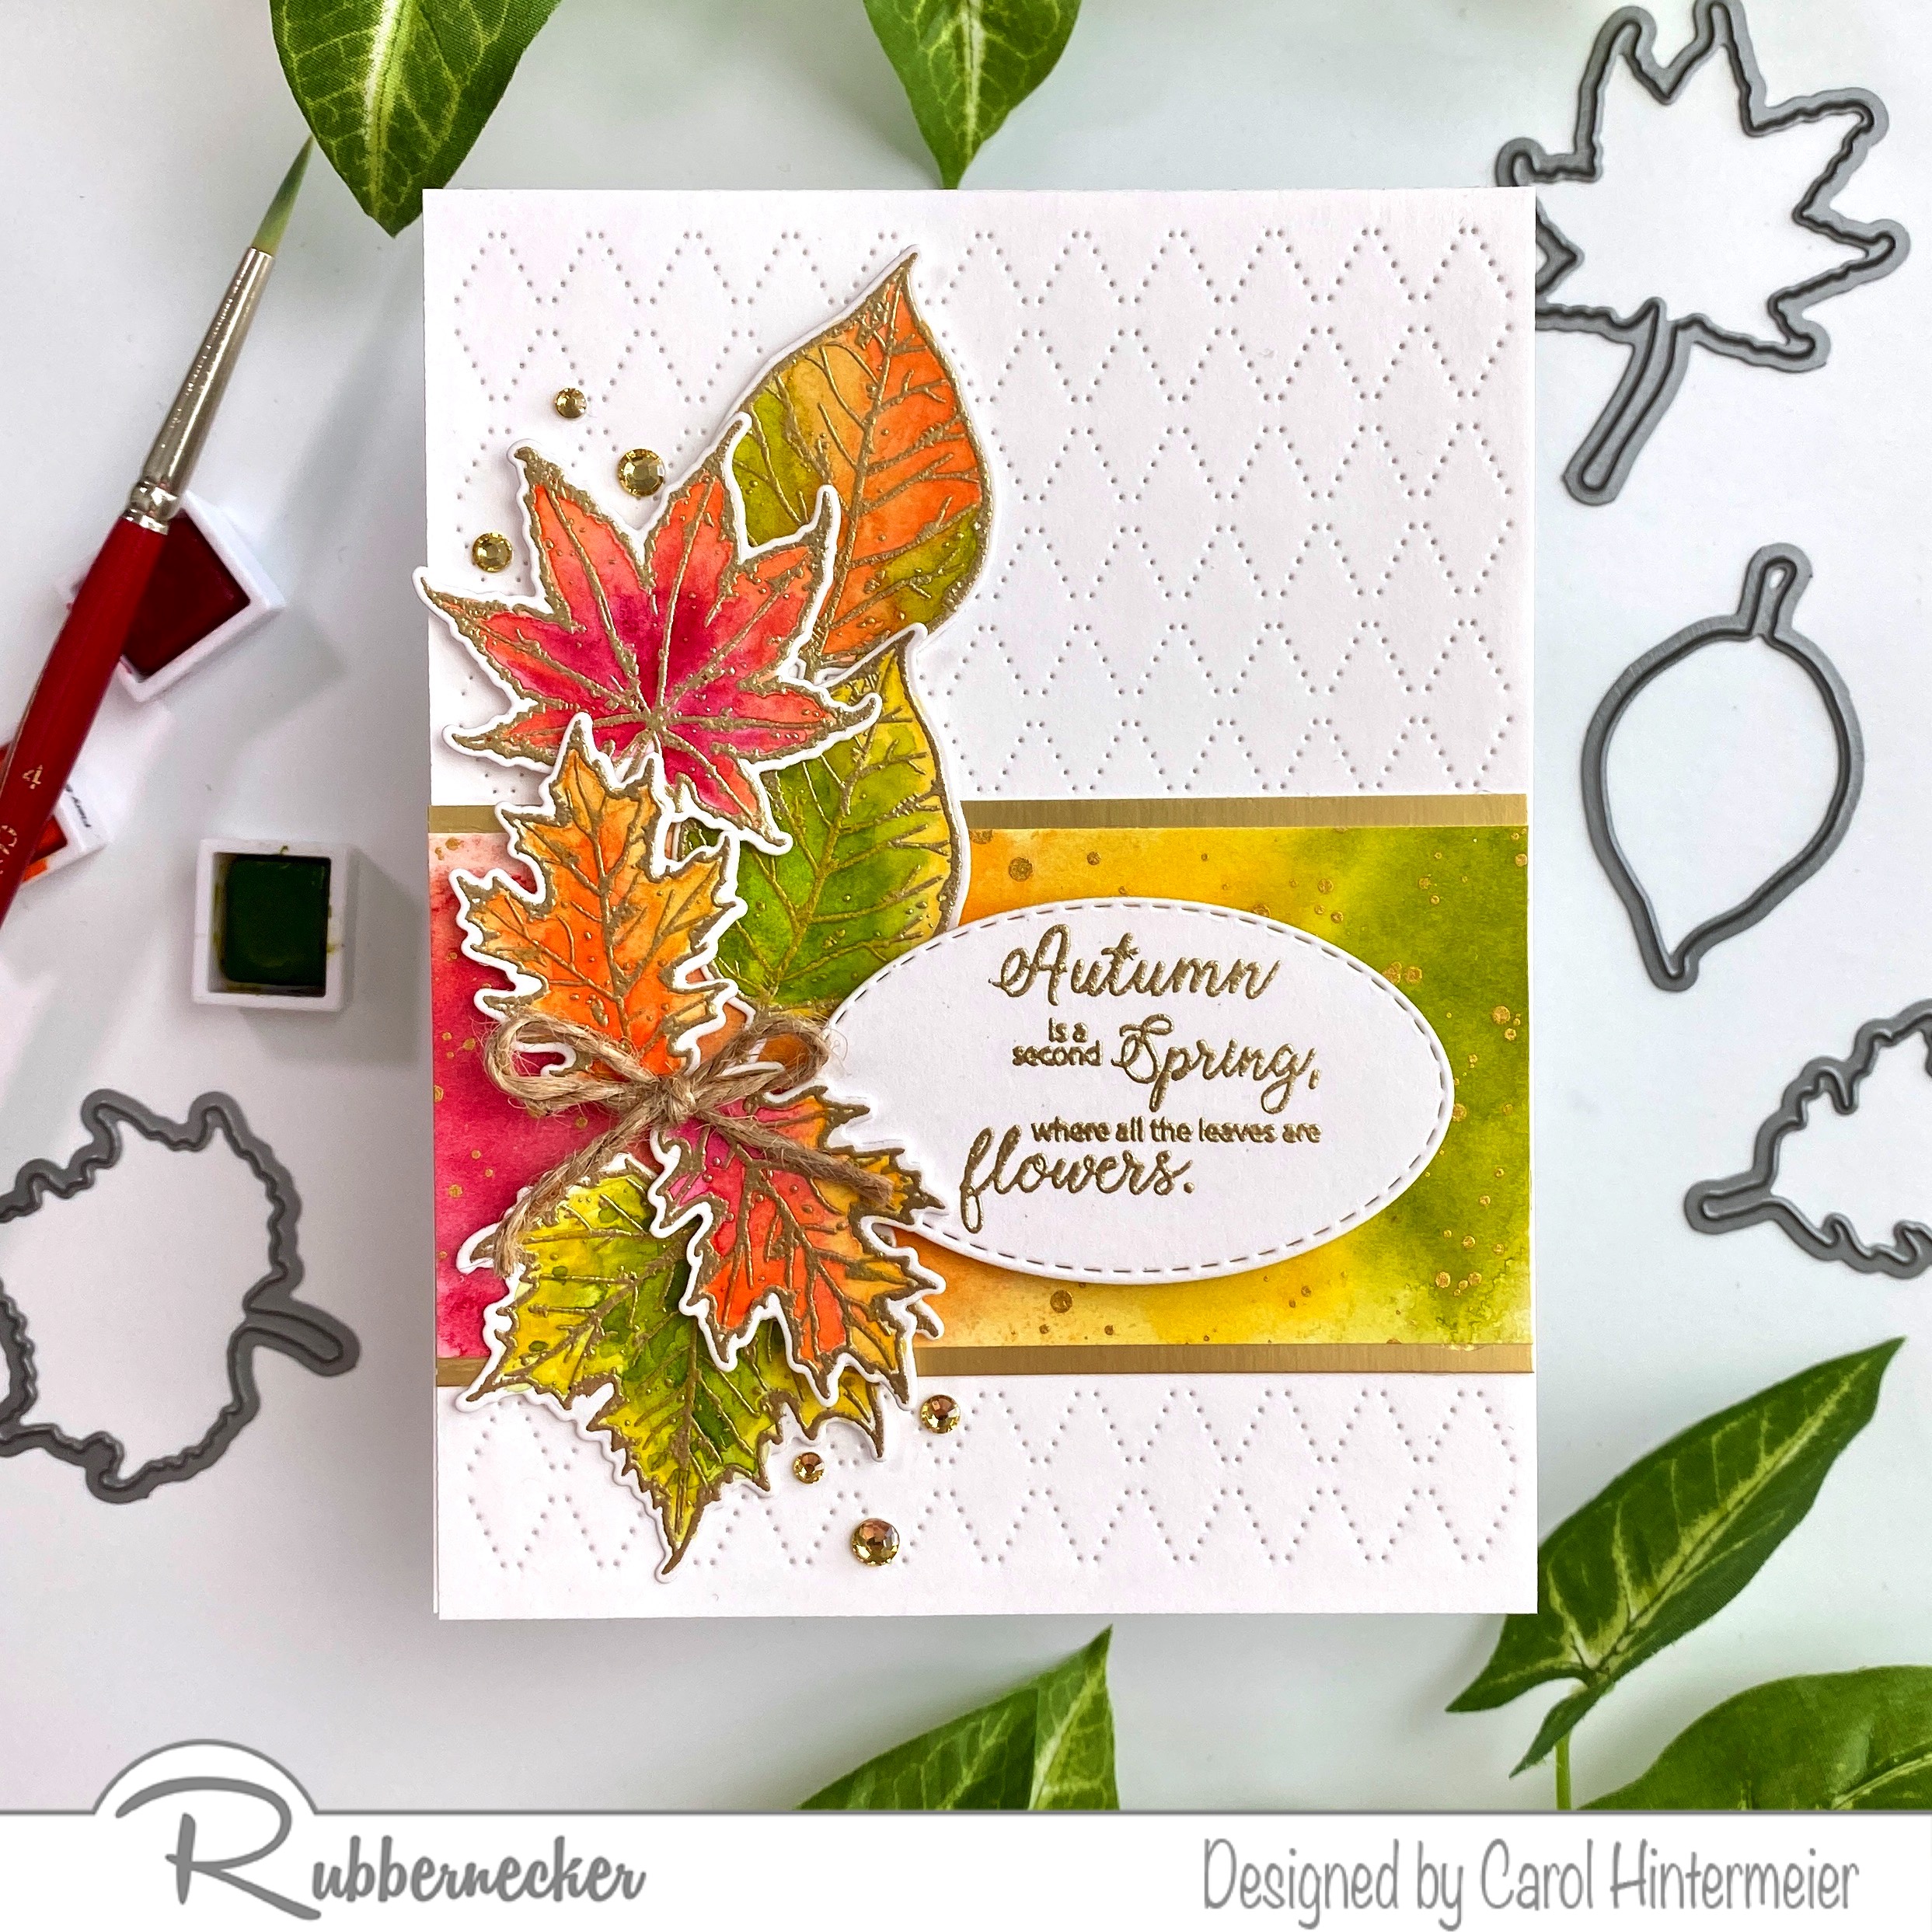
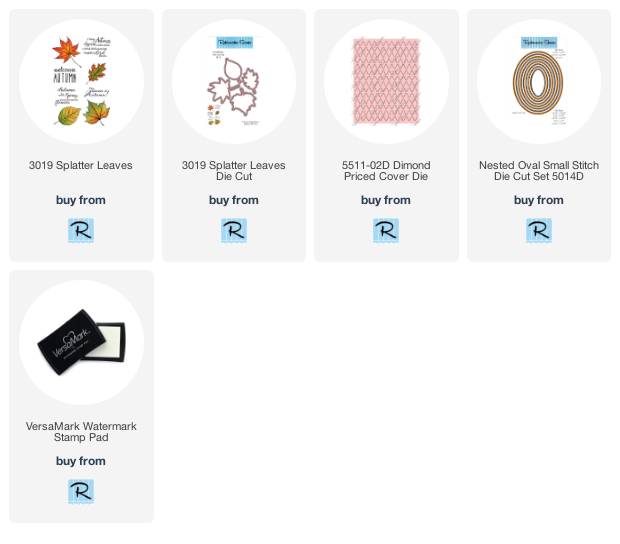
First I stamped my leaves from the Splatter Leaves set onto Strathmore Bristol Smooth cardstock with Versamark, added gold embossing powder, and then heat set them.  While I had the supplies out, I went ahead and stamped the sentiment from the set and heat embossed it too.

Then I used some Artist Watercolors in some warm colors to color the leaves.  (The set I used is linked below. I used Red Cosmos, Fiery Sunset, Fall Harvest and Tropical Green watercolors.)  First I used a brush and water to dampen the paper and then dropped in my colors and let them alone to blend.  I let them dry and then added another layer of color.  While that was drying I took another piece of Bristol and added random water puddles and dropped in the same colors.


When the strip of color was dry, I trimmed it to 2" x 4-¼" and adhered it to a gold card stock layer measuring 2-¼" x 4-¼".  I glued this to white cardstock that I die cut with the Diamond Pierced Cover die.  I added this to an A2 card base.

Then I used the coordinating Splatter Leaves dies to cut out the leaves.  I arranged them and then adhered a few with foam tape and the others with glue.

Next I die cut the sentiment with the third smallest Nested Oval Small Stitch die.  I popped it up onto the card with foam tape.  I embellished the card with a twine bow (attached with a small Glue Dot) and a few gem stickers.

I love the gold embossing with the Autumn colors!  This was really fun to make and I hope you've enjoyed it.  Thank you so much for stopping by!


Thursday, August 25, 2022

Spellbinders Winter Wonderland Collection Guest Designer/Blogger!!!

 Hello friends!!  I'm so happy to share that I was invited to be a guest designer/blogger over on the Spellbinders blog today!!  I created three cards using the adorable Winter Wonderland Collection for this blog post.

Here's a sneak peek of one of my cards:

I hope you'll join me over on the Spellbinders blog to see the other two cards and all of the details to create them!!


Wednesday, August 24, 2022

A Sweet Trio of Baby Cards!

Happy Wednesday friends! Today I'm sharing three baby cards that are quick and fun to make! These feature Honey Bee Stamps Rock-a-Bye Baby and Bundle of Joy Honey Cuts and some fabulous patterned paper that Honey Bee is known for!

Other than the focal elements, all three cards are created the same way. Use these steps to create each card base:

Now that our card bases are prepared, it's time to start on the focal images for each card. This first card uses the cut little outfit from the Bundle of Joy Honey Cuts. I die cut it twice, one from patterned paper in the Spring Lullaby paper pad and the other from 80# Neenah.

I trimmed off the ruffles and the top middle of the patterned paper die cut to make a cute little strapped outfit. I adhered it to the white die cut and used a few Copic markers to add some shading. I die cut and colored the hanger and added it to the outfit. Then I added foam tape to the back to pop it up on the card.

The next two cards' focal images are from the Rock-a-Bye Baby Honey Cuts.

I die cut the two rocking horse layers and rocker from 80# Neenah. Next I added shading to the horse with some gray Copics and used brown colors for the rockers. I used scraps of blue patterned paper to die cut the mane and tail portion of the horse and glued them in place. I adhered the rocking horse layers with Bee Creative glue. The rug and rein are also die cut from the same patterned paper. This next photo will give you a good visual of the mane and tail pieces before I assembled them.


I added foam tape to the rocking horse and sentiment for some fun dimension. I love the simple blue theme to go with this precious sentiment!

My final card features the cute little bassinet with the bunny and the mobile.

I die cut all of the images from 80# Neenah except the bunny and rug. That patterned paper is in the Spring Lullaby paper pad.

After I colored the pieces with my Copic markers I assembled the bassinet and popped it up on the rug. I glued the mobile to the top of the white layer.  Next I used a white gel pen and black Micron 005 pen to add details to the bunny.  I love this card for when the baby will be a surprise and the couple are waiting to find out if it's a boy or girl!

I love how the layout of these cards puts the focal point on the images and sentiment! You can also die cut everything from colored cardstock for an equally cute look! Thanks so very much for stopping by. Have a wonderful, crafty day!

(Affiliate links--never any extra cost to you)

Saturday, August 20, 2022

Christmas Gnome Tree by Spellbinders

Today I'm sharing a card with an adorable stack of gnomes!  This fun die by Spellbinders is called Gnome Tree and is part of their Gnome for Christmas release.

I created my A2 card base first.  I chose some red cardstock from my stash and used the Twilight Sparkle Strip hot foil plate to add silver holographic foil using my Glimmer System.  This hot foil plate is about ½ the width of an A2 card so I shifted it over and repeated the foiling.

I used an ink blender brush to add some dark red ink around the edges and finished the inking with just a bit of Black Soot Distress ink.  I trimmed the piece to 4" x 5-¼" and added it to my A2 card base.

Now for the Gnome Tree fun!  The products I used for this are:

  • Black cardstock
  • Silver cardstock
  • 100# white cardstock
  • Silver glitter adhesive foam
  • Patterned paper (retired)
  • Deco Foil Flock Transfer Sheets
  • Double-sided adhesive sheet
  • red gem stickers
First I used the outer die for the Gnome Tree to die cut the white cardstock.  Then I used the solid gnome tree die to lightly dry emboss the images on the white cardstock.  This will help with placement of all of the gnomes' pieces.  Then I added double-sided adhesive to white cardstock and die cut the tree.  I used just the beard pieces and followed the directions for adding the flocking to the beards.  I die cut the tree twice more from the patterned paper and red cardstock.

All of the other pieces are separate dies included with the Gnome Tree die set.  After I die cut the extras, I began gluing the pieces to my white cardstock die cut.  I used a white gel pen to add extra detailing to each gnome.  I decided to use these cute puffy white pom poms that I've had forever to top off each gnome's hat!  I added foam tape to the back of the tree to pop it up on my card.

I think this stack of gnomes is just the cutest!  There are so many possibilities for different looks too!  Thank you very much for stopping by today!  I hope you have a fabulous, and crafty weekend!

Thank you if you choose to shop with my affiliate links!  (never any addition cost to you)

Wednesday, August 17, 2022

Serene Beach Scene Card

Hello friends! Today I'm sharing my card that features a piece of beautiful, and so dreamy, paper from Honey Bee Stamps' new Vitamin Sea paper pad! And can you believe I've never used the fun Sand Castle Builder Honey Cuts? It's a great time to use them with some of the newest ocean themed Honey Bee products. Keep reading for all the details!  (If you're on Instagram, I started making reels to go with some of my cards and I have one for this one.  Click HERE to see a bit of my creating this card!)

First I created my card base by die cutting this patterned paper from the Vitamin Sea paper pad with a Sweet Stacks: Rectangles die. (Don't you love the new 6" x 8-½" size?!!) I adhered the paper to an A2 card with Bee Creative glue.

Next I used a detail blender brush to ink up a piece of 80# Neenah with Antique Linen Distress Oxide ink. Then I put the piece into my MISTI and stamped it with the Sandy Shores Background stamp and Antique Linen Distress Ink--not Oxide--as I found this ink stamped a bit darker. Then I die cut the panel with the Sand Castle Builder Honey Cuts. I didn't use all of the sand castle pieces, but now I have extras for another card. I added them to the card with foam squares.

I created more pieces for my scene by die cutting some of the dies from the Shoreline Scene Builder Honey Cuts from 80# Neenah. I used some Copic markers to color them and the sand castle flag. The Copic colors are:  palm trees and grass: G14, YG09, YG11, E39, E37, E35; sailboat and flag: BG53, B00, C3, C1, C00.

I used my scissors to cut foam squares in half and added them to the back of the trees, grass and sailboat to adhere them to the card. I used Bee Creative glue to adhere the seagulls. A Micron 005 pen made it easy to add the beak and eye details to the seagulls.

I stamped the sentiment from the Seas The Day set with Intense Black ink. Then I cut it out with the coordinating die. I popped this up with foam strips. (Yes, I do like dimension on my cards--Haha!) I'm amazed at the beauty of the patterned paper and how it makes such an easy, and beautiful, card!

I just love the calm and serenity this card evolves. This card could be used for several different occasions, depending on what you write inside. Thank you so much for stopping by today! Have a wonderful, crafty day!

Tuesday, August 16, 2022

Friends Are Like Sunflowers - Stencil and Texture Paste Fun!

 Hello crafty friends!  It's still hot as blazes here in Texas, but making autumn cards sure has me hoping that we cool down soon!  This card features Rubbernecker Stamps beautiful Like A Sunflower set along with the Fall Leaf Stencil.  

I love using stencils, inks and texture pastes and this was a fun background to make!  First I sprayed the Fall Leaf stencil with Pixie Spray.  I highly recommend it for this intricate stencil!  I placed the stencil onto a piece of 4" x 5-¼" light green cardstock.

I used an ink blender brush and Distress Oxide Inks to add color through the stencil.  The colors I used are: Mowed Lawn, Rustic Wilderness, Peeled Paint, Mustard Seed, Wild Honey and Spiced Marmalade.  The pigment properties of these allow the color to show over the colored cardstock.

I removed the stencil and cleaned all of the ink off.  Then I placed it back over the cardstock.  Using a pallet knife, I spread some transparent matte texture paste through the stencil.  Once it was smooth, I removed my stencil and immediately washed it and my tools.  I set it aside to dry while I worked on the flower and sentiment.

I stamped the first layer of the Like A Sunflower set onto 80# Neenah with Citrus ink from Color Fuse #2 set.  I did not ink the center of the flower stamp.  Using my MISTI allows me to stamp again, if needed.

Then I used a sponge dauber to ink up the flower center of the stamp with Caramel and Cinnamon ink from Color Fuse #3 set.  It didn't bother me to get some of the brown inks on the base of the petals.  That will just add some dimension to them.

Next I lined up layer 2 of the flower stamps and used Apricot ink for that layer.  There is an included layering guide, if you need it.  Then I stamped layer 3, the outline stamp, with Pecan Ink.  I stamped it 2-3 times to deepen the ink color.  Leave this stamp in your MISTI for the next step.

To add even more dimension, rub an anti-static tool over the flower.  Then ink it up with Versamark and stamp.  Sprinkle on clear embossing powder and heat set.  I used my detail scissors to fussy cut it out.

Next I stamped the sentiment from the Like A Sunflower set in black ink and trimmed it out.  With the texture paste on the background dry, I inked the edges with some Mowed Lawn Distress Oxide ink.  Then I adhered all of the elements to an A2 card base.  I popped up the flower and sentiment with foam tape.

Thanks so very much for stopping by today!  I sure hope you have a wonderful, and crafty, week!


Wednesday, August 10, 2022

Ocean Scene Retirement Card

 Hello crafty friends!  Today I'm sharing a beautiful retirement card that features Honey Bee Stamps awesome Seaside Summer stamp set!  I also added some pieces from the Shoreline Scene Builder dies to add extra dimension to my ocean scene.  Join me for the steps to make this card as I dream of being at the beach!!!

I began by creating my ocean scene using the Seaside Summer set.  All inks used are Distress Oxide inks. I also used my MISTI for all of the stamping so I could repeat the stamping as needed.

  • Stamp the bottom sand dune with Antique Linen.
  • I used a brayer to add Antique Linen to the second sand dune layer to make it appear lighter.
  • Stamp the top sand dune layer.
  • Stamp the shadows of the top sand dunes with Brushed Corduroy.
  • Use an ink blender brush or sponge dauber to color in the sand that will be between the dunes and the water.
Be sure to let these inks dry before beginning the next steps.  I used my heat tool, because I'm a tad bit impatient! LOL!

  • Plan where to position the grasses on the card.
  • Treat the cardstock with an anti static pouch.
  • Stamp the grasses with Mowed Lawn.
  • Then stamp with clear embossing ink, add clear embossing powder, and heat set.
  • Stamp the fences with Weathered Wood.
  • Stamp with clear embossing ink, add clear embossing powder, and heat set.

  • Stamp the ocean with Uncharted Mariner, Mermaid Lagoon, and Salvaged Patine.  Use a towel or ink blending brush to smooth out any hard lines between the color so the colors will blend.
  • Stamp the sun with Squeezed Lemonade and heat emboss with clear embossing powder.  
  • Mask off the ocean with some masking tape.  Use ink blender brushes to blend on Mustard Seed, Squeezed Lemonade, Tumbled Glass, and Mermaid Lagoon.
  • Note:  After I inked the sky, the sun didn't show up anymore!  So I stamped the sun again with clear embossing ink and heat embossed Bee Sweet embossing powder over it.
  • Trim the panel to 3-¾" x 5".
Next I die cut some of the pieces from the Shoreline Scene Builder Honey Cuts and colored them with a few Copic Markers.  I adhered them with small pieces of foam tape and also Bee Creative glue.  The sentiment from the Seas The Day set is stamped with black ink and die cut with the coordinating die.  I popped it up with foam tape.  I adhered the panel to a 4" x 5-¼" piece of cardstock that I inked the edges of in Mermaid Lagoon Distress Oxide.  The panels are then glued to an A2 card base.

Check out the wax seals I made using the new Vitamin Sea Wax Melts and the Seashell Wax Stamper. These are so fun to make! I use my heat tool to melt the wax in the Wax Melting Spoon and pour them out onto a silicone mat. This way, if I mess it up, I won't have ruined an envelope. I just use a very strong adhesive like Glue Dots to attach them when I want to use one.

I wish it showed in the photos, but I did add some sparkle with a clear glitter pen to the white parts of the waves.

I hope you enjoyed my trip to the beach with my card today!  Have a wonderful, crafty day!  As always, thank you so much for stopping by!


Sunday, August 7, 2022

Spellbinders August 2022 Glimmer Hot Foil Kit of the Month - Two Elegant, Foiled Cards!

Hello friends!  I'm thrilled to say that I'll be sharing projects each month using Spellbinders Glimmer Hot Foil Kits!  I'm really loving hot foil plates and discovering different ways to use them!

I created two cards to share with you today.  Both use the August Glimmer Hot Foil kit and Matte Gold hot foil.  You can receive this month's kit by signing up before August 28th.  I also use the Glimmer Hot Foil System and Spellbinders Platinum die cutting machine with the projects.  This month's kit includes the floral image, two sentiments, and coordinating dies along with an oval solid hot foil plate to do reverse foiling with.  A roll of Glimmer Foil is also included each month!

I went for an elegant look for both cards.  This first card was foiled with Matte Gold foil onto 80# Neenah Solar White cardstock.  I used the coordinating die to do partial die cutting on the floral.  (I love that there are coordinating dies for the sentiments too!)  Then I trimmed the floral piece to approximately 3-¾" x 4-¼".  I created a coordinating gold strip by applying double-sided adhesive to some cardstock.  Then I took a narrow strip of the matte gold foil and pressed it onto the adhesive.  Peel up the clear film and voila! 

 I adhered these to a navy blue mat layer that I inked up the edges of with Prize Ribbon and Black Soot Distress ink.  I added a few gold gem stickers for some pretty sparkle!

For my second card I used purple cardstock to foil the floral image onto.  Such a pretty and elegant look!

I used my Prismacolor Pencils to color the flowers.  I used the white pencil first to lay down a white base so that the other colors will show up.  I love this technique for coloring on colored cardstock!  I die cut the image and then foiled the solid plate onto Glimmer  Specialty Cardstock.  This is a synthetic cardstock with a super smooth surface that foils beautifully!  To die cut this out I used a die from the Essential Arches set.  I die cut one end, then rotated the die to cut the other.

Of course, this solid foiling plate is intended to be used to take the foil leftover from the first card I made and do a reverse type foiling with it.  I just chose to use it as a solid foiled oval to compliment the floral image.

I added foam tape to the back and adhered it to a purple cardstock panel that I embossed with the Tufted 3D Embossing Folder trimmed to 4" x 5-¼".  I adhered this to a gold trimmed layer (I used the same technique as above to create this perfectly coordinated layer).  I glued the floral image to the card and popped the sentiment up with foam tape.

I used a gold gel pen to add gold dots to the "buttons" of the Tufted embossing folder.

I hope you've enjoyed my cards today.  I look forward to sharing the new Glimmer Kits with you each month!  If you'd like to check out the subscription details, click here.  Thank you so much for stopping by today!