Showing posts with label Christmas card. Show all posts

Wednesday, December 17, 2025

Ho Ho Ho! A Vintage Santa Christmas Card

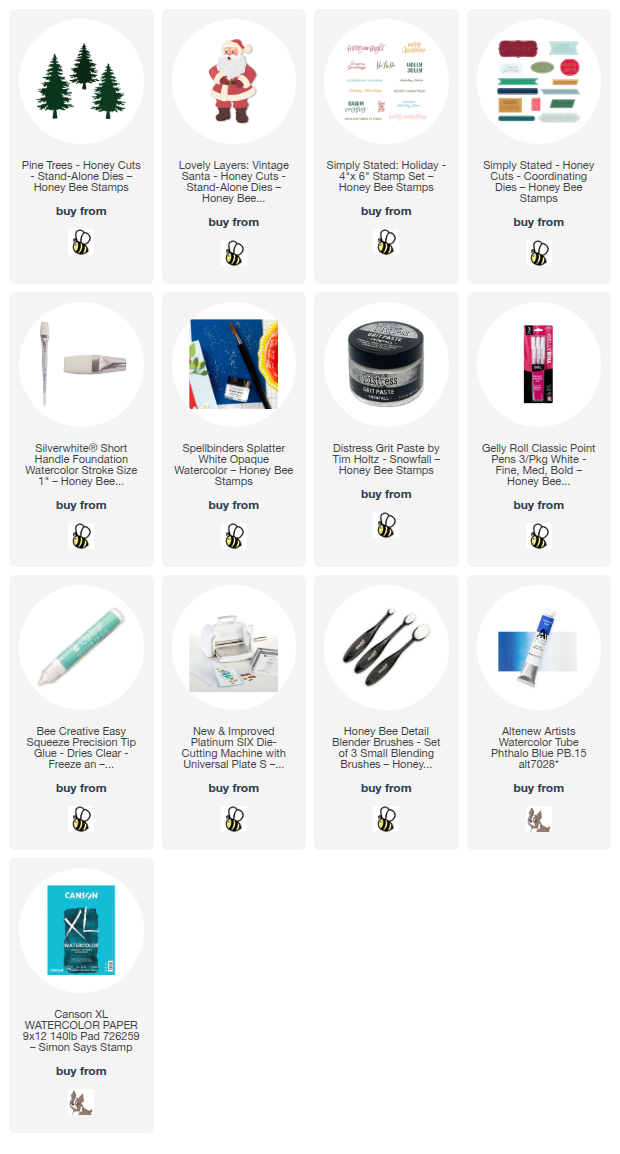
Hello crafty friends!  With eight days to go until Christmas, I thought I'd make a card to share with you using Honey Bee Stamps totally amazing Lovely Layers: Vintage Santa Honey Cuts.  The details on this Santa's face are truly amazing and so life like!

First I worked on making the Lovely Layers: Vintage Santa.  I die cut red and brown cardstocks with the clothing dies.  All other die cut pieces are from white cardstock.

I used Copic markers to color each die cut of the facial details.  Here is a list of colors I used:

  • skin tones: E11, E50, E51, E53
  • cheeks, tongue: R20, R21, R30
  • eyes: BG02, 100
  • shading hair/beard and trim on clothes: B0000, C00, C00, C01

I also used a dark red and brown Copic maker to add some quick shading to the clothes and boots.

Using the Layering Guide (link to download is in product description) is so helpful when assembling the layers for the first time.  I used Bee Creative glue to adhere each layer.  Then I added details to Santa's cheeks, hat, and clothes with a white gel pen.

Next I die cut green cardstock with the Pine Trees Honey Cuts.  I used a blending brush to add dark green ink for shading.  Then I used my finger to add Snowfall Distress Grit Paste here and there on the trees.  I set them aside to dry.

Next I created a fun bokeh watercolor background.  Later today, I will have a reel on my Instagram where you can see exactly how I made this.  The basic steps are as follows.

  • Trim watercolor paper to 5" x 7" and tape it down to your work surface with removable tape.
  • Use a wide flat paintbrush to wet the entire panel.
  • Starting at the top, brush on dark blue watercolor from side to side to create an ombre look.
  • For the bokeh dots I took a small piece of clean paper towel and wrapped a few coins of different sizes with it.  If you panel is still wet, just dab the wrapped coin onto the panel to lift the paint.
  • My panel was dry, so I misted just a bit of water onto the paper towel and pressed it onto the painted surface to lift off the paint.
  • Next I diluted bleed-proof white paint with a bit of water and added splatters to the panel with a paint brush.

When the splatters were dry, I diluted more white paint and used a brush to paint the snowy ground and dried it with my heat tool.  Then  I used a pallet knife to smear Snowfall Distress Grit Paste over the white paint.  This Grit Paste gives a subtle sparkle for the snow.

I adhered the dry panel to a 5" x 7" card base.  Then I used glue and foam tape to adhere all of the elements to the card.

I'm still using the sentiments from the Simply Stated: Holiday stamp set.  I stamped this once a few weeks ago.  You get 14 sentiments on one stamp!  Then die cut them out all at once with the coordinating Simply Stated die.

I find creating backgrounds like this one so very relaxing!  Do you ever create inky backgrounds for your cards?  You should try it!  Just remember to have fun and don't worry about messing up--it's just paper!

Thank you so much for stopping by today!  I'll be back here on Christmas Eve to share one more holiday card!  Have a wonderful week until then!

Thank you so very much for using my affiliate links to shop (never any additional cost to you)!

Wednesday, November 12, 2025

Merry Everything Mixed Media Card With Stitching

Happy Wednesday, crafty friends!  Today I'm sharing my card featuring Honey Bee Stamps gorgeous In Stitches: Snowflake Honey Cuts with the equally beautiful Silent Night stamp!  I created a sparkly stitched and embellished snowflake to add to my mixed media holiday card.  Check out the details below!

My supplies for the In Stitches: Snowflake are as follows:

The In Stitches: Snowflake set has two dies--one for the top layer and another for the bottom layer.  Both layers can be die cut from felt, however, I die cut the bottom layer from white glitter cardstock.

After separating my embroidery floss into three strands, I stitched through the die cut holes in the center of the Snowflake as there are no holes for these in the back layer.  If you use felt for both layers, you don't need to do this step.

Then I stitched both layers together.  I used regular white thread to sew on the seed beads.  As I mentioned above, there are no holes for the middle portion.  I could use a sharp pointed needle to poke through the glitter cardstock, but I just used my cannot-craft-without die pick tool to add those holes.

I like to add little dabs of glue to the thread knots on the back of the piece.  Probably not necessary, but it gives me peace of mind that it won't come undone!  Haha!

The A2 card base is layered with a piece of patterned paper that is in the "Free Bee" paper pack that will automatically be added to a qualifying order.

I stamped the gorgeous Silent Night stamp set with clear embossing ink onto a light brown cardstock.  I added a white sparkle embossing powder and used my heat tool to set it.

Next I tore all of the edges of the panel.  Then I used an ink blending brush to ink the edges with Gathered Twigs Distress Ink.  I glued the panel to my card base.

EDITED:  There was something I just didn't like about the look.  Several hours after publishing this post, I had a thought.  I DID NOT like the brown edges!!!!  So I used a blending brush and white pigment ink to go over the edges and I like it much better.

HERE IS MY ORIGINAL PHOTO.  Which do you like best?

I like the new version so much better!  Do you ever do anything like this?  LOL!

Next I decided I wanted just a touch of something with the Snowflake so I die cut a few branches that are in the Lovely Layers: Sleigh Bell die set.  I glued those to the card, and then glued on the snowflake.

I am a HUGE fan of sentiment stamps that are ONE piece and stamp several sentiments all at once!  That is what the Simply Stated: Holiday stamp set is!  I stamped it in black pigment ink and cut it out with the coordinating Simply Stated die.

After I chose one of the awesome sentiments, I used foam squares to adhere it to my card.

After I stamped the Simply Stated: Holiday stamp, I noticed four tiny little hearts that also were stamped.  Guess what those are for?  The Simply Stated die has four little heart holes that help you line up the die!  Isn't that genius?!!

There are so many fun techniques on my card today!  I hope you like it and are inspired to try one of the awesome In Stitches die sets on a project.  TIP:  I use this Storage Pocket to store all of my In Stitches sets together!

Thanks so much for stopping by.  I hope your day is fabulous!

Thank you for using my affiliate links to shop (never any additional cost to you)!

Monday, November 10, 2025

Merry Christmas From One Little Birdie To Another

Hello, friends!  Today I'm sharing my card I made that features Spellbinders November Embossing Folder, called Luxe Lattice!  As you can see, this embossing folder is suitable for any occasion, including a Christmas card!

I embossed white cardstock with the Luxe Lattice embossing folder and glued it to an A2 card base.

I wanted to use these sweet birds from the Little Birdies die set and cut red, glitter, and white cardstocks with the dies in the set.  I adhered the birdies and branch with glue.

I love layered sentiment dies like this one from the Merry Sentiments stamp and die set.  Another BIG favorite is the one piece sub sentiment stamp that includes eight sentiments.  Just stamp it in black ink and then use the included die to cut out all the sentiments in one pass!

With all of the card elements complete, I decided on an arrangement and glue to adhere everything except the Birdies.  I used foam squares to adhere those.

I do love bird watching and I guess that's why I think the Little Birdies are just the cutest!!  I hope you've enjoyed my card and that you will check out all of Spellbinders Club Kits!  There's something for every taste!

Thanks so much for stopping by!  Have a fabulous day!

Thank you for using my affiliate links to shop (never any additional cost to you)!

Wednesday, November 5, 2025

Holy Night Holiday Card

Hello friends!  Today is release day for Simon Says Stamp's new And Everything Nice release!  I've used the sweet Holy Night stamp set from the release to make this card with ink blending, masking, and Copic coloring!

First I stamped the building and star stamps from the Holy Night set with Copic safe ink onto an A2 sized white cardstock panel.  Before removing the stamp from my MISTI, I stamped them again onto masking paper.  I used my scissors to cut out the masks and adhered them over the images on the cardstock panel.

Then I used SSS Pawsitively inks in the colors of Twilight, Night, and Galaxy to color the sky.  Then I used a tan shade of ink for the sand beneath the buildings.

I removed the mask from the buildings and colored them with a few Copic markers.

I treated the upper portion of the panel with my anti-static pouch.  I stamped the sentiment from the Holy Night stamp set with clear embossing ink, added black embossing powder and heat set it.

Next I used my Copic markers to color the sweet images from the Holy Night stamp set.  These were stamped on another piece of white cardstock and then cut out with my scissors.  I don't have the coordinating Holy Night dies, but they are available!

I added foam tape to the colored images to adhere them to the card.

I love the sweetness of the images in the Holy Night set!  Thanks for stopping by.  I hope your day is awesome!

Thank you for using my affiliate links to shop (never any additional cost to you)!

Wednesday, October 29, 2025

Snowman Winter Scene Holiday Card

Hello crafty friends, and happy release day for Honey Bee Stamps!!  The new release, Merry Moments, will be available after the "release party" this evening on Honey Bee's YouTube channel.

EDIT: This awesome Merry Moments release is available now!!  

I had to schedule this post last week as I am out of town and didn't get a chance to create a sneak peek card for you with the new goodies.  However, I have pulled out a few of my most loved older holiday sets and made a festive card for you!

This card features the oh, so adorable Build A Snowman dies and Lovely Layers: Trees!

First I created my A2 card base and added some patterned paper from a retired paper pad (I'm sorry, I had no idea it wasn't available!).

I hand cut a white glitter cardstock hill for the base of the card front.

Then I die cut the top layer of the Lovely Layers: Trees from a pretty white glitter cardstock and layered them onto the base cut from white cardstock.

I glued two of the trees to the card and popped the other up with foam tape.

Then I die cut more white cardstock with the dies from the Build A Snowman set.  This set has so many fun accessories and arms to choose from to create the exact snowman scene you want!

I colored the die cut pieces with a few Copic markers and glued the Snowman layers together.  I used a fine-point black pen to add little eyes on the red birds.  I used a white gel pen for the stripes on the snowman's scarf.  I added foam tape to these pieces to adhered them to the card.

The sentiment is from another older and loved set called Wonder Of Christmas.  I stamped the sentiment with black pigment ink and then cut it out with the coordinating die.  I added foam strips to the back to adhere it to my card.

I love cardinals and just had to add several to my card.  Now, be sure to click this link to check out all of the latest and fabulous items in the Honey Bee Stamps Merry Moments release!

Thanks so much for stopping by!  I'll be back here next week with my first card for this awesome release!

Thank you for using my affiliate links to shop (never any additional cost to you)!

Monday, October 13, 2025

Wishing You Peace, Love, and Joy

Today I'm sharing my card that features the Spellbinders October Embossing Folder Club Kit.  The Holiday Flurry embossing folder is a perfect background for so many of our winter and holiday cards!

First I created the card base and layers by embossing white cardstock with the Holiday Flurry embossing folder.  I trimmed it to 3-¾" x 5" and adhered it to mint green cardstock with foam tape.

Next I die cut two bears from the SO adorable Polar Bear Pals die set.  I LOVE these cute bears!!!  Haha!  I used some coordinating green inks to color the green pieces with blending brushes.  I used Copic markers to color the bears' body and cheeks.  The markers I used are W3, W1, W00, and RV21.

When I was finished coloring, I used glue to assemble each bear.  There is a layering guide on Spellbinders' website to help with the assembly.  It is found by scrolling through the product photos.

I found a sentiment I liked in the Country Christmas Banner & Sentiments press plate and die set.  I pressed it with black pigment ink onto white cardstock.  Then I cut it out with the coordinating die.

I added foam tape to the bears and the sentiment to adhere to the card.  To add just a touch of sparkle, I added glitter drops to each bears' hat pompom.  (The specific one I used is Nuvo's Fresh Snowfall Glitter Accents.)

The Holiday Flurry embossing folder is such a great one to have!  You can join the Embossing Folder Club now and get yours!

Thank you so much for stopping by.  I hope you have a wonderful week ahead!

Thank you for using my affiliate links to shop (never any additional cost to you)!


Wednesday, December 25, 2024

Wishing You Much Joy, Love & Peace!

Merry Christmas, friends! Today I'm sharing a beautiful card I made for this Christmas day using Honey Bee Stamps' Artsy Angel stamps and Honey Cuts, along with the newer Floral Noel stamp set and coordinating dies.

I stamped the beautiful Artsy Angel first with No Line Coloring ink using my MISTI onto a panel of white cardstock. I left the stamp in the MISTI and colored the angel with some Copic markers.

Then I placed the panel back into my MISTI and treated it with an anti static powder. Then I inked up the stamp with Clear Embossing ink. I stamped it a few times to be sure to get good ink coverage, then I poured some gold glitter embossing powder (one I've had in my stash quite a while) and heat set it using my heat tool.

I cut the Angel out with the coordinating die and set it aside to work on the background panel.

I wanted a kind of aura of light behind the angel, so first I used blending brushes to add Antique Linen and Scattered Straw Distress Oxide inks in the center of an 80# white cardstock panel in a triangle pattern.

Then I blended Prize Ribbon, Chipped Sapphire and a bit of Black Soot Distress Oxide inks around the edges.

Next I added some diluted gold paint splatters with a paint brush to the background. After it dried, I used glue to adhere it to an A2 card base.

For the sentiment I used the Joy and the sub-sentiment from the Floral Noel stamp set. I heat embossed both on a dark blue cardstock with the same gold glitter embossing powder. I used the coordinating die to cut out Joy and trimmed the other sentiment into a banner with fish tail ends.

The Artsy Angel is popped up on the card with foam dots. Do you ever cut your foam dots into little strips? That's what I did for the sentiment! I just added a few strips to the top of the "j" and the "y" and added glue to the right side of the "o" to adhere it. More glue adhered the banner sentiment.

TIP: Does your white foam stand out sometimes on a dark background? I used a dark blue Copic marker to color the sides of the foam tape so it doesn't show! Try it!

Whatever holiday you celebrate this season, I wish you all the joy, peace, and love today and all of the next year! See you in 2025!!

Thank you so much for choosing to use my affiliate links to shop (never any additional cost to you)!

Wednesday, December 11, 2024

Santa Is Coming Down The Chimney Holiday Card

 Hello crafty friends! Today I'm sharing my interactive card featuring Honey Bee Stamps' Lovely Layers: Fireplace with the Lovely Layers: Fireplace Add-On Honey Cuts. Santa is swinging on down the fireplace in this cute scene! I love these sets because I can create any color of theme and also use the "fire" dies for the fireplace too!

I first created my 5" x 7" card base and added a white cardstock layer that I embossed with the Wood Planks 3D embossing folder. I trimmed 1-¼" off of the bottom before adhering it to the card with glue. I stamped the sentiment from the Sending Christmas Joy stamp set onto a 1-¼" x 5" strip of white cardstock in black pigment ink. I adhered this to the bottom of the card and glued on a strip of dark gray cardstock just above it.

Next I die cut the Lovely Layers: Fireplace dies from three shades of gray cardstock. I used the Layering Guide to help me in assembling the fireplace layers with glue. I did not adhere the inner fireplace brick piece at this time.

Then I die cut the desired pieces from the Lovely Layers: Fireplace Holiday Add-On from green, red, white, brown, and black cardstock. I, again, referred to the Layering Guide as I glued the pieces together. I added some sparkle to the lights with a clear glitter pen.

Next I worked on the interactive portion of the card. I will do my best to explain it here, but I will have a reel posted over on my Instagram soon where you will get a visual of how I made this. Here are the steps for the interactive portion:

  • Using the completed fireplace as a guide, I used a pencil to trace the opening onto the card.
  • Then I adhered a piece of dark gray cardstock that is larger than the tracing.
  • Still using the fireplace as a guide, I added glue to the back of the brick insert and glued it to the dark gray piece.
  • Next you will need a circular, dimension piece for the swinging portion. You can use a penny, or die cut/punch several small circles (no larger than ¼" and adhere them together. It just needs to have a bit of height for the Santa to swing.
  • First cut a strip of cardstock that is a bit wider than your chosen circular piece and is about 1" to 1-½" long.
  • Adhere your dimensional circle to the card with a small piece of strong double-sided tape. Then I used my anti-static tool on the adhesive that is around my dimensional circle so that the Santa piece will not stick to it.
  • Now you will need to trim a piece of cardstock that is a bit wider than your dimensional circle and about an inch or so long. Punch a hole that's a bit wider than your dimensional circle near the top of the strip.
  • Glue this strip to the back of the Santa.
  • I placed a piece of removable tape onto the front of the Santa and fireplace to hold him in place.
  • Then I added thick foam dots to the back of the fireplace to adhere to the card and removed the temporary tape.

I finished up the card by placing the other elements of the scene around the fireplace. I used glue and more thick foam dots to adhere them.

If I decide to mail this card I will used a padded envelope. It will be a bit more postage but I think this card is worth it!! If you have any questions about how to make this fun swinging Santa card, please leave me use the "contact me" form in the left column, and I will be happy to help.

Thank you so much for stopping by today! Have a wonderful day!

Thank you for using my affiliate links to shop (never any additional cost to you)!

Wednesday, November 27, 2024

Gingerbread Sweet Christmas Card + A Black Friday Sneak Peek!

Hello friends! Today I'm sharing my card featuring products from Honey Bee Stamps Cozy Christmas release along with a sneak peek of their Black Friday Free Bee. This adorable die set will be free, while supplies last, with any orders over $100! Of course, you know there will be more fun on Black Friday, so watch for it over at Honey Bee's website!

I die cut the adorable dies from the BF Free Bee die set from red, brown, and white cardstocks. I added a bit of shading to the gingerbread with a blending brush and Walnut Stain Distress Ink. I used glue to adhere these cuties together. Using your reverse tweezers and pick-up tool makes assembly so easy!

Next I stamped the wooden tray from the Homemade With Love stamps set with a very light brown ink. Next I stamped the gingerbread recipe onto the board (from the same stamp set) in a dark brown ink. Then I cut it out with the coordinating die.

I tied a red gingham bow onto the board, added some twine at the top, and foam dots to the back. It's adhered to an A2 card base with a piece of paper from the Gingerbread Village paper pad and a white cardstock layer I cut with a die from the Decorative Star Layering Frames dies.

To add a bit more interest and color, I die cut green cardstock with a pine branch die in the Postcard Holiday Add-On dies. I used glue to tuck them in at the top of the board.

I added foam dots and squares to the gingerbread people to adhere them to the card front. I stamped a sentiment from the Sprinkled With Joy stamp set with dark brown ink and cut it out with the coordinating die.

The BF Free Bee die set is so cute and fun to use. I think these would be adorable as a tag for sweet treats to gift during the holidays too! There are lots of sets from the Cozy Christmas release to coordinate with this adorable Free Bee set! 

Thank you so very much for stopping by! If you are celebrating Thanksgiving tomorrow, or not, I hope you have a most wonderful day!

Thank you so much for choosing to shop with my affiliate links (never any additional cost to you)!

Wednesday, November 20, 2024

Adorable Holiday Card with Die Cuts

Hello crafty friends! Well, I certainly loved Honey Bee Stamps' Lovely Layers: Beach Bound set for the summer, and now, with the new Lovely Layers: Beach Bound Holiday Add-On, this set is at the top of my favorites!!!

The card base is an A2 white cardstock, with a layer of patterned paper from the North Pole paper pad. (The papers in this paper pad are gorgeous!) Then I used my scissors to trim glitter paper from my stash for a snowy hill. I adhered the hill to the card with foam tape.

I die cut the adorable pieces from the Lovely Layers: Beach Bound and Holiday Add-On from various cardstocks. The red part of the bus is white cardstock colored with two Copic markers (R59 and R27). The striped part of the bus is also from the North Pole paper pad. I also used black cardstock, red glitter cardstock, and some silver metallic cardstock.

If you feel like you may be overwhelmed by the layers, let me assure you, that the provided Layering Guides are your best friend!

I used glue to assembled this adorable bus (with blue eyes like mine :) and added foam tape to the back to adhere it to the card.

I added a tree in the background with dies from the Postcard Holiday Add-On dies. I really like how the set makes adorable postcards, but also that the pieces can be used individually on any card!

I stamped a sentiment from the Sprinkled With Joy stamp set in black ink. I cut it out with the coordinating Honey Cut die. I love popping up sentiments with the foam tape strips!!

I just think this Beach Bound Add-On is so adorable!! How cute are those eyelashes? Thank you so much for stopping by today! Have a wonderful day!

Thank you so much for using my affiliate links to shop (never any additional cost to you)!

Thursday, October 10, 2024

Let's Have Some Christmas Fun

A quick post here to share a few details of my card that features Picket Fence Studios adorable Reindeer at Play stamps and coordinating dies.

I stamped four of the super cute reindeer and the sleigh from the Reindeer at Play stamp set with Black Hybrid Ink.  Then I colored them with my Copic markers and cut them out with the coordinating dies.

Next I stamped a sentiment from the Reindeer at Play set with black ink and used the coordinating die to cut it out.  I added foam tape to the back of all of the die cuts and set them aside.

I chose one of the beautiful The Season of Christmas Fabulous Folding Toner card fronts.  I thought it would be fun to keep the background black and white for the images to really stand out.  These are to be used with heat from a laminator type machine.  I cut a piece of Pitch Black toner foil, placed it on top of the toner card front, and then ran it through my Minc mini machine.

After trimmer it to 4" x 5-¼" I glued it to an A2 card base.  Then I adhered the sentiment and images to the card.  Then I added a bunch of the Day & Night gems to the tree.  I used my Crystal Katana pickup tool to place the gems on tiny dots of glue for a bunch of pretty bling!

I hope you will come over to Instagram to check out my reel I posted for this card.  Thanks so very much for stopping by!

Thank you for using my affiliate links to shop (never any additional cost to you)! 

Saturday, September 28, 2024

Elegant Red and Gold Embossed Holiday Card

Happy Saturday!  Today I'm sharing this card featuring Picket Fence Studios' Winter Blooms stamp and the Merry Christmas Word Die Set.


I started with a 4" x 5-¼" piece of red cardstock.  After using my anti-static powder on the cardstock, I stamped the small image from the Winter Blooms stamp set with Versamark embossing ink and added gold embossing powder.  After I heat set the powder, I inked around the edges with two shades of dark red ink.  Be sure to use a clean towel to wipe the excess ink off of the embossing!

I die cut the "Christmas" from the Merry Christmas die three times in red cardstock and once from brushed gold cardstock.  Merry is die cut from white cardstock and inked with a dark red ink using a Paper Pouncer.

I added gold gems from the North Pole gem mix for a bit of sparkle!  

Thanks for stopping by and I hope you're having a good weekend!

Thank you for using my affiliate links to shop (never any additional cost to you)!

Saturday, September 21, 2024

Joy To The World Shaker Card

Hi crafty friends!  I have a super quick post to share a bit more about my card in my Instagram reels featuring Picket Fence Studios gorgeous Winter Blooms.

I love the colors of the Jingle All The Way sequin mix and wanted to coordinate my card colors so I could use this in a shaker card!  After I stamped the large image from the Winters Blooms set in black ink, I used these Copic marker colors:

  • Flowers: V09, V17, V15, V01; leaves: YG17, YG25, YG03, G19, G17, G09, G05, G03, G28; berries: B18, B05, B04.

I cut it out with the coordinating Winter Blooms die.  Next I added tape runner on the back around all of the images to adhere a piece of acetate and then thick foam tape all around.  Then I removed the backing paper of the foam tape.

I added probably over half of the beautiful Jingle All The Way sequin mix to the center of the acetate.  Then I added glue to the foam tape.  There's two reasons for this: 1) it gives you a bit of "wiggle room" to position the card base, and 2) the glue will hold the layers together over the long term.  I've found that just the adhesive of the foam tape alone, over time, looses its stickiness.

The sentiment is from the Deck the Halls stamp set.  I cut it out with the coordinating die and adhered it to the card with glue.

Thank you for stopping by today!  I hope it's a wonderful one!

I know there are many choices for shopping, and I really appreciate you using my affiliate links (never any additional cost to you)!