Showing posts with label Winter Card. Show all posts

Wednesday, December 31, 2025

Pink Amaryllis Winter Birthday Card

Hello, and happy New Year's Eve crafty friends!  I realized that I need more birthday cards for friends that have birthdays in January!  I love using products in a different way as I did here with the Lovely Layers: Amaryllis Honey die set!

Don't miss out on the  birthday sale, today only, in celebration of Honey Bee's owner, Melissa!  30% off your entire order, no coupon needed, at the Honey Bee shop!

I went with a pink theme and a snowflake background for this card.  To create the background, I used the Snowflakes Background stencil set.  First I placed the stencil with the large snowflakes over an A2 sized piece of white cardstock.  I used a pallet tool to spread pink paste through the stencil, then removed the stencil and set it aside to dry.

Don't forget to clean the stencil and your tools immediately.

When the pink layer was dry I added white pearl paste through the other stencil in the Snowflake Background set.

While that dried, I die cut pink, green, brown, and white cardstock with the die in the Lovely Layers: Amaryllis and the Lovely Layers: Winter Greenery sets.  Note:  I die cut the layers for the Amaryllis twice.

Next I used green, pink, and brown inks with blending brushes to add shading to the layers.  Beginning with colored cardstock makes this very quick and is so easy too!

Following the Layering Guides for the Amaryllis and Winter Greenery, I used Bee Creative Glue to adhere the layers together.

Now that the stenciled panel is dry, I can adhere it to an A2 card base with glue.  I arranged and then glued the Winter Greenery pieces to the card.  To adhere the Amaryllis I put foam tape on the back of the burlap bag and the Amaryllis and placed each one on the card.

The sentiment is from the Celebrating You stamp set (I LOVE the font of this set).  After I stamped it with black pigment ink, I cut it out with the coordinating die.  Some foam strips were used to attach it to the card.

With the shimmery snowflake background, I felt like the greenery and flowers needed a touch of sparkle too!  I added some Frosted Stickles here and there to the pieces.  Before that dried, I sprinkled on some Rock Candy clear glitter for even more sparkle!

I am very pleased with how my card came out and hope you like it too!

On this New Year's Eve, I would like to express my gratitude for the kind words and support I received from you all this year.  I wish all the best for you in 2026!

See you back here next year!

Thank you so very much for using my affiliate links to shop (never any additional cost to you)!

1
Wednesday, October 29, 2025

Snowman Winter Scene Holiday Card

Hello crafty friends, and happy release day for Honey Bee Stamps!!  The new release, Merry Moments, will be available after the "release party" this evening on Honey Bee's YouTube channel.

EDIT: This awesome Merry Moments release is available now!!  

I had to schedule this post last week as I am out of town and didn't get a chance to create a sneak peek card for you with the new goodies.  However, I have pulled out a few of my most loved older holiday sets and made a festive card for you!

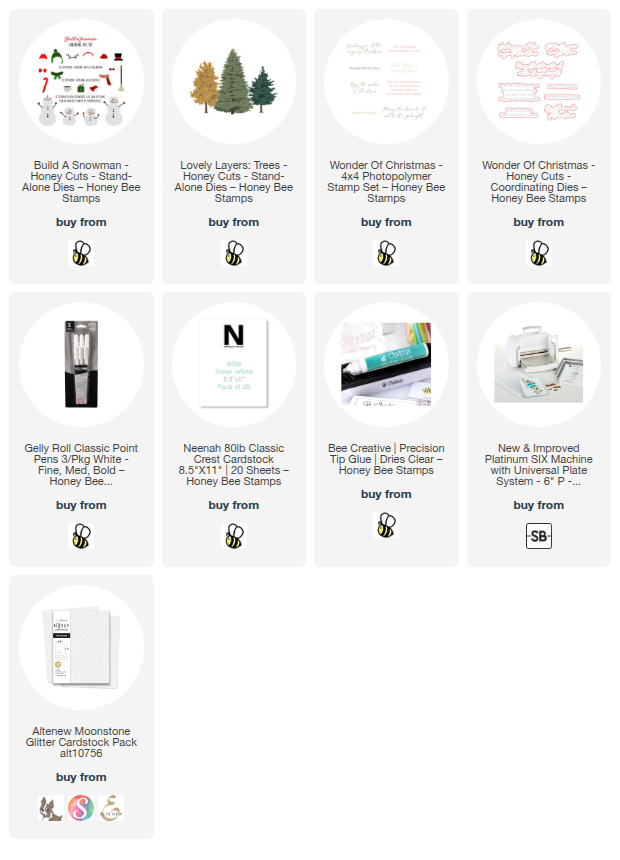
This card features the oh, so adorable Build A Snowman dies and Lovely Layers: Trees!

First I created my A2 card base and added some patterned paper from a retired paper pad (I'm sorry, I had no idea it wasn't available!).

I hand cut a white glitter cardstock hill for the base of the card front.

Then I die cut the top layer of the Lovely Layers: Trees from a pretty white glitter cardstock and layered them onto the base cut from white cardstock.

I glued two of the trees to the card and popped the other up with foam tape.

Then I die cut more white cardstock with the dies from the Build A Snowman set.  This set has so many fun accessories and arms to choose from to create the exact snowman scene you want!

I colored the die cut pieces with a few Copic markers and glued the Snowman layers together.  I used a fine-point black pen to add little eyes on the red birds.  I used a white gel pen for the stripes on the snowman's scarf.  I added foam tape to these pieces to adhered them to the card.

The sentiment is from another older and loved set called Wonder Of Christmas.  I stamped the sentiment with black pigment ink and then cut it out with the coordinating die.  I added foam strips to the back to adhere it to my card.

I love cardinals and just had to add several to my card.  Now, be sure to click this link to check out all of the latest and fabulous items in the Honey Bee Stamps Merry Moments release!

Thanks so much for stopping by!  I'll be back here next week with my first card for this awesome release!

Thank you for using my affiliate links to shop (never any additional cost to you)!

Monday, October 13, 2025

Wishing You Peace, Love, and Joy

Today I'm sharing my card that features the Spellbinders October Embossing Folder Club Kit.  The Holiday Flurry embossing folder is a perfect background for so many of our winter and holiday cards!

First I created the card base and layers by embossing white cardstock with the Holiday Flurry embossing folder.  I trimmed it to 3-¾" x 5" and adhered it to mint green cardstock with foam tape.

Next I die cut two bears from the SO adorable Polar Bear Pals die set.  I LOVE these cute bears!!!  Haha!  I used some coordinating green inks to color the green pieces with blending brushes.  I used Copic markers to color the bears' body and cheeks.  The markers I used are W3, W1, W00, and RV21.

When I was finished coloring, I used glue to assemble each bear.  There is a layering guide on Spellbinders' website to help with the assembly.  It is found by scrolling through the product photos.

I found a sentiment I liked in the Country Christmas Banner & Sentiments press plate and die set.  I pressed it with black pigment ink onto white cardstock.  Then I cut it out with the coordinating die.

I added foam tape to the bears and the sentiment to adhere to the card.  To add just a touch of sparkle, I added glitter drops to each bears' hat pompom.  (The specific one I used is Nuvo's Fresh Snowfall Glitter Accents.)

The Holiday Flurry embossing folder is such a great one to have!  You can join the Embossing Folder Club now and get yours!

Thank you so much for stopping by.  I hope you have a wonderful week ahead!

Thank you for using my affiliate links to shop (never any additional cost to you)!


Saturday, October 11, 2025

Sending Frosty Wishes

This month's Club Kits by Spellbinders are all so awesome!  I'm sharing this sweet, simple, and easy card today that features the October BetterPress Club Kit called Made With Snowflakes.  The October Club Kits are available now to sign up for and get yours!

I wanted to keep this card fully focused on the Made With Snowflakes BetterPress of the month.  First I pressed the plate into the Porcelain cardstock panel with Thunder BetterPress ink.  (Don't forget that Press Plates can be used with your hot foil machine such as the Glimmer.)

Then I picked the cute little snowman right in the center of the panel to color.  I used a few Copic markers to simply color it.  Then I pressed the sentiment (one of two included) with Thunder ink.  I trimmed the sentiment into a strip and then layered onto a piece of white cardstock that I colored with the same red Copic I used for the hat.

To keep everything coordinated, I colored the edges of a white cardstock panel with the red Copic markers and glued it to an A2 card base and then glued the pressed Made With Snowflakes panel.

I added foam strips to the back of the sentiment and placed it just below the colored snowman.  I couldn't get it to show in my photos, but I did use a clear glitter pen over the snowman for just a bit of sparkle!

This is a card that I just might mass produce!  It's so easy and cute too!

Be sure to check out each of the Club Kits for October!  Thanks so much for stopping by today!

Thank you for using my affiliate links to shop (never any additional cost to you)!

Saturday, September 21, 2024

Joy To The World Shaker Card

Hi crafty friends!  I have a super quick post to share a bit more about my card in my Instagram reels featuring Picket Fence Studios gorgeous Winter Blooms.

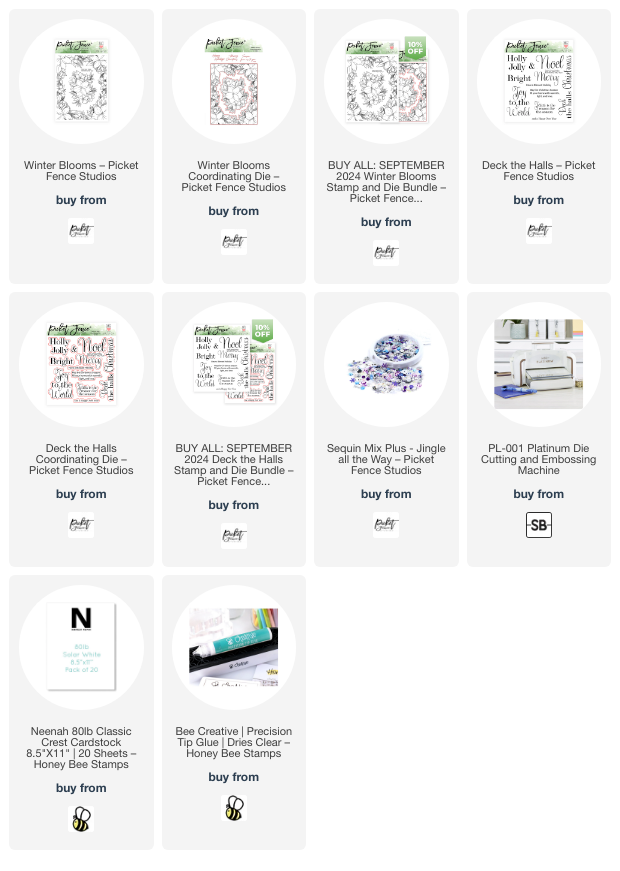
I love the colors of the Jingle All The Way sequin mix and wanted to coordinate my card colors so I could use this in a shaker card!  After I stamped the large image from the Winters Blooms set in black ink, I used these Copic marker colors:

  • Flowers: V09, V17, V15, V01; leaves: YG17, YG25, YG03, G19, G17, G09, G05, G03, G28; berries: B18, B05, B04.

I cut it out with the coordinating Winter Blooms die.  Next I added tape runner on the back around all of the images to adhere a piece of acetate and then thick foam tape all around.  Then I removed the backing paper of the foam tape.

I added probably over half of the beautiful Jingle All The Way sequin mix to the center of the acetate.  Then I added glue to the foam tape.  There's two reasons for this: 1) it gives you a bit of "wiggle room" to position the card base, and 2) the glue will hold the layers together over the long term.  I've found that just the adhesive of the foam tape alone, over time, looses its stickiness.

The sentiment is from the Deck the Halls stamp set.  I cut it out with the coordinating die and adhered it to the card with glue.

Thank you for stopping by today!  I hope it's a wonderful one!

I know there are many choices for shopping, and I really appreciate you using my affiliate links (never any additional cost to you)!

Tuesday, December 13, 2022

Snowflake Stenciled Winter Thank You Card

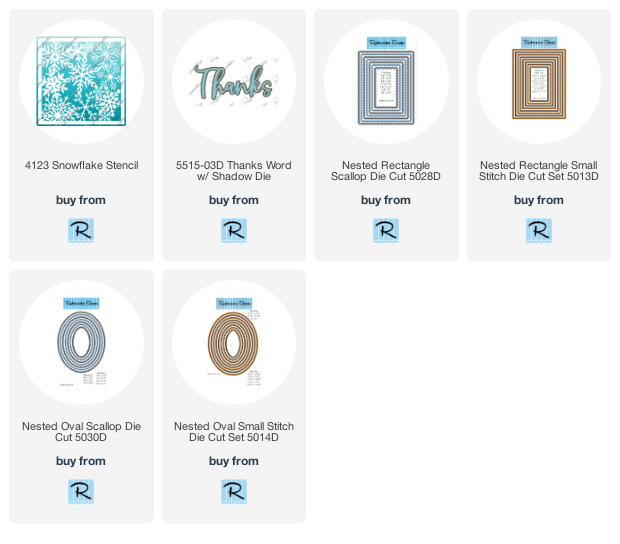
Today I'm sharing my wintery thank you card with Rubbernecker Stamps beautiful Snowflake Stencil and Thanks Word with Shadow die!  Other than the time for my texture paste to dry, this card came together very quickly!

First I placed the Snowflake Stencil over some 110# Neenah white cardstock.  I spread Frostbite Nuvo Glacier paste through the stencil with a pallet knife.  I spread a bit more of the paste on some scrap cardstock in an area large enough for the Thanks Word die.  I set these aside to dry and cleaned up my tools.

I die cut a Nested Rectangle Scallop die from 80# Neenah and added foam tape to adhere it to an A2 card base.

I die cut the dry stenciled panel with a Nested Rectangle Small Stitch die and adhered it with glue.  I just LOVE the shine of the Glacier Paste!!!

The Thanks Word die sentiment shadow is die cut once from white cardstock. I die cut the work three times from white cardstock and also from the Glacier Paste piece.  I adhered these together with glue and added them to stitched and scalloped die cut ovals.

For a touch of bling I added some sequins and snowflakes I had in my stash here and there on the card!

I really think this is one of my most favorite thank you cards!!!!  Thank you so much for stopping by!!

Thank you if you choose to use my affiliate links (never any additional cost to you).

Sunday, December 27, 2020

Sending Warm Thoughts | Rubbernecker Stamps

 Hello friends!  I hope your holidays have been fun so far!  Today I have a wintery card using Rubbernecker Stamps adorable Wintery Friends stamp set.  It's a one layer card and all you need is to do some masking and inking to get this dimensional look!  I love the sentiment I've used as it can serve for many types of cards!


Stamping, masking and inking:

  • Die cut white cardstock with the largest Nested Rectangle Scallop die.
  • Stamp the bear with Copic safe ink.  Also stamp the bear onto some masking paper.
  • Fussy cut the masking paper bear and place the mask over the stamped image.
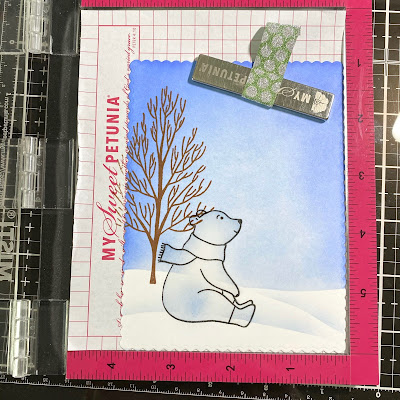
  • I used a pencil to free-hand a hill onto masking paper.  Then divide that hill into three parts.  (see the photo below)  Cut the hills apart and place onto the card layer.
  • With an ink blending brush, ink on Sky ink (Color Fuse Set #7) getting lighter towards the middle of the card.
  • Ink on Odyssey ink around the edges.
  • Next remove the mask for the top portion of the hill and very lightly ink on Sky ink to create a shadow.  Repeat for the middle portion of the hill.  The photo below is a good visual of the process.  Leave the mask for the bear in place.  Click the photo to view it larger.


Next stamp the tree from the Wintery Friend set in Pecan ink.  This is from Color Fuse Set # 3.  It's best to use a MISTI, or other stamp positioning tool, for this as you will see from the next step.

For this step, use your anti-static powder over the tree to prevent embossing powder from sticking where you don't want it.  Leaving the tree stamp in place, ink it up with Versamark clear ink and stamp over the brown tree.  Sprinkle on clear embossing powder and heat set.  This gives just a bit of dimension and interest to a one layer card.


While my card was in the MISTI, I added some anti-static powder, then stamped the sentiment with Versamark, sprinkled on black embossing powder and heat set it.

Now is the magic time!  I love removing the final mask from the bear to begin my coloring!


To add shading to my white bear, I used a few grey Copic markers to color it.  Be sure to color in a shadow where the bear is sitting to "ground" it.


To finish up, I used a white gel pen to add white dots for some snow and.  I also added white dots to the bear's scarf.  I used two different sizes of Jelly Roll pens to get the different sized dots.  One was a 10 and another an 8.


Thank you so much for stopping by!  I'll see you back here in 2021!  Happy New Year!!


Thursday, December 26, 2019

Masculine Winter Birthday Card | Honey Bee Stamps

Hello and happy Thursday my friends!  I hope your holidays have been full of lots of fun so far!  I have to say that I love making Christmas cards so much that I'm always a bit sad when it's time to move on.  However, this masculine winter birthday card I've made sure helps the transition!  I needed a birthday card for my  nephew and Winter Bouquet Honey Cuts was perfect to use for his card!


To begin, I die cut the pinecones and several of the leafy branches from the Winter Bouquet Honey Cuts.  I used green card stock from my stash for the branches and some brown card stock for the pinecones.  I used the Detail Blender Brushes to add some shading on the die cut pieces.  The little brushes are perfect for this!  I used Mowed Lawn and Lucky Clover Distress Ink on the greenery.  For the pinecones, I used Walnut Stain and Ground Espresso.


I used tools from the Heartfelt Creations Flower Shaping Essentials Kit to add dimension to the pinecones and branches.  If you want them to really hold the shape, very lightly spritz the back of the piece with a water mister before you shape them.  For a snowy effect, I diluted some white gouache with water and added splatters on them all with a paint brush.  Then I added some gloss white NUVO Crystal Drops to the pinecones and set them aside to dry.

For the card layers, I added a piece of Tim Holtz Distress Woodgrain Cardstock to a 5-½" x 4-¼" top-folding A2 card base.  I cut a strip of patterned paper from the Home Essentials pack to 5-¼" x 1-½" and adhered it towards the bottom of the woodgrain cardstock.  I cut a thin strip of the brown cardstock and adhered at the top of the patterned paper.

Next I arranged the pinecones and branches and adhered them with liquid glue and foam squares.  The sentiments are from the Thanks A Bunch set.  I stamped happy birthday with Versamark ink and heat embossed it with white embossing powder.  I used the coordinating "happy" Honey Cut to cut it out and trimmed the "birthday" sentiment with my paper trimmer.


I hope you've enjoyed this masculine birthday card and that it has given you some inspiration today.  As always, thank you so much for your kindness and for taking a look.  I wish you all the best in the coming new year and and lots of fun crafty times!  See you next year!

Supplies:
Honey Bee Stamps Winter Bouquet Honey Cuts
Honey Bee Stamps Thanks a Bunch stamps and Honey Cuts
Honey Bee Stamps Detail Blender Brushes
Heartfelt Creations Flower Shaping Essentials Kit 
Home Essentials 6x6 Specialty paper pack
Tim Holtz Distress Woodgrain Cardstock
NUVO gloss white Crystal Drops


Tuesday, December 3, 2019

Honey Bee Stamps 12 Days of Christmas

Hello my friends!  It's Day 3 of designers on the Honey Bee Stamps blog for 12 days of Christmas inspiration!


It's no secret that I love all things sparkly, especially for the holidays, and I had so much fun making this Winter card with the Snowfall Background Stencil!


To begin, I sprayed the back of the stencil with some Pixie Spray.  If you are a fan of using stencils, this spray is a must have, I think.  It's a light, tacky adhesive that holds even the most delicate stencil in place and allows for easy removal when you are done.  I put my stencil onto a 4" x 5-¼" white cardstock layer and I used the Background Blender Brushes to ink an ombre background in Chipped Sapphire, Faded Jeans, and Stormy Sky Distress Oxides.

An important thing I learned is to make sure the Oxide Inks have dried thoroughly before applying any paste or gel.  The moisture will lift the colors and tint your medium (ask me how I know!)  I applied some Gina K. Designs white Glitz Glitter Gel through the stencil and set it aside to dry.


While that was drying, I worked on the sentiment.  Using the Winter Honey Cuts, I die cut three of the top layer from some Neenah Solar White 80# cardstock.  I adhered those layers with liquid glue.  For the middle layer, I took a scrap piece of cardstock and inked the same Distress Oxides in the ombre pattern with the Blender Brushes.  While I had these out, I also inked around the edges of the front of my A2 card base.  Using the inked scrap piece, I die cut the middle layer of the Winter Honey Cuts.  The pierced bottom layer is die cut from vellum.  I adhered all the layers together with Ranger Multi Medium Matte Collage and put them under a large stamp block to weight it down while it dried.  I used more of the blue inked scrap piece and stamped the other sentiment from the Winter Stamp set with Versamark ink.  I added white embossing powder and heat set it.  I used my paper trimmer to cut them in strips and added some thin foam tape behind them.  I added all of the other elements to the card base with liquid glue.  


I love how easy this card was to make and I wish you could see how sparkly this is in real life!  Thank you so much for stopping by today!  Be sure to check back at the Honey Bee Stamps' blog each day as there will be awesome inspiration from some super talented designers for you to see!  Until next time, have a wonderful, crafty week!

Supplies: