Showing posts with label Winter Bouquet. Show all posts

Sunday, October 25, 2020

Layering Winter Bouquet and a Sparkly Background! | Rubbernecker Stamps

 Happy sparkly new week my friends!  Today I have a beautiful card featuring Rubbernecker Stamps gorgeous layering set called Winter Bouquet.  I've layered these beauties onto a sparkly background for that festive feeling!  Read on to learn how I created my card.

Card base:

  • Stamp the Veined Leaves Background stamp in Versamark clear ink onto 80# Neenah Solar White card stock.
  • Sprinkle on embossing powder (I used some gold sparkle embossing powder from my stash.)  Heat set.
  • Die cut with the largest Nested Rectangle Small Stitch die.
  • Cut a 2-½" x 6" strip of vellum.  Fold around the embossed panel and adhere on the back side.
  • Adhere the panel to a top-folding A2 card base.

Winter Bouquet:

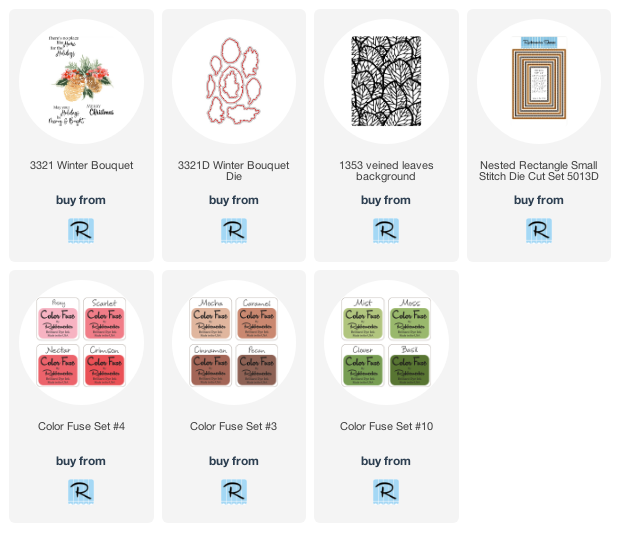
  • Stamp the pinecone layers with Mocha, Caramel, Cinnamon, and Pecan inks from Color Fuse set #3.  The base layers are stamped in Mocha.  Stamp the second layer in Caramel, and then Cinnamon for the third layers.  The large pinecone has a fourth layer which I stamped in Pecan.
  • The leaves and pine branches are stamped in various greens from Color Fuse set #10.
  • Be sure to use the included guide to make your layering easier.  Some layers I stamped once, others 2-3 times.  You can get different looks by varying the intensity of layers.
  • For the berry branches I used Color Fuse set #5.  I used Pecan ink for the branches.
  • Die cut the pieces with the coordinating dies.

  • To make it easy to adhere your pieces to the card, arrange them first off of the card.
  • Next I pressed a piece of Press N Seal over my arrangement making sure it is stuck to all of the pieces.
  • Now you can flip it over and add glue to the back of the pieces you want adhered flat.  Pick up the Press N Seal and flip it over to adhere the pieces with glue to the vellum.  I put something heavy on it for several minutes while the glue dried.  It does take a bit longer for glue to dry on the vellum, so don't rush this part. Carefully pull up the Press N Seal keeping all of the other pieces stuck to it.
  • I added glue to the next layer of elements I wanted glued flat.  Once those were dry, I added thin foam squares to the large pinecones and a regular foam square to the small one and adhered them down.
  • To finish, I stamped and heat embossed the sentiment with the same gold sparkly embossing powder.  I trimmed it into a fishtail banner shape, added foam squares and adhered it to the card.

I hope I've inspired you to give these beautiful layering stamps a try!  Thank you so much for stopping by!  Have a wonderful, and crafty, week!

Thursday, December 26, 2019

Masculine Winter Birthday Card | Honey Bee Stamps

Hello and happy Thursday my friends!  I hope your holidays have been full of lots of fun so far!  I have to say that I love making Christmas cards so much that I'm always a bit sad when it's time to move on.  However, this masculine winter birthday card I've made sure helps the transition!  I needed a birthday card for my  nephew and Winter Bouquet Honey Cuts was perfect to use for his card!


To begin, I die cut the pinecones and several of the leafy branches from the Winter Bouquet Honey Cuts.  I used green card stock from my stash for the branches and some brown card stock for the pinecones.  I used the Detail Blender Brushes to add some shading on the die cut pieces.  The little brushes are perfect for this!  I used Mowed Lawn and Lucky Clover Distress Ink on the greenery.  For the pinecones, I used Walnut Stain and Ground Espresso.


I used tools from the Heartfelt Creations Flower Shaping Essentials Kit to add dimension to the pinecones and branches.  If you want them to really hold the shape, very lightly spritz the back of the piece with a water mister before you shape them.  For a snowy effect, I diluted some white gouache with water and added splatters on them all with a paint brush.  Then I added some gloss white NUVO Crystal Drops to the pinecones and set them aside to dry.

For the card layers, I added a piece of Tim Holtz Distress Woodgrain Cardstock to a 5-½" x 4-¼" top-folding A2 card base.  I cut a strip of patterned paper from the Home Essentials pack to 5-¼" x 1-½" and adhered it towards the bottom of the woodgrain cardstock.  I cut a thin strip of the brown cardstock and adhered at the top of the patterned paper.

Next I arranged the pinecones and branches and adhered them with liquid glue and foam squares.  The sentiments are from the Thanks A Bunch set.  I stamped happy birthday with Versamark ink and heat embossed it with white embossing powder.  I used the coordinating "happy" Honey Cut to cut it out and trimmed the "birthday" sentiment with my paper trimmer.


I hope you've enjoyed this masculine birthday card and that it has given you some inspiration today.  As always, thank you so much for your kindness and for taking a look.  I wish you all the best in the coming new year and and lots of fun crafty times!  See you next year!

Supplies:
Honey Bee Stamps Winter Bouquet Honey Cuts
Honey Bee Stamps Thanks a Bunch stamps and Honey Cuts
Honey Bee Stamps Detail Blender Brushes
Heartfelt Creations Flower Shaping Essentials Kit 
Home Essentials 6x6 Specialty paper pack
Tim Holtz Distress Woodgrain Cardstock
NUVO gloss white Crystal Drops


Thursday, November 14, 2019

Golden Joy Holiday Card | Honey Bee Stamps

Hello friends!  Today I'm over on the Honey Bee Stamps blog with the elegant, easy to make holiday card.  I've used the Joy Noel Wreath Honey Cuts, Winter Bouquet Honey Cuts and the Follow That Star Background Stencil to create this classic and elegant Christmas card!


To begin, I cut some red card stock to 5-¼" x 4".  Then I used two of the Background Blender Brushes to ink around the edges with Fired Brick Distress Ink and just a touch of Black Soot Distress Ink.  I sprayed some Pixie Spray on the back of the Follow That Star stencil and let that dry.  Pixie Spray is a light tack, repositionable adhesive that makes using stencils so easy!  Then I put it on the red cardstock and applied Golden Era NUVO Glacier Paste through the stencil.  This paste is so smooth and not as "gritty" as other glitter pastes with a beautiful and subtle shine.  Be sure to clean your stencil immediately!

While the Glacier Paste was drying, I used the "j" and "y" from the Joy Noel Wreath Honey Cuts and die cut them from some gold mirror cardstock.  I also cut the smallest and next to largest poinsettias from the Winter Bouquet Honey Cuts from the gold mirror cardstock.  For the middle layer I smooshed a Ranger Emboss It Dabber Clear embossing ink onto some 80# Neenah.  I made sure I had a thick, solid layer of the embossing ink.  I sprinkled some Stampendous Shabby White Embossing Enamel over it.  I let my heat tool get good and hot and then heat set it from the back of the paper so the enamel didn't blow off.  This embossing powder is SO pretty with the gold, white, and gold sparkle in it!  Once that was totally cool, I die cut the next to largest poinsettia and the flower center from the embossed piece.  I adhered the pieces together with glue dots.


After the stenciled piece way dry, I used a ruler and an extra fine point gold metallic marker to draw a frame near the edges.  I layered this onto a 5-½" x 4-¼" gold mirror piece.  I added these to a top-folding 80# Neenah card base.


I used my t-square ruler to help align and center the J and Y.  I adhered those and the poinsettia with liquid glue.  I love how the poinsettia dies have lines in them that emboss for that extra dimension!


I love combining sets, and all of these that I've used are so versatile!  Thank you so much for stopping by!  Stay warm, and crafty!!


Supplies:
Honey Bee Stamps:

Other supplies: