Wednesday, November 30, 2022

Simon Says Stamp 2022 DieCember® Release & Celebration

Happy December 1, and happy DieCember® 2022!!!!  

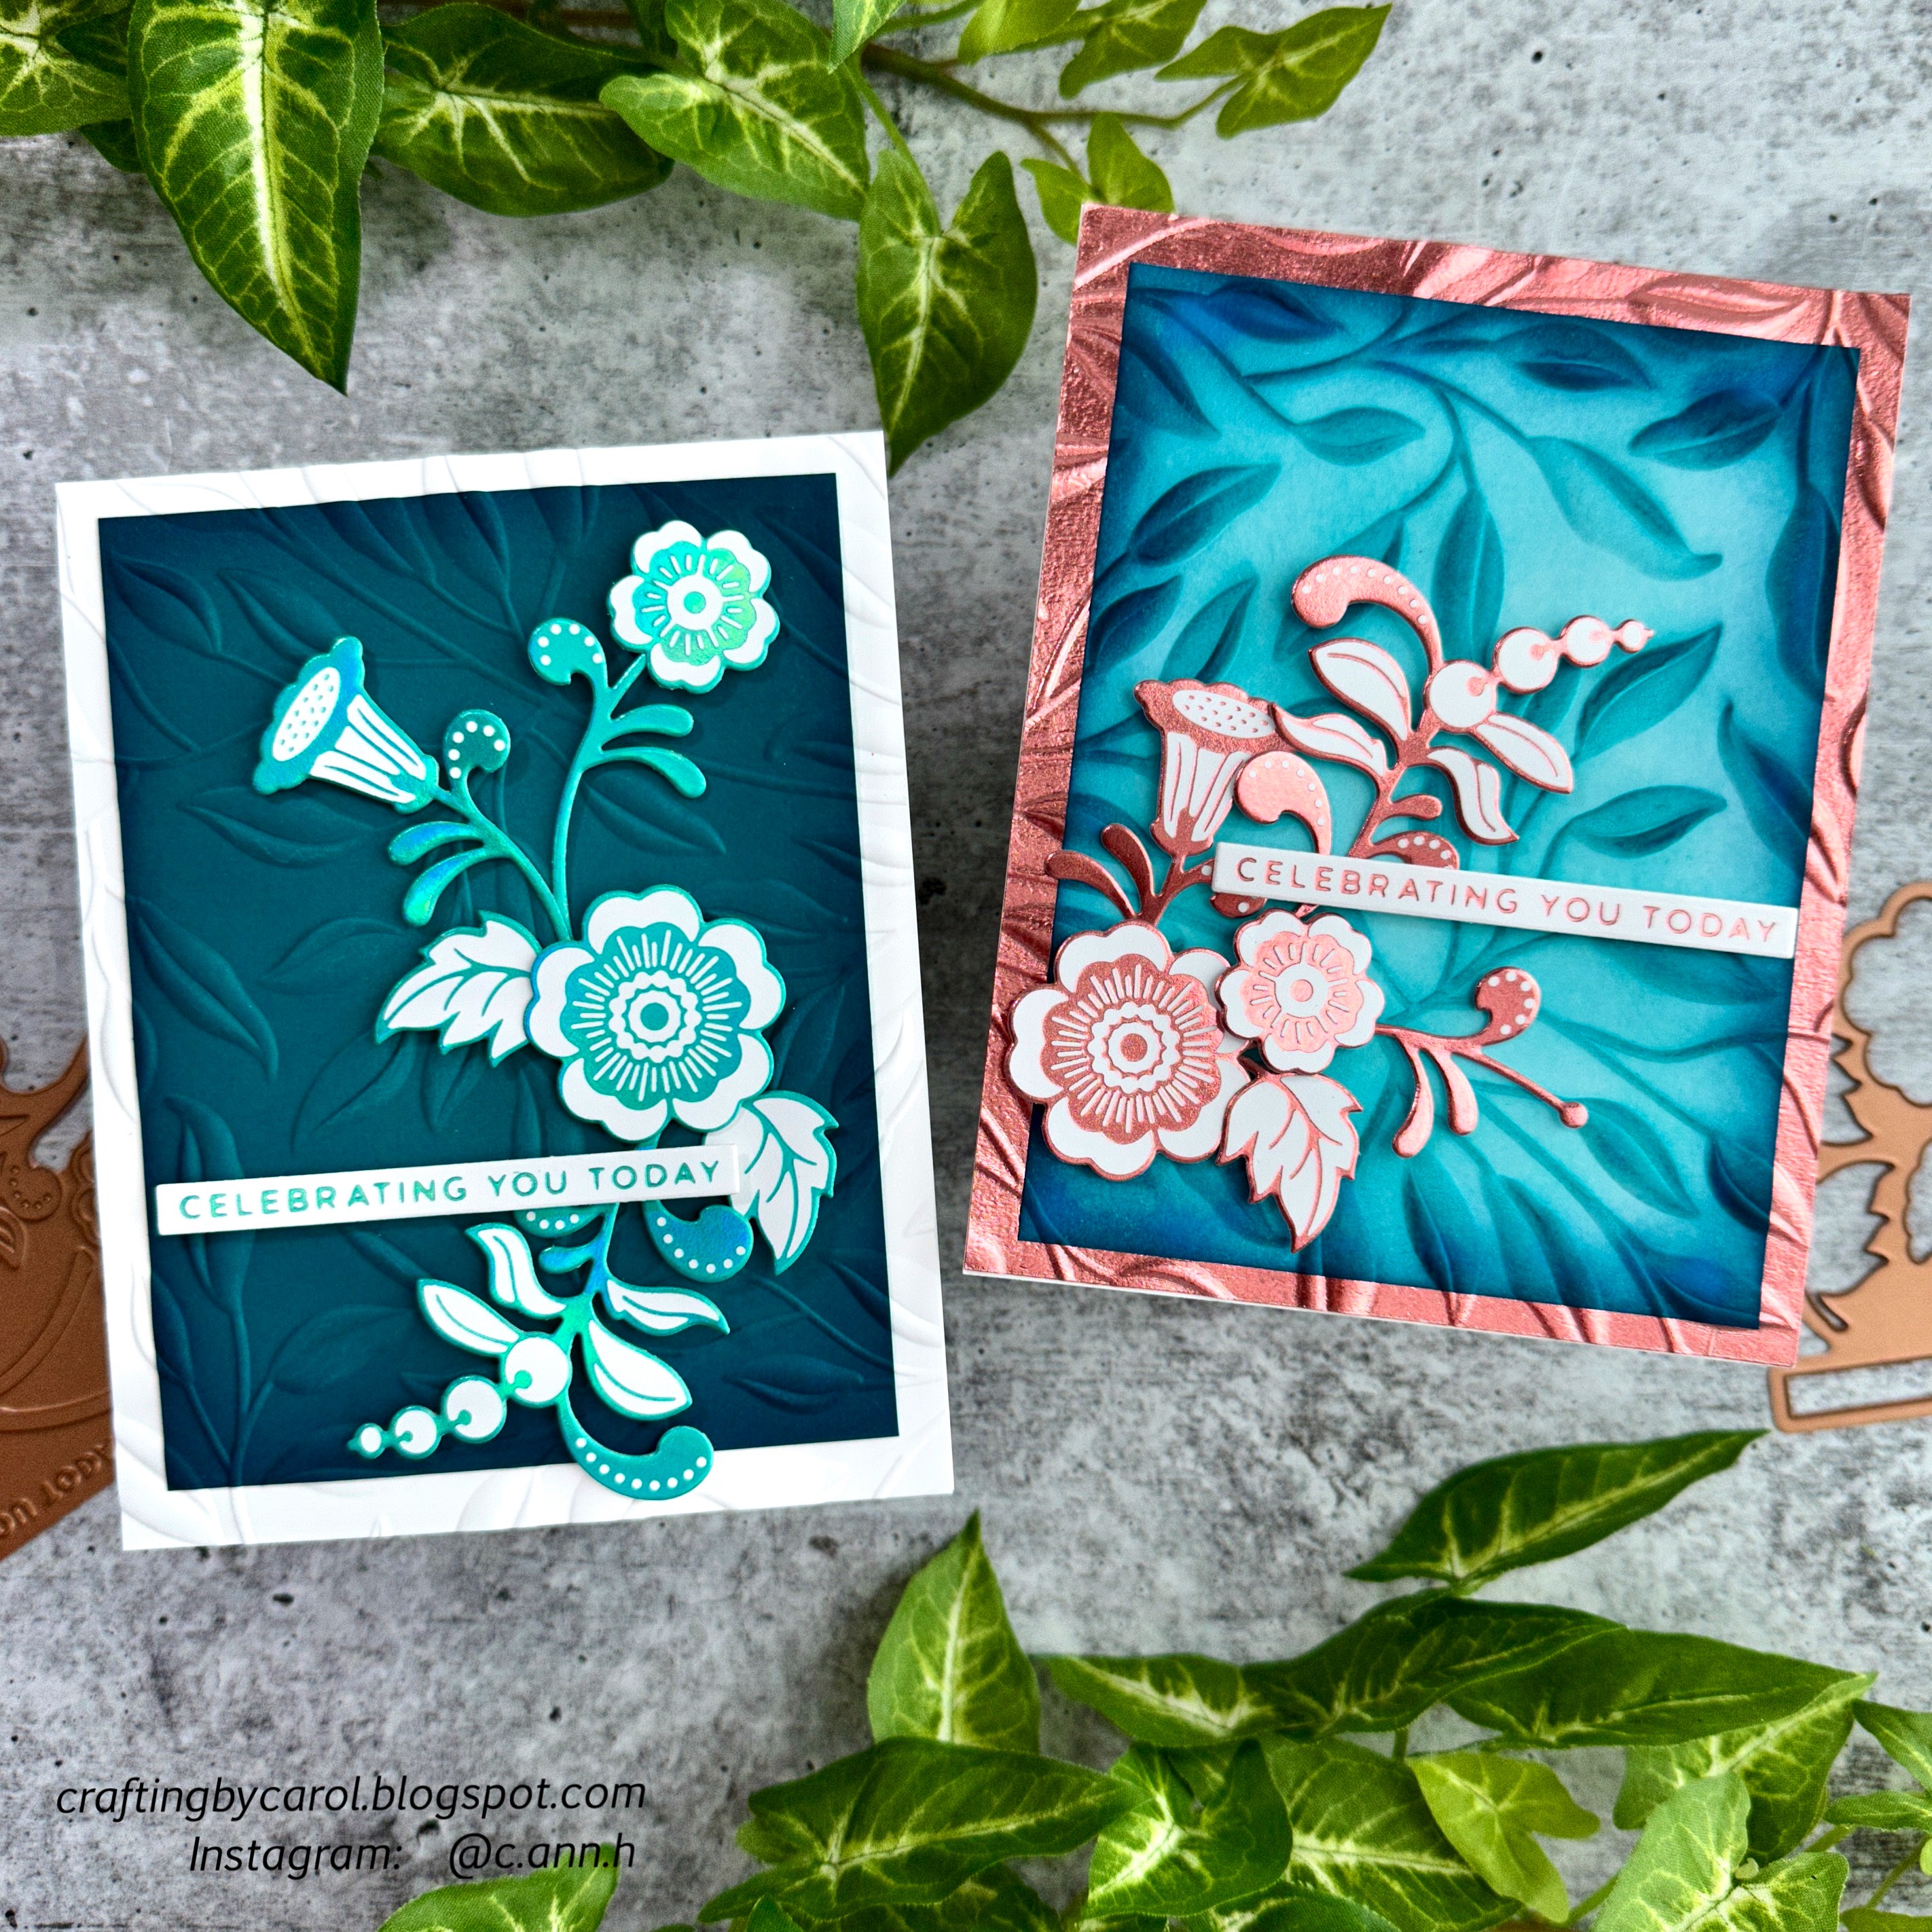
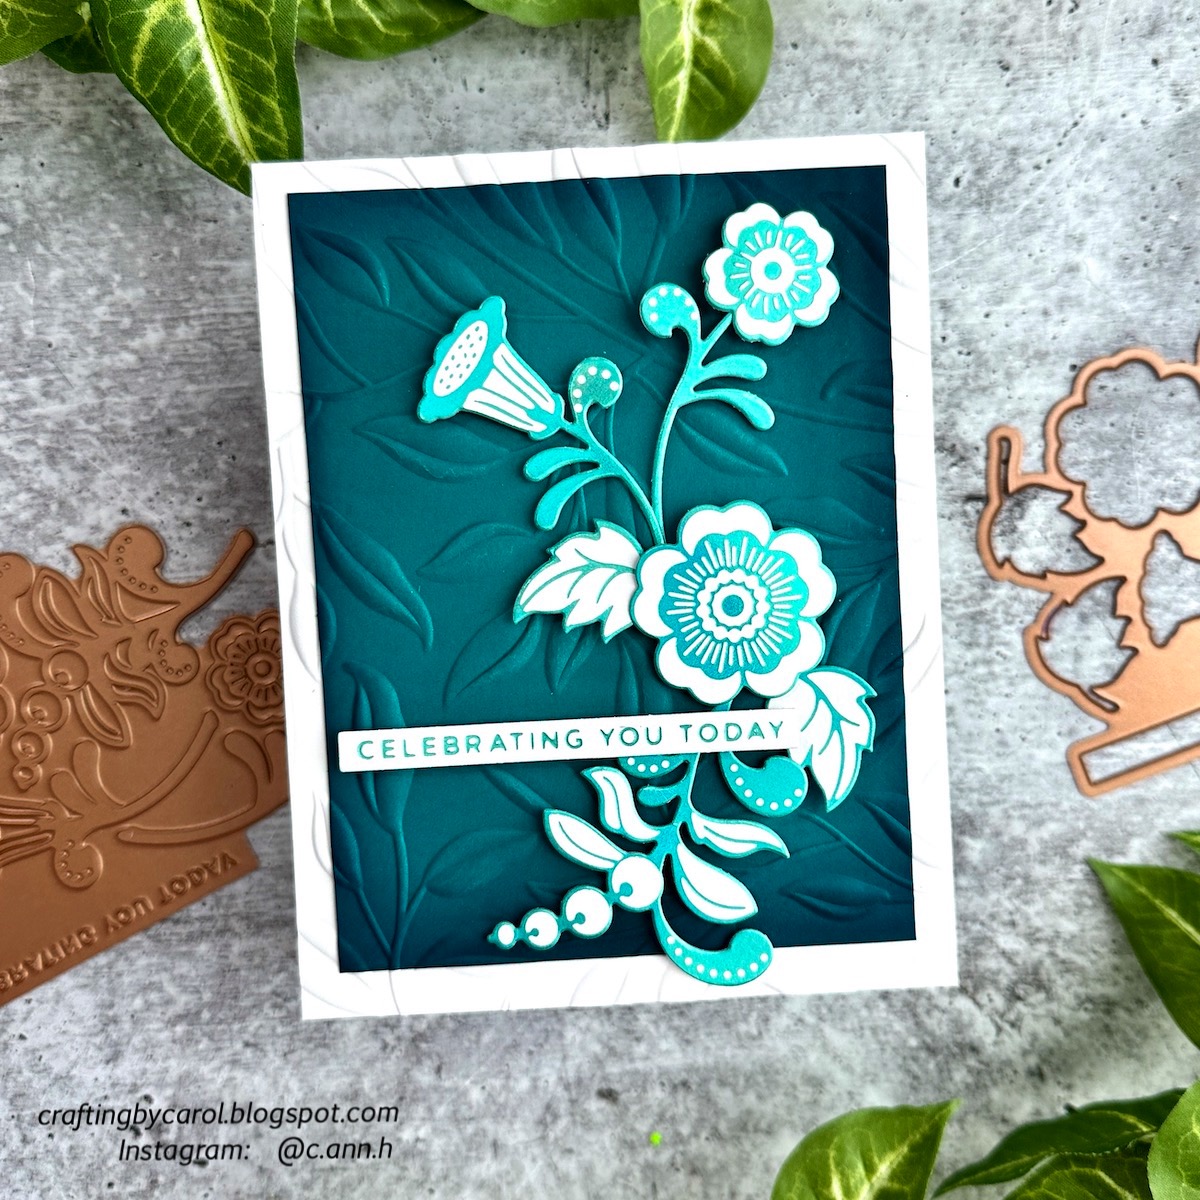
To celebrate dies as one of our favorite crafty products, Simon Says Stamp hosts a month-long celebration during the month of December!  I am thrilled to be part of the kick-off with my shaker card featuring one of the new release dies called Fancy Birthday.  There are so many varieties and styles of dies in this DieCember® release by Simon.  Be sure to check it all out in their shop!

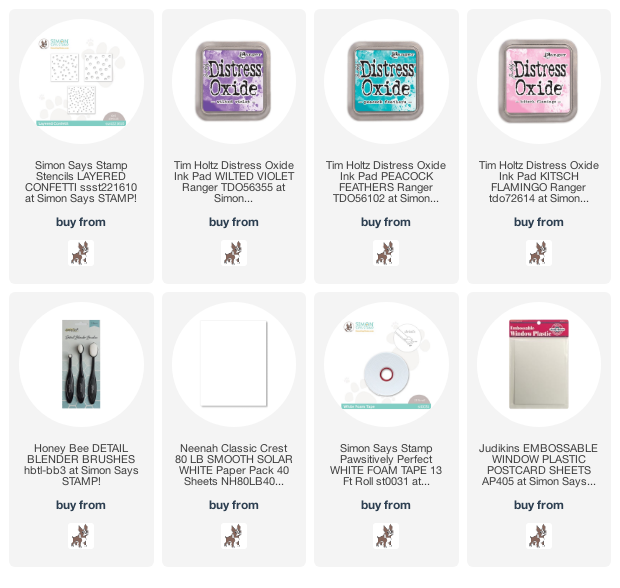
I made my shaker card by first using the Layered Confetti Stencil set and inking some Distress Oxides through the layers with ink blending brushes.  I used Kitsch Flamingo, Wilted Violet, and Mermaid Lagoon.

Next I used the shadow layer of the Fancy Birthday die to cut the opening of the stenciled panel.  I added adhesive on the back around the opening and adhered a piece of acetate for my shaker window.  Then I trimmed the piece to 4" x 5-¼".

I added foam tape to the back of the panel edges and around the die cut opening to create a space for my shaker bling.  I added some bling from my stash, then adhered another piece of acetate to the foam tape.  This closes the window and makes it so much easier to then adhere the shaker panel to my A2 card base.

I die cut the birthday die three times from white cardstock and once from a scrap of cardstock I inked up with Kitsch Flamingo Oxide ink.  I used glue to adhere the layers and then to the center of the shaker window.  I used Honey Bee's Happy Birthday stamp set to stamp "happy" with Kitsch Flamingo Oxide.

Be sure to head over to Simon Says Stamp's blog to get all of the details for this DieCember® release and the rest of the month!  Thank you so much for stopping by!

Thank you for shopping with my affiliate links (never any additional cost to you).

May Your Christmas Be Bright!

 Hello crafty friends!! Today I've pulled out some of my favorite holiday stamps and dies from Honey Bee Stamps previous releases and paired them with products from their newest Make it Merry release! For this card I created a sweet snowman scene with the Build A Snowman Honey Cuts and the new Mason Jar Vase Honey Cuts!

First I created the background by inking Kitsch Flamingo Distress Oxide around the edges of an A2 white cardstock panel. Then I die cut the Mason Jar Vase from another piece of white cardstock. Keeping the negative piece, I ran that through my die cutting machine with the Pierced Fancy Flakes A2 cover die. I trimmed it down and adhered it to the pink layer with glue and then to a top-folding A2 card base. (This is a good way to use all of that cardstock!!)

I die cut the Mason Jar Vase lid from silver cardstock. Before I adhered the lid to the jar, I blended Kitsch Flamingo and Stormy Sky Oxides on the mason jar. Then I added white paint splatters.

Next I took a piece of white glitter cardstock and die cut just the bottom portion of the Mason Jar Vase. I hand trimmed two hill shapes and adhered them to the mason jar with foam tape and glue.

I die cut the Build A Snowman Honey Cut pieces from various colored cardstock scraps in my stash. (I used a few blue Copic markers to color the little birdie.) I used a fine tipped glue, my reverse tweezers, and a Quickstik to assemble the cute snowmen. I adhered them with glue and some foam tape to the Mason Jar.

The greenery at the top is from the Lovely Layers: Winter Greenery Honey Cuts and the bow is from the Lovely Layers: Pinecone Honey Cuts.

I stamped the sentiment from the Inside: Holiday Sentiments stamp set with black ink and die cut it with a Sentiment Banners die.

I added a bit of chunky glitter to the greenery and some white gel pen details to the scarf and bird for a few fun extra touches!

Thank you so much for stopping by today!  I hope you have a wonderful day!

Thank you for using my affiliate links (never any additional cost to you).

Tuesday, November 29, 2022

The Magic of The Season

Happy Tuesday, crafty friends!  Today my sparkly card is featuring some beautiful paper from Rubbernecker Stamps new Festive Farmhouse paper pad!  I've coordinated it with some glittery stenciling and a sparkly poinsettia!  Read on for the details.

First I created my card base.  These are the steps:

  • I used the Snowflake stencil and spread some chunky gold glitter clear glaze through it onto 110# white cardstock.  Set it aside to dry.
  • Die cut patterned paper from the Festive Farmhouse paper pad with the largest Nested Rectangle Small Stitch die.
  • Partially die cut the dry stenciled panel with the same Rectangle Stitch die.  Adhere on top of the patterned paper die cut.
  • Adhere the layer to an A2 card base.
  • Cut some dark green paper from the Festive Farmhouse paper pad into a narrow strip and adhere to the card.

  • I die cut the Poinsettia #2 from 80# white cardstock.
  • Then I used some flower shaping tools to shape all of the petals.
  • Before adhering all of the flower layers together, I used my finger to add some of the chunky glitter glaze to the petals' edges.
  • After it dried, I used liquid glue to adhere the layers together and to add it to the card.
  • The sentiment is from the Christmas Cheer Set and heat embossed with gold embossing powder.
  • I added foam tape to the sentiment to pop it up on the card.

I totally love all of dimension, sparkle and shine with this gorgeous paper!  Thank you so much for stopping by today!

Thank you for shopping with my affiliate links (never any additional cost to you).


Wednesday, November 23, 2022

Christmas Bells Are Ringing! - Coloring Die Cuts and A Layering Stencil

Hello friends! I think making Christmas cards is my most favorite thing to make! These gorgeous Layering Holiday Bells by Honey Bee Stamps were so fun to ink up and add to my stenciled background I made with the Under The Mistletoe stencil set!


First I die cut some 110# cardstock with the second largest Deckle Edge A2 die. Then I used some detail blender brushes to add Mowed Lawn and Rustic Wilderness Distress ink through the Under The Mistletoe layer 1 and layer 2 stencils. Then I used a pallet knife to spread red glitter gel through the "berries" stencil. I set it aside to dry. Be sure to clean your stencil and pallet knife immediately!

Next I die cut the bell pieces of the Layering Holiday Bells Honey Cuts from 80# Neenah. (Be sure to check out the downloadable layering guide in the product description.) The center piece of the bells, the ringer, and berries are die cut from some white glitter cardstock from my stash. I also die cut six of the mistletoe leaves and one of the berry clusters that are in the Lovely Layers: Winter Greenery Honey Cuts.

I used my blending brushes and the Distress Inks again to color the bells and leaves green with the same Distress Inks. I kept going over them until I had the shading the way I wanted.

I added foam tape to the back of the stenciled piece and adhered it to an A2 card base. Next I played around with the arrangement of the leaves and bells. When I had the pieces arranged I picked them up with a piece of Press N Seal and added dots of glue to the back of the leaves. I laid the Press N Seal back down to adhere the leaves to the card.

I used thin foam tape on the bells to pop them up a bit. I topped the bells with a red die cut bow (also in the Layering Holiday Bells set).

Next I stamped the sentiment from the Jingle All The Way stamp set with Lumberjack Plaid Distress Oxide ink. I added some clear embossing powder to it and then heat set it. I cut the sentiment out with the coordinating die. A thin foam strip pops it up onto the card!

I love the bright green color with the pops of red on my card and hope you do too! If you are in the States, I'm sending wishes to you for a very happy Thanksgiving! And to all, happy crafting!! Thank you for stopping by today!

Thank you for using my affiliate links to shop (never any additional cost to you).

Wednesday, November 16, 2022

Potted Poinsettia Holiday Card & 3D Embossing Folder

Happy Wednesday friends! Today my card features a few new products from Honey Bee Stamps wonderful Make it Merry release.  I've used the beautiful Potted Poinsettias stamp set and coordinating dies for this card.  The new Kaleidoscope 3D Embossing Folder made the perfect background for these gorgeous watercolored poinsettias!

First I created the background by running some dark green cardstock through my die cutting machine with the Kaleidoscope 3D embossing folder. I love the look of inked edges on colored cardstock! I used a couple detail blender brushes to ink up the edges with Rustic Wilderness and Black Soot Distress Ink. Then I used a paintbrush to dilute some gold metallic watercolor and add splatters to the embossed panel. I used Bee Creative glue to adhere the panel to an A2 card base.

Then I stamped all of the flowers, leaves, the bow and sentiment from the Potted Poinsettias stamp set onto Bristol Smooth cardstock with clear embossing ink. Don't forget to use your anti-static tool first! Then I sprinkled on gold embossing powder and heat set it.

I used some watercolors I have in my stash to paint the flowers and other elements of the image. I ended up not using the other poinsettias, but now I have some to use for another card! I watercolored the bow with the same gold metallic watercolor that I splattered on the background. Once everything was dry, I die cut the images with the coordinating dies.

I hope you've enjoyed my card process and have found some inspiration for your own cards!  Thank you so much for stopping by!

Thank you for using my affiliate links (never any additional cost to you).

Tuesday, November 15, 2022

Merry and Bright -- A Festive Holiday Card

 Hi crafty friends!  I'm in full holiday card-making mode now, are you?  For this card I've used the beautiful Buildable Poinsettia Set by Rubbernecker Stamps.  There are other images and two sentiments also in the set with coordinating dies available!  

I heat embossed the poinsettia with gold embossing powder.  Then I stamped it again onto masking paper and fussy cut it out.  I quickly colored it with a few warm gray and subtle green Copic markers, then placed the mask onto the image.

I ink blended all of the blue inks in the Color Fuse #7 ink cube set.  I used ink blending brushes to ink the lighter color around the poinsettia, working out towards the edges with the darkest shades.

I added water drops, and splatters of white gouache and gold metallic paint with a paint brush.  I used my heat tool to dry each layer of color before adding another layer.

Next I die cut the panel with a Nested Rectangle Scallop die and then used glue to adhere it and a layer of brushed gold metallic cardstock to an A2 card base.  The sentiment is also in the Buildable Poinsettia Set and is heat embossed in gold and popped up on the card with foam tape.

I added some gold gem stickers to the flower center to complete my festive card.

I just love how this came out and hope that you've enjoyed the process.  Thank you so much for stopping by!

Thank you if you choose to use my affiliate links (never any additional cost to you).

Monday, November 14, 2022

Spellbinders Joyful Christmas by Simon Hurley Collection Ornament String Hot Foil Plate Mini Slimline Card

Happy Monday crafty friends!  Today I'm sharing my mini slimline card that features the Ornament String Hot Foil Plate and coordinating die from the Joyful Christmas by Simon Hurley Collection!

First I used my Glimmer Hot Foil Machine to add gold Speckled Aura Glimmer Hot Foil to the Ornament String.  I foiled it onto some beautiful Blue Spruce cardstock that was first trimmed to 3-½" x 6".  I used the coordinating die to cut it out.  I set aside the foiled piece and placed the remaining negative piece into the Dazzling Dots embossing folder.

After I ran the embossing folder through my Platinum Die Cutting machine, I adhered the piece to another mini slimline sized piece of Blue Spruce cardstock.

Then I used an ink blending brush to add Pine Needles and Lucky Clover around the edges of the card and the edges where the die cut piece was.  This adds so much richness and dimension to the card!

Next I adhered the panel to a white mini slimline card base.  I added foam squares to the back of the foiled Ornament String and adhered it to my card.

I foiled a sentiment from the Glitter Wishes hot foil plate and die set with Speckled Aura Glimmer Hot Foil onto a scrap of the Blue Spruce cardstock.  I also popped this up with a foam tape strip.

I'm in love with how this turned out and hope you think so too!  Thank you so much for stopping by!! Have a wonderful, and crafty week!

Thank you very much for using my affiliate links to shop (never any additional cost to you).

Thursday, November 10, 2022

Winter Rose Poinsettia Digital Stamps

 Hello crafty friends!  I have a quick blog post today to share my card that features Graciellie Design's new Winter Rose Poinsettia digital stamp set.

First I downloaded the images in the Winter Rose Poinsettia set.  Then, using Word, I inserted the images by using the "insert, pictures".  Next you need to select "wrap text" and in that menu select "behind text".  Now you can freely move and resize the image.

I use my Epson EX-7100 ink jet printer with a rear feed tray, and "thick paper" turned on, to print the images onto 80# Neenah Solar White.  I make sure to select "best quality" before printing.

After I let the ink from the printer dry, I used these Copic markers to color my image:

  • poinsettias: R39, R37, R35, and YG25, YG21, YG01 for the centers
  • leaves:  G29, G07, YG17
  • basket:  E79, E49, E59, E57

To deepen the very darkest shadowed areas, I used a very sharp black Prismacolor pencil!  Use a light hand!  It really helps to add more depth!

I die cut the image and sentiment with a couple of pierced rectangle dies.  Then I adhered them to a red cardstock layer and an A2 card base.  I debated on whether to add bling or splatters to the background, but decided to keep it simple with the focus on the image.  What do you think?

Thank you for stopping by!  Click HERE to check out all of the beautiful digital stamps over in Gracielle Design's shop.

Wednesday, November 9, 2022

Simon Says Stamp Holiday Sparkle Release

 Hello crafty friends!  I'm happy to be sharing my card and coordinating gift tag I made featuring Simon Says Stamp's new So Many Presents stamp set!  This is part of their Holiday Sparkle release that is available now!

What's really fun about the So Many Presents stamp set is that the center is removable and it stamps the three presents you see on my tag!

These were super easy to make and I stamped the images onto 80# Neenah Solar White cardstock with Versamark clear embossing ink.  Then I sprinkled on some red glitter embossing powder (that I've had forever!) and heat set it.

I die cut the tag and trimmed red glitter cardstock to layer behind it.  I stamped and heat embossed "to" and "from" using a set from Honey Bee.  Then  I tied on red and gingham ribbons from my stash.

I trimmed the main panel to 4" x 5-¼" and wrapped red grosgrain ribbon around it twice.  Then I added foam tape to the back and adhered it to a red glitter A2 panel.

Next I stamped the sentiment from the Inside Christmas Greetings with Versamark onto red cardstock.  I heat set the white embossing powder and added a glitter cardstock layer behind it.  Of course, I had to pop it up with foam tape!

Super easy card and tag to make!  I hope you'll check out all of the wonderful Holiday Sparkle release over in Simon's shop.  Thanks so much for stopping by!

Thank you for using my affiliate links (never any additional cost to you).

Holiday Wreath Shaker Card

Happy Wednesday!  Today I'm sharing a beautiful shaker card I made with Honey Bee stamps new Holiday Wreath stamps and coordinating dies and stencils!

First I used the Holiday Wreath Stencils to ink on Distress Inks with my detail blender brushes.  I used the new Lumberjack Plaid Distress ink and Aged Mahogany on the flowers--these pair beautifully together!  For the berries I used Festive Berries, the leaves are Rustic Wilderness and Mowed Lawn.  I used the same  colors for the individual flower, leaves, and berries stencil.

When the stencils aren't too detailed, I do my stenciling first so I don't have to worry about any ink dulling stamped or embossed lines.  Honey Bee's stencils are so easy to line with because of the etched lines in them.  When the inks were dry, I lined up the coordinating Holiday Wreath stamp and heat embossed it with gold embossing powder.  Don't forget to use your anti-static tool first!

Next I used the coordinating dies to cut all the pieces out.  Then I stamped the sentiment from the Holiday Wreath set onto embossable window plastic and heat set it with gold embossing powder.  I used double sided adhesive to add it to the back of the wreath panel.  Then I added foam tape to the back of the panel and poured in some coordinating sequins from my stash.  I like to add another piece of acetate to the back to close the shaker window.  This makes it much easier to line it up with my card base.

After I adhered the shaker panel to the A2 card base with Bee Creative glue, I used glue and foam dots to add on the additional flowers, leaves, and berries!

I really do enjoy having coordinating stencils to color the stamped images!  I think this Holiday Wreath would be so pretty in other colors and would definitely be just as beautiful as a flat non-shaker card!  Thank you so much for stopping by today!

Thank you for using my affiliate links (never any additional cost to you).

Thursday, November 3, 2022

Spellbinders November 2022 Glimmer Hot Foil Kit of the Month

Hello friends!  Today I'm sharing two cards I made with Spellbinders' November Glimmer Hot Foil Kit.  This month's kit consists of one foiling plate for all of the images!!  I love this!  There is also one die to cut the images out along with a roll of hot foil.

My first card uses some teal cardstock and Moondust Glimmer Hot Foil.

First I embossed some white and teal cardstock with the Leafy 3D embossing folder.  I trimmed the teal piece down to 3-¾" x 5" and inked the edges with Peacock Feathers and Uncharted Mariner distress inks.

After I foiled the Glimmer Kit plate with Moondust foil, I used the die to cut them out.  I popped all the elements up with foam tape.  I love the look of two different cardstocks with the embossing folder!

My second card features the Glimmer Kit plate and rose gold Glimmer foil!

I used the same Leafy 3D embossing folder here.  First I added a sheet of double-sided adhesive to some white cardstock.  I carefully slowly pulled the backer away while adhering a piece of Rose Gold Glimmer foil.  I wanted a perfectly coordinating border for this card and I love the look.  I ran the panel, along with some white cardstock through my Platinum with the Leafy embossing folder.

Then I used an ink blending brush to add Peacock Feathers and Uncharted Mariner distress inks to the white panel.  I really like how the brush emphasizes the raised embossed leaves!  Again, I adhered the foiled images with foam tape and glue.

These were fun to make and I'm not sure which I like better!  Do you have a preference?  Let me know in the comments.  Thanks so much for stopping by today.  I hope you've enjoyed my versions of the Glimmer Foil Kit!

Thank you for using my affiliate links (never at any additional cost to you).