Showing posts with label Spellbinders Platinum Die Cutting Machine. Show all posts

Wednesday, January 24, 2024

Hearts, Home, & Patterned Paper Card

 Hello crafty friends!! While we await the new Vintage Love release from Honey Bee Stamps on January 31, it gives me the chance to pull out previously released favorite sets to create with. Today my card is all about heart and home and features the Spring Cottage Village dies and No Place Like Home sentiments.

Often, when I am using products that I've used before, I like to try to think of something different to do. This time I used a sheet of beautiful paper from the Marvelous Moments paper pad. I chose the paper that has a flower border around three sides. I trimmed one end of the paper to 4-¼" x 5-½" and glued it to an A2 card base. My "something different" is to use my scissors to trim around the flowers of the remaining piece of the paper. When I had it all trimmed, I added thin foam dots to the flower border and adhered it in the bottom left corner of the card.

Next I chose a cottage from the Spring Cottage Village dies and cut the pieces from 80# Neenah. I used various inks in my stash that coordinate with the patterned paper colors to color the cottage elements. I used glue with a fine tip, and my reverse tweezers, to assemble the cottage.

I die cut a Stacking Hearts die from 80# Neenah and used removable tape to mask off the bottom so I could add green ink with a blender brush. Before I removed the mask, I added ink splatters in the same green ink diluted with a drop or two of water. Then I masked off the green and repeated the steps with blue ink.

I used glue to adhere the cottage and tree to the ink blended heart. Next I chose a coordinating solid paper in the Marvelous Moments paper pad and die cut a Scallop Hearts from it. I glued it to the card base and the other heart on top with foam dots.

The sentiment from the No Place Like Home set is stamped in black ink and die cut with the coordinating die.

Have you ever trimmed part of your patterned paper to pop up on your card? This was my first time, and I really like the look and hope you do too! Thank you so much for stopping by today! I hope you have a wonderful and crafty day!

Thank you so much for using my affiliate links to shop (never any additional cost to you)!
Thursday, November 3, 2022

Spellbinders November 2022 Glimmer Hot Foil Kit of the Month

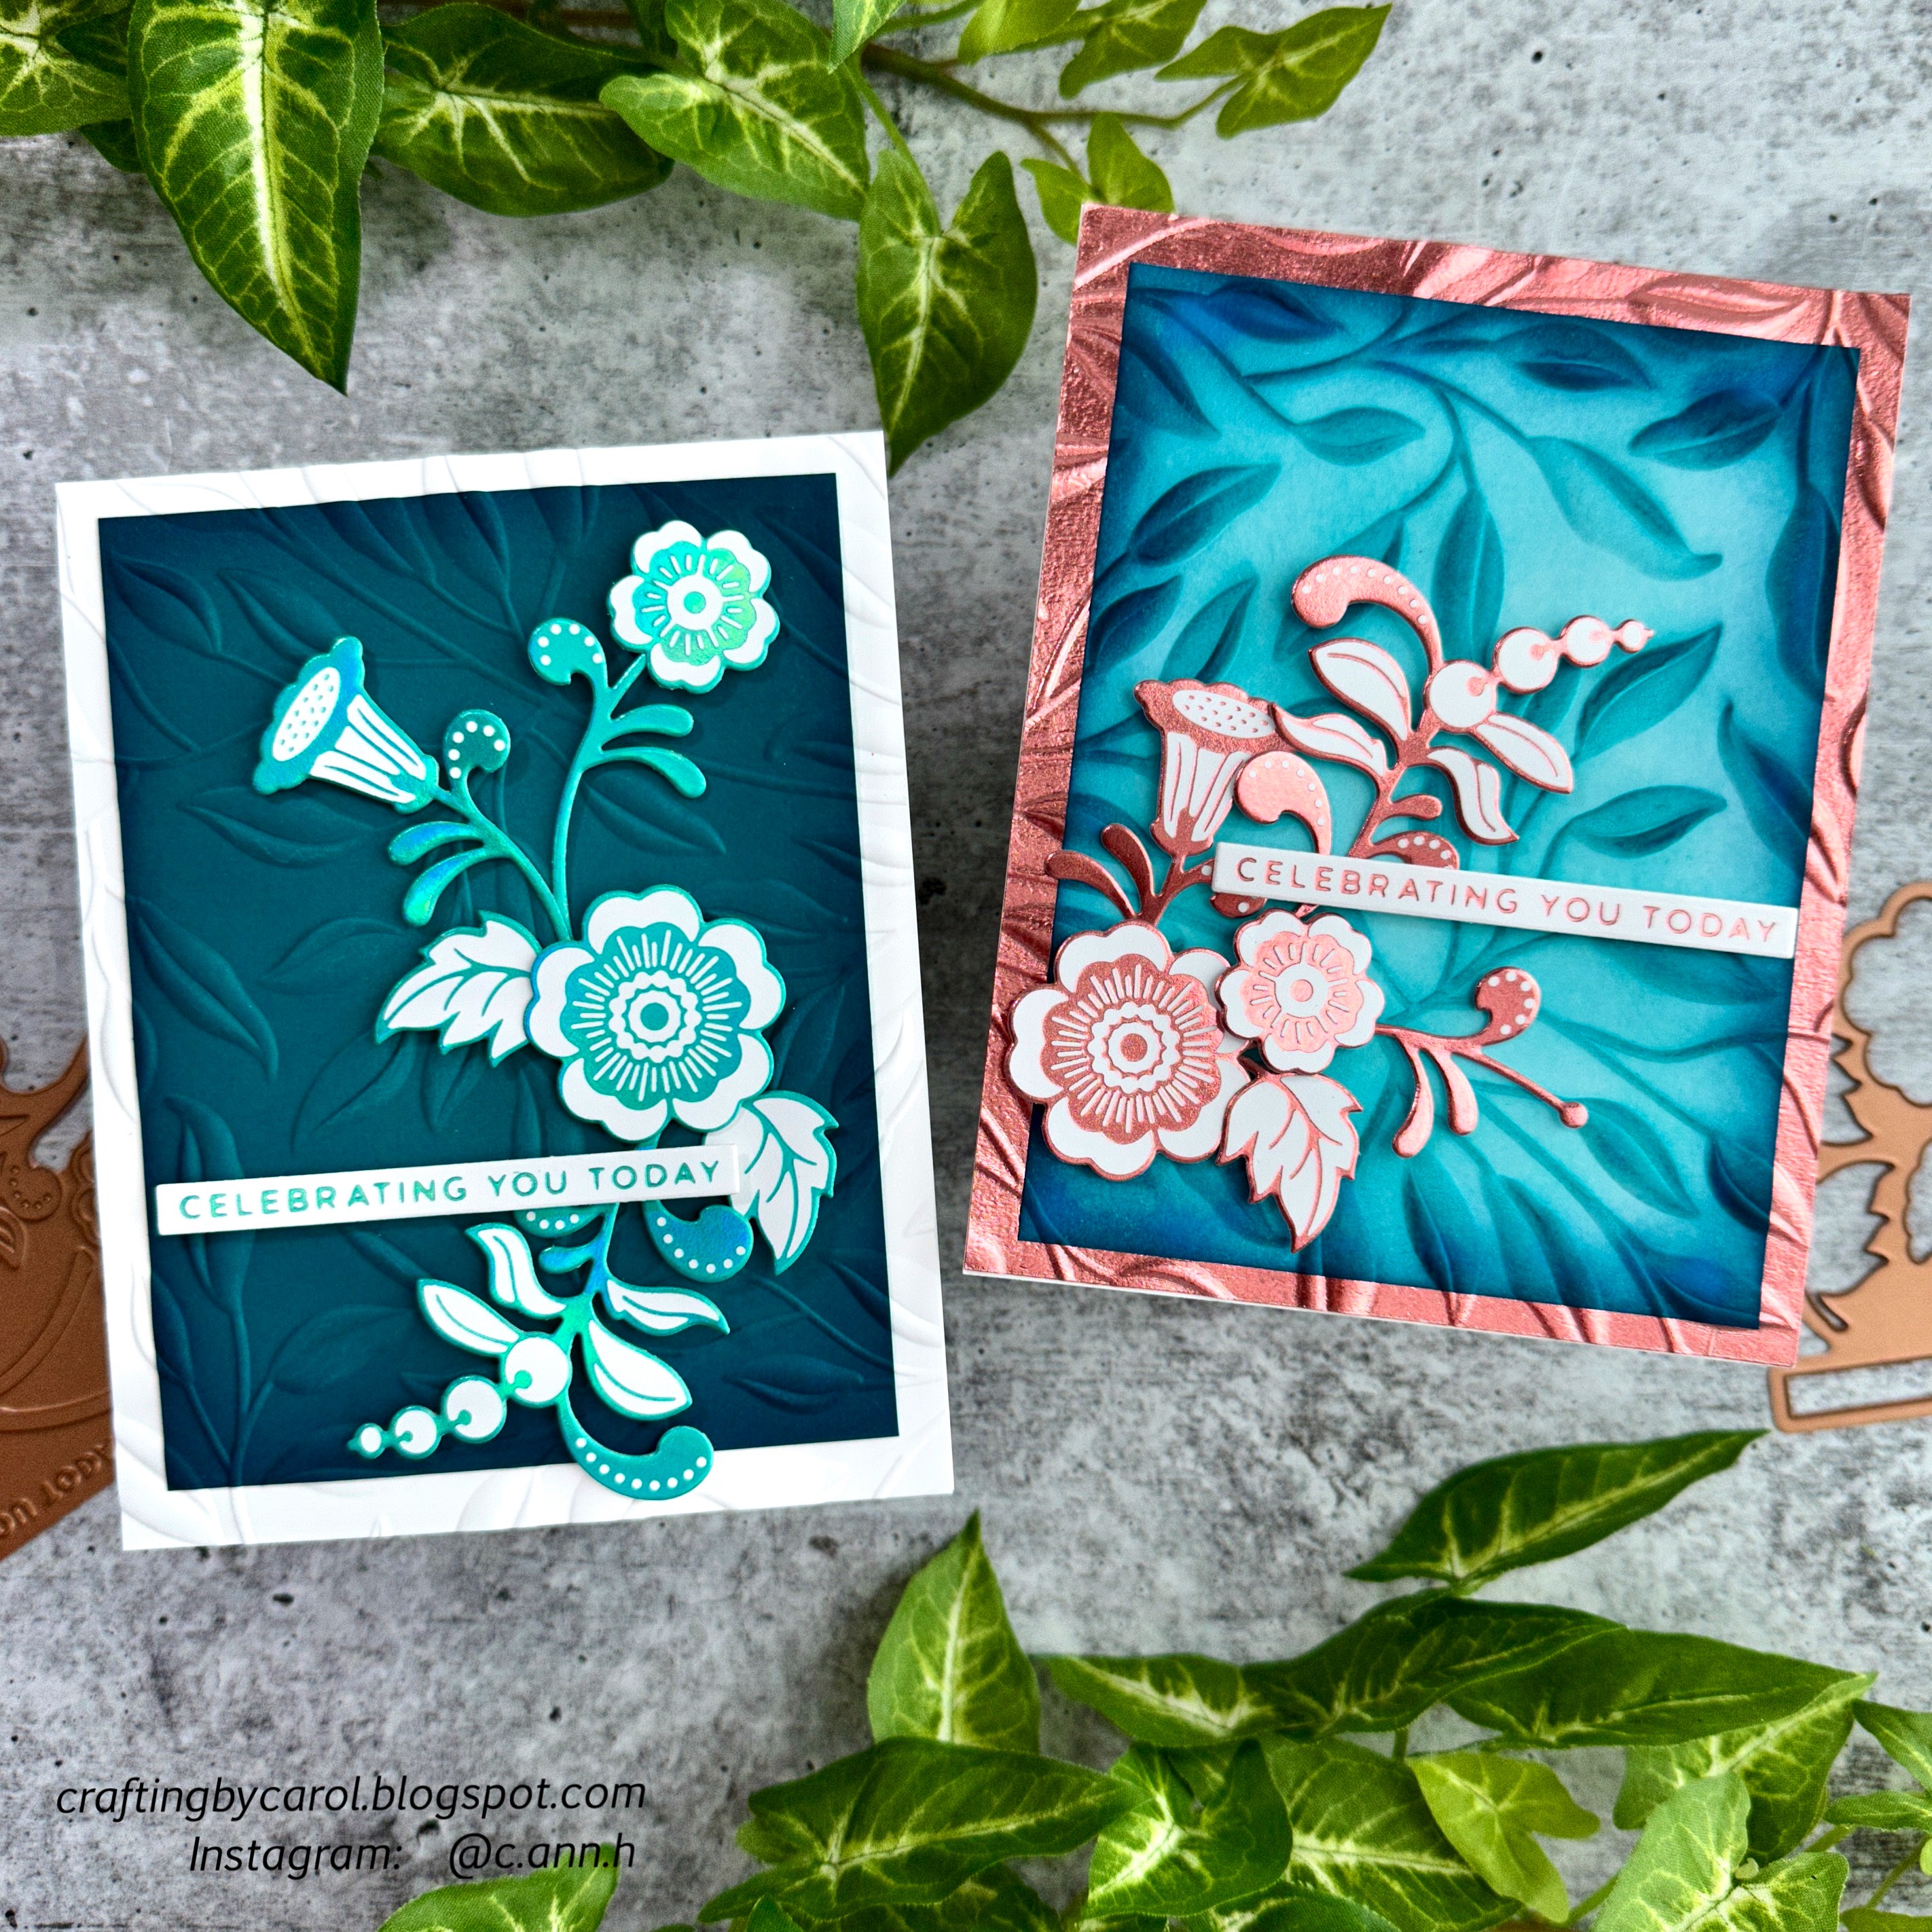
Hello friends!  Today I'm sharing two cards I made with Spellbinders' November Glimmer Hot Foil Kit.  This month's kit consists of one foiling plate for all of the images!!  I love this!  There is also one die to cut the images out along with a roll of hot foil.

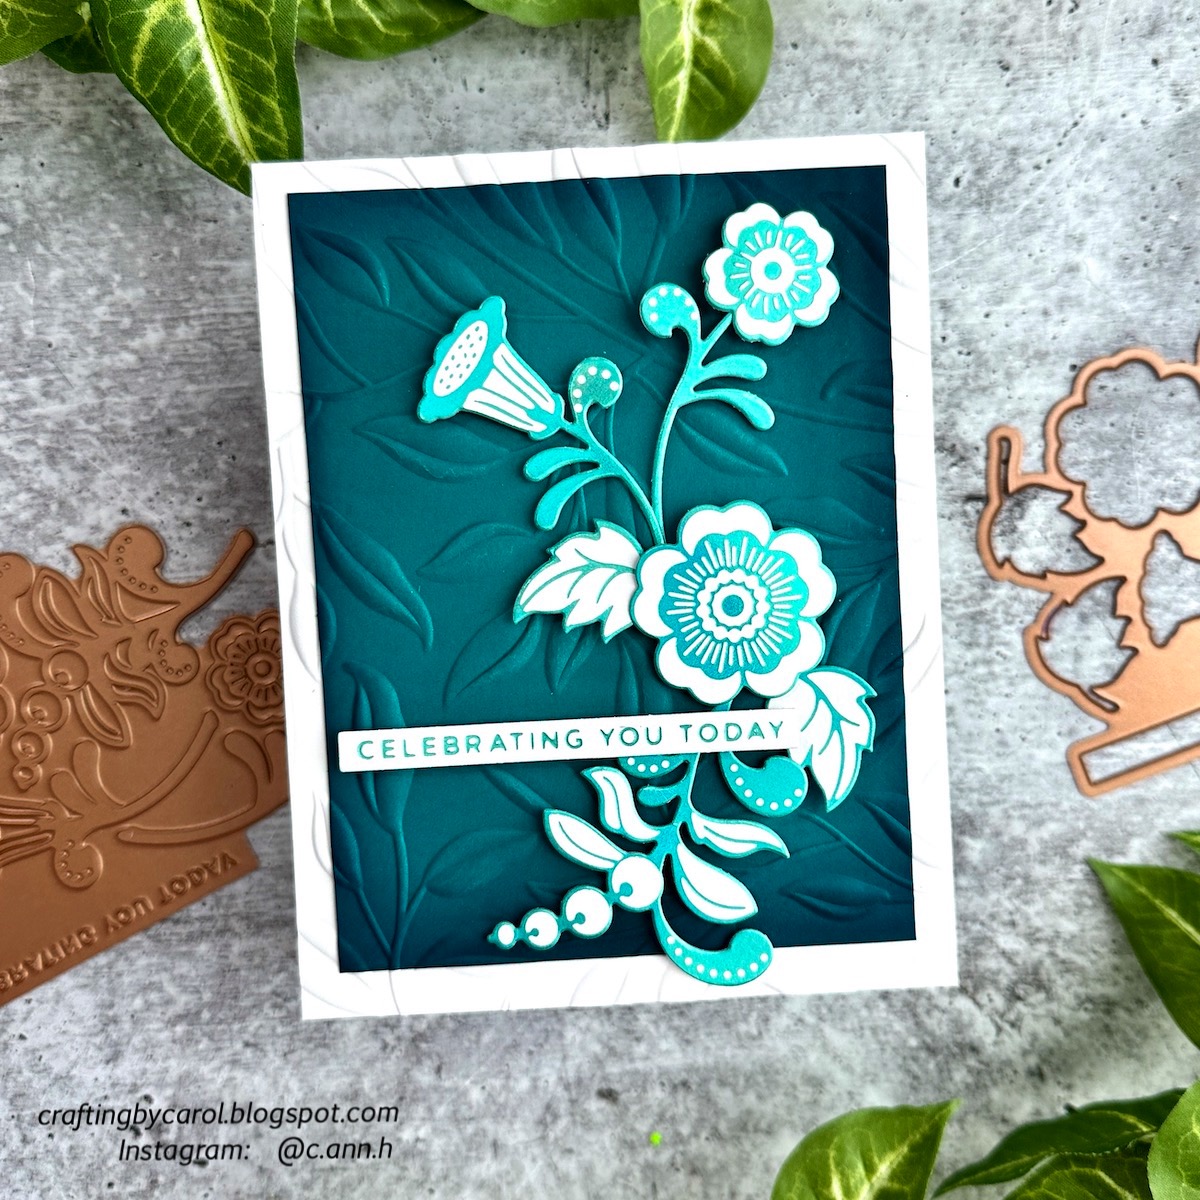
My first card uses some teal cardstock and Moondust Glimmer Hot Foil.

First I embossed some white and teal cardstock with the Leafy 3D embossing folder.  I trimmed the teal piece down to 3-¾" x 5" and inked the edges with Peacock Feathers and Uncharted Mariner distress inks.

After I foiled the Glimmer Kit plate with Moondust foil, I used the die to cut them out.  I popped all the elements up with foam tape.  I love the look of two different cardstocks with the embossing folder!

My second card features the Glimmer Kit plate and rose gold Glimmer foil!

I used the same Leafy 3D embossing folder here.  First I added a sheet of double-sided adhesive to some white cardstock.  I carefully slowly pulled the backer away while adhering a piece of Rose Gold Glimmer foil.  I wanted a perfectly coordinating border for this card and I love the look.  I ran the panel, along with some white cardstock through my Platinum with the Leafy embossing folder.

Then I used an ink blending brush to add Peacock Feathers and Uncharted Mariner distress inks to the white panel.  I really like how the brush emphasizes the raised embossed leaves!  Again, I adhered the foiled images with foam tape and glue.

These were fun to make and I'm not sure which I like better!  Do you have a preference?  Let me know in the comments.  Thanks so much for stopping by today.  I hope you've enjoyed my versions of the Glimmer Foil Kit!

Thank you for using my affiliate links (never at any additional cost to you).

Saturday, October 15, 2022

3D Vignette Pet House by Spellbinders

Hello friends!  Today I'm sharing a beautiful and fun kind of project.  This features the new 3D Vignette Pet House die set by Becca Feeken for Spellbinders.  This fun project folds flat to fit into a padded envelope for a fun and unique surprise for the recipient!

I followed the included layering directions (downloadable PDF on the Spellbinders' site) and die cut the pieces from a few shades of teal cardstock using my Spellbinders Platinum die cutting machine.  I die cut the little dog in white (after our sweet Maltese, Baxter) and also the bowl and bone.  I Copic colored the bowl with a few gray markers.  That is the only piece that I colored!!

Here's a helpful photo showing the pieces before assembly.  The roof and roof trim is already glued onto each piece as well as the dog's collar and tail.  (There's also a die for a cat for the cat lovers!) You can cut little teal scraps to fit behind the bone and the sentiment to coordinate with the other pieces!

Here's a view of the side.

This folds totally flat for mailing!  I will use a larger and padded envelope when I mail it.

I used pieces of foam tape to adhere the grass strip, bone, and the sentiment.

I hope you've enjoyed this unique project!  It's super cute and a special treat for your friends with fur babies!  Thanks so much for stopping by.  I hope you have a wonderful, and craft, weekend!

Products used for this adorable project (affiliate links, never additional cost to you)

Saturday, May 1, 2021

Spellbinders Stained Glass Bouquet Collection

 Hello my friends!  I was thrilled to get to create with two products from Spellbinders Stained Glass Bouquet Collection by Becca Feeken.  There are several other gorgeous sets in the collection that you can check out here.

My first card features the stunning die set called Be Leave Me.  I went with a feminine color scheme that makes this perfect for sending to your BFF!

I used a 5-½" x 4-¼" white card base and added pink and patterned paper panels that I die cut with my Spellbinders Platinum machine using the largest dies in the A2 Matting Basics A and A2 Matting Basics B die sets.

Next I die cut the large leaf cluster and the two leaves from white card stock.  I got lucky when I saw that all of the little pieces remained in place after I die cut them!  To keep them in place I added some purple tape to the back and then removed the white frames.  Next I die cut just the solid layer of both.  I used a few Copic markers to color the pieces and then adhered the solid layer, the frame, and then the inlay pieces together.

I repeated these steps for the sweet flower; however, first I die cut it from pink card stock, and again from white card stock.  I used one Copic marker to add a bit of shading to the pink pieces.

Next I used glue and foam squares to add the elements to my card base.  I stamped the sentiment onto the banner and popped it up with a foam strip.  It's hard to see from my photo, but there's a fun bit of sparkle on the flower and leaves that I added with a Wink of Stella.


My second card features the gorgeous Tulip Trio die set.  I Copic colored some vellum for this sweet stained glass look.  Read on for the details.

First I created a 5" square white card base.  I used the outer square die in the Tulip Trio die set to cut a piece of pink card stock, added foam tape to the back and attached it to the card.  Then I die cut the detailed square from white card stock and adhered it to the pink layer.

Next I centered the tulip circle die into the circle die and put some purple tape on them to keep them together.  I placed it on some white card stock and ran it through my Spellbinders' Platinum die cutting machine.  Then I used just the circle die to cut a vellum circle.  I adhered the detailed tulip circle to the vellum circle with some dots of liquid adhesive.  Then I used two Copic markers (RV25 and RV13 to color the tulips on the back of the vellum.  I used G28 and YG17 for the leaves.  TIP:  Color your lightest color first, then flick on the darker shade--don't try to blend!!  It will make a hot mess!  LOL!!  Next I attached the piece to the card base.

I used the same steps and pink Copic markers for the decorative corners.  I did use the solid corner die to cut four white corner pieces and adhered them to the top layer.  I decided that this is just too pretty to add any sentiment!  I'll add one inside when I have an occasion to send the card to a friend!

Thank you all so much for stopping by!  I hope you're getting to have a fun and crafty weekend!

Friday, April 9, 2021

Spellbinder's / Susan's Spring Flora Collection Parrot Tulip & Sweet Pea Etched Dies

 I'm so thrilled to have been invited to have a play with these beautiful Spellbinders' die from Susan's Spring Flora Collection by Susan Tierney-Cockburn.  Some of the very first dies I bought many years ago were flower shaping dies, so these dies are definitely right up my alley!  I've always loved creating these super dimensional flowers to make stunning cards!

My first card features the gorgeous Parrot Tulip dies.  This flower was not very familiar to me, so I just did a web search for images, and wow! there are so many colors of these beauties!


This post is mostly photos for you, along with colors and supplies I used.  I love how Spellbinders has videos, by the designer herself, to show us how to use these dies.  I will provide links to her videos, as well as links to the supplies I've used for my cards.

Before I got started on my card, I watched Susan's video for the Parrot Tulips.  My goodness me, she creates the most stunning cards with her dies!!!!  I used my Spellbinders' Platinum Die Cutting Machine to cut out the flower and leaves from white card stock.  I really like how the flower pieces are all on one die, and also there is a number etched into the die to tell you how many times it needs to be die cut to complete the flower!!!  

I colored my flower parts with my Copic markers.  I used R24, R14, R22, and YR28.  For the leaves I used YG17, YG25, and YG03.  I followed Susan's directions for assembling the flowers.  I did add a touch of glitter to the stamens, which I think you can see in the photo.

I created my card base by dry embossing the next-to-the-largest A2 Matting Basics A Card Creator die on an A2 card panel.  Next I die cut a rectangle with the middle-sized A2 Matting Basics A die.  I used the Embossing Plate and Mat to create more dimension around the edges of the rectangle.

Then I stamped the sentiment in black ink from a retired set in my stash in the upper right corner.  Next I added some coordinating spatters with Abandoned Coral Distress Ink and popped it up on the card front with some foam tape.  I arranged my flowers and adhered them with liquid glue.

-----------------------------------------------------------------------------

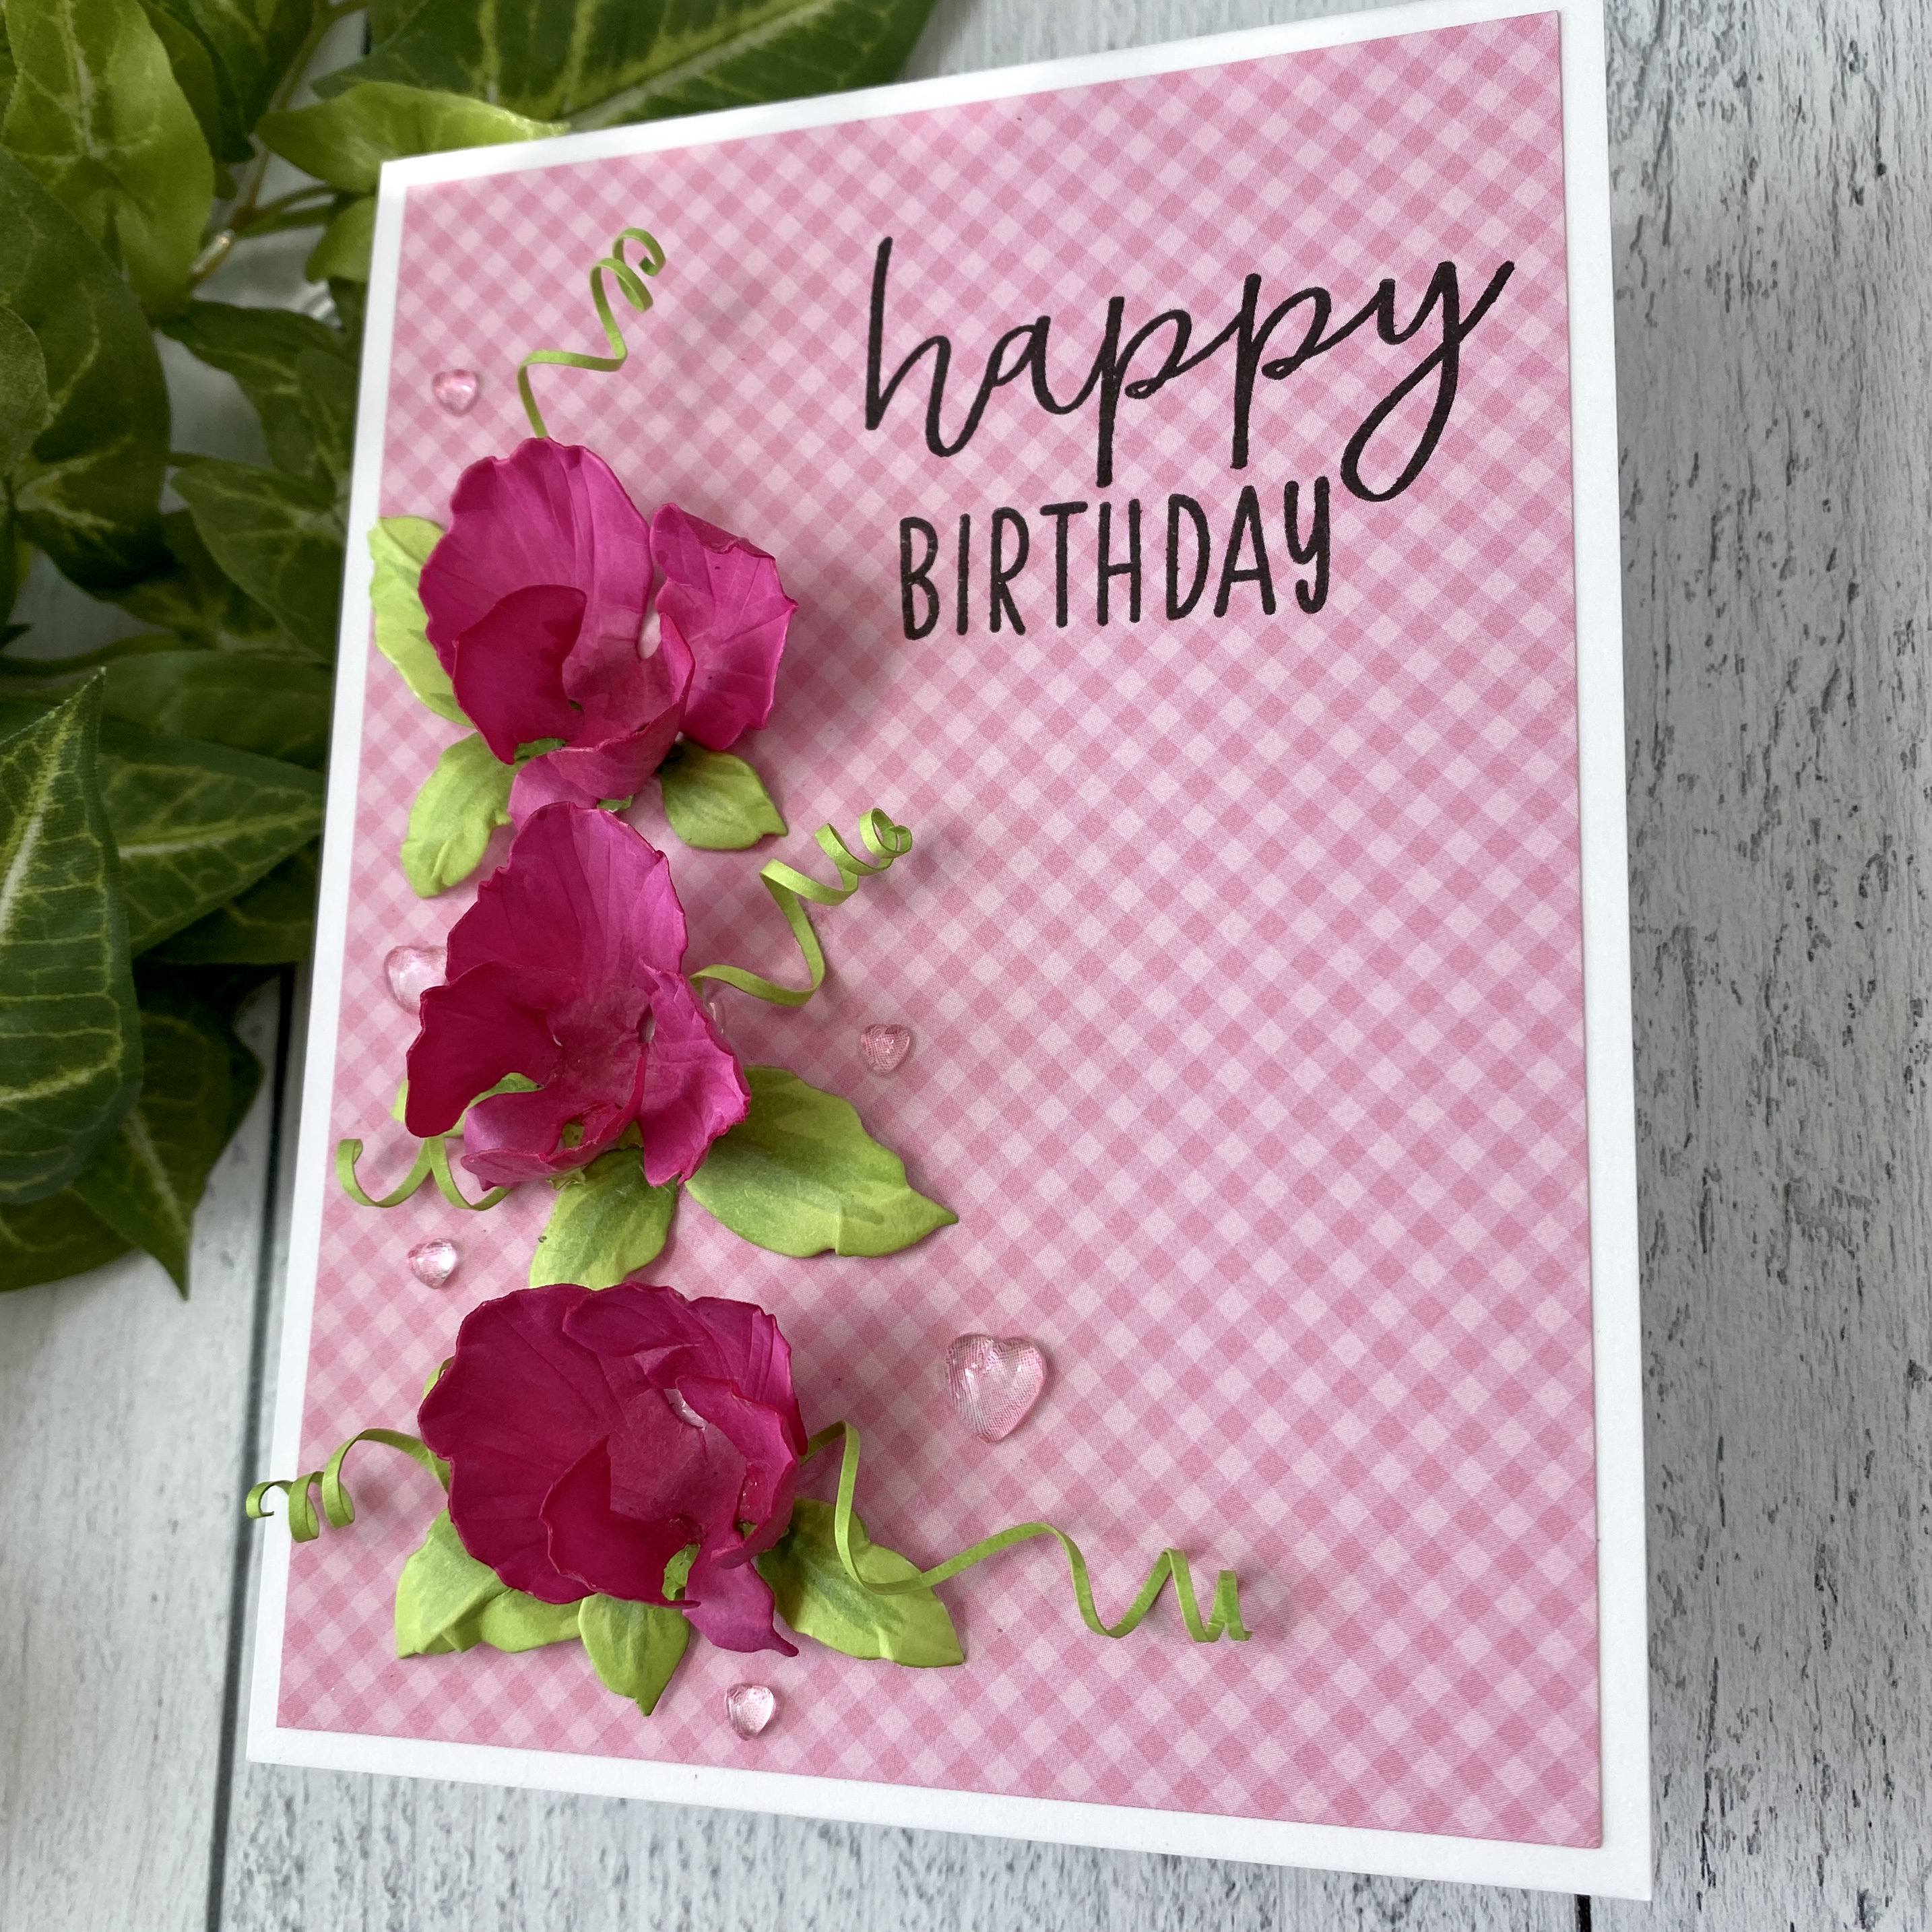
My next card features the so sweet and very pretty Sweet Pea Etched Dies.  Susan's video for the shaping and assembly of these was so very helpful!


When I searched the images of Sweet Peas, I found so many beautiful colors, from pastels to brights!  As you see, I went with bright!

Again, I die cut these with my Platinum machine from white card stock.  Then I colored them with my Copic markers.  I used RV19, RV17, RV09, and YG17 and YG23 for the leaves.

Because I love gingham, and Sweet Peas just seem to fit, I adhered them to a card panel of pink gingham after I stamped my sentiment.  I added some clear acrylic hearts around these sweet flowers for a touch of bling!

I absolutely loved playing with these beautiful dies!  I thank you so much for stopping by and hope I've inspired you to give these a try!  Thank you for stopping by today, and I hope you have a wonderful, crafty weekend!