Showing posts with label Simon Says Stamp. Show all posts

Thursday, June 11, 2026

Way To Gator Done!! -- Simon Says Stamp

Hello friends!  Today I'm sharing another card I made using products from Simon Says Stamps' Always There release!  This one, that's so sweet and easy to make, features the super cute Mr. Snappy stamp set (that name! love it!) and the Star Champion embossing folder.

There are three adorable gator images in the Mr. Snappy stamp set.  One that grills, another builds, and the one I chose, the happy one!  I stamped the gator, and the balloon, in alcohol marker safe black ink and colored both with my Copics.

There are coordinating Mr. Snappy dies available, but I don't have them so I easily used my scissors to cut them out.  Then I added foam tape on the back of both pieces.

I stamped the sentiments, two of the eight included in the set, with black pigment ink.  I used my paper trimmer to cut them into rectangles and added foam tape to the back.

For my A2 card, I added a white cardstock layer that I embossed with the Star Champion embossing folder.  This folder would be so fabulous for many occasions such as graduation, birthdays, anniversaries, and lots more!!

After I glued the embossed panel to my card base, I removed the backing from the foam tape on the Mr. Snappy images and adhered them to the card.

After adding a couple of white gel pen lines to the balloon, I was finished!

Now you see how quick and easy this card was with Mr. Snappy!  Perfect for many celebrations!  Thanks so much for stopping by today.  Happy crafting!!

Thank you for using these affiliate links to shop (never any additional cost to you)!

Wednesday, May 27, 2026

Do Frivolous Things - Always There Release by Simon Says Stamp

Hello crafty friends!  Today is the day for Simon Says Stamps' new release called Always There!  My card today features these products from this awesome release!

My first step was to make the stenciled background.  This is a pretty ombre texture paste background.  I tinted three dabs of texture paste by first smooshing Cheeky, Blush, and Pucker inks onto my glass craft mat.  After I mixed the inks into the paste I spread each shade through the Dot Petal Pattern stencil, darkest to lightest.  (All of the ink colors I used are in the list below.)

While that was drying, I die cut white cardstock with the dies in the Sunblush Flowers die set.  I used ink blending brushes and the same inks as above to color the flower die cuts.  To color the leaves I used Sprout and Fairway inks.  I adhered the layers together with glue.

Next I die cut vellum with a Sparkler Scallop Frames die.  Using my MISTI, after adding some anti-static powder, I stamped this sentiment from the Frankly, My Dear stamp set with clear embossing ink.  I added white embossing powder and heat set it.  You may think the sentiment looks a bit light, but in real life it’s just right and very easy to read.

Then I used a few drops of glue to adhere the Sunblush flowers and leaves to the vellum.  As you may know, it can be tricky to adhere vellum because it is semi-transparent and foam adhesive will show through.  Having the flowers on the vellum makes it easy to hide the foam adhesive by adding it directly behind the flowers.  I used some thick glue dots that I stretched out to be just under the top line of the sentiment.  Even in real life, I cannot see it!

I love the white embossed sentiment on vellum that allows the pretty pattern from the stencil to show through!  

Thank you so much for stopping by today!  Be sure to head over the Simon's website to check out all of the other awesome products in this release!

I can't say how much I appreciate those of you who use my affiliate links to shop (there's never any additional cost to you)!

Friday, March 20, 2026

Simon Says Stamp In My Heart Release Blog Hop Day 1

Hello, crafty friends!  I'm so happy to be joining in Simon Says Stamp's In My Heart Day One Blog Hop!  As is true for all of Simon's releases, this one is filled with so many beautiful stamps, dies, stencils, and embossing folders just right for our spring time projects!

Check this out!

You will receive this exclusive and not-yet-released Beautiful Day 3" x 4" stamp set for free with your purchase of any item in the exclusive In My Heart Collection!  How awesome is that?!  Note:  This gift with purchase will expire on March 22 at 11:59 pm EDT or while supplies last.

Also, I want to let you know that Simon Says Stamp will be awarding a $25 coupon to every stop of the blog hop!  All you need to do is to leave your comment here and at each stop along the way, which will increase your chances of winning!  Check out the complete hop list below.

Now, on to my first card I am sharing with you!  This features the new and so beautiful Jaunty Stem die set and the Big Basketweave Stencil.

One of my most favorite techniques to use in my card making is tinting texture paste to use with stencils!  I tinted this texture paste with one drop of Lost Shadow Distress Ink Re-inker.  I spread the tinted paste through the Big Basketweave Stencil without smoothing it off for this rustic look.

Mounting the dry stenciled panel onto light gray cardstock adds another touch of the light gray I used in the texture paste.

I love this background for the Jaunty Stem die set!  After die cutting white cardstock, I did some quick Copic marker coloring on the pieces.  Foam tape squares behind the flowers and glue on the stems creates more dimension on the card.

I used a sentiment from the previously released Basket of Blooms stamp set.  I love making birthday cards for my stash!

----------------------------------------------------------------------------------------------

This next card is so sweet with a whimsical background I made with the Folk Flowers Background stamp.

I stamped this fun Folk Flowers Background stamp with clear embossing ink onto white cardstock.  I added white embossing powder and then heat set it.  I used ink blending brushes to add on soft shades of Distress Oxide inks.

I love how the white embossing just pops when color is added to the panel!  Be sure to use a clean towel to wipe off any excess ink from the embossing.

The sentiments are from the new Thanks, Mom stamp set.  I used my scissors to trim out the large sentiment, but there are coordinating dies available.  Check out the link in my product list below.

----------------------------------------------------------------------------------------------

In case you missed it, yesterday I shared this fun and vibrant card over on my Instagram, @c.ann.h.  This features the beautiful Friendly Blossoms Stencils and Coordinating Dies.

I used some of my favorite Simon Says Stamp Pawsitively Saturated Ink pads to color through the Friendly Blossoms Stencils.  I have all of the colors I used in my product list below.

When I die cut the stenciled images with the Friendly Blossoms dies, I die cut two more layers of each die from white cardstock.  Note that I did not die cut the leaves.

I really love the perspective in dimension is achieved with the stacked florals and leaving the stenciled leafs on the panel!

These sentiments are also in the Thanks, Mom stamp set.  I used my trimmer to cut them into rectangles and foam strips to adhere them to the card.

Thank you for taking a look at my cards in this awesome hop!  I hope I've inspired you and that you will leave a comment for me before you continue hopping!  The winners will be chosen by Simon Says Stamp and posted on their blog on Wednesday, March 25 with instructions on how to redeem your prize.

Hop along here for lots of amazing inspiration!

  • Simon Says Stamp Blog 
  • Barbara Tarayao
  • Suzy Plantamura
  • Cathy Zielske
  • Nicky Meek
  • Heather Ruwe
  • Tina Smith
  • Lisa Addesa
  • Mindy Eggen
  • Miriam Prantner
  • Emma Williams
  • Kim Hamilton
  • Dana Joy
  • Rosemary Dennis
  • Carol Hintermeier
  • Amy Tsuruta
  • Here are the supplies I used for my cards shown.  Thank you so much for using my affiliate links to shop (never any additional cost to you)!

    Thursday, January 8, 2026

    Heart To Heart New Release By Simon Says Stamp

    Today is release day for the Heart To Heart release!  As usual, Simon Says Stamp has something for everyone in this release!  Valentines, friends, and more!

    I'm sharing three cards I made with products from this awesome release!  Please forgive me for the brief descriptions, but I am recovering from an upper respiratory infection I've had for a week and a half, and just don't have the energy today!  If you do have any questions, please use the contact me form in the left margin of my blog.


    This first card features the new Love City stencil set and the Words Of Love stamp set.  (Links for all available supplies are in the list below.)

    There are three stencils in the Love City set.  I used two stencils with two shades of gray inks.  I spread Pearl White Stencil Butter through the third stencil and set it aside to dry.

    I stamped the Words Of Love stamp onto vellum with embossing ink.  I added white embossing powder and heat set it.  Then I cut it out with my scissors.

    I stamped the Love You stamp from the Words Of Love set with Sangria ink.  I also trimmed the sentiment with my scissors.

    Next up is my card using the new Love City die set.  These dies also coordinate with the Love City stencils.  I chose to make a clean and simple card with them.

    I used two colors of pink cardstock to die cut the Love City dies from.  Quick shading was added with blending brushes and Strawberry and Dusty Pink inks.

    The sentiments are from the Label Slides Love and Friendship stamp set.  (There are Label Slides dies available, but I do not have this set.).

    The hearts and sentiments are adhered to the card with foam tape.

    Sweet and simple, but sure to be loved by a best friend!

    Finally, I have my card featuring the Love Is In The Air stamp set.  There are coordinating dies available.

    There are three images in the Love Is In The Air stamp set, and I guess I was determined to use all three on one card!  LOL!  But I am happy with how this turned out.

    Everything was stamped with Copic safe ink.  I stamped masks for all of the images and cut them out with my scissors.  A bit tedious?  Yes, but worth it.

    I used the masks to ink blend blue and green inks for the sky a grass.  When that was finished, I colored the image with my Copic markers.

    There are seven sentiments in the Love Is In The Air stamp set and I chose two to use for my card.  Other than the foam tape for the sentiments, this is basically a two-layer card!

    I hope you've enjoyed my three cards featuring products from the Heart To Heart release!  Be sure to head over to Simon Says Stamp's website to check out all of the other fabulous new products!

    Thanks so much for stopping by.  Have a wonderful and crafty day!

    Thank you for using my affiliate links to shop (never any additional cost to you)!

    Saturday, December 6, 2025

    Simon Says Stamp DieCember® 2025 Blog Hop Day 2

    Hello friends!  I am thrilled to be joining in the celebration of Simon Says Stamp's 2025 DieCember® release blog hop Day 2!  You will see so many beautiful, inspirational projects today.  Keep reading until the end for the entire hop list!

    Simon Says Stamp is giving away a $25 coupon to a commenter on every stop of the hop!  These will be chosen from the comment section of each blog, so BE SURE TO LEAVE A COMMENT HERE AND AT EACH STOP to increase your chances of winning a coupon!  The winners will be chosen and posted on the Simon Says Stamp blog on Wednesday, December 10, where the winners can find out how to redeem their prize.

    When you are finished hopping today, be sure to check out the fabulous makes in the Day 1 blog hop!

    Look at this Free Gift!  This adorable Bundled Snowman die set will automatically be added to your cart that contains any purchase from the exclusive DieCember® collection!

    Please note:  This gift with purchase will expire 12/7 at 11:59 pm EST or while supplies last.

    Today I have three cards to share with you.  Each features one or more of some fabulous die sets, stamps and an embossing folder that are part of the DieCember® release!

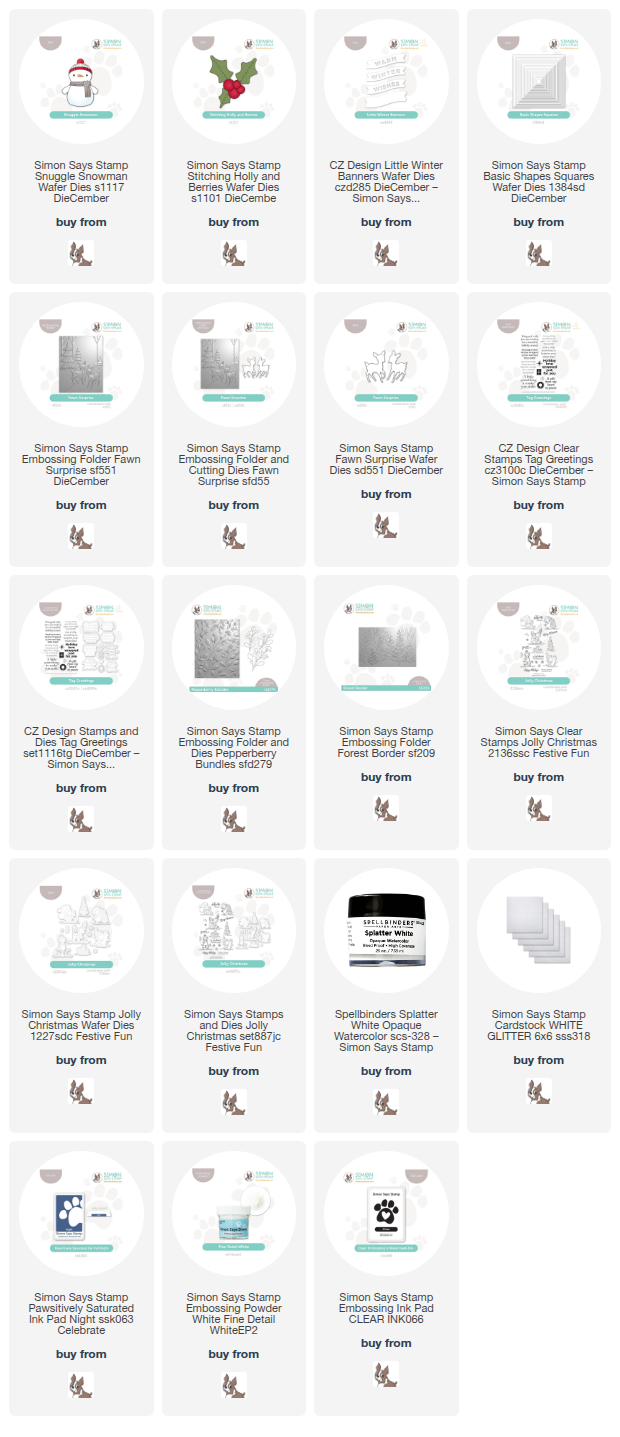
    For my first card I've used the SO adorable Snuggle Snowman die set!  I love snowmen, and these are some of the cutest, I think!

    I die cut the Snuggle Snowman dies from white, red, and green cardstocks, three times.  I glued the three snowman layers together.  I just had to have three of these adorable snowmen!!

    The background is blue cardstock embossed with the Forest Border embossing folder.  I added Night ink around the edges with an ink blending brush.  Then I added white pigment ink to the bottom of the panel.

    Next I diluted a bit of Splatter White Opaque Watercolor with a few drops of water.  I used a paint brush to add splatters over the panel.  When it was dry I glued it to an A2 card base.

    I used foam tape to adhere the three adorable Snuggle Snowman images to the card.

    The sentiment is from the Jolly Christmas stamp set.  I stamped it with clear embossing ink, added white embossing powder, and set it with my heat tool.  I trimmed the sentiment into a strip and popped it up onto the card.

    ------------------------------------------------------------------------------

    Next I created a greeting card and coordinating gift tag using the fun and easy-to-stitch Stitching Holly and Berries dies!

    I used the new Basic Shapes Squares die set to die cut white and silver cardstock to use on the card and tag.

    The tag's white square and an A2 sized piece of white cardstock are embossed with the Pepperberry Bundles embossing folder.

    The feature element of this card and tag is the fun new Stitching Holly and Berries die set.  If you are new to stitching on cardstock, then this set is for you!  I stitched all six leaves with embroidery floss in just a few minutes.

    The tag's sentiment is from the new Tag Greetings stamp set.  For the sentiment, I chose one from the Holy Night stamp set.

    ------------------------------------------------------------------------------

    My final card features the beautiful Fawn Surprise embossing folder and the Little Winter Banners die set in a sweet, snowy and simple design.

    I cut a 4" x 5-½" piece of white glitter cardstock to emboss with the Fawn Surprise embossing folder.  Tip:  Add one or two "shims" of printer paper to add a bit more pressure for the glitter paper.  I adhered that with glue to a piece of silver mirror cardstock and then those to an A2 card.

    I die cut the sentiments from silver and white glitter cardstock.  After I glued the layers together, I popped each one up on the card with foam tape.

    This was such an easy card to make!!

    That's all from me and I hope you found some inspiration here.  Thank you so much for stopping by!   If you would like, please check out all of my supplies in the list below.

    Your next stop on the hop is Trina Pham!

  • Simon Says Stamp Blog 
  • Nina-Marie Trapani
  • Laura Bassen
  • Suzy Plantamura
  • Nichol Spohr
  • Mindy Eggen
  • Sandi MacIver
  • Keisha Charles
  • Melissa Phillips
  • Emma Williams
  • Lorraine Aquilina
  • Rachel Alvarado
  • Barb Engler
  • Dana Joy
  • Carol Hintermeier <---you are here
  • Trina Pham

  • Below are links to the new DieCember® products I've used, along with other awesome goodies!

    Thank you for choosing to use my affiliate links to shop (never any additional cost to you)!

    Wednesday, November 5, 2025

    Holy Night Holiday Card

    Hello friends!  Today is release day for Simon Says Stamp's new And Everything Nice release!  I've used the sweet Holy Night stamp set from the release to make this card with ink blending, masking, and Copic coloring!

    First I stamped the building and star stamps from the Holy Night set with Copic safe ink onto an A2 sized white cardstock panel.  Before removing the stamp from my MISTI, I stamped them again onto masking paper.  I used my scissors to cut out the masks and adhered them over the images on the cardstock panel.

    Then I used SSS Pawsitively inks in the colors of Twilight, Night, and Galaxy to color the sky.  Then I used a tan shade of ink for the sand beneath the buildings.

    I removed the mask from the buildings and colored them with a few Copic markers.

    I treated the upper portion of the panel with my anti-static pouch.  I stamped the sentiment from the Holy Night stamp set with clear embossing ink, added black embossing powder and heat set it.

    Next I used my Copic markers to color the sweet images from the Holy Night stamp set.  These were stamped on another piece of white cardstock and then cut out with my scissors.  I don't have the coordinating Holy Night dies, but they are available!

    I added foam tape to the colored images to adhere them to the card.

    I love the sweetness of the images in the Holy Night set!  Thanks for stopping by.  I hope your day is awesome!

    Thank you for using my affiliate links to shop (never any additional cost to you)!

    Thursday, October 9, 2025

    May Your Heart Be Filled With Peace

    Hello friends!  There's a new release, available now, by Simon Says Stamp called Sugar And Spice!  I'm sharing my card featuring a beautiful stamp set from the release called Graceful Swans.

    The Graceful Swans stamp set has so many beautiful stamps in it that it was hard to choose just a few!  I arranged my chosen stamps into a sweet scene.  I used my MISTI to stamp them in a Copic safe ink onto 80# white cardstock.

    After I colored the scene, I die cut the panel with a Notched Corner Frames die.  I cut gray cardstock from the next largest die to layer behind the scene.  Then I glued the two pieces together and added foam tape to the back.

    I adhered the layered scene to an A2 card base.  The Graceful Swan stamp set has three different sentiments.  One that is to send comforting thoughts, a birthday greeting, and a thank you sentiment.

    I stamped the sentiment with black pigment ink and cut it out with my scissors.  I adhered it to the card with foam tape.

    The hardest part of making this card was deciding what images to use!  Check out the Graceful Swans stamp set and all of the other new products in the Sugar and Spice release over at Simon Says Stamp.

    Thank you for stopping by today!  I hope you have a fantastic one!

    Thank you for using my affiliate links to shop (never any additional cost to you)!

    Tuesday, September 2, 2025

    Scripty Birthday Background Card + Simon Says Stamp 16th STAMPtember® Blog Party! 🎉

    Woohoo!  It's September and that means it's also Simon Says Stamps STAMPtember® with a HUGE NEW RELEASE!!  I am thrilled to be joining in their Blog Party that's happening over on the Simon Says Stamp blog!!  This isn't a hop, but you will find links to other makers sharing their inspiration for this release!

    At the end of my post, you will see a graphic with an exclusive STAMPtember® promotion JUST FOR YOU!  There are many other different promotions that will be offered by the other Blog Party participants too!  Think of it as a crafty scavenger hunt!  So be sure to check them all out.

    STAMPtember® is a month full of new crafty goodies, not only from Simon Says Stamp, but also  EXCLUSIVE products released in partnerships with many of the industry’s finest brands.  These are ONLY available at SimonSaysStamp.com.

    -----------------------------------------------------------------------

    My card features one of the exclusive Simon Says Stamp products and it is called Scripty Birthday Background.  This is a wonderful stamp perfect for backgrounds on your birthday cards!

    I stamped the Scripty Birthday Background stamp onto white cardstock with clear embossing ink.  I added white embossing powder and used my heat tool to set it.  Then I blended on three shades of ink in an ombre pattern.  I used these Pawsitively Saturated Inks: Guava, Watermelon, and Cherry.

    I trimmed it to 4" x 5-¼" and glued it to an A2 card base.

    I added two sweet butterflies die cut from white cardstock with the Stitching Butterflies.

    The sentiment is from the Big Old Birthday stamp set.  There are some fun and awesome sentiments in this set!  After I stamped it in black pigment ink, I used the coordinating die to cut it out.

    I added a few sparkly gem stickers for a bit of bling.

    -----------------------------------------------------------------------

    🎉🎉SPECIAL OFFER!!!  Follow the three steps shown here to redeem this Sweet Birthday Treat die set!  NOTE:  This offer is only valid through 9/3 at 11:59 pm ET, while supplies last.


    Thanks so much for stopping by!  I hope I've inspired you with my Scripty Birthday Background stamp set card!  SO many ideas and ways to use this set!

    Thank you for using my affiliate links to shop (never any additional cost to you)!