Showing posts with label Copic markers. Show all posts

Wednesday, July 23, 2025

Stitched With Love

Hello crafty friends!  Honey Bee Stamps has another release coming called Maker's Mix!  Today I am sharing a sneak peek card with two of the new products.  This next wonderful release by Honey Bee will be available tomorrow evening after their Release Party.

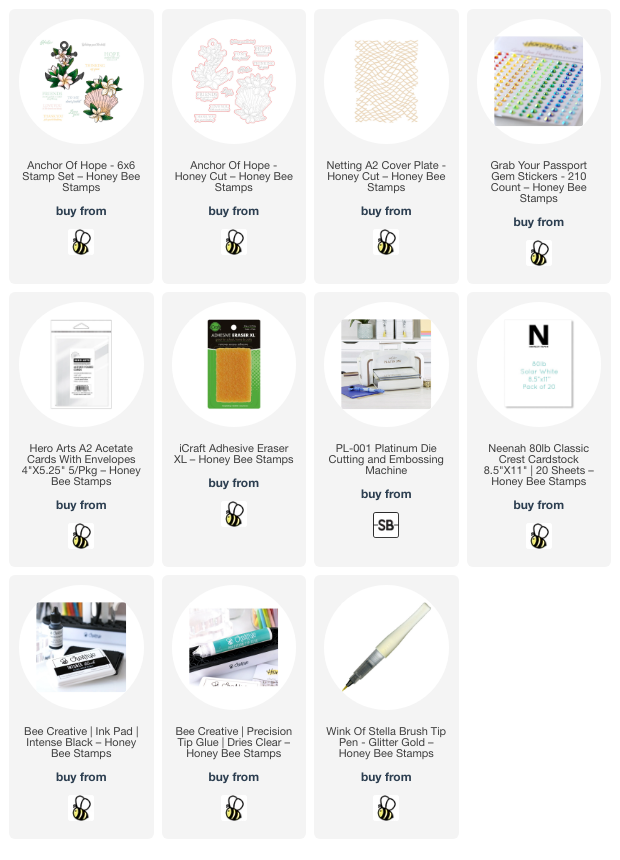
This card gives you a sneak peek of this beautiful set called Stitched With Love.  It's illustrated by the oh, so talented Kelly Taylor, and of course, has coordinating Stitched With Love dies too!

I stamped one of the three florals from the set and the embroidery hoop onto white cardstock with Intense Black ink.  I colored the images with my Copic markers and then die cut them with the coordinating dies.

I die cut three more of the embroidery hoop from 110# white cardstock and glued all of the layers together with Bee Creative Glue.  NOTE:  There are two dies for the embroidery hoop and you can die cut a solid one, or also use the inner oval die to cut out the center.

Next I used just the outer die for the embroidery hoop and die cut it from white cardstock.  I placed the die cut into the Burlap 3D embossing folder and ran it through my die cutting machine.  Then I glued the layered Copic colored hoop to this piece.

For the background layer on my A2 card base, I used one of the 12 patterned papers from the "FreeBee" double-sided cardstock.  This is available, while supplies last, with a qualifying $100 or more purchase and will be added automatically to your cart.  These are such pretty papers!!!

I stamped one of the three sentiments in the Stitched With Love set in black ink.  I cut it out with the coordinating die.  To adhere the sentiment I added a few pieces of foam tape and some glue.

To finish up, I used some pink gingham ribbon from my stash to tie a bow.  A glue dot keeps it nice and secure at the top of the hoop.

I hope you've enjoyed this sneak peek of the Maker's Mix release!  Trust me, you won't want to miss the release party to see it all!

Thanks so much for stopping by!

Saturday, July 19, 2025

Peace, Joy, and Love To You!

Christmas in July is a good thing, right?!  I love getting a head start on my Christmas cards and today's features another adorable House Mouse stamp set.  This is the Tree-mendous stamp set and is available over at Spellbinders, along with three other sets in this collection.

I stamped the Tree-mendous Christmas image in Copic safe ink and used my markers to color it.  I added gold gel pen accents on the ornaments and the star (too back it doesn't show in photos).

Next I die cut the panel with a die from the A2 Matting Basics A die set.  Then I added Splatter White opaque watercolor diluted with water for the "snow".

I die cut dark gray cardstock with a Matting Basics B die and glued it behind the colored image.  I added foam tape to the back of the layers.

The card base is an A2 size and has a panel of white cardstock embossed with the In The Pines embossing folder.

The sentiment is one of three included in the set and is popped up on the card with foam strips.

That's it!  So easy to make this adorable holiday card with quick coloring.  Thanks so much for stopping by.  I hope you have a wonderful weekend and lots of crafty time!

Thank you for using my affiliate links to shop (never any additional cost to you)!

Wednesday, May 14, 2025

You Are So Special To Me -- Framed English Cottage Scene

Hello crafty friends! Today I'm sharing my card that features the beautiful English Cottage stamp and the Lovely Layers: Bird Bath Honey Cuts from the new Honey Bee Stamps Cottage Countryside release.

The idea I had in my mind was to create a scene with the English Cottage as a background for the Bird Bath. My original thought was to just stamp the cottage in one subtle color as a background. But I decided to go with light colors and use my markers color the stamped image.

Once I decided to color the English Cottage I stamped it with Lost Shadow Distress Ink. This was much easier to use than one of the no-line coloring inks since it is darker than those. I think I still achieved a no-line coloring fairly well, do you? I used lots of lighter colors and a kind of "loose" coloring technique. This made my coloring session fun and relaxing without any stress!

Here's the Copic marker colors I used for the main areas:

  • Cottage: W4, W3, W1, W0, W00
  • Stones: T5, T3, T2, T0
  • Path: E44, E43, E42, E41
  • Vines/bushes on and around cottage: G94, YG61, G24, G20
  • Background trees, grass: YG67, G07, YG17, YG25, YG03
  • Door, windows: BG23, BG11, BG10
  • Purple flowers: BV11, BV000, BV00
  • Bird bath: C3, C1, C00
  • Birds: E59, E57, E55, E53, E51

Next I die cut the Wood Frame Builder dies three times from white cardstock. I glued the layers together and then glue them to my colored English Cottage scene, and glued the panel to an A2 card base.

I die cut the Lovely Layers: Bird Bath dies from white cardstock. After I colored the bath and the birds with my markers, I used glue to adhere the layers together.

Then I added a bit of foam to the back of the Bird Bath to adhere it to the card. I used glue to attach the birds at the top of the bird bath.

The sentiment is from the new So Special stamp set. I adore all of these sentiments! After I chose one and stamped it with black ink, I cut it out with the coordinating die. I added a few pieces of foam strips to adhere the sentiment at the bottom of the card.

I really hope this inspired you to try this idea for a background with the English Cottage. The coloring is really fun--just don't stress and be loose with your coloring and it will be fantastic!

Thank you so much for stopping by today! I hope you are having a wonderful week with lots of crafty time!

Thank you for using my affiliate links to shop (never any additional cost to you)!

Thursday, February 27, 2025

Hip Hip Hooray! Have A Happy Birthday!

It's time for the Favorite Things release by Simon Says Stamp, and it's available now!!  My card features a super cute stamp set call Hip Hip Hooray.


I hadn't made a card with masking in quite a while, and it's so fun!  I stamped both hippo images and the water  from the Hip Hip Hooray stamp set onto masking paper.  I used my scissors to cut each one out.

Next I planned where I wanted to stamp each image and which one would be in the foreground.  That's important to know since it is the first image you will need to stamp.  I stamped the hippo on the left first with alcohol marker safe black ink.  I placed the coordinating mask over that hippo.

Next I stamped the water, then placed its mask over it.  Then I stamped the hippo with the watermelon.  I placed a mask over it so I could use blending brushes with green and blue inks to fill in the scene.  The ink colors I used are in the list below.

Here's a photo collage showing the scene after removing each mask.  The reveal is so fun!

I used my Copic markers to color the stamped images.  Then I used a rectangle die to cut out the piece.


Next I chose two sentiments from the Hip Hip Hooray stamp set.  I stamped these with black pigment ink.  Then I stamped the two butterflies and colored them with Copic markers.

I added foam tape to the back of the panel and adhered it to an A2 card base.

While it's not a one-layer card, it is a one-layer scene, which I rarely make!  It was fun and I like how it turned out.  I hope you do to and found some inspiration to make a card with this adorable Hip Hip Hooray set.

Thanks so much for stopping by!

Thank you for using my affiliate links to shop (never any additional cost to you)!

Wednesday, January 22, 2025

You're My Queen Of Hearts Valentine Card

Hello crafty friends! Today I'm sharing my vintage Valentine card that features Honey Bee Stamps' beautiful Queen of Hearts stamp set. This set is made from red rubber and I totally love the crisp stamped image you get! You can also stamp the entire piece all at one time!

First I worked on my stenciled background. I inked up a 4" x 5-¼" piece of white cardstock with three pink Distress Oxide Ink colors. For my ombre pattern I used Picked Raspberry, Kitsch Flamingo, and Spun Sugar.

After using my heat tool to dry the ink a bit, I placed one of the two Scattered Hearts stencil over the inked panel. I added Picked Raspberry Oxide ink through the stencil with an ink blending brush.

Before I added the texture paste with the second stencil, I stamped the four hearts in the Queen of Hearts set with the pink Distress Oxides randomly over the panel.

Next I placed the second Scattered Hearts stencil over the panel. Then I added some pretty Frosted Petal Glacier Paste through the stencil with a palette knife. I carefully removed the stencil and set piece aside to dry.

Next I stamped the Queen of Hearts girl with Intense Black ink onto white cardstock. (Did you know that the Queen of Hearts set is made so you can use all of the images separately?) Next I colored her with my Copic markers. I used these colors:

  • dress: C5, C3, C1, C00
  • parasol & other pink elements: R39, RV25, RV06, RV04, RV02, RV10, RV00
  • hair: E59, E57, E55
  • leaves/grass: G17, G25
  • skin: E11, E51, E50

I used glue to adhere the dry stenciled panel to an A2 folded card base.

Next I cut out the Queen of Hearts with the coordinating Honey Cut. I added foam dots to the back to pop it up on the A2 card.

I stamped extra hearts from the Queen of Hearts with Picked Raspberry Oxide ink and cut them out with the coordinating dies. I used foam squares to adhere them to the card.

The sentiment is also another separate stamp in the Queen of Hearts stamp set. It is stamped with black ink and cut out with the coordinating die.

Since I was thinking her pretty white dress would have a sparkly overlay in real life, I used a clear glitter pen to add lots of sparkles on her dress!

I hope you've found some inspiration today for your card making!  Be sure to check out the entire Perfect Match release for other fun themed products.  Thank you for stopping by!!

Thank you for using my affiliate links to shop (never any additional cost to you)!

Wednesday, November 20, 2024

Adorable Holiday Card with Die Cuts

Hello crafty friends! Well, I certainly loved Honey Bee Stamps' Lovely Layers: Beach Bound set for the summer, and now, with the new Lovely Layers: Beach Bound Holiday Add-On, this set is at the top of my favorites!!!

The card base is an A2 white cardstock, with a layer of patterned paper from the North Pole paper pad. (The papers in this paper pad are gorgeous!) Then I used my scissors to trim glitter paper from my stash for a snowy hill. I adhered the hill to the card with foam tape.

I die cut the adorable pieces from the Lovely Layers: Beach Bound and Holiday Add-On from various cardstocks. The red part of the bus is white cardstock colored with two Copic markers (R59 and R27). The striped part of the bus is also from the North Pole paper pad. I also used black cardstock, red glitter cardstock, and some silver metallic cardstock.

If you feel like you may be overwhelmed by the layers, let me assure you, that the provided Layering Guides are your best friend!

I used glue to assembled this adorable bus (with blue eyes like mine :) and added foam tape to the back to adhere it to the card.

I added a tree in the background with dies from the Postcard Holiday Add-On dies. I really like how the set makes adorable postcards, but also that the pieces can be used individually on any card!

I stamped a sentiment from the Sprinkled With Joy stamp set in black ink. I cut it out with the coordinating Honey Cut die. I love popping up sentiments with the foam tape strips!!

I just think this Beach Bound Add-On is so adorable!! How cute are those eyelashes? Thank you so much for stopping by today! Have a wonderful day!

Thank you so much for using my affiliate links to shop (never any additional cost to you)!

Thursday, October 31, 2024

Thinking Of You Floral Card & Stenciled Background

Hello friends!  Today my card features the beautiful Graceful Magnolias stamps and dies by Picket Fence Studios!  Be sure to check out my reel by clicking the Instagram post in the left column.

First I stenciled my background using the Frame of Mind 6x8 Stencil and Huckleberry Blue Paper Glaze.  I only covered one upper and lower corner leaving open space on my A2 card layer.  I set it aside to dry and wash the stencil and tools.

I stamped the Graceful Magnolias flowers and sentiment with Copic safe ink and color them with my markers.  Then I cut them out with the coordinating dies.  

When the stenciled layer was dry, I smooshed my Prize Ribbon Distress Ink pad onto my craft mat, diluted it with water and splattered it onto the piece.

Next I glued the stenciled piece to a layer of coordinating blue cardstock.  Then I used foam tape to adhere the flowers, leaves, and sentiment to the card.

I added some pretty pearls from the Navy Blue & Charcoal Gray pearl mix.

This was a fun, and pretty easy, card to make!  Thanks so very much for stopping by!

Thank you for choosin g to use my affiliate links to shop (never any additional cost to you)!


Sunday, October 13, 2024

Happy Halloween, Friend!

 I'm over on the blog at Brass & Bliss today to share the details of my Halloween card that features the Jack O Lanterns stamps and coordinating dies.

I used patterned paper from the Spook-tacular paper pad to frame the stamped and Copic colored scene within the Nested Square die cut opening.  The tree stamp is in the Jack O Lantern stamp set.

I stamped the string of pumpkins and the other pumpkin images and colored them with my Copics.  The images are die cut with the coordinating Jack O Lantern dies.

There are five sentiments in the Jack O Lantern stamp set and I chose one to stamp and trim for my card.

I was so dismayed to discover some mysterious smudges on the patterned paper and actually tossed this in the trash!  However, after other attempts to save this card I ended up retrieving it from the trash.  I hid the smudges by creating the two frames you see on the card!  Two dies nested together from two set (Nested RC Squares and Classic Nested Rectangle dies) created the frames and saved the card!

Get lots more details and progress photos over on the Brass & Bliss blog.  Thank you so much for stopping by!

Tuesday, September 10, 2024

Joy To The World with Peaceful Christmas Flowers Stamps

Hi crafty friends!  Today I have this card as my featured reel on Instagram and thought I'd share a few details here!  I have featured the beautiful Peaceful Christmas Flowers stamps and coordinating dies on this holiday card.

I chose one of the three images from the Peaceful Christmas Flowers set and stamped it in black ink.  I stamped the berry sprig three times.  After I colored the stamped images with my Copic markers, I used the coordinating dies to cut them out.  I have the Copic marker colors listed at the end.

The images are popped up with foam tape onto a stenciled brick background.  This was made with the Brick and Mortar 6x8 Stencil and some Twinkle Lights Clear Paper Glaze.

I stamped the sentiment "Joy" that's in the Peaceful Christmas Flowers stamp set and cut it out with the coordinating die.  "To the world" is part of the Joy to the World stand-alone die set.  I adhered two layers of the die cut from black cardstock for more stability.

Of course, I thought this card needed lots of bling!  I added gems all around that are from the Starry Skies gem mix.

I love the wintery feel the texture paste background gives this card!  I hope you've been inspired a bit by my card.  Thank you for stopping by!

Copic markers used:  BG90, BG93, R59, R46, R17, G28, YG67, YG17, YG25, YG23, YG21, YG03

I know you have many shopping options, and I thank you so much for using my affiliate links to shop (never any additional cost to you)!

Wednesday, August 7, 2024

Beach Themed Clear Acetate Card

Hello crafty friends! Have you ever made a card with a clear acetate base? Today I'm sharing how I made my clear acetate card featuring the beautiful Anchor of Hope stamps and coordinating dies!

I began by assembling the elements for the clear card base. First I stamped the image from the Anchor of Hope stamp set with Copic marker safe black ink. Then I used Copic markers to color it. Next I cut it out with the coordinating Anchor of Hope die. I die cut white cardstock with the same shell die three more times.

I chose a very light shade of coral cardstock and die cut the Netting A2 Cover Plate from it twice.

Next I stamped two sentiment from the Anchor of Hope stamp set in a coral color ink. I cut them out with the coordinating dies.

The card base is one of these pre-folded acetate A2 cards. First I added tiny drops of glue to the back of one of the A2 Netting die cuts. I placed it at an angle on the acetate card base and then trimmed off the overhang. Next I added dots of glue to the front of the other Netting die cut. I adhered this on the front inside of the card making sure to line it up with the Netting on the front. Again, I trimmed off the excess.

Next I glued the Copic colored shell image to the front. Then I glued another of the white shell die cuts on the inside back. To easily line up the shell die cut on the inside (to use for your message), add a bit of removable adhesive to the inside front shell. Next, place another shell die cut on this, face down. Add glue to the back of the shell and close the back acetate over it. Allow plenty of drying time and open the card, using an adhesive eraser to take off the temporary adhesive.

Here's a photo of the inside for a visual of the above directions. I glued the last shell die cut on the back of the card to hide the glue.

I used glue to adhere both of the sentiments to the front of the card.

I added a bit of sparkle with a Wink of Stella pen and some gems from the Grab Your Passport gem stickers.

This is really an easy card to make, and I hope I've inspired you to give it a try! If you have any questions, please be sure to drop it in the comments. Thank you for stopping by!

Thank you so much for using my affiliate links to shop (never any additional cost to you)!

Thursday, July 25, 2024

Sending Autumn Blessings

Hello crafty friends!  Today I'm sharing this card that I made with some new sets from the Picket Fence Studios Fall Into Autumn release that's now available!  My card features the beautiful Sweet Autumn Holiday stamps and coordinating dies.

Check out my Instagram to see the reel where I'm sharing the card making process!

I started first by creating my background with the Sprinkles 6x8 Layering Stencil Set (set of five stencils).  I used Blender Brushes to add Distress Oxide Inks through three of the stencils.  The colors used are Mustard Seed, Wilted Violet, Ripe Persimmon.

Next I added some of the new Paper Glaze colors.  First I spread Agapanthus Purple glaze through another Sprinkles stencil.  I let that dry and then added Marigold Orange and Daffodil Yellow glazes through the remaining stencil.  I cleaned the tools and set the panel aside to dry.

Next I stamped the images and sentiments from the new Sweet Autumn Holiday stamp set with black hybrid ink.  I colored these with my Copic markers.  I used these colors: V09, V17, V06, V12, YR18, YR07, YR04, E57, E58, 0, YG17, YG25, YG03, Y15, Y11, Y00.  Then I cut them out with the coordinating Sweet Autumn Holiday dies.  

After I trimmed the stenciled Sprinkles piece to 4" x 5-¼", I glued it to a coordinating purple layer, and then to an A2 card base.  I adhered the Sweet Autumn Holiday images and sentiments with foam tape.

I added some sparkle by choosing the purple sequins from the A Bird's Feathers sequin mix.

I hope you'll check out the rest of this awesome release over on Picket Fence's website.  Thanks so very much for stopping by!

Thank you for using my affiliate links to shop (never any additional cost to you)!

Wednesday, June 26, 2024

Because Of The Brave, We Celebrate!

Hello friends! It's officially summer and it sure feels like it here in Texas!! Our first summer holiday is next week, and I thought it was a great time to pull out Honey Bee Stamps' awesome Big Pickup: Americana Add-on and use it with our much loved Big Pickup Tailgate stamps and dies!  This is just one of several awesome products in the Sunkissed Summer release that is perfect for celebrating our heroes!

First I stamped the Big Pickup Tailgate stamp and a few images from the Big Pickup: Americana Add-on set with Intense Black ink onto 80# Neenah. I also stamped the most adorable dog that is in the Loads of Fall Add-on. I colored the images with Copic markers. Here is a list of the markers I used:

  • Truck: R59, R46, R35
  • Blues: B39, B37, B26, B16
  • Dog: E55, E23, E53, E51, E50
  • Grays: C9, C7, C5, C3, C1, C00; N9, N8, N7

When I finished coloring, I die cut all of the images with the coordinating dies.  I forgot to stamp the license plate and chose the sentiment "blessed" from the Tailgate stamp set.  I think it's perfect because I feel blessed to be born in our great country!

To make the shaped card base, I cut a sheet of 80# Neenah to 5" x 9". I scored it at 4-½". Then I placed the Big Pickup: Tailgate die onto the folded card with the top edge just off of the folded edge. I ran it through my die cutting machine. Then I glued the colored Big Pickup: Tailgate to the card.

To make the multi-colored fireworks with the stamp from the Americana Add-on I placed white cardstock into my MISTI. Then I used a blue and red watercolor marker to color directly onto the stamp. After stamping it down, I repeated the steps several times to get the coverage I liked. Then I swiped a clear sparkle pen over the stamp to add a bit of sparkle. I repeated this a few times until I was happy with it. I know the photos don't show the sparkle, but it is there, I promise!

I used glue and foam dots to adhere all of the elements to the truck. Then I used a white gel pen to add detailing to the tires and tail lights.

Next I stamped a sentiment from the Because of The Brave stamp set with red ink and cut it out with the coordinating die. I glued this on the inside of the card.

I added a few gems from the Americana Gem stickers for a bit more sparkle!

I love the Big Pickup series and this new Americana Add-on is just fantastic!  Thanks so much for stopping by.  Have a wonderful and crafty day!

Thank you for using my affiliate links to shop (never any additional cost to you)!