Showing posts with label Color Fuse inks. Show all posts

Sunday, December 22, 2024

Quick and Easy Holiday Gifts Tags

Three days until Christmas!  Hello, crafty friends!  If you need some quick and easy coordinating gift tags, I have just the plan for you.  As we are all short on time, I will direct you to the blog at Brass & Bliss for all of the details.

I love how these turned out, and seriously, I made these 6 tags in about an hour or so!

I'm just going to share a list of the products I've used, as I still have LOTS of wrapping to do today!  Can you relate?  LOL!

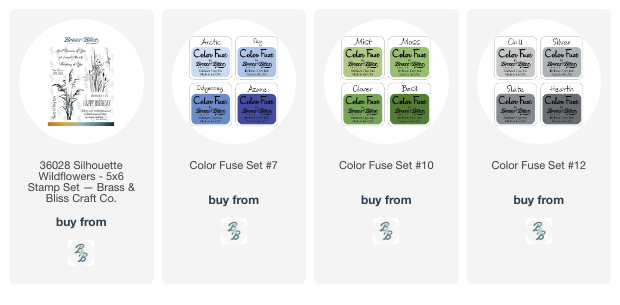
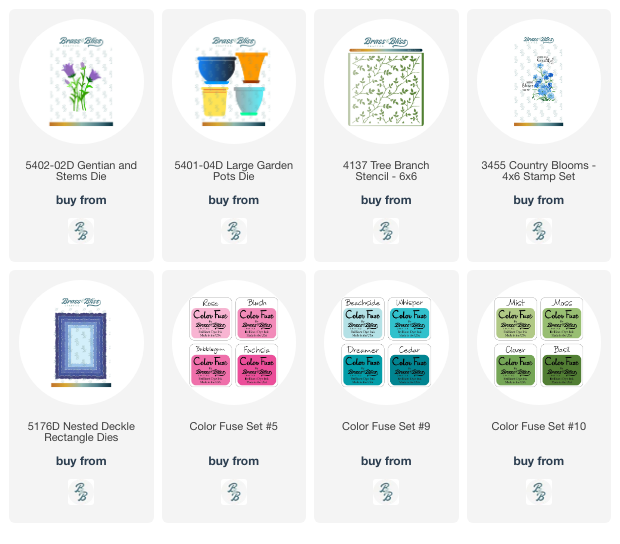
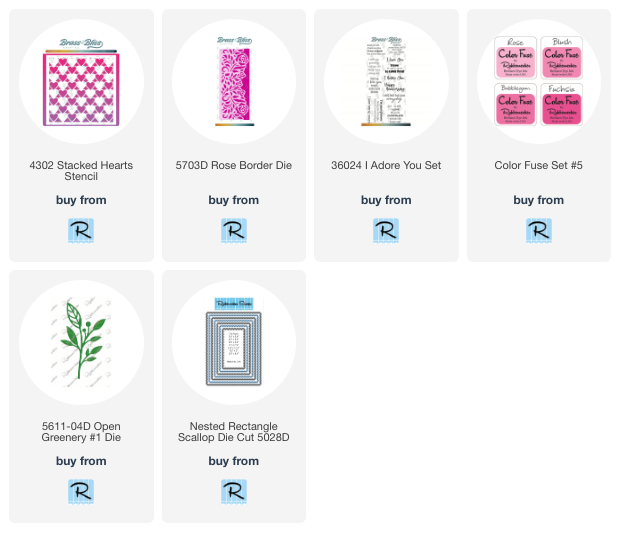
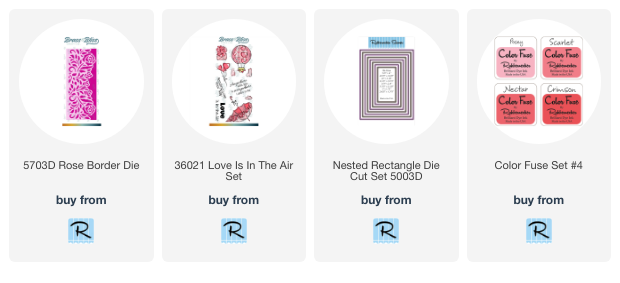
These products are all available over at the Brass & Bliss website:

 Holiday Tags Die

 Holly and Berry Stencils

Crimson ink (Color Fuse Set #4)

36010 Winter Wreath stamp set

Moss ink, Basil ink (Color Fuse #10)

I really hope you will join me over on the blog at Brass & Bliss for all of the process photos with lots more details!

I always so appreciate you stopping by!

Sunday, November 24, 2024

Thanks For Always Being So Wonderful

Happy Sunday!  I'm over on the Brass & Bliss Craft Co. blog today to share my card featuring the new, and so beautiful, Wildflowers in the Breeze layering stamp set.

The card base is A2 size and layered with an embossed panel.  I dry embossed the Flourish stencil by using my tan rubber mat according to the directions for embossing with my die cutting machine.

I stamped the layers of the Wildflowers in the Breeze stamp set with Color Fuse inks.  Then I die cut the panel with one of the Nested Deckle Rectangle dies.

Before I popped the panel up with foam tape, I used the Flourish stencil again with blue ink.  I used a very light hand so that the stenciling wouldn't distract from the stamped image.

The sentiment is from the Thank you stamps and dies set and stamped with black ink.  Then I cut it out with the coordinating die.

Please join me on the Brass & Bliss blog for even more details and process photos!  Thanks so very much for stopping by!

Sunday, November 10, 2024

Quick and Easy Stenciled Thank You Card

Hello crafty friends!  I love making quick and easy thank you cards in bright and cheerful colors!  I'm sharing all of the complete details of this card over on the Brass & Bliss blog today.

The stenciled layer uses the pretty Fall Flourish stencil set.  It includes three layering stencils that you use to create your background.

I love how in spite of the name "Fall Flourish" this set can absolutely be used for any season!  I only had to use four ink colors!  I used these colors from the Color Fuse ink line:  Dreamer, Grass, Juniper, and Pecan.

Next I've used the new Thank You Die set.  I inked up white cardstock with the teal ink and die cut the top layer of the Thank You die set.  I cut it twice more from white cardstock and glued the layers together.  I love dies that have a shadow layer as it helps the sentiment stand out from a more busy background!

This was really that easy!  If you would like to see lots of step-by-step photos and directions, join me over on the Brass & Bliss blog.  Thank you so much for stopping by!

Sunday, September 22, 2024

Autumn Grateful For Your Friendship Card

Happy Sunday!!  I'm over on the Brass & Bliss blog today to share all of the details to make this card featuring the new and so beautiful Fall Mushroom Bouquet Die Set and the Nested Woodgrain Sign Die.

I used several different colored cardstock scraps (most in the links below) to die cut the elements in the Fall Mushroom Bouquet Die set.

I really like the new Nested Woodgrain Sign Die and can think of many different ways to use it!  I added some brown ink to shade the brown cardstock after I die cut the sign.

I heat embossed the sentiment from the Kittie Says Friends stamp set in gold for some pretty shine!

Thanks for stopping by and if you'd like all of the details, please stop by the blog at Brass & Bliss!

Thanks so much for using my affiliate links to shop (never any additional cost to you)!

Sunday, July 28, 2024

A Hollies and Berries Filled Holiday Card

Happy Sunday friends!  Today I'm sharing this Christmas card I made with some products from Brass & Bliss's Holly Jolly release.  This is a cheerful and fun card made with the Hollies and Berries stencils.  Check all of the details on Brass & Bliss's blog.


 I used some Color Fuse inks to color the Hollies and Berries leaves.  Next I spread some very pretty Barn Door Stencil Butter through the berries stencil.  I you want this card to be extra fast to make, just use your favorite red ink for that step!

The sentiment is the Merry Christmas w/Shadow Die.  I really like the font of this sentiment!  A vellum layer behind the sentiment mutes the background just a bit and helps the sentiment to stand out.

Please join me over on the Brass & Bliss blog for all of the specific details to make this cheerful Christmas card.  I hope you have a wonderful week ahead with lots of crafty fun too!

Sunday, July 14, 2024

Easy-To-Make Heat Embossed Holiday Card

Happy Sunday friends!  Today I am over on the Brass & Bliss blog to share with you this beautiful, and easy-to-make, holiday card.

This card features just a few products that make it an easy to mass produce card!  The gorgeous background is the Snowflake Frame With Sentiment stamp.  Can you believe that is the only stamp used?!  The other supplies are dark blue cardstock, Sapphire ink for inking the edges, Versamark ink, silver embossing powder, and black ink just around the edges for more depth.

The sentiment from the set was also heat embossed in silver and trimmed out with scissors.  A few silver metallic gems adds even more sparkle!

Come join me over on the Brass & Bliss blog for even more details!  Have a wonderful day!

Sunday, June 23, 2024

I Love You More Than Coffee...

I'm on a roll with the masculine cards lately, haha!  Today's fun card features Brass & Bliss' Mix and Match Coffee Cups die set with the Boats and Waves Stencil.  Patterned paper from the Life Upon The Sea paper pad gave me instant color too!  All of the detailed directions to make this card are over on the Brass & Bliss blog.

I die cut blue paper from the Life Upon The Sea with the Nested Rectangle die first.  Then I added texture paste through the Boats and Waves stencil and set it aside to dry.

I pulled out that paper crimper I've had forever to crimp the sleeve for the coffee cup made from more paper in the Life Upon The Sea paper pad.  The Mix and Match Coffee Cup dies have a variety of styles of cups to choose from.

I stamped a sentiment from the Let's Meet For Coffee set in Cinnamon ink for a coordinated look.

Be sure to click over the the Brass & Bliss blog to see process photos and more details!  Thanks so much for stopping by!

Thank you for using my affiliate links to shop (never any additional cost to you)!

Sunday, May 26, 2024

Easy Stenciled Father's Day Card With a Nautical Theme

Happy Sunday friends!  Today I'm over on the Brass & Bliss blog to share all of the details of this Father's Day card where I used scrap paper masks to create a more unique stenciled look!

The new Boats and Waves stencil is part of their new Tropical Dreams release.  I colored through the stencil with the small Detail Blending Brushes and Color Fuse inks.

I stenciled a few extra sailboats and cut them out with my scissors to use as embellishments.

The sentiment is from the Father's Day stamp set.  This set has several sentiments to choose from to personalize your Father's Day cards!

The only die cutting is done with some Nested RC Square dies for the sentiment and the layer.

I hope you'll join me over on the Brass & Bliss blog for all of the details and photos of my stenciling process.  Thank you so much for stopping by!  Have a wonderful day!

Thank you for using my affiliate links to shop (never any additional cost to you)!

Sunday, May 12, 2024

Just A Note To Say Hello!

 Happy Sunday, and happy Mother's Day to all celebrating!  It's a short post today to let you know I'm up on the Brass and Bliss blog with my sweet card featuring their Always Peony stamps, stencils and dies.  Please join me over there for all of the specific details!

I started out with their Tree Branch Stencil to create a soft background layer for the card base.

I used their new Large Blending brushes and Small Detail brushes with all of the stencils today.  It's great to have another source for ink blending brushes!

I love that the Always Peony set has coordinating stencils to make coloring the beautiful flowers so easy!  After using the blending brushes to color the images, I cut them out with the Always Peony dies.

Check out more details over on the Brass and Bliss blog!  Have a beautiful day!

Thank you for shopping with my affiliate links (never any additional cost to you)!

Sunday, April 28, 2024

Your Smile Brightens My Day!

 Today I'm over on the Brass & Bliss Craft Co. blog to share all of the details of my card using the beautiful new Flowers and Vases Set.  (Edit:  B&B had a computer crash, so my post there will be up asap!)

If you would like the detailed step-by-step directions to make this card, please join me over on their Blog!

There are three other lovely vases with flowers to choose in the Flowers and Vases set.  I used my Copic markers to color the image.

If you know me, you will know that I love using stencils with texture paste!  The Repeating Bricks stencil set makes a beautiful frame around the image.  There is a stencil with the brick texture (inked first with gray ink) and an open brick stencil.  I was surprised at how well the inked texture shows after I added the texture paste!  The Rectangle Mask was used to mask off first the image, and after all was dry, the frame.

After stamping one of the three sentiments from the Flowers and Vases set, I trimmed it into a strip and adhered it with foam strips.

I really love how this card turned out!!  Adding the textured brick frame really steps up the interest of this card.  Thanks so much for stopping by today!

Thank you for shopping with my affiliate links (never any additional cost to you)!


Sunday, March 24, 2024

Thinking Of You -- Masking, Ink Blending, & Heat Embossing

Hello crafty friends!  Today I'm sharing my card that features Brass & Bliss Craft Co.'s new Silhouette Wildflowers set.  This card was quick and easy and all you need are inks and just that stamp set!

I really enjoyed this masking process!  I have all of the step-by-step details and photos over on the Brass & Bliss blog.

I die cut a circle from masking tape and positioned it along with two more strips of masking tape on my card front layer.  Then I used ink blending brushes to add the blue and green inks.

I removed the moon mask and carefully added dabs of gray ink for definition in the moon.  Before I removed the other masking tape strips, I added splatters of metallic white watercolor.

After I made sure the ink was completely dry, I treated the piece with my anti-static tool and then stamped the Silhouette Wildflowers image and sentiment from the set with black pigment ink.  Then I sprinkled on black embossing powder and heat set it.

I created a coordinating layer for the main layer by swiping Azure ink along the edges of white cardstock.

And that's it!  I love how this card turned out.  The sentiment is perfect to use for a card to send as a sympathy card or to someone going through a hard time.

Be sure to check out the seven other sentiments in beautiful fonts included in the Silhouette Wildflowers set.  Several occasions are covered for versatility in our card making!  Thanks so very much for stopping by today!

Thank you for shopping with my affiliate links (never any additional cost to you)!

Sunday, March 10, 2024

Wishing You A Beautiful Day

Hello friends!  Today I'm over on the Brass & Bliss Craft Co. blog (formerly Rubbernecker Stamps) with my card featuring their Gentian Blooms dies with the Tree Branch stencil.  The Brass & Bliss Craft Co. website went live last week and it's a new improved and lovely site--be sure to check out the products, including the latest release!

All of my card details are on the Brass & Bliss Craft Co. blog.  Please click HERE to check it out!  After I die cut and colored the Gentian flowers I added them to one of the four flower pots from the Large Garden Pot die set.  I used small ink blending brushes and Color Fuse ink sets #5, 9, and 10.  I die cut it with a Deckle Rectangle die before adhering it to my A2 card base.

The stenciled background is the Tree Branch stencil colored with the Color Fuse ink set #10.

I chose a sentiment from the Country Blooms set and hand trimmed it.  The flower pot is adhered with glue to a deckle cut rectangle piece of vellum.  I added foam tape to the back of the vellum to pop it up.

I have many more details and photos over on the Brass & Bliss blog, and I hope you will join me there!  Thanks so much for stopping by!

Thank you so much for shopping with my affiliate links (never any additional cost to you)!

Sunday, February 25, 2024

I'm Yours Forever (No Exchanges)

Happy Sunday crafty friends!  Today I'm over on the blog at Brass & Bliss Craft Co. with all of the details of my card featuring the Rose Border die.  I thought it was really funny to add a snarky sentiment to this elegant card!  Haha!  It would be perfect for Valentine's Day or for an anniversary.  I plan on giving it to my husband and can't wait to see his reaction to the sentiment!! LOL!

I'm just hitting the highlights here, so be sure to head over to the Brass & Bliss blog for all of the steps to make this fun card.  I layered the Rose Border die after coloring each piece to make an ombre border.

The background panel is white on white with texture paste added through the Stacked Hearts Stencil.

I added a pink mat layer behind the sentiment from the I Adore You stamp set.  Both pieces are die cut with a rectangle scalloped die.

Before adhering the sentiment with foam tape I added two vellum Open Greenery die cuts.

Thank you so much for stopping by!  I hope you have a wonderful week!

Thank you so much for shopping with my affiliate links (never any additional cost to you)!

Sunday, February 11, 2024

Die Cut Rose Border Gatefold Card

 Hello crafty friends!  I'm happy to share my card featuring Brass & Bliss Craft Company's (formerly Rubbernecker Stamps) Rose Border die.  (Note: All products are listed on the Rubbernecker shop site until the Brass & Bliss site launches in March.)

I have all of the "how to make this card" details over on the Brass & Bliss blog today.  If you would like the specific instructions, please join me there.

After I die cut the gatefold sides of the card, I used the fabulous Paper Pouncers to add Posey, Scarlet, and Crimson ink to the die cuts.  These Pouncers really make coloring intricate die cuts a snap!

I stamped a sentiment and some extras from the Love Is In The Air stamp set on the card inside too!

Thanks so very much for stopping by!  I hope you'll join me over on the Brass & Bliss blog for all of the details.

Thank you for shopping with my affiliate links (never any additional cost to you)!