Showing posts with label interactive card. Show all posts

Wednesday, December 11, 2024

Santa Is Coming Down The Chimney Holiday Card

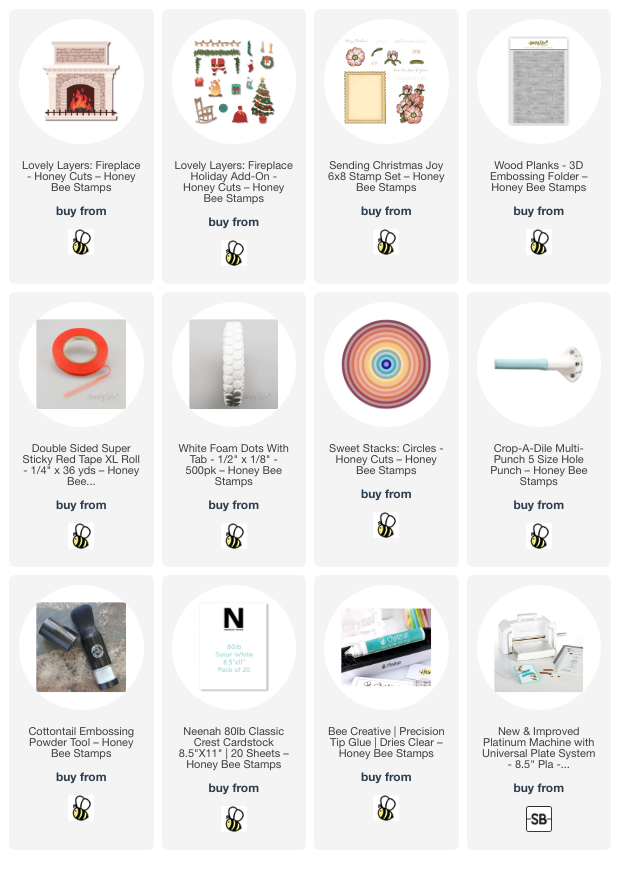
 Hello crafty friends! Today I'm sharing my interactive card featuring Honey Bee Stamps' Lovely Layers: Fireplace with the Lovely Layers: Fireplace Add-On Honey Cuts. Santa is swinging on down the fireplace in this cute scene! I love these sets because I can create any color of theme and also use the "fire" dies for the fireplace too!

I first created my 5" x 7" card base and added a white cardstock layer that I embossed with the Wood Planks 3D embossing folder. I trimmed 1-¼" off of the bottom before adhering it to the card with glue. I stamped the sentiment from the Sending Christmas Joy stamp set onto a 1-¼" x 5" strip of white cardstock in black pigment ink. I adhered this to the bottom of the card and glued on a strip of dark gray cardstock just above it.

Next I die cut the Lovely Layers: Fireplace dies from three shades of gray cardstock. I used the Layering Guide to help me in assembling the fireplace layers with glue. I did not adhere the inner fireplace brick piece at this time.

Then I die cut the desired pieces from the Lovely Layers: Fireplace Holiday Add-On from green, red, white, brown, and black cardstock. I, again, referred to the Layering Guide as I glued the pieces together. I added some sparkle to the lights with a clear glitter pen.

Next I worked on the interactive portion of the card. I will do my best to explain it here, but I will have a reel posted over on my Instagram soon where you will get a visual of how I made this. Here are the steps for the interactive portion:

  • Using the completed fireplace as a guide, I used a pencil to trace the opening onto the card.
  • Then I adhered a piece of dark gray cardstock that is larger than the tracing.
  • Still using the fireplace as a guide, I added glue to the back of the brick insert and glued it to the dark gray piece.
  • Next you will need a circular, dimension piece for the swinging portion. You can use a penny, or die cut/punch several small circles (no larger than ¼" and adhere them together. It just needs to have a bit of height for the Santa to swing.
  • First cut a strip of cardstock that is a bit wider than your chosen circular piece and is about 1" to 1-½" long.
  • Adhere your dimensional circle to the card with a small piece of strong double-sided tape. Then I used my anti-static tool on the adhesive that is around my dimensional circle so that the Santa piece will not stick to it.
  • Now you will need to trim a piece of cardstock that is a bit wider than your dimensional circle and about an inch or so long. Punch a hole that's a bit wider than your dimensional circle near the top of the strip.
  • Glue this strip to the back of the Santa.
  • I placed a piece of removable tape onto the front of the Santa and fireplace to hold him in place.
  • Then I added thick foam dots to the back of the fireplace to adhere to the card and removed the temporary tape.

I finished up the card by placing the other elements of the scene around the fireplace. I used glue and more thick foam dots to adhere them.

If I decide to mail this card I will used a padded envelope. It will be a bit more postage but I think this card is worth it!! If you have any questions about how to make this fun swinging Santa card, please leave me use the "contact me" form in the left column, and I will be happy to help.

Thank you so much for stopping by today! Have a wonderful day!

Thank you for using my affiliate links to shop (never any additional cost to you)!
Saturday, September 12, 2020

Espresso My Gratitude--Pink & Main with Pear Blossom Press Blog Hop

 Hello friends!  I'm so happy to be part of the Pear Blossom Press and Pink & Main collaboration blog hop!  We are creating fun and interactive projects with some awesome stamps and dies from Pink & Main and the so easy to use EZ-Lights from Pear Blossom Press!

I used the Pear Blossom Press EZ-Lights to create a fun card that lights up the sparkles on the whipped cream topping!  The Pink & Main Need To Venti set is awesome for all of your coffee cards!


Read on for the details to make this fun card!

I began by making my card base.  I added some brown card stock to an A2 card base.  I trimmed a piece of patterned paper (all supplies are listed below) to 4" x 5-¼" and adhered it to the card base.

I stamped the leaves and the acorn several times.  Then I die cut them out with the coordinating dies.  I added Glossy Accents to the acorn tops and set them aside to dry.

Next I created the panel for my lights and images.  I used another piece of the brown card stock trimmed to 4" x 2-½" and added a piece of 4" x 2" patterned paper.

I stamped two leafy cups from Pink & Main's Need to Venti set in Copic safe ink.  I colored one of the cups with my markers.  The colors I used are:  YG97, YG95, YG93, YR27, YR24, YR21, B39, B37, and B23.  I used the coordinating die to cut it out.  I fussy cut the whipped cream from the second cup.  Then I stamped the sentiment from the Need To Venti set with Versamark and and heat embossed it with brown embossing powder.  I adhered the cup to the panel and punched holes for the lights with a 1/8" hole punch.  Then I planned where to place the battery pack of the EZ-Light set from Pear Blossom Press.  I adhered the battery pack with double sided tape.  Next I positioned the wires and lights and kept it all in place with pieces of washi tape.  


I added a double layer of 2mm foam tape to the panel and adhered it to the card front.  I added some small pieces of foam tape to the other whipped cream, making sure I didn't cover the holes and added it to the cup.  I glued the leaves and acorns along the bottom of the panel.  For a bit of bling, I added some chunky glitter to the whipped cream.


Thank you so much for hopping along with us!  For more awesome inspiration, check out all of the stops in the hop and leave a sweet comment along the way!

Here's the full hop list:

Carol Hintermeier <---that's me!

Supplies:

Monday, June 8, 2020

Birthday Cake Twist Set with No-line Coloring | Art Impressions

Happy Monday friends!  Well, I went WAY outside my comfort zone to create this card using the beautiful Cake Twist Set by doing some no-line coloring!


I created my A2 card and added some patterned paper that I die cut with a die from the Rectangle Double Stitched die set.  Then I die cut the Twist Frame Die on the card front.  I stamped the cake images onto Neenah Solar White 80# card stock in some light colored ink.  While you can still see the stamped images, the lines disappear and blend into your colors.  My Copic colors are listed below.  When I finished coloring, I die cut the cakes with the dies included with the stamp set.  I also added some Ripened Pumpkin Nuvo Crystal Drops to the flower centers and clear sparkle to the cake icing.


It's so cool how the two cake images are mirror images!  All you need to do next is to adhere them back to back.  It's very easy to now slip it into the die cut frame.


I stamped the sentiment and trimmed it into a banner shape along with a yellow banner-shaped layer.  I adhered the banners and popped it up with some foam tape.  Add in a few yellow enamel dots, and I'm done!


I like how this turned out--what do you think?  Thank you so much for stopping by today!  Have a fabulous and crafty week!


Copic markers:
C00, C1, C3, E29, E27, E25,
YG67, YG17, YG25, YG23, YG03, YG01,

Wednesday, March 18, 2020

Pear Blossom Press EZ-Light Blog Hop | Lighting Up the Treat Shop!


Hello friends!  I'm so happy to be joining so many awesome crafters for the Pear Blossom Press Light-Up Card Hop with EZ-Lights.  Trust me when I say, "You will be using these all the time once you see how EZ they are to assemble!"  There are prizes for commenters too!  You will need to visit each stop and comment for your chance.  Please see the complete list of hoppers and prize information at the end of this post.


I have lots of photos for you, so on to the fun part!  I have always been impressed by the light up cards I've seen; however, I've been totally intimidated by trying to make one.  The EZ-Lights really are SO easy to use.


Check out these COOL lights!!!


I used the Honey Bee Stamps Treat Shop Add-On set that coordinates with their House Builder dies for my card.  (Links to all products are below.)  I created my card base from the House Builder dies.  I die cut one more house to use all of my elements on and to add the EZ-Lights to.

Next I have some photos of my assembly.   The top left is a photo of the back of the top layer showing how I laid out the unit and situated the wires, taping them down as I went along.  The next photo show how I used a small hole punch to make a hole for the umbrella light to stick through before adhering the roof .  The bottom right photo shows the foam tape (doubled up) and the Scar-Tape I used on the battery pack.   Finally, CHECK the lights before adhering it to your card base!!


After I had the top layer adhered to my card base, I could finish up with the cute little details to complete my treat shop!  So the recipient knows this is an interactive card, I stamped "press" onto the shrub on the left.


I don't really do videos, but I here's a short one that I hope works!  Haha!


I'm so glad you stopped by for a look, and I hope I've given you some inspiration to give these AWESOME EZ-Lights a try!  Be sure to go to  each stop and comment along the way for your chance to win!  See the prize information below this list.

Carol<<that's me!
Tanna<<your next stop

Now, who wants to win an awesome prize from Pear Blossom Press?  Two prizes will be awarded to two separate winners, chosen at random, from comments left on participating blogs and videos.  No purchase is necessary to win.  Comments must the posted by 11:59 p.m. PST on March 25, 2020.  Only one comment per blog or video will be counted, but you can comment on multiple blogs and videos in the hop for additional entries. (This is to prevent spam.)  Contest is open internationally to participants over 18 years of age.  Void where prohibited by law.  Any personal information collected will only be used for the purposes of contacting winners, your information will never be shared or sold.  Comments left on YouTube videos must not violate community guidelines.  This contest is not sponsored by YouTube.  Winners will be announced on April 1, 2020 at pearblossompress.com and prizes must be claimed within 30 days of announcement, or new winners will be drawn.

Supplies:
Distress Oxide inks:  Cracked Pistachio, Evergreen Bough

Honey Bee Stamps products:

Thursday, February 20, 2020

New Easter Twist Set & Challenge | Art Impressions

Hello my friends!  Have you seen the new interactive Twist Sets by Art Impressions?  There are eight adorable sets, including the Easter Twist Set I've used for my card today.  These sets are so fun and cute!  There are included dies to cut them out and they swivel, or twist, in the frame!


These sets come with stamps for both sides of the twisting element along with the dies to cut it out.  You will need the Twist Frame Die, sold separately.  This is a very easy and quick card to make!  I started with an A2 card base cut with a Scallop A2 die.  Leave the top edge of the card just below the cut line to get this cute scalloped-edged card.  I die cut some patterned paper with a Rectangle A2 Double Stitched die and adhered it to the card base.  I opened the card base and positioned the Twist Frame Die in the center and ran it through my die cutting machine.  For the white frame around the die I cut the frame from a piece of white card stock.  Then, leaving the die in place, trace around the outside of the die with a pencil and fussy cut it.  Adhere it in place around the opening.

Next I stamped the images in Copic safe ink and colored the bunny images with a few markers listed below.  I also stamped the egg portion of the images onto some patterned paper.  It was easy to fussy cut around the egg.  To give your fussy cutting a finished look, be sure to use a black marker to go around the edges.  I like to use a Tuxedo Black Memento Dual Marker.  Adhere the patterned eggs to the images. 


I do like to share what I've learned from my oopsies so hopefully it will help you!  I always save larger scraps of card stock to use.  I had a couple scrap pieces that the images fit onto when stamped.  Well......oops!  I didn't plan on room for the dies!  I made it work by die cutting these, then trimming off the top and bottom tabs.  I die cut one more from plain card stock and adhered them to the front and back.  It all worked out just fine!  My motto is to always try to find a way to fix it!


To finish up, I stamped the sentiment with Versafine Onyx Black ink and die cut it out with a die from the Tag Stitched Dies set.  I die cut two more from the patterned paper and layered all three together.  (Tip:  I had a silver brad and tapped it into my Versamark ink pad and dipped it into some pink embossing powder.  Heat set it, and while it's still hot, dip it into the powder and heat it again.  Repeat until you like the look!  I popped it up with a couple of foam squares.

I added some sparkle in the white stripes to both sides of the egg with a clear sparkle pen.  (I recently ordered and received these from Scrapbook.com and really like them.  These pens are equal to others and are at a great price point.)  I used a white gel pen to add dots to the eggs.  This photo will give you an idea of what the card looks like standing up.


Thank you for stopping by!  I sure hope to see your entry in the Movers and Shakers Challenge!  Stay crafty!


Copic markers:
C1, C0, RV11, RV21, W3, W1, W0

Supplies:

Thursday, May 2, 2019

Workout Gal Wheelie--Week 2 Interactive Cards Challenge!

Hello friends!  It's week two of Art Impressions Interactive Card challenge!  My card today features the new to the Ai shop Workout Gal Wheelie!

Working out, putting on makeup, and a glass of wine--sounds like a fabulous work out, right?!!  This is such a fun card and the wheel actually turns with a tab on the inside of the card!  I couldn't decide on what colors to use, so I looked through my pattern paper packs and found one that had some colors I thought would work.  Do you ever do that?


To get started, I stamped all the images with a Copic safe ink and colored all the pieces and parts.  I've listed my marker colors below.  Die cut the extra pieces with the included dies.  I followed the directions on the package and also watched THIS video where Kate shows exactly how to put this together.  I'm such a visual learner and found the video very helpful!

Here are photos of a few of my steps.  Click on the photo to see it larger.  Starting with the top left photo, the description is:
  1. After positioning the layer beneath the stamped image, trace the circle that was die cut in the wheel.
  2. Tape the ¼" die onto the aqua layer, centering over the pencil line and die cut.  Also, I don't have round foam dots so I took a square one, taped the die on it and die cut a circle!  
  3. I added some thin foam tape to the back of the stamped panel for some dimension, then adhered it to the aqua layer
  4. After I layered the patterned paper and aqua layer and then adhered it to the card base, I again traced the circle opening.  Then use the circle die to cut the opening.
  5. This last photo shows how the foam dot I die cut fits perfectly in the opening!  To finished with the turning tab, just follow the package directions.


When I was adding the included white brads, I didn't care for the white showing so much.  I took a coordinating Copic marker and colored it so it blends in some.  Much better I think!


For the sentiment, I stamped it and then cut it out with one of the Flag Double Stitched dies.  I cut it twice more with coordinating paper from the paper pad.  I used the Tiny Attacher to staple them together.  I also, very carefully, colored the staple with a pink Copic.  Finally, I added Diamond Glaze to her sunglasses and wine glass.


I hope you will join in our Interactive Card challenge!  Click HERE to go to Art Impressions blog for the details.  Thank you so much for stopping by!


Copic markers:
Clothing/towel:  RV11, RV32, RV34, BG11, BG32, BG34, BG49, C0, C0, C01, C03, 0
Skin/makeup:  BG01, R11, R20, RV04, RV13, E000, E00, E13
Hair:  E33, E39, E99
Bicycle:  BG49, BG34, C3, C5, C7
Wine glass: R37, R39, C0, C1
Wheel:  C0, C1, C3, C5, C7, BG34, BG32

Supplies: