Showing posts with label Easter card. Show all posts

Thursday, January 30, 2025

A Very Happy Easter To You! featuring Hoppy Poppy

Hello friends!  Yes, today I have an Easter card!  Picket Fence Studios' January release is filled with flowers, bunnies, and gardens perfect for your springtime card making!

Please note:  I have all available supplies, with links, in the list below.

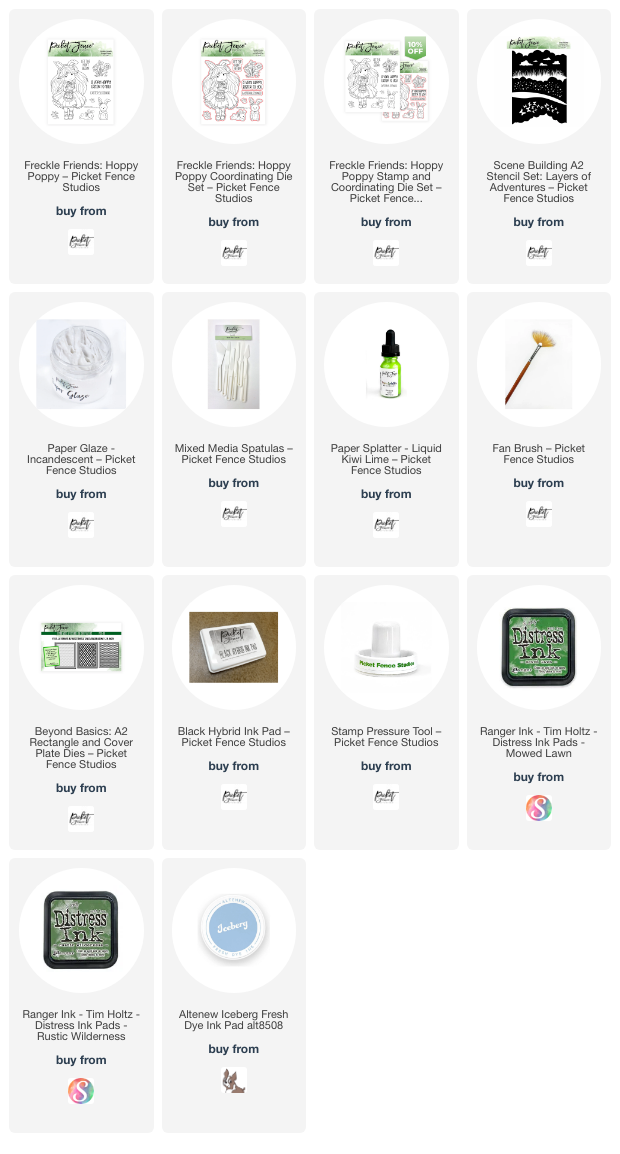
First I created a fun stenciled scene for my card featuring Freckle Friends: Hoppy Poppy.  I used the stencils in the  Scene Building A2 Stencil Set: Layers of Adventure.

I began by blending on two shades of green inks with blending brushes and the Layers Of Adventure stencils.  Then I blended the blue clouds in the sky.

Next I masked off the sky portion of the background to add some shimmery splatters to the grass.  I diluted a few drops of Kiwi Lime Paper Splatter with water and used a fan brush to splatter the mixture onto the card.

Another stencil in this set has clouds and I added the Incandescent Paper Glaze through the stencil and set it aside to dry.

Next I stamped the images from the Hoppy Poppy stamp set with Black Hybrid Ink and colored them with my Copic markers.  I cut them out with the coordinating dies.

I trimmed the dry stenciled panel with a die from the Beyond Basics: A2 Rectangle & Cover Dies set.  I used glue to adhere it to my A2 card base.

The other images and sentiment are popped up with foam tape.  I added a few highlights to the girls dress and shoes with a white gel pen.

The shimmer and shine that the Kiwi Lime Paper Splatter and the Incandescent Paper Glaze gives is SO pretty!  These are wonderful products and I hope you will check them out by clicking the links in the list below.

Thank you for stopping by today!  I hope it's a good one for you!

Thanks so very much for using my affiliate links to shop (never any additional cost to you!)
Wednesday, March 15, 2023

Pretty Pink Posh New Release -- Easter Card Stenciling Fun!

Hi crafty friends!  I'm so thrilled to be a Guest Designer for Pretty Pink Posh's March release!  There are so many beautiful new stamps, dies, and stencils from Easter themed to all the spring time flowers!

There's also an Instagram hop happening with prizes too!  Be sure to click here to join and leave a comment for a chance to win!

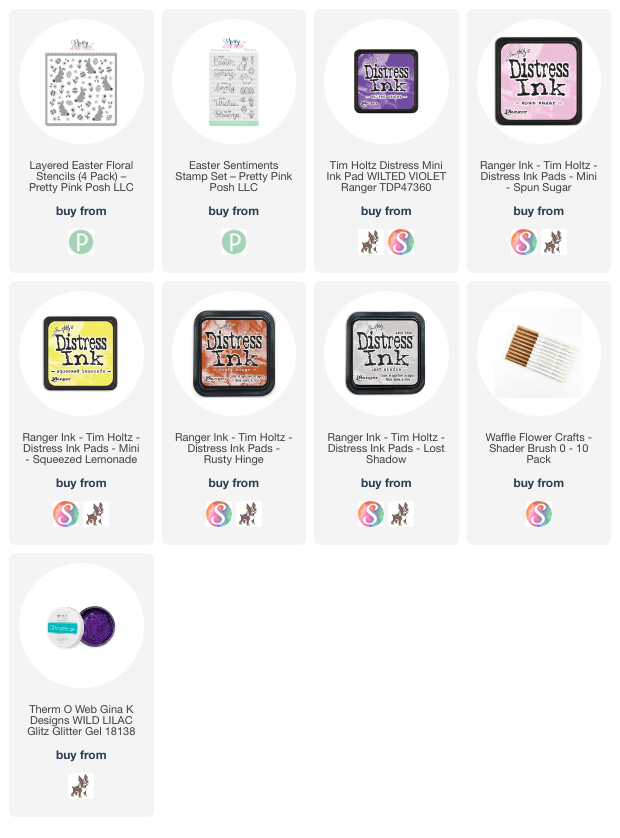
For my card today, I used the adorable four-piece stencil set called Layered Easter Floral.  I used various inks from my stash with small ink blending brushes to color each layer of the stencil.

For the white bunnies you just need to lightly stencil a shadow around the edges with a neutral color.  I used Lost Shadow Distress Ink.  

The next step for my stenciling was adding the pretty Glitz Glitter Gel through the stencil for the dots and stripes on the eggs!  This adds such a pretty dimensional element to the card!

When the purple glitter gel was dry, I placed the stencil layer with the bunnies' tails back on, and added some white opaque texture paste.  I made sure to make each tail thick and fluffy looking.  I hope you can see it in the photos!  So cute!

Thank you so much for stopping by today!  I hope I'll see you over on my Instagram for the hop!

I so appreciate you using my affiliate links (never any additional cost to you)!

Wednesday, March 23, 2022

Get Your Bunny Ears On and Have An Egg-stra Special Easter

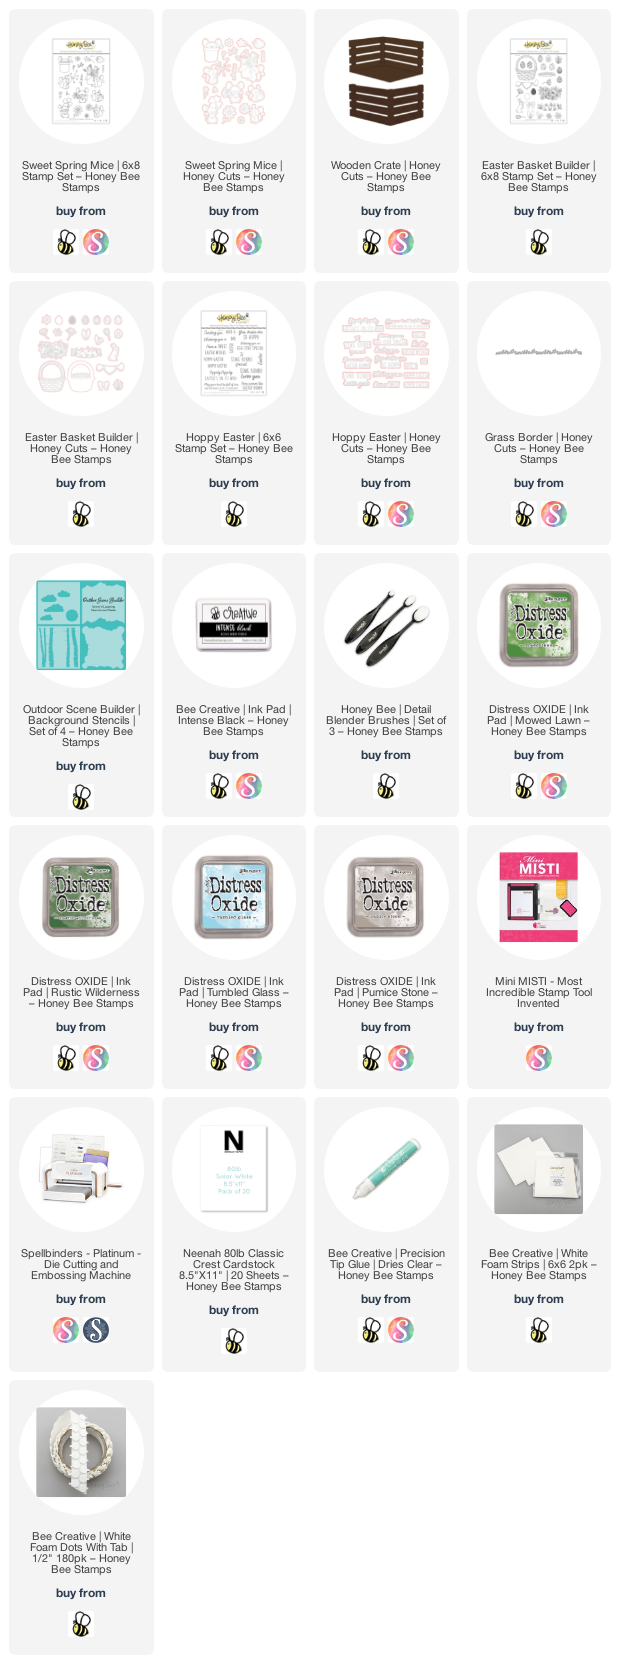
Hello Honey Bee friends! Easter is three weeks from this next Sunday, and this sweet mouse is all ready! I used one of the mice in the Sweet Spring Mice sets and added bunny ears from the Easter Basket Builder set that was released last year. The new Wooden Crate is filled with Easter eggs from that same set too!

I was super excited to see that the eggs in the Easter Basket Builder set (intended for the basket in that set) fit perfectly in the new Wooden Crate! I stamped it, the bunny ear, the extra eggs, and grass from that set in Intense Black ink. Then I stamped the mouse from the Sweet Spring Mice stamp set in the black ink. I colored them all with my Copic markers and die cut them with the coordinating Easter Basket Builder and Sweet Spring Mice Honey Cuts.

I used a pencil to sketch a line to "tie" the bunny ears onto the mouse. When I had my line how I wanted it, I used a black Micron pen to draw it in. Then I used Bee Creative glue to attach the ears to the mouse.

Next I die cut the Wooden Crate and the Grass Border Honey Cuts from white cardstock. I used some Detail Blender Brushes to add Mowed Lawn and Rustic Wilderness Distress Oxides to the grass strip. Then I sprinkled on some water drops and set it aside to dry. I used another Blender Brush to add Pumice Stone Distress Oxide ink to the wooden crate on the sides and the center. I adhered the two pieces together with foam strips.

Before I adhered anything to my A2 card base, I used the cloud stencil from the Outdoor Scene Builders Stencil set and blended on some Tumbled Glass Distress Oxide over it for the clouds.

After I adhered the grass strip to the card base, I added some foam strips to the back of the crate and adhered it to my card. Then I added some foam dots to the back of the mouse, one of the grass bunches, and one egg to adhere and used glue to adhere the other items.

I stamped the sentiment from the Hoppy Easter set with Intense Black ink and used the coordinating Honey Cuts to cut them out. I added foam strips to the back for dimension.

This little mouse with the bunny ears just makes me smile; and I hope it makes you smile too! Thank you so much for stopping by! Have a wonderful, crafty week!

Click the image to check out the supplies I used:

Wednesday, March 31, 2021

Wishing You A Hoppy Easter | Honey Bee Stamps

 Hello crafty friends!  It's almost Easter and I just had to use Honey Bee Stamps' adorable Easter Buddies set for one last Easter card!  I had lots of stencil fun creating my background!  Keep reading for the details!


First I created my background.  I have a few photos below showing my steps.  All of my inks are Distress Oxide inks and I used Honey Bee's Blender Brushes for my stenciling, which makes it really easy!  First I laid out the Oak Tree and Grassy Hill Borders stencil sets and placed them on my A2 80# Neenah card stock to kind of make a plan for my stenciling.  I used Gathered Twigs and Ground Espresso for the tree trunk.  Next I stenciled the tree and leaves with Mowed Lawn, Twisted Citron, and Rustic Wilderness.  The grass and hills are Mowed Lawn with a touch of Twisted Citron.

When I was finished, I realized I had a white sky!  So I used my Blender Brush for blue Oxides (without adding more ink) and lightly stenciled in some clouds with the cloud stencil that's in the Outdoor Scene Builder stencil set.  (TIP:  I keep one Blender Brush for each Oxide color family.  I just wipe it off on a clean, dry paper towel between each shade of that color and it works great!)


I decided to add a few water splatters to the grassy area and covered up the other parts before sprinkling on the water drops.  I took a clean paper towel and blotted it dry.  I wanted to add water drops to the tree, but I was too afraid of messing it up!  LOL!  I die cut the panel with the largest Deckle Edge A2 Honey Cuts.

Next I stamped all of the adorable little images from the Easter Buddies set in Copic safe ink and colored them with my Copic markers.  Then I cut them out with the coordinating Honey Cuts.  As I was planning on where to put everything on the card, I thought that the tree looked like it needed something more.  I remembered the cute little birdhouse and bird in the Birds and The Bees set and stamped, colored and die cut them with their coordinating Honey Cuts.


I decided to fussy cut the little grass pieces so they wouldn't cover up the eggs as much.  I added foam tape to the back of the birdhouse, bunny, chick and flower group and adhered them to the card front.  I adhered the other images with Bee Creative Glue.


I had a hard time choosing from all of the fabulous sentiments in the Hoppy Easter stamps, but finally decided on two.  I stamped them in Onyx Black ink and die cut them with the coordinating Honey Cuts.  I LOVE having dies for sentiments and Honey Bee does them so well!


I had so much fun creating this card!  The stencils sure do make creating backgrounds so easy!  I hope you have a wonderful weekend and a very blessed "Hoppy" Easter!  Thank you so much for stopping by!

Supplies:
Distress Oxides:  Mowed Lawn, Twisted Citron, Rustic Wilderness, Ground Espresso, Gathered Twigs


Wednesday, March 24, 2021

Old Rugged Cross Easter Card | Honey Bee Stamps

 Happy Wednesday friends!  My card today features the beautiful Honey Bee Stamps Old Rugged Cross stamp set and coordinating Honey Cuts   As you probably know, this next Sunday is Palm Sunday and I thought the Palm Frond Cover Plate die was the perfect background!  This stamp set is so very special to me as it reminds me of being a small child, being at church with our Mamaw (grandmother), and looking up at her while she sang this song with such joy in her eyes!  She loved this song (and so do I)!

I created my card base by die cutting the Palm Frond Cover Plate die three times from Neenah 80# card stock.  I adhered the layers together with Bee Creative glue and then adhered these to a top folding A2 card base.  I put a large stamp block on top to press it all down while it dried.  Next I die cut an oval from the Double Stitched Ovals Honey Cuts.  I adhered this to the center of the card base and put the stamp block back on it all to dry.


While the card base dried, I stamped the floral cross from the Old Rugged Cross stamp set in Copic safe black ink.  I also stamped the small flowers and palm fronds.  I colored them all with my markers and cut them out with the coordinating Honey Cuts.  (All my my marker colors are listed at the end.)

I stamped the sentiment from the Old Rugged Cross set in black ink and die cut it with the coordinating die.  I love how there are dies for the sentiments!  I added foam tape to the back of the sentiment and the cross.  Then I adhered them to the card front.  I used Bee Creative glue to adhere the extra flowers and palm fronds.

I love how this card turned out!  Be sure to check out this Old Rugged Cross set to see the other sentiments that make this a go to set for several occasions!  Thank you so much for stopping by today!

Copic markers:

pink flowers: RV09, RV17, RV06, RV02
greenery: G29, G07, YG09, and YG17, YG25, YG01
cross: E25, E34, E53

Thursday, March 19, 2020

New Easter Bunnies Set & Spring Celebrations Challenge | Art Impressions

Hello friends!  It's week two of Art Impressions' Spring Celebrations challenge!  We are showcasing the newest releases of the Easter Bunnies set and the Graduation set.  My card today is using the adorable Easter Bunnies set.


I stamped these images and colored them with the Copic markers that I've listed below.  I used a cloud stencil (carefully!) and stenciled in the clouds with Tumbled Glass Distress ink and a blender brush.  I used a few pieces of Post-It tape to cover up a few of areas to protect them from the blending.  Then I used the largest of dies in the Rounded Rectangle Double Stitched die set to cut it out.  I traced around the die on the patterned paper and trimmed it and rounded the corners by hand.  I did the same thing to a top-folding A2 card base and then adhered the layers on top.


I stamped the sentiment in black ink and die cut it out with a die from the Tag Stitched die set.  I cut two more tags from white card stock and used a couple of my Copic markers to color them to coordinate with the images.  I added a brad and some foam squares to pop it up for fun!  Finally, I added some clear sparkle to the eggs and the butterflies wings.


I hope you've been inspired to join in our Spring Celebrations challenge.  It doesn't need to be Easter either!  Be sure to check out the details over at Art Impressions, and then enter!  Thank you so much for stopping by today!

Copic markers:
bunnies: E57, E23, E55, E53, E51, E50
grass, leaves:  YG67 YG17 YG25, YG03, YG01
jacket, other purples:  BV13, BV02, BV01, B60
pinks:  RV14, RV13, RV21, RV10, RV00
yellows:  Y19, Y08, Y13, Y11
basket:  YR27, Y26, Y08

Thursday, February 20, 2020

New Easter Twist Set & Challenge | Art Impressions

Hello my friends!  Have you seen the new interactive Twist Sets by Art Impressions?  There are eight adorable sets, including the Easter Twist Set I've used for my card today.  These sets are so fun and cute!  There are included dies to cut them out and they swivel, or twist, in the frame!


These sets come with stamps for both sides of the twisting element along with the dies to cut it out.  You will need the Twist Frame Die, sold separately.  This is a very easy and quick card to make!  I started with an A2 card base cut with a Scallop A2 die.  Leave the top edge of the card just below the cut line to get this cute scalloped-edged card.  I die cut some patterned paper with a Rectangle A2 Double Stitched die and adhered it to the card base.  I opened the card base and positioned the Twist Frame Die in the center and ran it through my die cutting machine.  For the white frame around the die I cut the frame from a piece of white card stock.  Then, leaving the die in place, trace around the outside of the die with a pencil and fussy cut it.  Adhere it in place around the opening.

Next I stamped the images in Copic safe ink and colored the bunny images with a few markers listed below.  I also stamped the egg portion of the images onto some patterned paper.  It was easy to fussy cut around the egg.  To give your fussy cutting a finished look, be sure to use a black marker to go around the edges.  I like to use a Tuxedo Black Memento Dual Marker.  Adhere the patterned eggs to the images. 


I do like to share what I've learned from my oopsies so hopefully it will help you!  I always save larger scraps of card stock to use.  I had a couple scrap pieces that the images fit onto when stamped.  Well......oops!  I didn't plan on room for the dies!  I made it work by die cutting these, then trimming off the top and bottom tabs.  I die cut one more from plain card stock and adhered them to the front and back.  It all worked out just fine!  My motto is to always try to find a way to fix it!


To finish up, I stamped the sentiment with Versafine Onyx Black ink and die cut it out with a die from the Tag Stitched Dies set.  I die cut two more from the patterned paper and layered all three together.  (Tip:  I had a silver brad and tapped it into my Versamark ink pad and dipped it into some pink embossing powder.  Heat set it, and while it's still hot, dip it into the powder and heat it again.  Repeat until you like the look!  I popped it up with a couple of foam squares.

I added some sparkle in the white stripes to both sides of the egg with a clear sparkle pen.  (I recently ordered and received these from Scrapbook.com and really like them.  These pens are equal to others and are at a great price point.)  I used a white gel pen to add dots to the eggs.  This photo will give you an idea of what the card looks like standing up.


Thank you for stopping by!  I sure hope to see your entry in the Movers and Shakers Challenge!  Stay crafty!


Copic markers:
C1, C0, RV11, RV21, W3, W1, W0

Supplies:

Monday, March 25, 2019

Some Bunny Special, Art Impressions

Hello to you all!  It's Monday and I'm on the Art Impressions blog.  Can you believe March is nearing its end and Easter is just about a month away?  How time flies!  My card today features two sets:  Holiday Mansion and HM Easter.


I stamped and then colored everything with my Copics (colors listed below).  For the background I used a cloud stencil and some Distress Oxide inks in pretty pastel rainbow colors.  This angled photo shows the clear sparkle I added to the eggs.


I glued the three bunnies in position on the house before I added the foam tape to the back for dimension.  I adhered the basket of eggs directly onto the card base to add a more dimensional look.  I used Nuvo Crystal Drops to emulate "smoke" coming from the chimney.  Maybe the bunnies got some of their egg colors in the fireplace?  Haha!


I hope you're inspired to make some cute Easter cards for "some bunny special"!  :)


Copics:
B000, B00, B01, B02, C0, C1, C3, C5, C7, E51, E53, E55, E57,
Y08, Y11, YG06, YG11, RV000, RV00, RV02, RV10, RV11, RV21, RV23, RV32, V12, V15

Supplies:
Art Impressions Holiday Mansion Set
Art Impressions HM Easter Set
Gina K. Designs Amalgam Ink
My Favorite Things Cloud stencil
Distress Oxide Inks:  Spun Sugar, Squeezed Lemonade, Mowed Lawn,
Tumbled Glass, Milled Lavender
Nuvo Crystal Drops Sweet Lilac

Monday, February 25, 2019

Easter Blessings, Art Impressions

Hello!  It's Monday and that means I'm over on the blog at Art Impressions today!

My card today features some of the adorable bunny images in the Basket of Blessings set.  I used the Window Die for the opening for the row of bunnies to peak through.  The flower pots are from the Potting Shed MTF.


For the card front I used a Spellbinders brick embossing folder (sadly it's retired) and some white card that I embossed on my score board for that bead board look.


I hope to see you over at Art Impressions' blog.  You'll find more photos and details!  As always, I so appreciate you stopping by here on my blog!  Have a great week!


Prismacolor Premier pencils:
Pink, Deco Pink, Blush Pink, Carmine Red, Olive Green, Apple Green
50% Cool Grey, 70% Cool Grey, 90% Cool Grey, 50% French Grey, 70% French Grey, Chestnut,  Terra Cotta, White

Supplies: