Showing posts with label Rainbow card. Show all posts

Saturday, March 2, 2024

Friends Make The World Beautiful

Happy Saturday friends!  Today I have this beautiful rainbow colored card that features Picket Fence Studios Two Big Beautiful Butterfly Die Set.  This was so fun to color the card die cuts using the awesome Paper Pouncers!

I hope you'll join me over on Instagram to watch my fun reel for this card!

I used the A2 Rectangles for Card Layering set to die cut my card layers.  Then I used Paper Pouncers to add rainbow ink colors.  I have to say that the more I use these, the more I see how easy they make coloring my die cuts!  (I have the colors I used in the links below.)

I die cut one of the two butterflies from the Two Big Beautiful Butterfly Die set from white cardstock.  Then I used the so cute Pint-sized Paper Pouncers to color the top layer in the same inks as the background.  The small size of these helped me get the narrow strips of colors onto the butterfly.

For the butterfly I first spread a layer of Paper Glaze Luxe Twinkle Lights Clear onto a piece of cardstock that would fit the base layer of the butterfly.  After it dried, I die cut the base layer of the butterfly, and I wish photos would show the pretty subtle sparkle of the Paper Glaze!

The sentiment from the Fancy Friendship Sentiments set is stamped in black ink and cut out with the coordinating die.

I appreciate you stopping by today, and I hope your weekend is awesome!

Thank you so much for shopping with my affiliate links (never any additional cost to you)!
Thursday, March 16, 2023

Rainbow Birthday Card

The Simon Says Stamp Just For You release is awesome and has so many spring themed crafting goodies!  My card here uses the new Sunshine Background stamp.

It is a unique stamp in that each section of the Sunshine Background stamp is separate!  This made inking up a rainbow of colors super easy!  (I have all of the colors I used linked below.)  Use your MISTI, or other stamp positioning tool, to help get it lined up.

After I inked it all up I placed the Circular Lace stencil over it, and used an ink blending brush to add white pigment ink through the stencil.

Then I die cut the Detailed Rose from white cardstock.  I used some of the same inks to color the rose in a rainbow hue.

I added a sentiment stamped in pink ink from the Big Old Birthday stamp set.  The sentiment and rose are popped up with foam tape.  I die cut two more leaves from vellum to balance it out.

Thanks so very much for stopping by today!

Thank you for using my affiliate links to shop (never any additional cost to you).

Wednesday, June 1, 2022

Watercoloring a Rainbow & Hydrangea Birthday Card

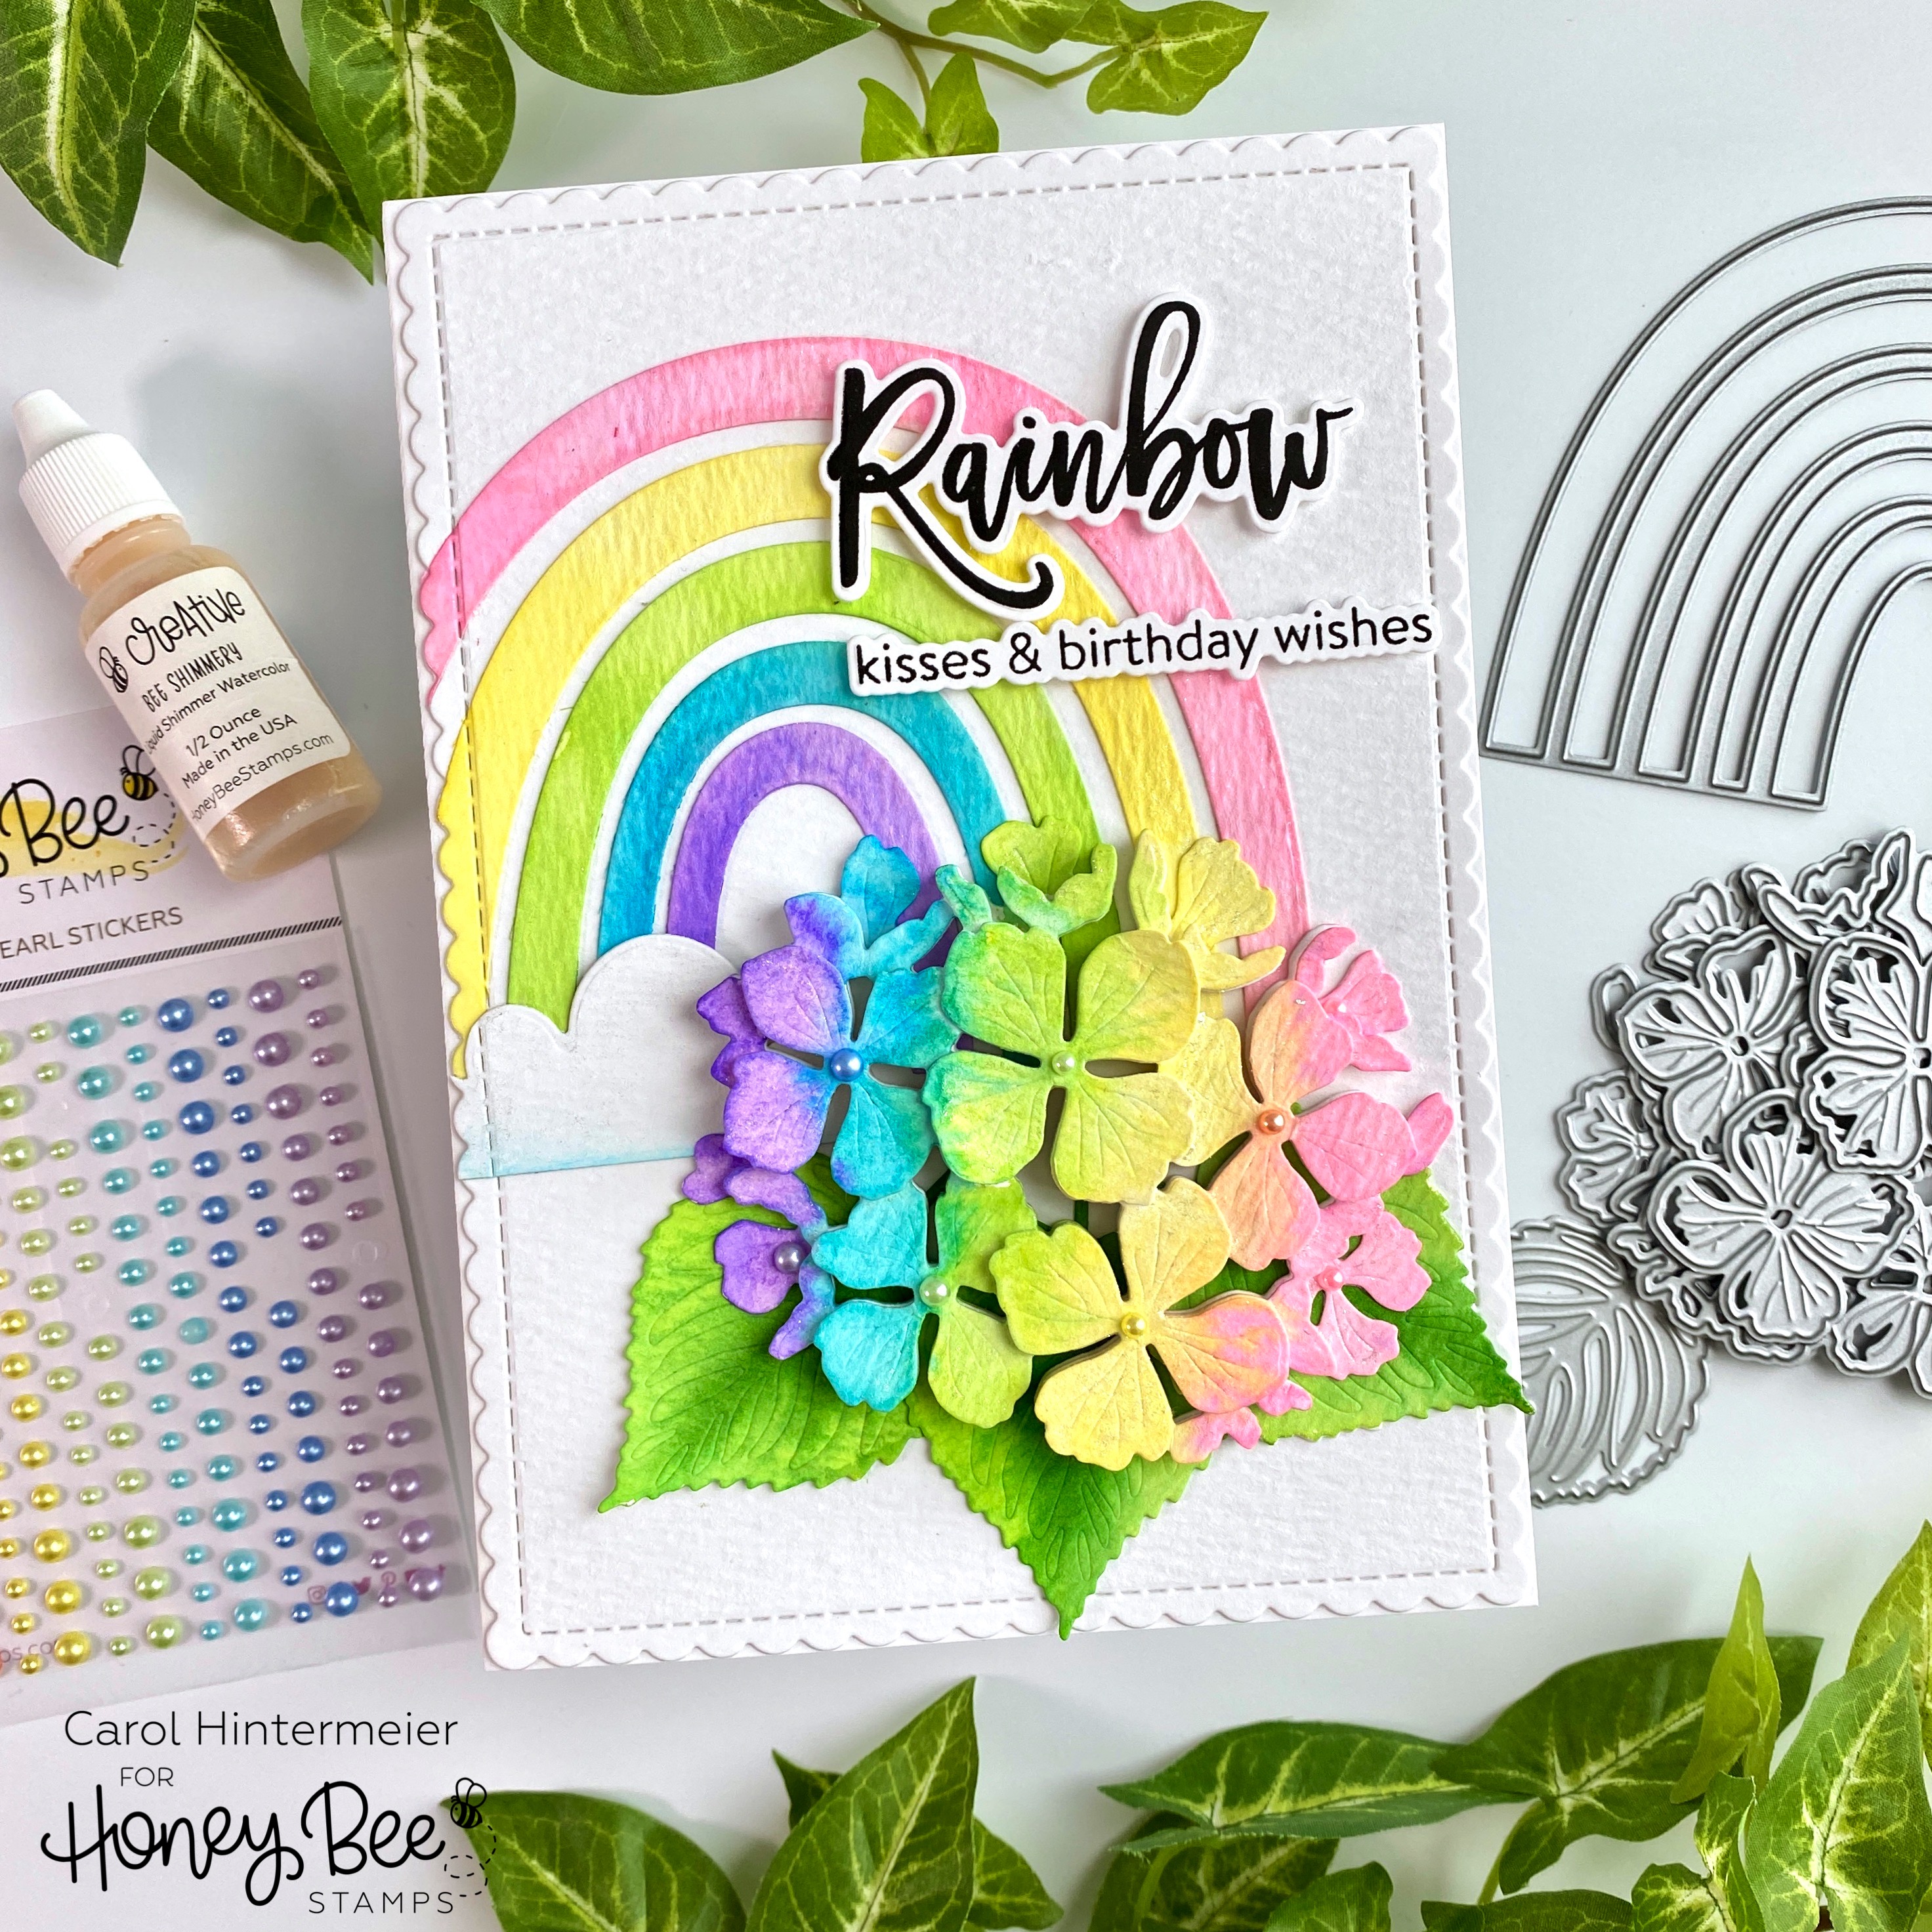
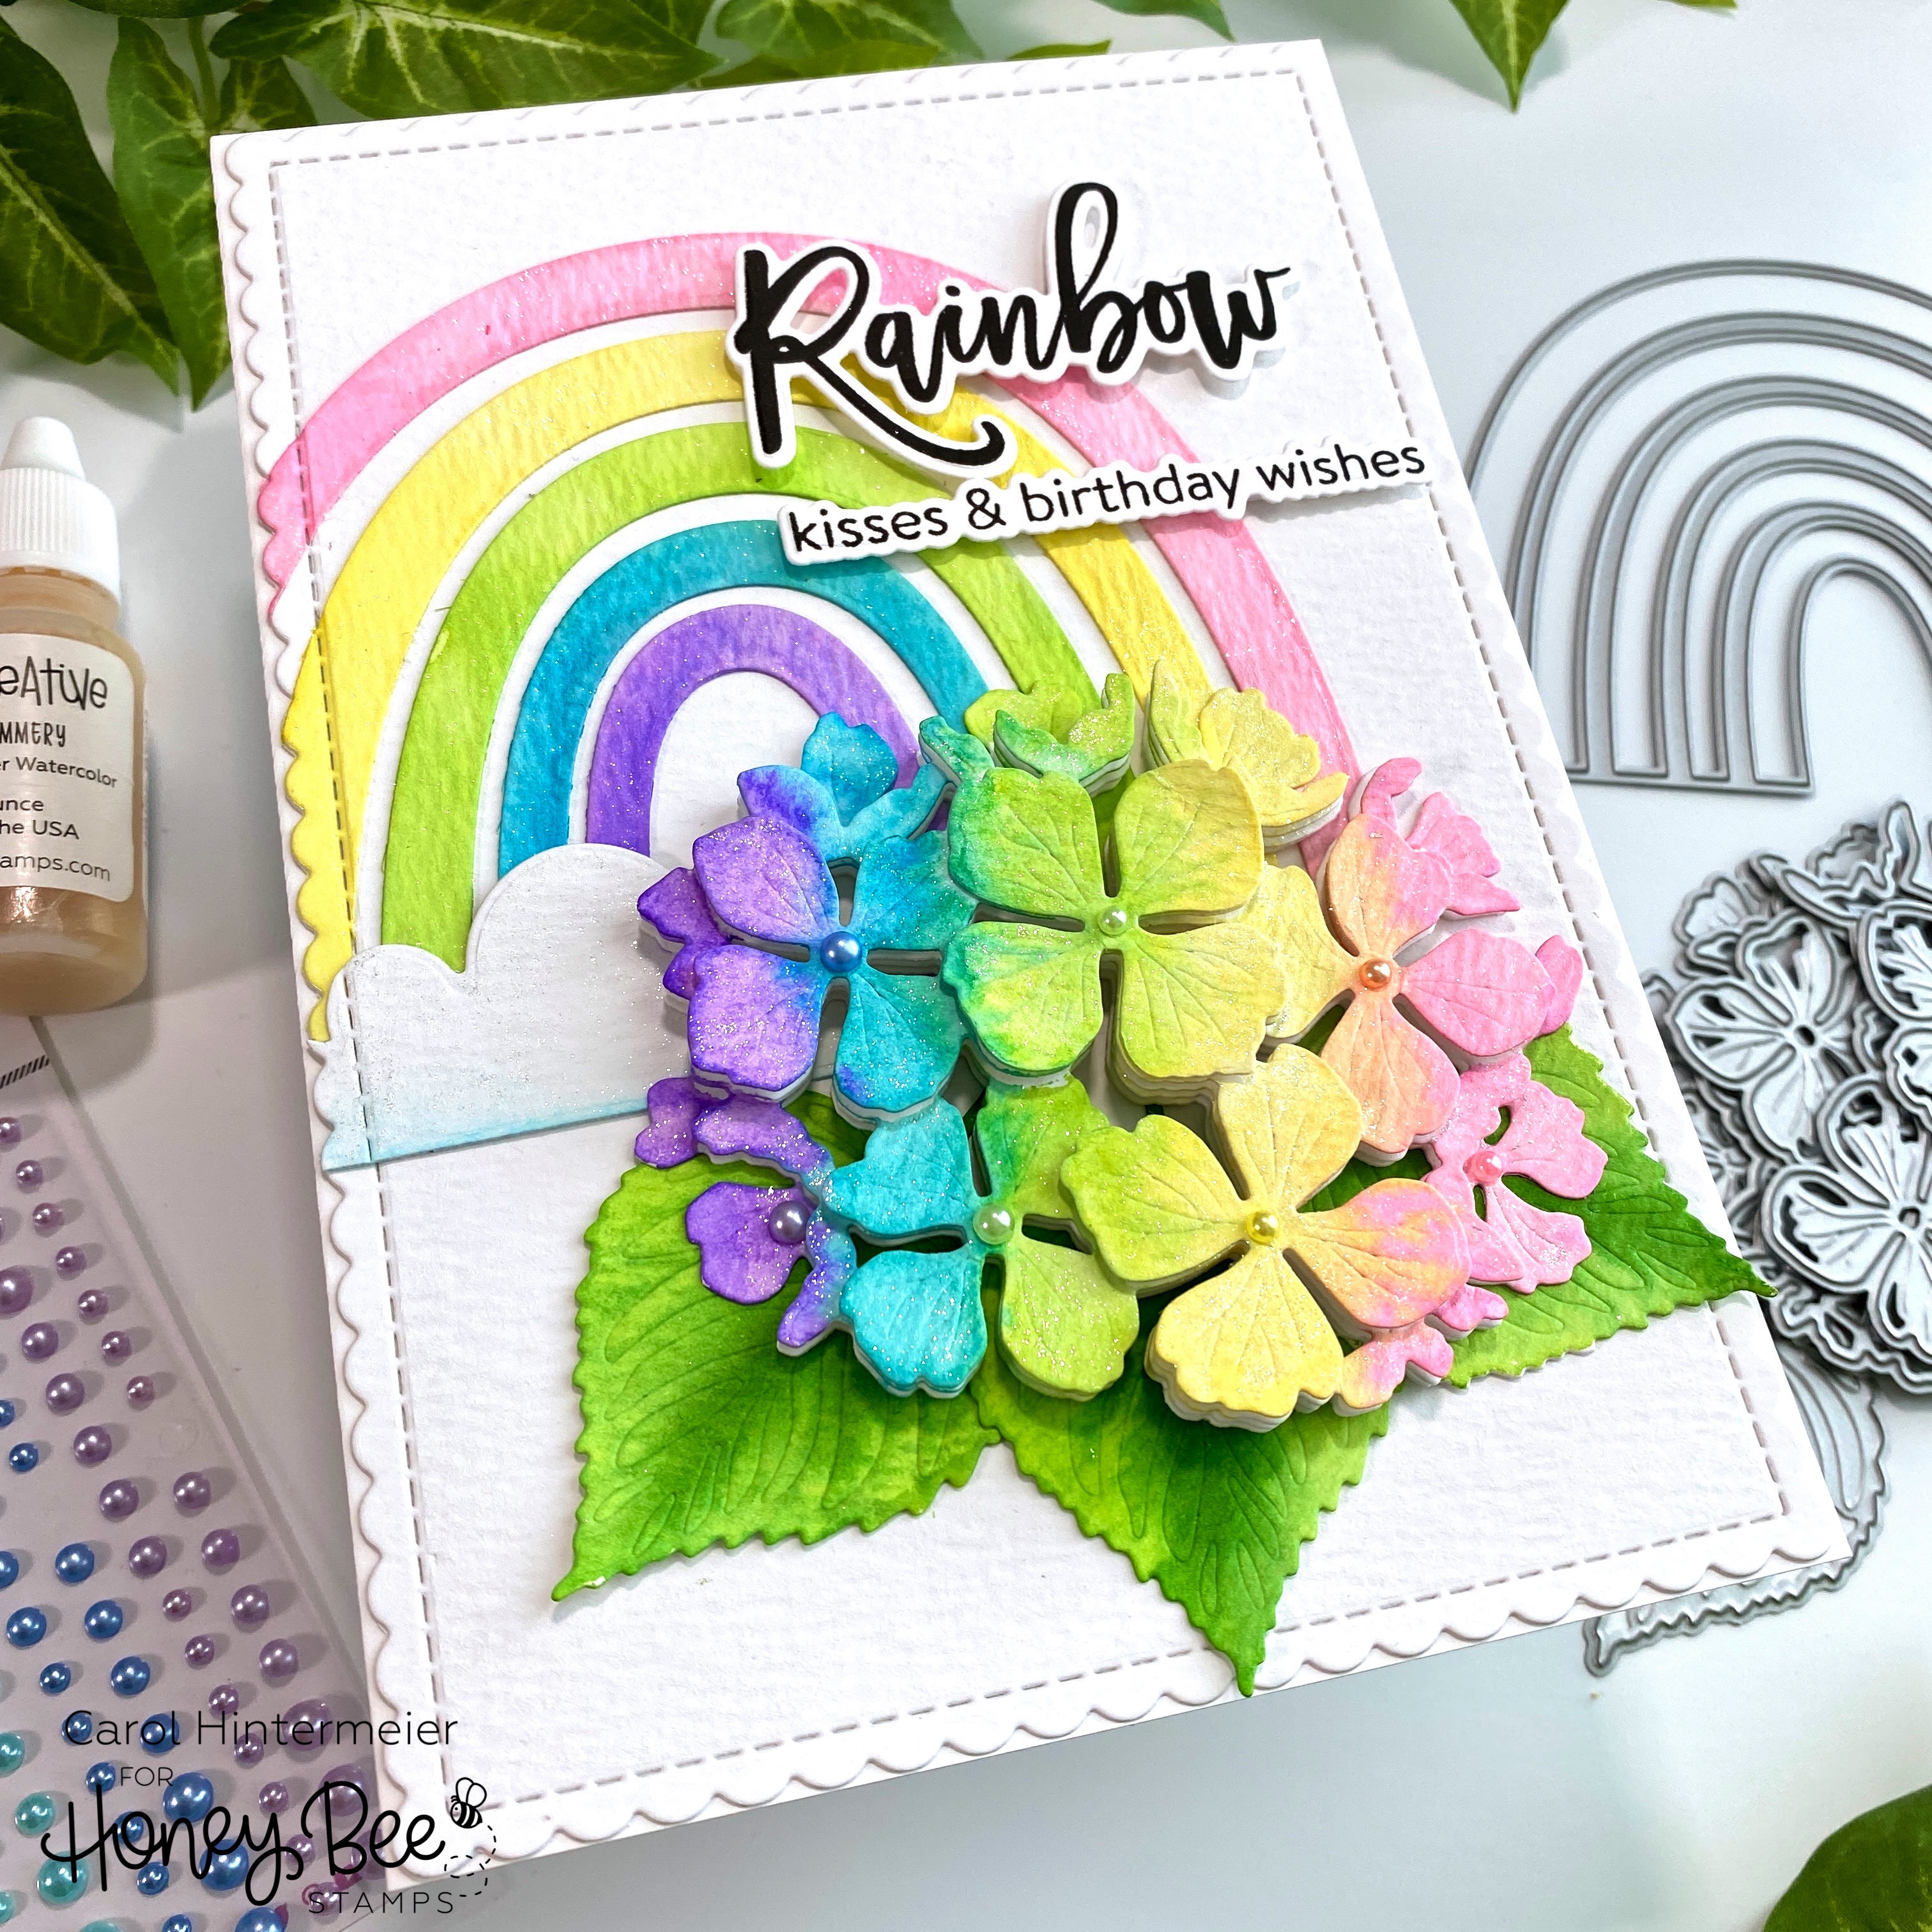
Hello crafty friends, and happy first day of June! Today I'm sharing a birthday card I made with some of Honey Bee Stamps new Rainbow Dreams release products plus the beautiful Lovely Layers: Hydrangea! I had an idea for this card in my mind, and I'm always thrilled when I'm able to create what I envisioned! 


All of my layers, except the sentiments and card base, are die cut from this bright white watercolor paper. I die cut the rainbow from the Rainbow Accents Honey Cuts, the cloud from the Rainbow Builder A2 Card Base, and the flower from the Lovely Layers: Hydrangea.

Then I used several Distress Ink re-inkers to color the rainbow and hydrangea. My colors are inspired by the gorgeous new Spring Pearls stickers! The colors I used are Kitsch Flamingo, Squeezed Lemonade, Twisted Citron, Mowed Lawn, and Wilted Violet. I put drops of each re-inker onto my mat and used my paint brush with water to pick up the colors. As I colored the pieces, I found that with this watercolor paper it helped to dampen the paper with a bit of plain water first, then add the color.

Before I began to color the hydrangea, I adhered all of the layers with some repositionable adhesive. Then I was able to just add the color to the pieces that were on top.

For all of the rainbow and hydrangea pieces, I added some Bee Shimmery Liquid Shimmer Watercolor to them with my paintbrush and a drop or two of water. I wish the photos showed the beautiful sparkle!

I created my 5" x 7" card base by scoring a 10" x 7" piece of Neenah at the 5" mark. Then I die cut more watercolor paper with the largest Scallop A7 Card Frames Honey Cut. Next I adhered my rainbow pieces and the cloud with Bee Creative glue. I placed the Scallop A7 die back over the piece (secure it with temporary tape) and ran just the left edge through my die cutting machine. I like how the rainbow now has the same scallop edge!

I added foam dots between each layer of the hydrangea and adhered it and the leaves with glue. Then I stamped the sentiment from the Look For The Rainbow set with black ink. I used the coordinating Honey Cuts to die cut them and popped them up with foam tape.  To finish up, I added some Spring Pearl stickers to the flower centers.

I absolutely love how this turned out, and hope you do too! If you are over on Instagram, check out my Instagram feed later today for a reel I'm making to show some of the card making process. Thanks so much for stopping by. I hope you have a wonderful day!

Tuesday, April 12, 2022

Rainbow Card with New Yoga Cats Set

 Hello crafty friends!  Today I'm sharing a rainbow card I made with Rubbernecker Stamps' new Yoga Cats Set.  This set has five different cute cats in various yoga poses along with six different sentiments!  I created a fun rainbow background for these yoga cats--read on for the details!


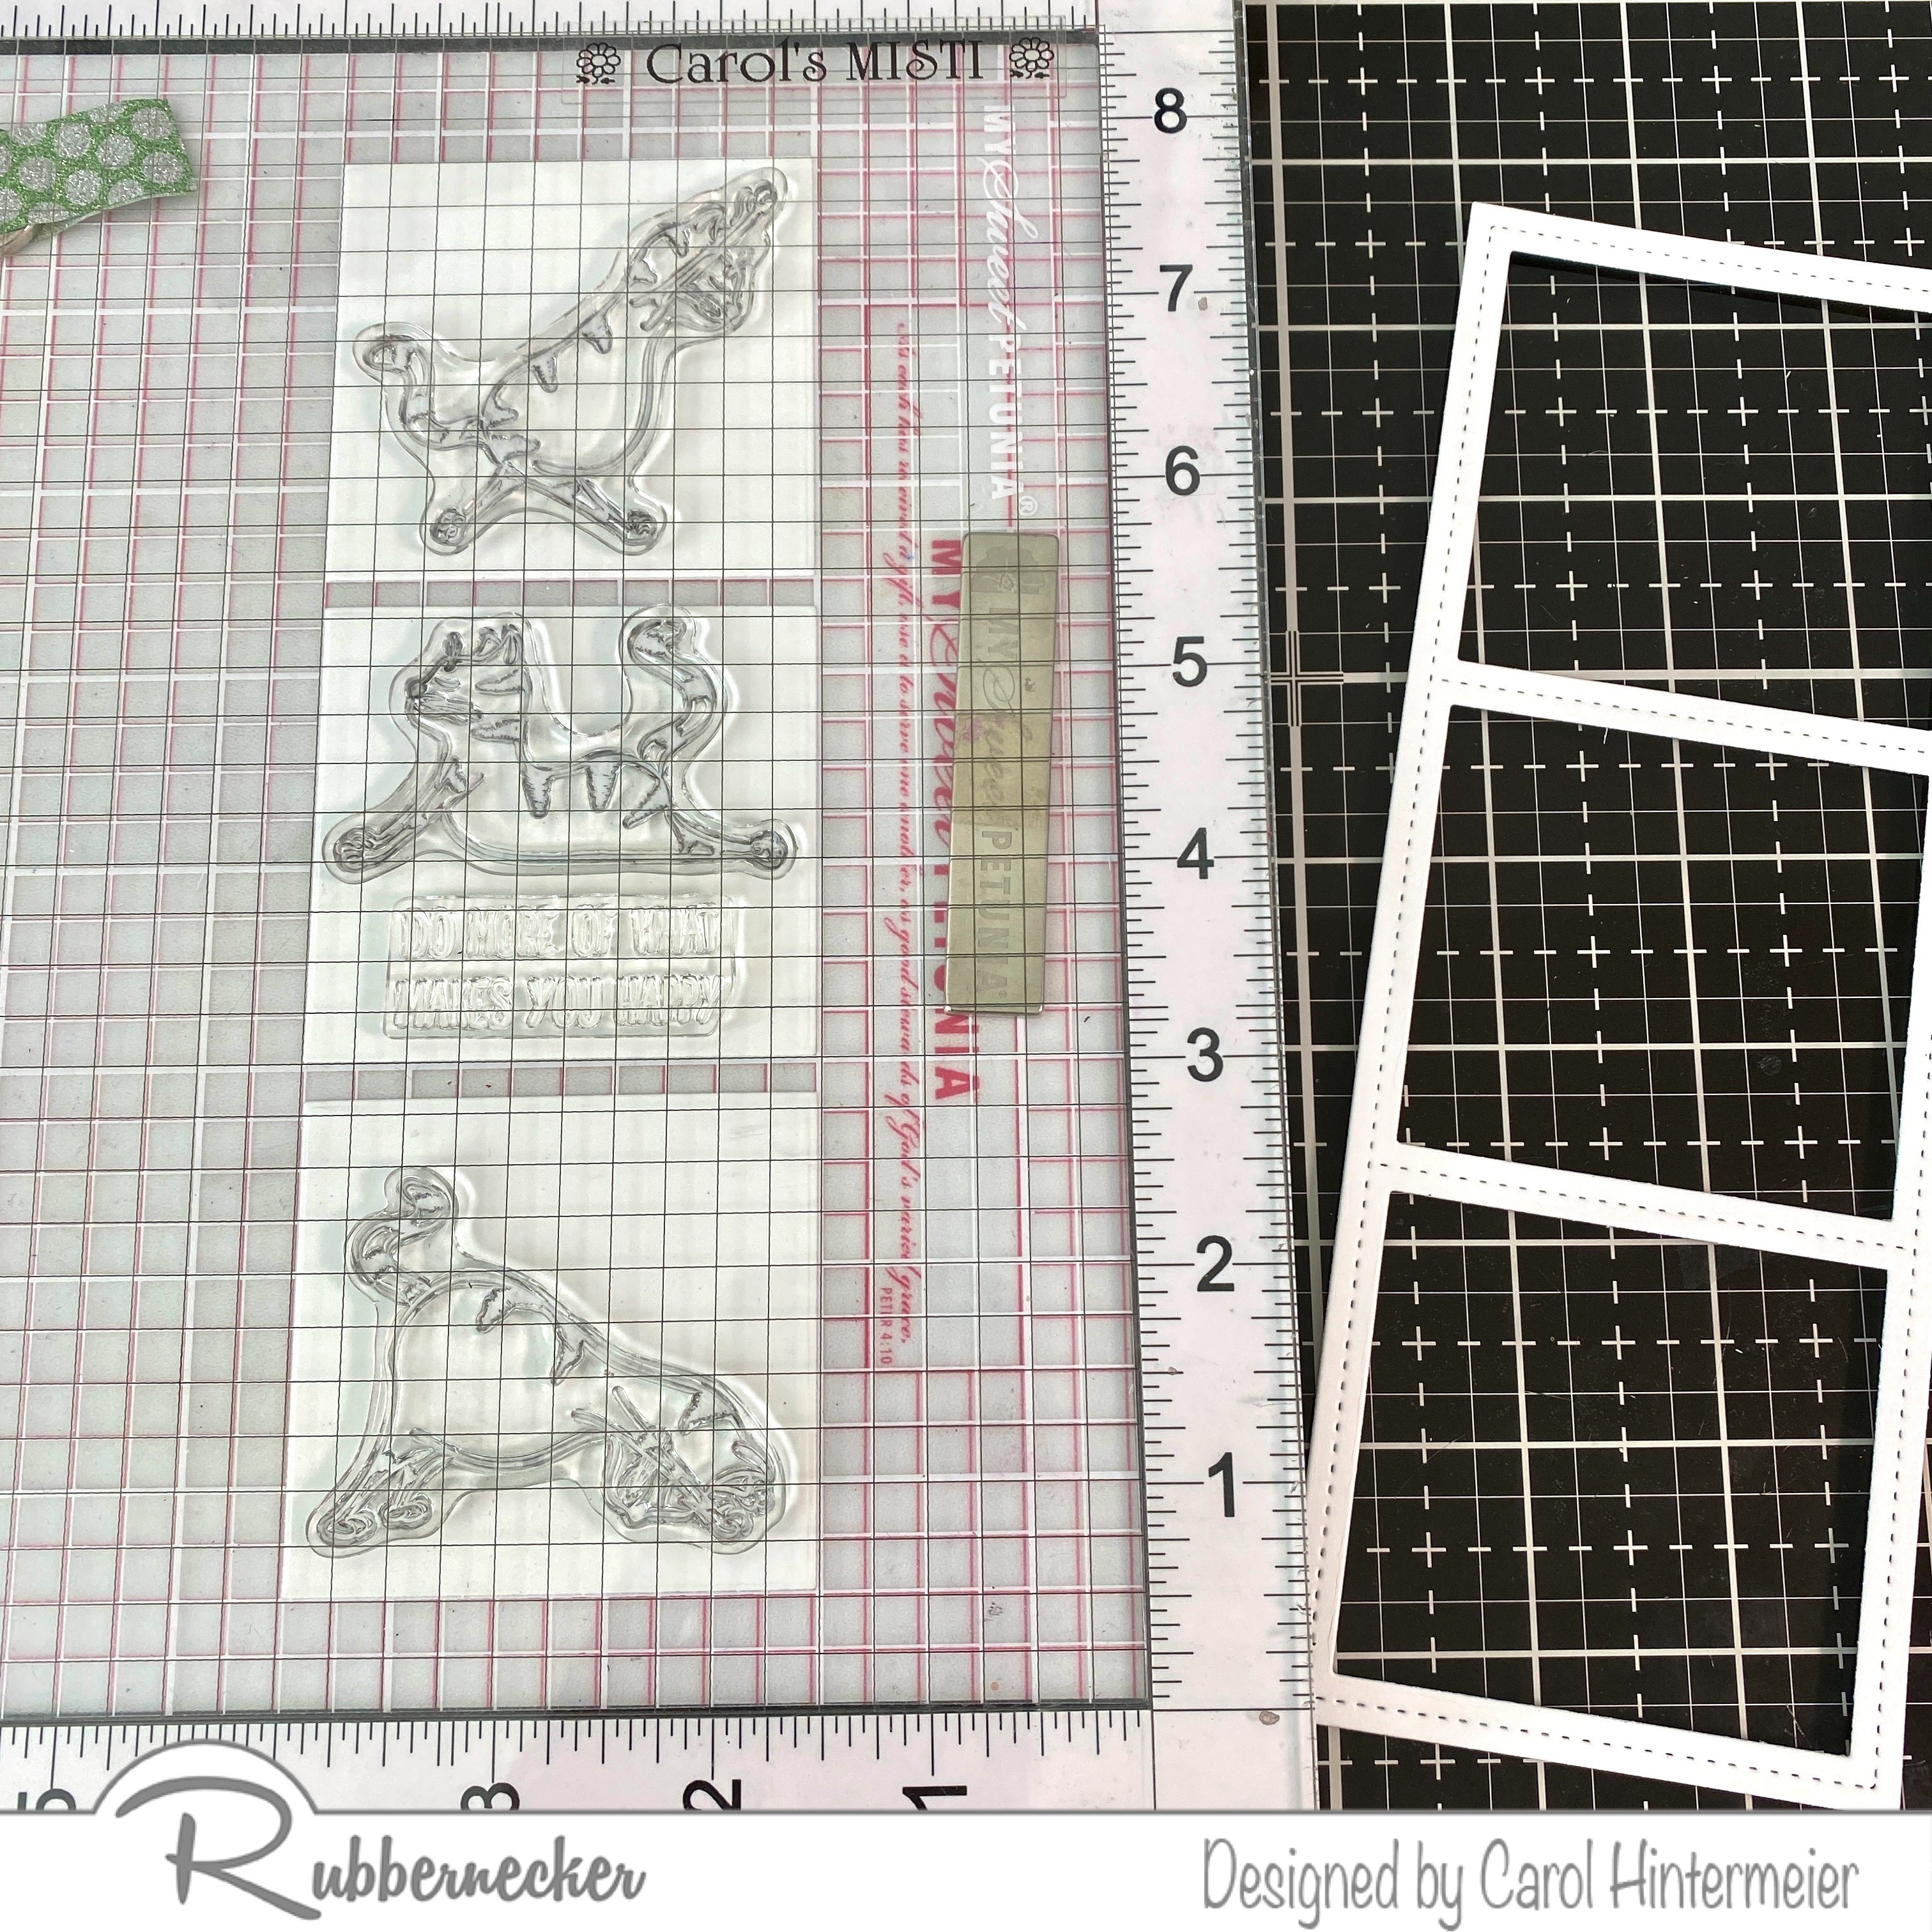
 First I die cut the Slimline OPC Squares die three times.  Be sure to save one set of the squares that are cut.  Glue all three frames together and then onto a slimline card base.  Set aside to dry.

Next I stamped a cat on each of the three squares in Copic safe ink.  I also stamped the sentiment near the bottom of the middle square.  I placed a strip of masking paper over it. Then I stamped the cats again onto masking paper and fussy cut the masks.  Place the masks over the stamped images.  In the second photo below, you can see my test strip.  This helped me do two things: 1) make sure I liked the shades of ink I chose; and 2) helps me get the colors spaced out to cover all three squares.


To make it easy to ink the rainbow in a contiguous pattern, I adhered the squares in a line by placing some removable tape on the back of the squares.  I used ink blending brushes to blend on Posey, Lemon, Moss, Sonata, and Lavender inks.  The Color Fuse ink cube sets are linked in the supply list below.  Check out the reveal after removing the masks!

I kept my coloring simple in order for the cats to stand out from the background.  I used a few gray Copic markers to add shading on and under the cats.  When I finished coloring, I adhered each square into the frame on the card.

I decided to re-stamp the sentiment because my masking paper strip was a tiny bit crooked and I am somewhat OCD about things being straight and lined up!  LOL!  I added foam tape to the back of the sentiment to pop it up on the card.

Thanks so very much for stopping by today!  I hope you have relaxed after seeing these cute Yoga Cats! LOL!