
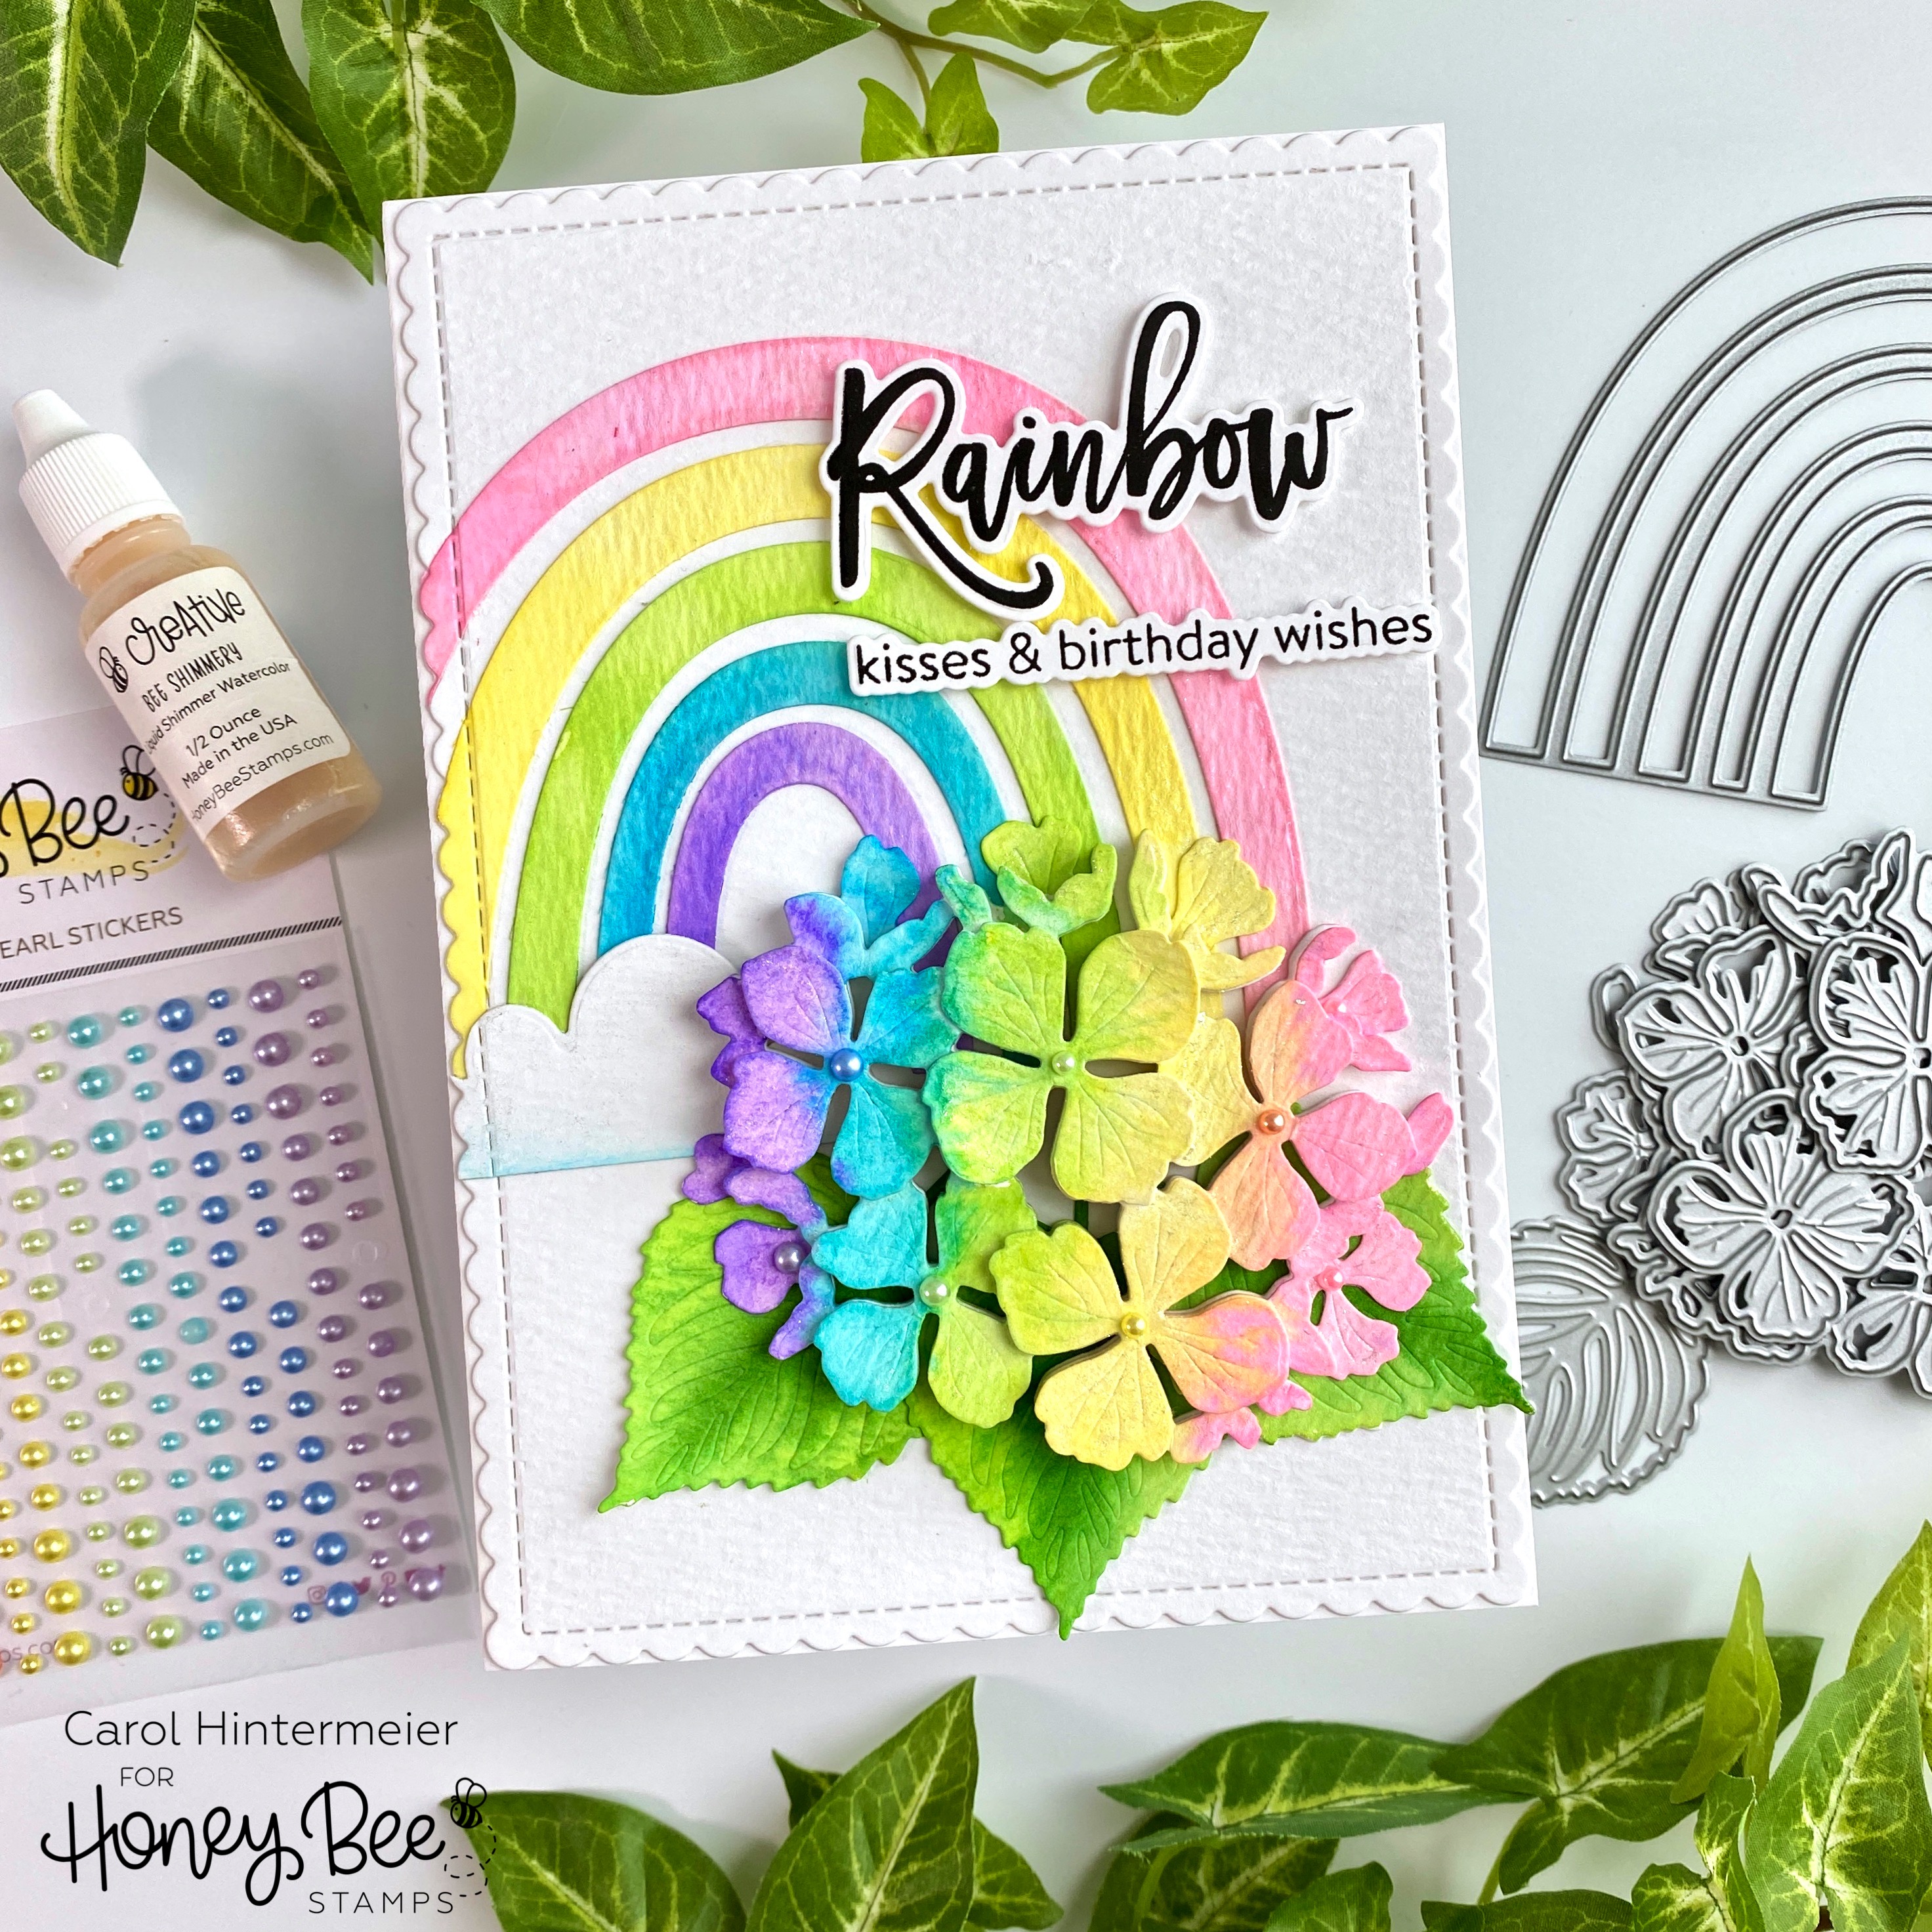
Then I used several Distress Ink re-inkers to color the rainbow and hydrangea. My colors are inspired by the gorgeous new Spring Pearls stickers! The colors I used are Kitsch Flamingo, Squeezed Lemonade, Twisted Citron, Mowed Lawn, and Wilted Violet. I put drops of each re-inker onto my mat and used my paint brush with water to pick up the colors. As I colored the pieces, I found that with this watercolor paper it helped to dampen the paper with a bit of plain water first, then add the color.
Before I began to color the hydrangea, I adhered all of the layers with some repositionable adhesive. Then I was able to just add the color to the pieces that were on top.
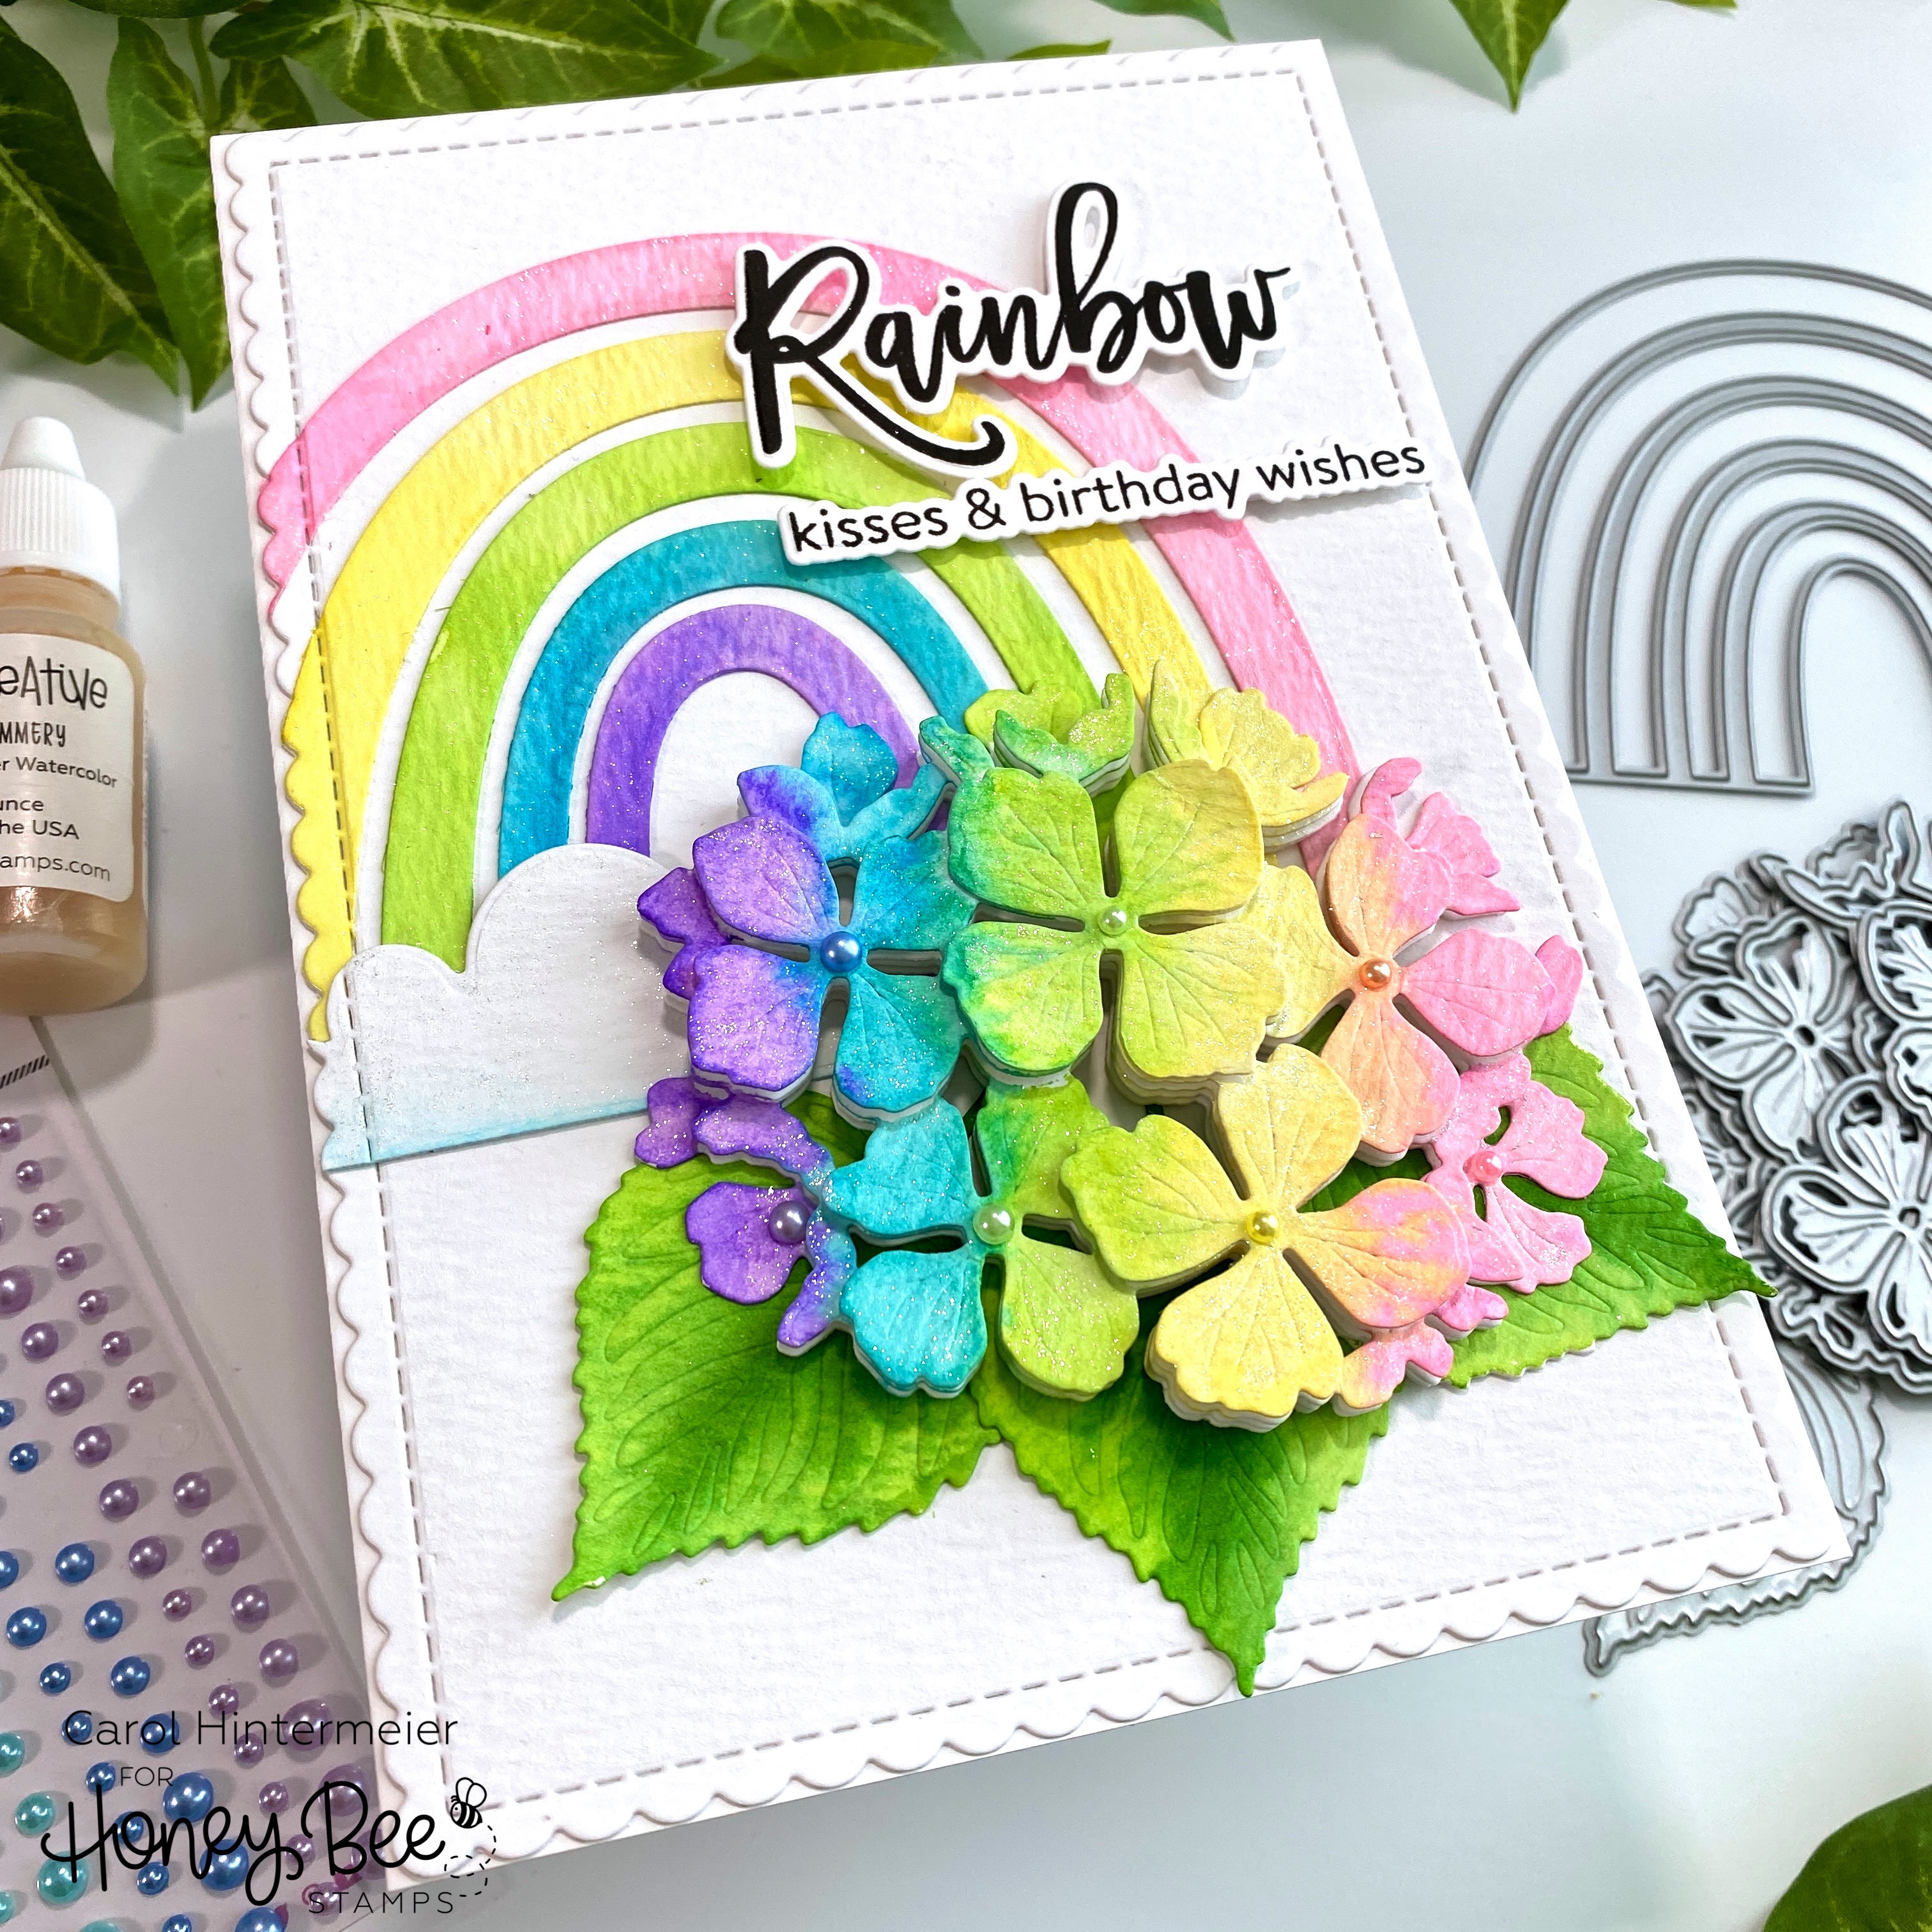
For all of the rainbow and hydrangea pieces, I added some Bee Shimmery Liquid Shimmer Watercolor to them with my paintbrush and a drop or two of water. I wish the photos showed the beautiful sparkle!

I created my 5" x 7" card base by scoring a 10" x 7" piece of Neenah at the 5" mark. Then I die cut more watercolor paper with the largest Scallop A7 Card Frames Honey Cut. Next I adhered my rainbow pieces and the cloud with Bee Creative glue. I placed the Scallop A7 die back over the piece (secure it with temporary tape) and ran just the left edge through my die cutting machine. I like how the rainbow now has the same scallop edge!
I added foam dots between each layer of the hydrangea and adhered it and the leaves with glue. Then I stamped the sentiment from the Look For The Rainbow set with black ink. I used the coordinating Honey Cuts to die cut them and popped them up with foam tape. To finish up, I added some Spring Pearl stickers to the flower centers.
I absolutely love how this turned out, and hope you do too! If you are over on Instagram, check out my Instagram feed later today for a reel I'm making to show some of the card making process. Thanks so much for stopping by. I hope you have a wonderful day!
No comments:
Post a Comment
Thank you so much for using my product links to shop. Some of the product links I've provided may have what is called an "affiliate" link. By using my links to purchase products, I may earn a bit of a commission, at absolutely no additional cost for you. Thank you for supporting my blog.