Showing posts with label Pinstripes & Polka Dots paper pad. Show all posts

Wednesday, March 29, 2023

You're Eggstra Special!

Hello crafty friends! Easter is almost here so I made this beautiful pastel card featuring Honey Bee Stamps' Egg Crate Honey Cuts along with other new sets from their Simply Spring release! I had so much fun coloring these eggs--read on for the details!  And, if you are on Instagram, check out my fun reel showing some of the card making process--click HERE.
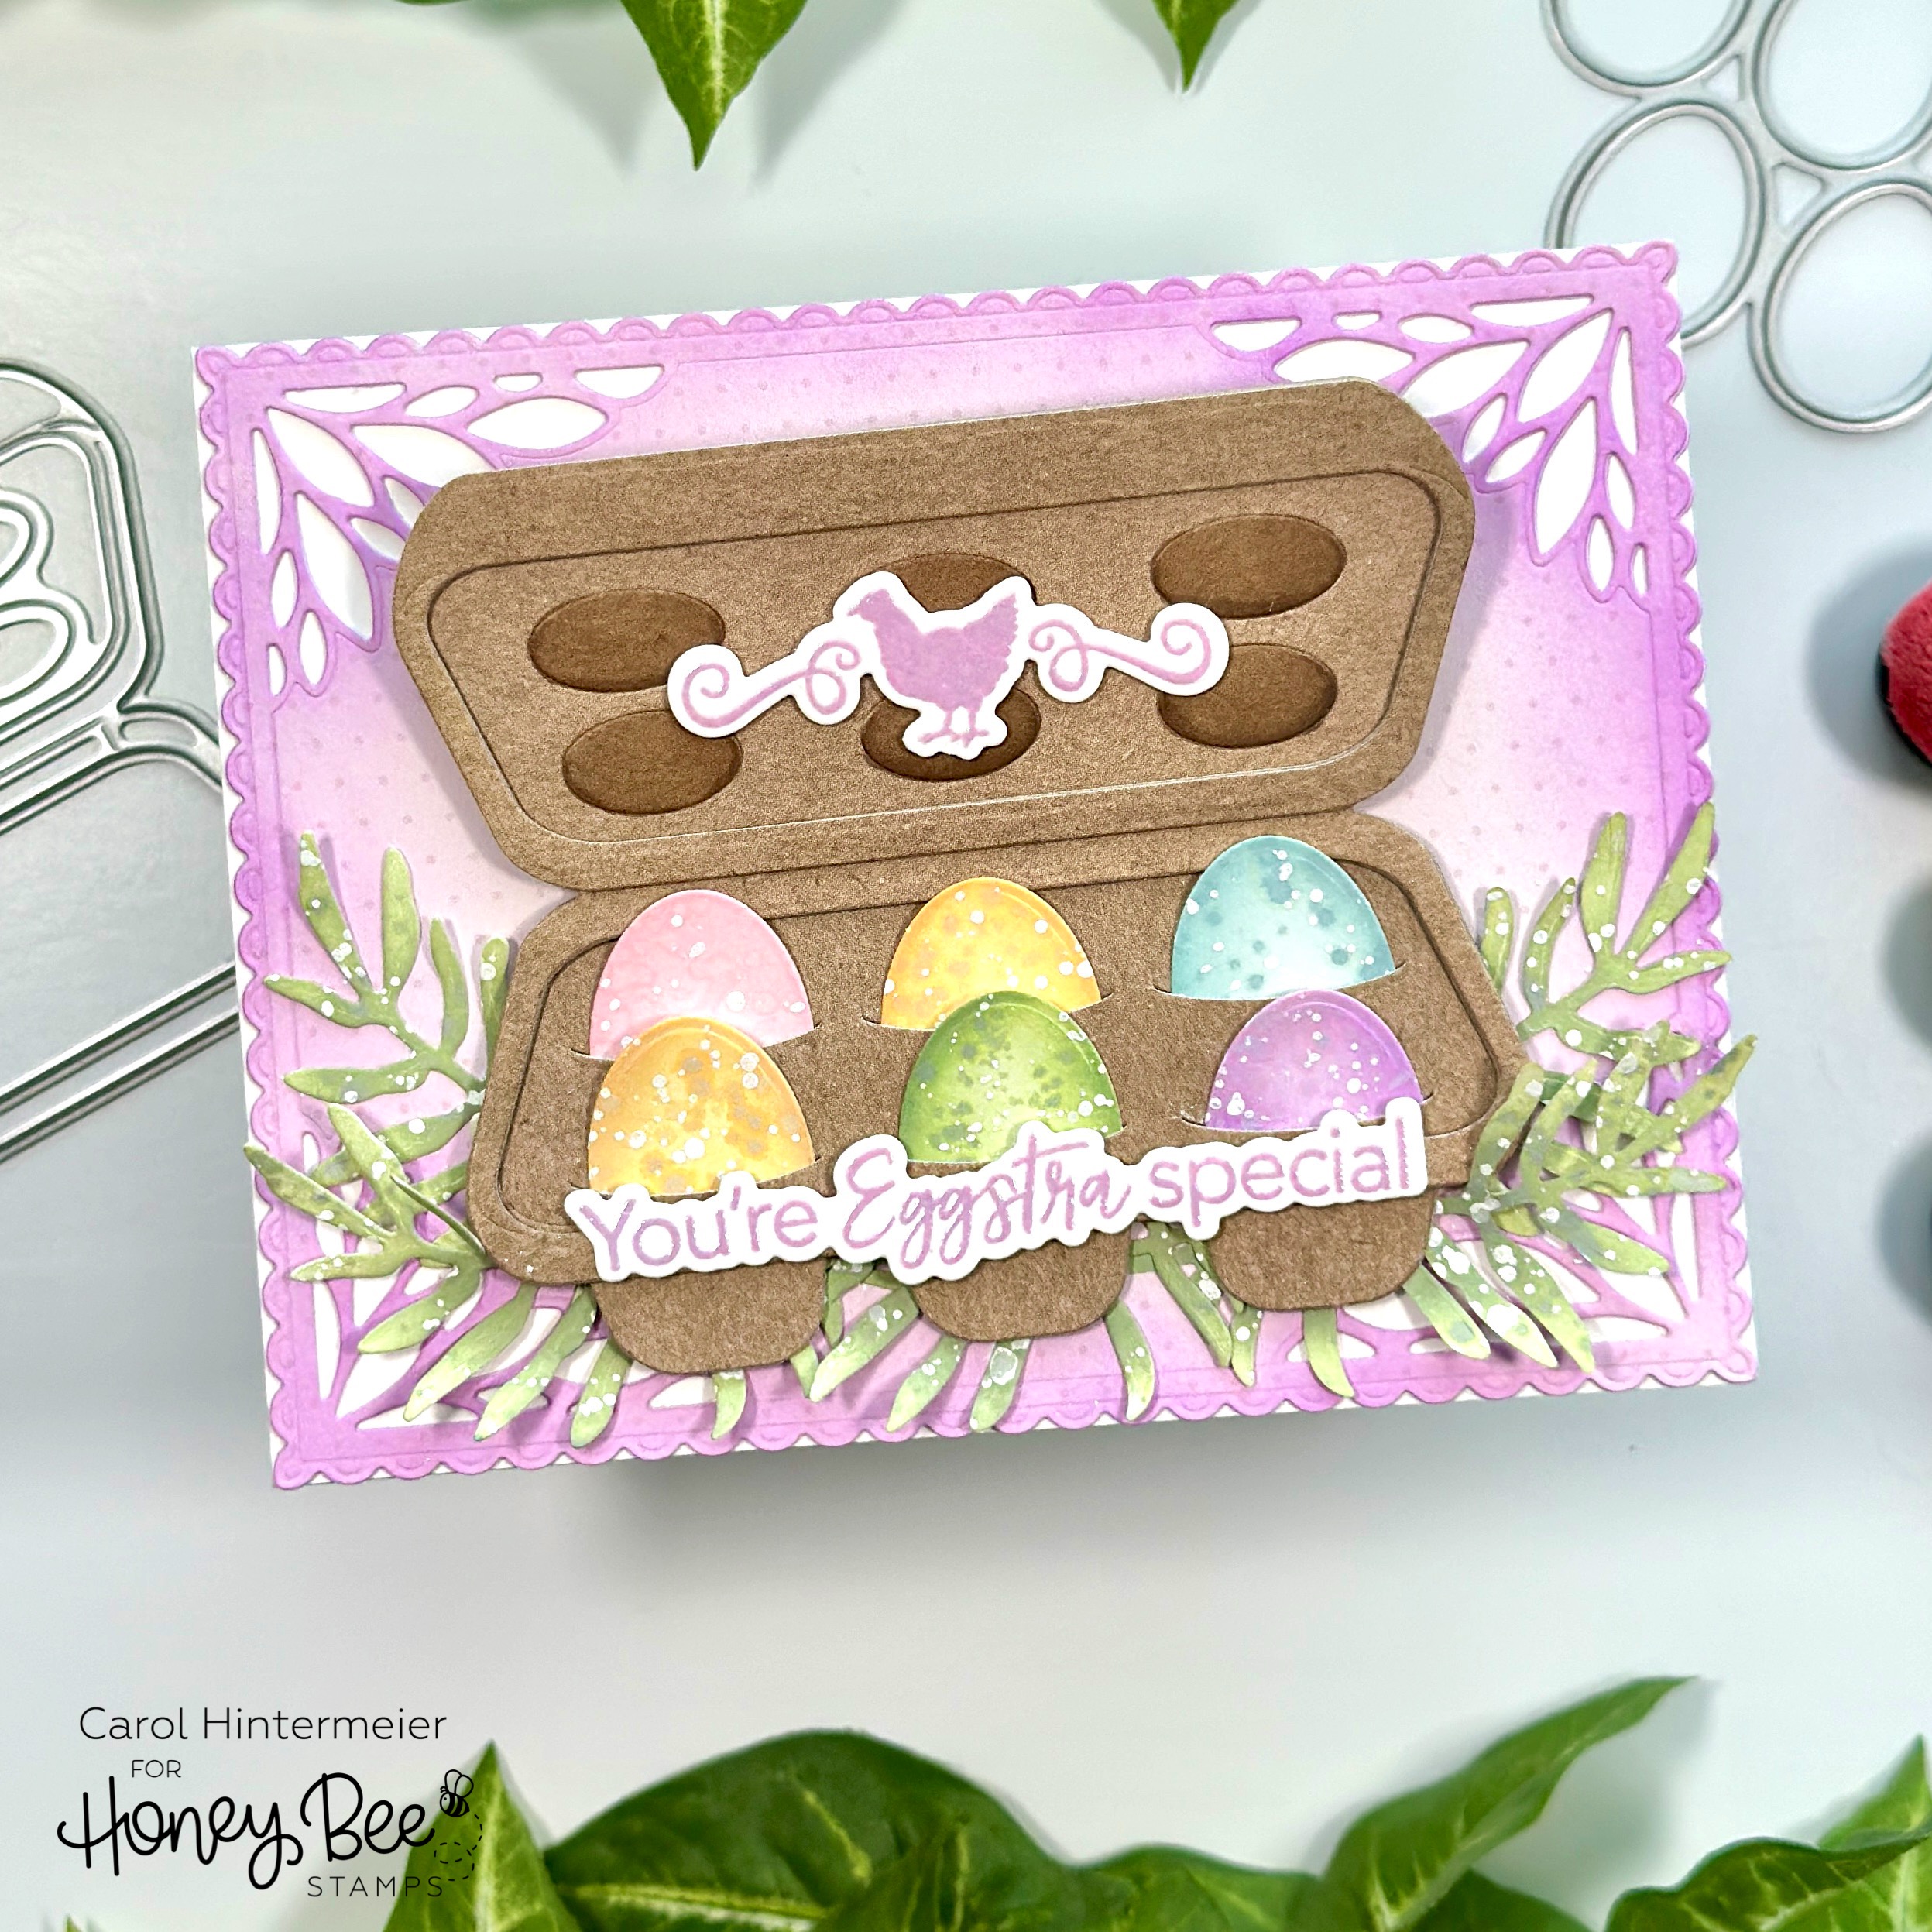
After I die cut the eggs in the Egg Crate set from 80# Neenah, I colored them with Distress Oxides using Detail Blender brushes. The Oxide colors I used are: Spun Sugar, Scattered Straw, Dried Marigold, Speckled Egg, Milled Lavender, and Bundled Sage. After I had each egg colored I smooshed that egg's color of Oxide ink onto my craft mat.

Then I spritzed the ink with just a bit of water, dipped a paintbrush into the diluted ink, and added splatters to the egg. I repeated this for each color. When the ink splatters were dry, I diluted some white acrylic paint and added white splatters. I love how these turned out!

Next I built the Egg Crate by die cutting paper found in the Fresh Brewed paper pad. Be sure to check out the Layering Guide found in the product description for the Egg Crate. I wanted extra dimension for the rim of the Egg Crate so I die cut two more of Layer 3 and Layer 4 from brown cardstock. I trimmed off the top piece of Layer 3 before adhering the layers together. Bee Creative glue is the best for adhering these pieces. It has a bit more "wiggle" time before it totally sets up!

I used two Copic markers (E43 and E44) to color in the circles on the Egg Crate lid.

For the card background layer I die cut the largest Spring Vine Layering Frames from paper in the Pinstripes and Polka Dots: Spring paper pad. I die cut one more from white cardstock and glued the layers together. I used some Milled Lavender Distress Oxide to ink up the edges of the die cut with a Detail Blender Brush.

The sentiments are from the Eggstra Special stamp set. I first stamped it with Milled Lavender Oxide ink and then stamped it again with Clear Embossing ink. My MISTI made this very easy! I added clear embossing powder and heat set them. I cut them out with the coordinating Honey Cuts and adhered them to the Egg Crate.

The greenery is a die from the Lovely Layers: Spring Greenery and inked up with Bundled Sage Distress Oxide ink. I repeated the steps of adding ink and white gouache splatters.

I hope you enjoyed coloring Easter eggs with me today!  Have a wonderful and crafty day!

Thank you for choosing to use my affiliate links (never any additional cost to you)!
Wednesday, March 22, 2023

Sending You Big Hugs with Cherry Blossoms

Hello crafty friends! Happy spring, and I hope it's feeling like spring where you're at! Today I'm sharing my card featuring the beautiful new Lovely Layers: Cherry Blossom Honey Cuts. I've made this with a vintage chic style featuring patterned paper and lots of fun layers!

Let's start with the card base and layers:

  • Trim a piece of dotted paper from the Pinstripes & Polka Dots: Spring paper pad to A2 size. Adhere to an A2 card base.
  • Die cut the rectangle piece in the Spring Vine Layering Frames Honey Cuts twice. Once from floral paper from the Simply Spring paper pad and one more from 80# Neenah.
  • Adhere those layers together and glue to the card.
  • Next I trimmed a piece of burlap (I've had in my stash forever!) to 2-5/8" x 5-½". I used Super Sticky Red tape to adhere the burlap to the card.
  • Next I die cut the next largest piece in the Spring Vine Layering Frames with more polka dot paper. After I lightly inked the edges with Antique Linen Distress Ink, I adhered it to the card with more Red Tape.
  • I die cut the next layer from the Spring Vine Layering Frames from coordinating cardstock and glued it to the card.
  • I die cut the circle from the same die set from more polka dot paper and some 80# Neenah. After I inked the edges with Antique Linen Distress Ink, I glued those together I popped it up on the card. 

Next I die cut all the pieces of the Lovely Layers: Cherry Blossom from 80# Neenah.

I used these Copic Markers to color the pieces:

  • Flowers and buds: RV19, RV34, RV32, RV000, R85, R56, R83
  • Branch: E29
  • Leaves: YG95, YG63, G43, YG61

I used the very helpful Layering Guide and Bee Creative glue to assemble the cherry blossom branch. I added a couple of foam dots to the back of the flowers near the bottom of the branch before adding dots of glue to the branch to adhere it to the card. I used thin foam squares behind a couple more buds for more dimension.

The sentiment from the Garden Bouquet stamp set was stamped in clear embossing ink onto a scrap of dotted paper and heat set after adding black embossing powder. I cut the sentiment out with the coordinating Honey Cut. I die cut 80# twice more from the sentiment die and adhered the layers together. I used thin foam tape to adhere the sentiment to my card.

I really enjoyed making this beautiful vintage chic style card--not my normal style, but I think I like it!  Thanks so very much for stopping by!

Thank you so much for using my affiliate links for shopping (never any additional cost to you)!