Sunday, August 23, 2020

New Autumn Fire Layering Floral Stamps | Rubbernecker Stamps

 Oh my, I am so loving the new floral layering stamps from Rubbernecker Stamps!  For my cards today, I've used the beautiful Autumn Fire stamps with the coordinating dies.  I made two cards with this set--one that would suit any time of the year, and another that is in fall colors.


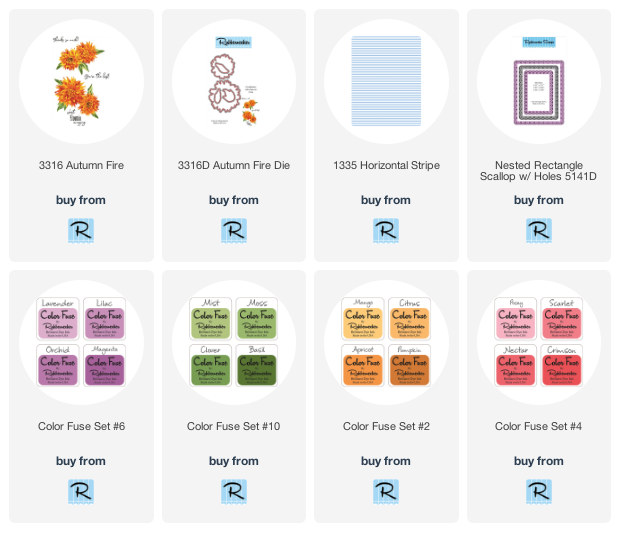
For the purple card I used the Color Fuse Set #6.  Here are the details:

  • Stamp the Horizontal Stripe background on white card stock with Lavender ink.  Trim the piece to 4" x 5-¼".
  • Cut two thin strips of white card stock.  Drag the Magenta ink pad along each strip to color coordinate them.  Adhere the strips with liquid glue.  Attach the layer to a top folding A2 card base.
  • For all of the floral stamping, I strongly recommend a stamping tool such as the MISTI.  If you need to re-stamp any layer there is no worry if you are using one.
  • I stamped all of the flowers using all of Set #6 inks.  Start with the lightest ink, Lavender, for the base layer.  Use Lilac, Orchid, then Magenta for each subsequent layer.
  • Stamp the flower center with a black ink.
  • Stamp the leaves with Clover and Basil inks from Set #10.
  • Die cut the flowers and leaves with the coordinating dies.
  • I arranged and then adhered the leaves and flowers with glue.  I popped up one large flower and the small one with foam tape.
  • Stamp the sentiment that's in the Autumn Fire set with black ink and trim it to a banner shape.  Adhere it with some glue and foam tape.

To finish the card with a bit of bling, I added some clear purple acrylic hearts with Distress Collage Medium Matte.  I added little dots of Ebony Black Nuvo Crystal Drops to the flower center.

My next card has the beautiful colors of fall!  I think I actually created a CAS card! LOL!

Here are the details for my more more fall themed card.

  • I die cut some white card stock with the Nested Rectangle Scallop w/Holes die.  Stamp the sentiment in black ink in the bottom right corner.
  • Attach this to an A2 red top-folding card base.
  • Place this layer into the MISTI and stamp the large flower layers.  Starting with the base layer and up, I used Mango, Citrus, and Apricot from Set #2.  The fourth layer is stamped with Crimson from Set #4.  Stamp the flower center with Pecan from Set #3.
  • I did a bit of masking for the leaves around the flower that is stamped on the card base layer.  I stamped the base layer onto a full stick Post-it Note.  I fussy cut it out (it really didn't make me fussy though! LOL!)  Place the mask onto the flower.
  • Stamp the leaves around it with Basil and Moss from Set #10.
  • On a separate piece of white card stock, stamp the small flower and some leaves with the same colors as above.
  • Die cut the small flower and leaves with the coordinating dies.
  • Add foam tape to the flower and leaves.  Adhere to the card base.

I love my bling so I added a few gem stickers around the arrangement.  For the dots on the centers I used Chocolate Chip Nuvo Vintage Drops.

I hope I've inspired you to give these beautiful floral layering stamps a try!  Thank you so much for stopping by!  Have a wonderful, crafty week!
Thursday, August 20, 2020

Camping Fun on the Beach | Honey Bee Stamps

Happy Thursday friends!  Today I have a fun beach scene card featuring the Beach Scene A7 Cover Plate die and the Camp Trailer Card die.  I don't know about you, but I'm ready to go somewhere!  The beach is truly one of my favorite places to be, so I'll just dream about it for now!

I used the Hot Tropics 6x6 paper pad and chose the paper with the sun rays on it.  Position the top portion of the Beach Scene A7 Cover Plate die so the rays are in the middle and run through your die cutting machine.  Then I die cut the entire Beach Scene A7 die from some white card stock.

I added some Weathered Wood Distress Oxide to the cloud sections with a Detail Blender Brush and the negative cloud piece from the Mountain Z-Fold stencil set.

For the waves I ink blended Salty Ocean, Mermaid Lagoon, and Broken China Distress Oxides.  The Background Blender Brushes make this very easy!  Next I blended Antique Linen Oxide onto the sand pieces.  Then I inked up the Sandy Shores Background stamp with Brushed Corduroy and Walnut Stain Oxides and stamped it onto the sand.  I adhered all of the pieces onto a top-folding A7 card base.

I used the Camp Trailer Card die to cut out the trailer and other pieces.  I added embossed lines using my scoring board every ¼" on the main part and then I die cut the door from it.  Then I added Twisted Citron and Mowed Lawn Oxide to the embossed piece. The other the bottom panel is patterned paper from the Hot Tropics pad. I Copic colored the door frame, awning and strip of white card stock with coordinating colors. I used silver mirror card stock for the hitch and bottom trim. I adhered all the pieces with the awesome NEW Bee Creative Precision Tip Glue and trimmed it to fit the card.

Next I stamped the Hello Summer images in Copic safe ink and colored them with my markers. I die cut them with the coordinating Honey Cuts. I adhered some with glue and used foam squares on the umbrella, chairs and one grass.

To finish up, I stamped the sentiment from Flippin' Fabulous in black ink and die cut it with the coordinating Honey Cut. I popped it up with foam squares. I added a few gem stickers from the Hot Tropics Gem Stickers. I used a white Gelly Roll pen to add highlights here and there.

This card was so fun to make! I can see making several different scenes with this awesome Beach Scene Cover Plate die! Thanks so much for stopping by today!

Wednesday, August 12, 2020

Paradise Blooms No-line Coloring Birthday Card | Honey Bee Stamps

 Happy Wednesday friends!  Today I'm sharing a very special card I made with Honey Bee Stamps beautiful Paradise Blooms stamps and dies.  What makes this card so special is that I made it for our daughter to give to her on her birthday, which was Monday.  I had so much fun creating the background with the Palm Frond stencil and then no-line coloring the flowers and leaves.


I stamped the flowers and leaves with Ink On 3's Fadeout No-line Coloring Detail ink and copic colored them all.  I used a couple of Prismacolor pencils to add details and more shadows to the flowers.  When I finished my coloring, I used the coordinating dies to cut them out.  What I've learned about no-line coloring is that it will look way worse before it looks better!  Just tell yourself to keep going!

For the background, I used the Palm Frond stencil (spray the back with Pixie Spray to make it easy to use this intricate stencil) and inked on some Spun Sugar and Picked Raspberry Distress Inks onto white card stock.  Then I slightly shifted the stencil and applied some Ranger clear transparent  embossing paste through the stencil.  After I removed the stencil, I immediately sprinkled on some chunky glitter.  I love the subtle sparkle of this background!


I die cut a frame from the Double Stitched Squares Honey Cuts and added foam tape.  When the background was dry, I trimmed it to 5-¼" square and adhered it to the background.  I adhered all of this to a 5-½" square pink card stock base.

The sentiment is from the Slimline Sentiments Eyelet Honey Cuts and I die cut three from white card stock and one from pink.  I adhered all of the layers together, added some clear sparkle pen and adhered it to the frame.  I stamped "birthday" from the Wish stamp set in clear embossing ink, sprinkled on white embossing powder, and heat set it.  After I trimmed it into a rectangle I added some small foam squares to the back and adhered it.  Then it was just a matter of die cutting my florals and arranging them.  I used glue to adhere the leaves and foam squares for the flowers.


Thank you so very much for stopping by today!  Have a wonderful and crafty rest of the week!!!

Supplies:
Honey Bee Stamps:
Other:
Distress Inks: Spun Sugar and Picked Raspberry

Sunday, August 9, 2020

Masculine Birthday Card For Your Golfing Guy! | Rubbernecker Stamps

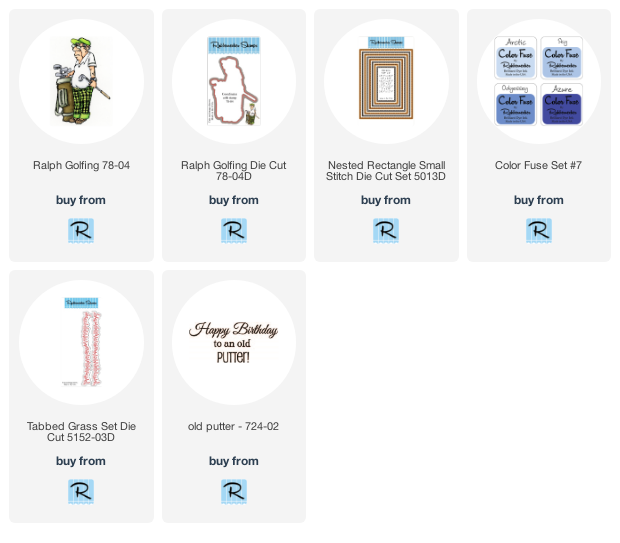
Happy Sunday friends!  I have a fun masculine card today featuring one of Rubbernecker Stamps "old characters" called Ralph Golfing!  He has quite the expression on his face, and I wonder what he is thinking!  LOL!  This card was really easy and quick to make!  Read on for the directions.


The card base:
  • I used a top-folding A2 card base from Neenah Desert Storm card stock.
  • Using the largest Nested Rectangle Small Stitch die, cut some 80# white card stock.
  • Add clouds with a cloud stencil, an ink blending brush, and Arctic Ink from Color Fuse Set #7.
  • For the "golf course" I drew a pencil line on some green card stock for the hill and then cut along that line with my scissors.
  • I used a green Copic marker that was a bit darker than the card stock to color the putting green.  Use a dark gray Copic to add the hole.
  • Using both of the dies in the Grass die set, cut two shades of green card stock.  Adhere the layers with glue.
  • I wanted the stitching to be on the edges of the hill and grass layers.  It's easy to do by using the same Nested Rectangle die and just holding the pieces in place with some tape.  See the next photo for a good visual explanation.  I did this same thing with the hill.
  • Adhere the grass border to the hill.
  • Adhere this to the white card stock layer.
  • Adhere this layer to the card base.
Card elements:
  • Stamp Ralph in Copic safe ink and color him with Copic markers.
  • Using the coordinating die to cut him out.
  • Add some thin foam squares to the upper half of the back of Ralph.  I made sure to tuck his feet into the grass before letting the foam squares adhere to the background layer.
  • For the flag, I just hand cut a triangle and colored it with a few red Copic markers.  The pole is a 1-¾" strip of white card stock that I colored with gray markers.
  • Adhere the flag to the pole and add a small thin foam square to the back of the flag and glue to the back of the pole.  Adhere it into place.

To finish up, I stamped the Old Putter sentiment with Versafine Onyx Black ink onto white card stock and trimmed it to a rectangle shape.  I used a piece of blue card stock to create a layer.  Add some foam squares to the back and adhere it to your card.


I hope you've enjoyed this fun masculine card!  Thank you so much for stopping by.  I hope you have a wonderful and crafty week!


Thursday, August 6, 2020

Ocean Scene Card & Lots of Stenciling Fun | Honey Bee Stamps

Hello friends!  I love using stencils and I had so much fun creating this card with mainly stencils, two stamps and some dies!  Most of these beautiful products are from Honey Bee Stamps awesome Hello Summer release!


I love how this background turned out!  I used the Garden Lattice stencil set to make it.  Here are the steps:
  • I positioned the base Garden Lattice stencil over this making sure the large squares of the stencil aligned with the inked squares.
  • I spread some white Gina K. Designs white Glitz Glitter Gel through the stencil and set the piece aside to dry.  (Be sure to clean your stencil and tool immediately!)  When it was dry, I used the largest Double Stitched Square die to cut it out. I adhered it to a 5-½" square card base.
     

Next I die cut the palm tree leaves, trunk and coconuts that are in the Beach House Add-on die set.  I used the Beach House stencil to add Oxide inks.  I used Mowed LawnTwisted CitronGround Espresso and Gathered Twigs.  

I stamped the sentiment from the Sea Breeze stamp set and die cut it with the coordinating die   I popped up the oval and the sentiment with some thin foam tape.  To finish, I adhered the palm tree to the oval.


I totally love how this turned out and wish you could see the sparkle of the glitter gel in real life!  Thanks so much for stopping by!


Supplies:
Honey Bee Stamps:

Other:

Distress Oxides:

Wednesday, July 29, 2020

Just A Tini Note Birthday Card with A Window | Honey Bee Stamps

Hi my friends!  Today I have a birthday card using several of Honey Bee Stamps' new stamps and dies.  I love Honey Bee's cover plate dies and the Garden Lattice Cover Plates are so beautiful!!  This sentiment from Sip Sip Hooray is so funny!  Keep reading to see the inside of card to see what I mean!


The most complicated part of this card is creating the card base, so I have the steps and a couple of photos to explain how to make this.  (All supply links are below.)
  • Die cut some 80# Neenah Solar White card stock with the Garden Lattice Base and Top cover plates.
  • Next I used a nesting circle die from my stash to die cut the circles in the Garden Lattice cover plate pieces.
  • I die cut the top layer first, then positioned this over the base layer and drew a pencil line on the base layer.  Die cut the circle from the base and repeat for your A2 top-folding card base.
  • Adhere the Garden Lattices to the card base, lining up the circle openings.
  • Next I die cut white card stock with the Circle Thin Frames die.  I picked two circles to fit over the openings of the card front and adhered them together with 1/8" Scor-Tape and attach to the card front.
  • I used a scrap piece of card stock that just fit the circles of the Circle Thin Frames that I chose and die cut those again.  Adhere together in the same way and use on the inside of the card front for a finished look.

Next I worked on the layer inside the card.
  • I didn't, but you could go ahead and die cut some card stock with the largest A2 Double Stitched Frames die.  (I just didn't think about it at the time. Haha!)
  • Now for the stenciling.  I used the Circle Spotlight stencils and positioned one with the card stock in my MISTI.
  • Next I created some masks with some full stick Post-It Notes so I could add the sand layer.
  • First I used a Blending Brush to add some Antique Linen Distress Oxide.
  • Now position the Sandy Shores background stamp and stamp it onto the sandy layer with Brushed Courduroy Distress Oxide.
  • Now I repositioned the mask from the sand to cover it.  I used Mermaid Lagoon and the Ocean Waves stencil to add the waves.  (Tip:  When you get this stencil, use your scissors to snip the various waves apart.)
  • Next I covered the waves with a mask and added the sun and sky.  I used Squeezed Lemonade, Mustard Seed, and Tumbled Glass Distress Oxides.

Now for the other fun elements!
  • I die cut the florals and greenery with the Topical Bouquets dies from colored card stock.  I added shading to some pieces with Distress Oxide ink and a couple of Copic markers.
  • Stamp and die cut the martini glass in the Raise A Glass stamp set and coordinating dies twice.  I used the solid stamp to color in the glasses.  I added some clear sparkle pen to add a bit of bling.
  • Once I had these finished I adhered them to the card front and inside.
  • I stamped the sentiments from the Sip Sip Hooray stamp set and die cut them with the coordinating dies.  I popped up the one on the card front with foam and adhered the inside sentiment with glue.
  • I LOVE these little lemons from the Lemon Drop sequin mix and just had to add them to my martinis!

Now I want to buy the ingredients for some Lemon Drop martinis!  Haha!  I sure hope that my instructions help explain how to make a card like this!  If you have any questions, you can always use the "contact me" form in the left column.  Thank you so much for stopping by!!


Supplies:
Garden Lattice cover plate: Top & Base
Distress Oxides:  Antique Linen, Brushed Corduroy, Squeezed Lemonade, Mustard Seed, Mermaid Lagoon, Tumbled Glass

Sunday, July 26, 2020

Butterfly Kisses Slimline Card | Rubbernecker Stamps

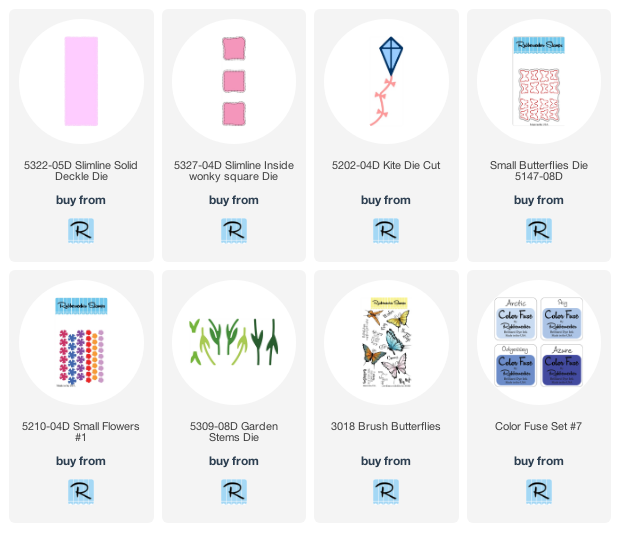
Hello friends!  I have another fun slimline card using another new slimline die from Rubbernecker Stamps!  They have released several new "accessory" dies to go with the slimline layers called Slimline Inside Dies.  My card today uses the Slimline Solid Deckle die and the just released Wonky Square Slimline Inside die.  I built my sweet scene for this card using the Kite Die and Small Flowers #1 die.  


First I created the card base.  Here are my steps:
  • Create a slimline card base by scoring a 8-½" x 7" card lengthwise at 3-½".
  • Center the Wonky Square Slimline Insert in the center of the Slimline Deckle Die.  I taped these together on the non-cutting side with blue painters tape.
  • Die cut four of these from white card stock and adhere all layers together with liquid glue.
  • Put temporary adhesive on the back of three of the wonky squares that remain from the die cutting.
  • Center the layered frame on the card front and stick each wonky square in its corresponding opening.  Set the layered from aside.
  • Ink a cloud background using Color Fuse Set #7, a blending brush, and a cloud stencil.  Note:  You are inking over those wonky squares that are temporarily adhered from the previous step.  I stenciled my clouds in an ombré look starting with the darkest ink at the top. (Don't pay attention to the order of the ink pads in the photo below!  LOL!)
  • Remove the wonky squares and adhere the layered frame to the card base when you are finished with the cloud stenciling.
  • Glue the wonky squares into the openings.


Card elements:
  • I die cut the Kite Die, Small Butterflies Die, Garden Stems Die, and the Small Flowers #1 die from white card stock.  If you prefer, you can just die cut these from different colors of card stock.  I prefer to color them with Copic markers rather than endlessly searching through my colored card stock for just the right colors.  (Maybe I should take that clue and organize my card stock better?  Haha!)
  • Die cut the kite three more times to have enough extra kite bows to make two layers each.  Also, take one kite string and adhere it to the end of another.  When everything is colored, snip six of the bows from the extra strings.  Add a dot of glue just to the center of the bottom bow and layer another bow on top.
  • When the glue is dry on the bows, bend up the sides to add dimension.
  • A tip for easy coloring of the small die cuts.  After you die cut them, put some temporary tape on the back of the die cut negative, and put your die cuts back in place.  This makes it really easy to color them without have to try to hold onto them while coloring!

  • After I had everything colored, I used a stylus to add some shape to the flowers and attached them to the stems.
  • Trim the Garden Stems as you like to create a cluster of flowers in the bottom wonky square.
  • Adhere some of the flowers with liquid glue and a few with foam tape.
  • Add a foam square to the back of the kite and adhere in the top square.
  • Add a few drops of liquid glue to the kite string to adhere to the middle square.
  • Add glue only to the center of the butterflies and arrange on the card front.
  • Stamp the sentiment from Brush Butterflies in black ink and trim into a rectangle shape.
  • Color a scrap of card stock with a dark blue Copic marker and trim to fit as a layer behind the sentiment.
  • Adhere the sentiment with liquid glue.

To finish up, I added some white dots to the kite with a gel pen and some gem stickers to the kite string.  Because I love my sparkle, I added some to the butterflies with a clear sparkle pen.


I love these new slimline dies and inserts!  Which ones are your favorites?  I have a hard time choosing! LOL!  Stay well, and crafty, my friends!