Sunday, September 13, 2020

Celebrate Autumn: Layering Stamps with Embossing | Rubbernecker Stamps

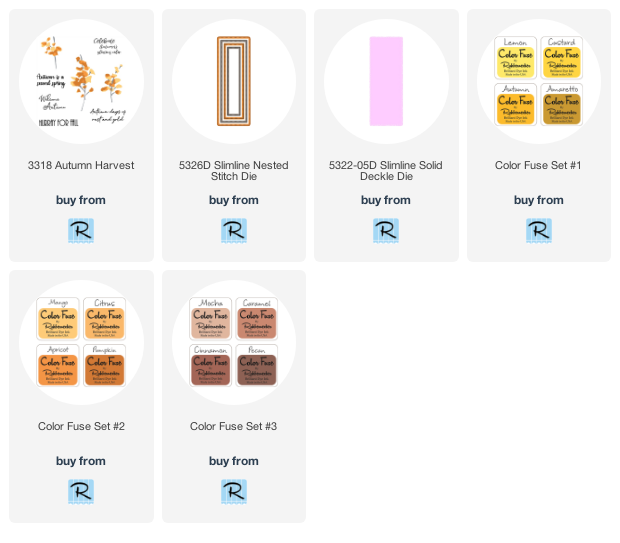
Hello friends!  Today I've added a twist to using layering stamps by embossing the final layer!  I've used Rubbernecker Stamps' beautiful Autumn Harvest stamp set for my slimline card today!

Here are the steps for my autumn card:

  • I began by centering one of the Slimline Nested Stitch dies (the second largest) in the middle of the Slimline Deckle Die.  Use tape to keep them together.
  • Trace a pencil line around the inside of the rectangle.  (see photo) Be sure to keep them together as we will use them later for die cutting.


  • I roughly planned where the branches would go, using the pencil line as my guide, so I would know where to stamp my sentiment.  See photo above.
  • Next I stamped the sentiment with Versamark ink and added copper embossing powder, then heat set it.  I repeated this step to get a more dimensional look.
  • Stamp the base layers of the stamps in Mocha ink from the Color Fuse Set #3.  I placed the branches randomly, here and there, using the sentiment and pencil line as my guide.

  • Position the second layer of the branches. For this layer I used a variety of inks.  I used Mango, Citrus, and Apricot on the different branches.  The included layering guide makes this very easy!
  • For the final layer, instead of stamping it with inks, I used embossing powder.
  • Make sure all of the inked layers are dry!  Use your anti-static bag, then stamp the third layer with Versamark ink.  I used embossing powders I had in my stash.  One was WOW copper and the other BEE Sweet, a golden yellow shade (and on sale now).  Heat set the powders with your heat tool.
  • Now use the two taped together dies and line the pencil line up with the inside of the rectangle die.  Run it through your die cutting machine.  Be sure to erase your pencil line!

  • I added foam tape to the back of the rectangle piece.
  • I centered it onto a coordinating card base and adhered it.  The card base is from The Paper Cut's Festive Variety Scored Slimline Cards pack.
  • I added liquid glue to the deckled frame and adhered it around the rectangle.
  • To finish it up I added some coordinating sequins from my stash.  I never can have too much bling! Haha!

I loved adding the embossed layer to this card, and I hope I've inspired you to give it a try.  Have a wonderful and crafty week!
Saturday, September 12, 2020

Espresso My Gratitude--Pink & Main with Pear Blossom Press Blog Hop

 Hello friends!  I'm so happy to be part of the Pear Blossom Press and Pink & Main collaboration blog hop!  We are creating fun and interactive projects with some awesome stamps and dies from Pink & Main and the so easy to use EZ-Lights from Pear Blossom Press!

I used the Pear Blossom Press EZ-Lights to create a fun card that lights up the sparkles on the whipped cream topping!  The Pink & Main Need To Venti set is awesome for all of your coffee cards!


Read on for the details to make this fun card!

I began by making my card base.  I added some brown card stock to an A2 card base.  I trimmed a piece of patterned paper (all supplies are listed below) to 4" x 5-¼" and adhered it to the card base.

I stamped the leaves and the acorn several times.  Then I die cut them out with the coordinating dies.  I added Glossy Accents to the acorn tops and set them aside to dry.

Next I created the panel for my lights and images.  I used another piece of the brown card stock trimmed to 4" x 2-½" and added a piece of 4" x 2" patterned paper.

I stamped two leafy cups from Pink & Main's Need to Venti set in Copic safe ink.  I colored one of the cups with my markers.  The colors I used are:  YG97, YG95, YG93, YR27, YR24, YR21, B39, B37, and B23.  I used the coordinating die to cut it out.  I fussy cut the whipped cream from the second cup.  Then I stamped the sentiment from the Need To Venti set with Versamark and and heat embossed it with brown embossing powder.  I adhered the cup to the panel and punched holes for the lights with a 1/8" hole punch.  Then I planned where to place the battery pack of the EZ-Light set from Pear Blossom Press.  I adhered the battery pack with double sided tape.  Next I positioned the wires and lights and kept it all in place with pieces of washi tape.  


I added a double layer of 2mm foam tape to the panel and adhered it to the card front.  I added some small pieces of foam tape to the other whipped cream, making sure I didn't cover the holes and added it to the cup.  I glued the leaves and acorns along the bottom of the panel.  For a bit of bling, I added some chunky glitter to the whipped cream.


Thank you so much for hopping along with us!  For more awesome inspiration, check out all of the stops in the hop and leave a sweet comment along the way!

Here's the full hop list:

Carol Hintermeier <---that's me!

Supplies:

Friday, September 11, 2020

Simon Says STAMPtember & Honey Bee Stamps Exclusive "On My Mind"

 Happy STAMPtember!!!  What is STAMPtember, you may wonder?  Here is Simon Says Stamp's description:

"STAMPtember is a special celebration of stamping that lasts all month long! You'll find special new products, industry collaborations, prizes, supersized ispiration, education and so much more! Join us in celebrating the 11th Anniversary of STAMPtember! This product has been designed to inspire and delight you in making your projects. It's available exclusively at Simon Says Stamp while supplies last."

I'm very honored to have the opportunity to show you their collaboration stamp set with Honey Bee Stamps!  It's called On My Mind and it's so beautiful!!!  This set has many sentiments to use with this beautiful floral wreath that makes it perfect for many occasions!  This is available to purchase as just the stamp set, or the stamp set with the coordinating die.  Read on to see how I created my card!


First I created my A2 card base.  I adhered a piece of Concord & 9th's Dove Gray card stock to a white card base.  Then I stamped Honey Bee's Buffalo Plaid stamp onto some white card stock with Concord & 9th's Dove Gray ink.  I trimmed this to 4" x 5-¼" and adhered it to the card base.

Then I stamped the wreath and sentiment with Versamark ink onto a piece of Strathmore Bristol Smooth card stock. I heat embossed them with silver embossing powder.   Next I used my Zig Clean Color Brush Markers to color it.  I have the colors I used listed below.  I didn't have the die, but it was very easy to fussy cut out.  I added foam tape to the back.

I adhered the wreath onto the card base.  For a bit of bling, I added some Honeysuckle Nuvo Jewel Drops here and there.

I love how this turned out, and I hope you do too! Remember, this set is only available at Simon Says Stamp and while supplies last!  Thank you so very much for stopping by!!


Watercolor markers used:
Zig Clean Color:  Light Green, Yellow Green, Olive Green, Yellow, Gray Brown
Altenew:  Sweet Leaf, Lime, Purple Wine

Wednesday, September 9, 2020

One More Trip to The Beach! | Honey Bee Stamps

 Hello friends!  I needed one more trip to the beach (I wish!)  Since I've no trip planned for now, I've created a peaceful beach scene card to take me there!  The Honey Bee Stamps awesome Beach Scene A7 Cover Plate die makes this very easy.

I'm short on time today, so I hope you don't mind a list of the general steps.  (If you have any questions, use the contact form in the left column.)

  • Create a 5" x 7" card base from white card stock.
  • Die cut the Beach Scene A7 Cover Plate die from white card stock.  Adhere the thin frame onto the card base.
  • Using a blending brush, ink the wave pieces in Mermaid Lagoon, Salty Ocean and Blueprint Sketch Distress Oxides.
  • Ink the sand pieces with Brushed Corduroy and Antique Linen Oxides.
  • Ink up the Sandy Shores Background stamp with Ground Espresso and stamp onto the sand pieces.
  • Using a cloud stencil from the Mountain Z-fold stencil set, ink the die cut clouds with Weathered Wood Oxide.
  • Ink the sky portion with Tumbled Glass Oxide.
  • Adhere all the pieces into the frame on the card base.

  • Stamp the plants from the Luau stamp set in green inks.  I used Altenew Forest Glades and Evergreen.
  • Die cut the plants with the coordinating Honey Cuts.
  • Using scrap pieces of white card stock, blend some Nuvo Embellishment Mousse onto them.  I used Mother of Pearl, Aquamarine, and Coral Calypso.  Let dry.
  • Stamp the shells from the Hello Summer set onto the mousse pieces with Versamark clear ink.  Sprinkle on white embossing powder and heat set.
  • Stamp the beach chair from the Hello Summer stamp set with Ink On 3's Fadeout detail ink.  Color with Copic markers and then die cut with the coordinating Honey Cuts.
  • Die cut the top layer of Summer Honey Cuts three times and adhere the layers.  Die cut the middle layer from Mermaid Lagoon inked card stock.  Finally, die cut the bottom layer from vellum.  Adhere it to the card front.
  • Stamp the other sentiment from the Summer set on the leftover blue inked piece with Versamark, add white embossing powder and heat set.  Then I die cut it with a Sentiment Banners Honey Cuts.  I added foam tape and adhered it.

As always, I so appreciate your stopping by for a look!  I hope the rest of your week is good with lots of crafty time!

Thursday, September 3, 2020

Thank You Berry Much! | Honey Bee Stamps

Happy Thursday my friends!  It's still so hot, and humid, here in Texas and I'm not yet in the mood for making a fall themed card!  So, I've used Honey Bee Stamps new Freshly Picked stamps and Honey Cuts  along with a favorite of mine that's been out a while, Bushel and A Peck!  

Other than coloring the basket, this card was super quick to put together!  I started with an A2 card base and added a piece of 4" x 5-¼" piece of gingham paper from the Back to Basics paper pad.  I topped that with 80# Neenah that I cut to 3-¾" x 5".  The Bee Creative Precision Tip glue is perfect for this!

I used the basket from the Bushel and A Peck set and stamped it in Copic safe ink.  I wanted a smaller basket, so I fussy the basket and also cut off the top portion.  I colored the bottom of the basket with these Copic colors: E59, E57, E55, E23, and E53.  I added foam tape to the back.  Next I die cut the grass in two shades of green with the Grass Border Honey Cuts.   I adhered one piece to the white layer with glue, and added foam tape along the bottom edge of the top grass piece.

  I used the outline stamp for the strawberry in the Freshly Picked set and stamped it in Versafine Onyx Black ink.  Next I used the solid strawberry stamps and stamped them out in Concord & 9th's Poppy and Parsley ink--this is a quick and easy way to get your stamped images colored!  I die cut them with the coordinating dies.  I arranged them in the basket, adding foam tape to all but one.  Once I had all the pieces ready, I added them to the card.

I stamped the sentiment from the Pearfect Sentiments set with Versamark onto black card stock.  I added white embossing powder and heat set it and die cut it with the coordinating Honey Cut.  I popped it up with some foam squares.  While I had the sentiment set out, I stamped another sentiment inside the card and used an extra strawberry and strip of gingham paper to finish it off.  For a bit of bling on the card front, I added white gel pen accents to the strawberries, Glossy Accents to the basket, and a few of the oh, so cute strawberries from the Strawberry Daiquiri sequin mix.

Thank you so much for stopping by!  I'm not quite done with summer yet, but stay tuned, because soon you will be seeing a lot of autumn cards using some awesome new products!

Supplies:

Wednesday, August 26, 2020

Calla Lilies and Cover Plate Dies | Honey Bee Stamps

 Happy Wednesday my friends!  Today I have a card using Paradise Blooms and Pineapple Lattice Cover Plate Honey Cuts, which are products from Honey Bee Stamps Hello Summer release.  You may know that this release is all about summer and the topics.  However, with a change of colors and a different sentiment, it becomes a sympathy, encouragement, or get well card!

Other than the no-line coloring, which I am still practicing, this was a very easy card to make!  I stamped the lilies and palm frond in Ink on 3 Fadeout Detail ink.   I used these Copic markers: YG67, G07, YG45, G21, G40, W1, W0, and W00.  I used the coordinating Honey Cuts to cut them out.

I die cut the top Pineapple Lattice die from 80# Neenah card stock and the bottom Cover Plate from Simon Says Stamp Fog card stock.   I used the fabulous new Bee Creative Precision Tip glue to adhere them together and to the A2 card base.

The sentiment is from the With Sympathy stamp set.  I stamped it and then die cut it with a die in the Sentiment Banners die set.  I adhered it to Fog card stock and trimmed it to a banner shape.  I finished it off with a few of the Dappled Moss acrylic hearts (I love how these coordinated with my coloring!) 

I love how this turned out and how those cover plate dies don't scream pineapple for this card!  Thanks so very much for stopping by.  I sure hope you've been well and are staying crafty!!

Tuesday, August 25, 2020

Keeping Christmas Blog Hop - August 2020

How can it be August 25 already?!!  I don't know where the time goes!  Haha!  Well, that does mean it's time for more Christmas card inspiration from the talented gals in the Keeping Christmas Blog hop!  Check out the hop list below.


I have a couple of fun and quick cards I made using this cool ornament stencil called Striped Baubles.  This is from a small company in Dallas called A Colorful Life Designs.  I discovered this company when I was visiting a crafty Facebook group and someone used the most beautiful cloud stencil (which evidently has gone viral) and it really is awesome!  (I have no affiliate with them, but I do love being a crafty enabler!  LOL!)  Anyway, back to the cards,  I do enjoy stencils with glitter paste, embossing paste and all the fun pastes out there.  I did make a few more backgrounds but ran out of time to finish in time for the post (you can see a peek of them below.)  Here are the two cards I did finish.


My first card is embossing with metallic gold embossing paste. After I die cut the panel with a stitched rectangle die I blended on some Candied Apple and Black Soot Distress ink on the card stock panel.  I heat embossed the sentiment in gold on some heavyweight vellum.  I added some foam tape to pop it up on the card base.  I added a few gem stickers and it was done!  Except for the drying time, these are quick cards to make.


For the next card I added Nuvo Glimmer garnet red glitter paste on gold foil card stock.  I've had this beautiful sentiment from Impression Obsession for a number of years and still love it.  I just checked and they still have it at THIS link.  I die cut it twice from white card stock and once from gold mirror card stock.  I adhered the layers and added it to a vellum oval.


These backgrounds are so fun to make with pastes.  I still haven't tried inking it up with dye inks and I think I'll be doing that soon!


Thank you so much for stopping by!  Now go check out the other, what I know will be, amazing cards from the other ladies!

Hop list: