Saturday, August 19, 2023

Set of Three Easy-to-make Autumn Cards featuring the BetterPress Letterpress System

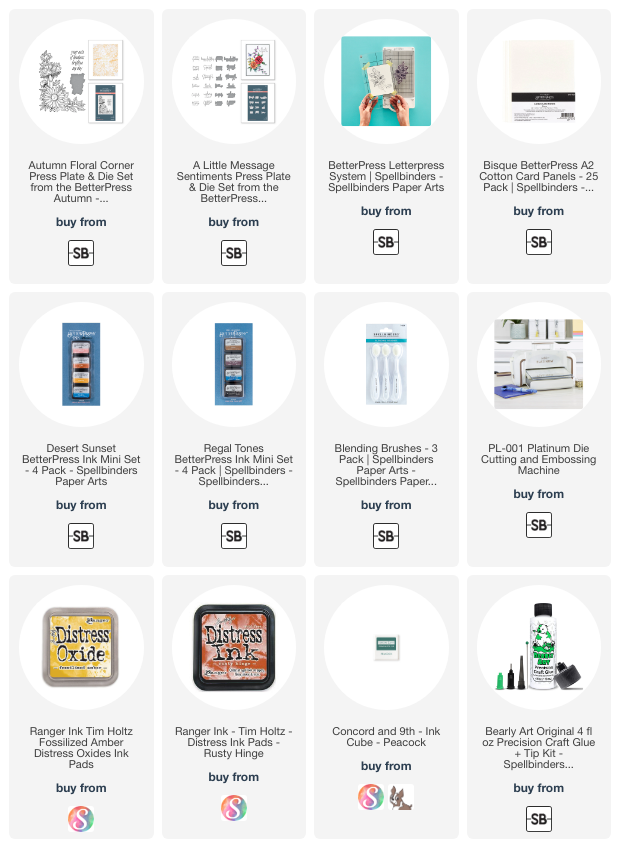
Hello, friends!  Today I'm sharing three cards I made with a couple of products in Spellbinders BetterPress Fall/Halloween Collection. These easy cards feature the gorgeous Autumn Floral Corner press plate and the Notched Corner Frames dies.

I created all three cards using Spellbinders' BetterPress Letterpress System.  I used three of the inks in the Desert Sunset BetterPress mini ink pad set and the Autumn Floral Corner press plate.  I followed the directions for the BetterPress and pressed the image onto Bisque A2 cotton card panels.  This first card is pressed with Tuscan ink.

The sentiment from this card is included with the Autumn Floral Corner set and pressed with black ink from the Regal Tones mini ink pad set.

Next I trimmed each panel to 4" x 5-¼".  Then I used the fourth largest Notched Corner Frames die and die cut the center of each panel.  Before I glued on the outer portion of the panel, I inked up the front edges of an A2 card base with Fossilized Amber Distress Oxide ink, which matches perfectly!

I tied a piece of gingham ribbon around the center panel and added foam tape to the back to pop it up.

The next two cards are created in the same way as the first, just different ink colors.

This time I pressed the Autumn Floral Corner with Clay ink.  I found another very good coordinating ink-Rusty Hinge Distress ink-for the card base.  This sentiment is from the A Little Message Sentiments press plates and dies set.

Last but not least, is the final card pressed with Coastal Ink.  I searched through my entire stash of ink pads to find a coordinating ink for the card base and this is the closest I could come!

Even though the Peacock ink is a bit bright, I do think that Concord & 9th's Peacock ink coordinates very nicely!  Again, the sentiment is from the A Little Message Sentiments set.

I hope you've been inspired by these easy and beautiful cards today!  I truly do love the BetterPress system and the crisp images it creates!  Thanks so very much for stopping by!

Thank you for shopping with my affiliate links (never any additional cost to you)!

Friday, August 18, 2023

Grateful for Your Friendship with the New Autumn Envelope of Wonder

Happy Friday crafty friends!  Have you seen Spellbinders' new die set called Envelope of Wonder?  It is SO beautiful with lots of different flower dies to fill the envelope!  For my card today I've used the add-on Autumn Wonder die set along with the Sentiments of Wonder BetterPress set.

I die cut the envelope die from the Envelope of Wonder set from patterned paper in the Floral Friendship paper pad.  I die cut an extra "liner" piece from gold and white paper along with the metallic gold trim.  This will coordinate with all of the Autumn Wonder die cut pieces that I added touches of gold to.

Next I die cut all of the pieces of the Autumn Wonder set from various colored cardstock scraps and some mat gold cardstock.  I've linked all of the current cardstocks in the list below.  I used ink blending brushes to add Distress Inks to the pieces for shading.  I used these colors:  Rustic Wilderness, Rusty Hinge, Fossilized Amber, Fired Brick, and Gathered Twigs.

On some of the pieces I used a gold sparkle pen to add touches of gold.  For the gold on the leaves I just brushed my embossing ink pad along the edges of each leaf.  After I sprinkled on gold embossing powder, I used a dry paintbrush to dab away some of the powder and then heat set the pieces.

The fun part of making this card was playing around with various arrangements for the florals!  Some pieces are adhered with a few dots of glue, and others have a foam dot or two for extra dimension.

I created the sentiment from the Sentiments of Wonder by inking it up with Clay ink and then following the directions for the BetterPress Letterpress System.  I cut it out with the tag die found in the Envelope of Wonder set.  I added a piece of twine to the tag before popping it up with foam tape.

As you can see from the above photo, this will easily fit into an A7 envelope for mailing!

This was really fun to make and these elements would also be beautiful as the focal point of a standard card.  Thanks so much for stopping by today.  I hope you have a wonderful, and crafty weekend!

Thank you for using my affiliate links (never any additional cost to you)!

Wednesday, August 16, 2023

Sending You Sunshine

Hello crafty friends! Today I'm back to the beach with my card featuring Honey Bee Stamps' fun Beach Scene A7 Cover Plate die, but not an A7 card! Keep reading for how I made this into an A2 card!

First I die cut the Beach Scene A7 Cover Plate die from 80# Neenah. Then I used some inks from my stash and a few Distress Inks to color the layers with ink blending brushes. The sand layers are Antique Linen and Gathered Twigs Distress ink. The water layers are three shades of teal inks (linked below). Then the sky is more Distress Inks in the color of Squeezed Lemonade, Scattered Straw, Tumbled Glass and Prize Ribbon.

Next I die cut more 80# Neenah with the fourth largest Sweet Stacks: Rectangles die. Then I used glue to adhere the Beach Scene layers to the rectangle. I slightly offset the center of the scene so that the sunrise would appear more on the right side. After all of the layers were glued on, I used my scissors to trim off all of the excess on each side.

I adhered the Beach scene to an A2 card base. Next I die cut colored cardstock with the hibiscus and plumeria blossoms and leaves dies from the Tropical Bouquet Honey Cuts. I adhered the pieces to the card with glue, except for the hibiscus, which is popped up with a foam dot.

I can't believe I didn't even add any shading to the flowers! LOL! But I just thought that they were very pretty as they are! I treated a piece of white cardstock with my antistatic tool. Then I stamped the sentiment from the Wish You Were Herestamp set in black pigment ink. I sprinkled on black embossing powder and used my heat tool to set it. I cut it out with the coordinating die.

I added foam tape to the back of the sentiment for dimension to match the flowers. I really wanted to add a bit of bling, but decided that this card didn't need it at all! What do you think?

As much as I loved making my autumn wreath card (last week's blog post) it's really hard to get into the autumn feel with it still so hot where I am! This beach scene was just what I needed, and I hope you've enjoyed the process. Thanks so very much for stopping by today!

Thank you for shopping with my affiliate links (never any additional cost to you)!

Tuesday, August 15, 2023

Cute Snowman Shaker Card

Hello crafty friends!  Today I'm sharing this fun shaker card featuring a couple of newer Rubbernecker Stamps' products along with some older and still fun products.  And, one more holiday card is done!

First I stamped the adorable little snowman from the Laughing Snowmen set in a very light gray ink so I could achieve a no-line coloring look.  I colored him with my Copic markers and used the coordinating die to cut it out.

This photo shows the marker colors I used:

Next I die cut a rectangle opening in paper from the Ho Ho Ho paper pad with a Nested Rectangle Small Stitch die.  I trimmed this to 4" x 5-¼".  I glued a piece of acetate to the back of the patterned paper then die cut three Inside Scallop Frames to layer up with glue and then adhere around the front of the opening.

For the shaker background I die cut four layers of the Slimline Christmas Tree and adhered it off-center onto a piece of blue snowflake paper from the Snowflake Fun Slimline paper pad.  I added white dots for snow to the tree with a white gel pen.

I added foam tape to the back of the piece with the acetate.  I sprinkled in translucent Distress Mica Flakes, removed the foam tape and then adhered the piece with the tree to close the opening.

After I adhered the shaker to an A2 card base with a red paper layer (also in the Ho Ho Ho paper pad), I glued the snowman to the front of the window and adhered the sentiment.  The sentiment is one of several in the Laughing Snowmen set.

Thank you for stopping by today!  I hope you have a wonderful day!

Thank you so much for using my affiliate links to shop (never any additional cost to you)!

Thursday, August 10, 2023

One Swirling Foliage Tree Hot Foil Plate = Three Beautiful Christmas Cards

There's a gorgeous new Spellbinders hot foil plate available today called Swirling Foliage Tree and I had so much fun making these three cards!  This is part of the Glimmer for the Holidays Collection release that's filled with many selections of dies, coloring stencils, hot foil plates, sentiments and so much more!

It was lots of fun thinking of three different looks for this beautiful Swirling Foliage Tree hot foil plate!  The sentiments on all of the cards are from the Glitter Wishes hot foil plates set.  It has 31 sentiments!!  Plus a long narrow rectangle die to use to die cut each one!

I used my Glimmer Hot Foil System to add Aura Glimmer Foil to red cardstock.  After foiling the Swirling Foliage Tree I trimmed the piece to 3-¾" x 5".  Then I used ink blending brushes to add dark red ink around the edges, followed by black ink.

It was super easy to make a perfectly coordinating layer for the image and sentiment by adding a sheet of double sided adhesive to white cardstock.  Then just remove the adhesive backer and carefully place a sheet of the Aura Glimmer Foil onto the adhesive.  It was easy--just go slow and smooth the foil with you other hand as you place it down.  Be sure to peel off the clear film of the Glimmer Foil after you adhere the foil!

I added some pretty gold gem stickers to the tree to up the bling factor!

The next version of the Swirling Foliage Tree is done in a dark teal cardstock with Opaque White Glimmer Foil.

The white foil is added to Spellbinder's Blue Spruce cardstock.  Now...this is my honest opinion:  After hot foiling on several different brands of colored cardstock, I have to say that I get perfect results when I use Spellbinder's colored cardstock!  I do not know what the difference is, but it's there!

If you look closely at the previous card, and the next card, there are small imperfections in the foiling, which was on a different brand of cardstock.  I didn't like it, but decided to stop being totally picky!  LOL!

I inked the edges of this cardstock with Pine Needles Distress Ink and also Black Soot.  I used Opaque White Glimmer Foil for the sentiment on this card.

I added silver gem stickers from my stash to the tree this time.

And finally, here is my third rendition of this card!

I used Red Glimmer Foil on 80# Neenah for this card.  Then I used my scissors to trim around the tree.  I added thin foam tape to the back of the tree.

I inked a 4" x 5-¼" panel of the red cardstock with dark red and black inks and adhered it to an A2 card base.  Of course, it was after this step that I decided I wanted white splatters, but not on the tree and sentiment!  Haha!  I just covered the tree with scrap paper as I added the splatters.

This sentiment is also done in silver foil and added to a white layer.  I popped it up onto the card and added red gem stickers.

These cards really were easy to make and I enjoyed the process of finding different versions for each card.  Be sure to check out the Swirling Foliage Tree hot foil plate and lots more fun elements in the Glimmer for the Holidays Collection!

Thank you so much for stopping by!  I hope you have a wonderful, and crafty day!

I appreciate you so much for using my affiliate links to shop (never any additional cost to you)!

Wednesday, August 9, 2023

Autumn Grapevine Wreath Card

Happy Wednesday crafty friends!  For my card today, I've used some previously release Honey Bee Stamps products that I still love! I've made an autumn wreath with the awesome and versatile Grapevine Wreath Honey Cut. Keep reading to see which other products I've used for this beautiful wreath.

I started by die cutting two of the Grapevine Wreath Honey Cuts from light brown cardstock. Next I die cut the leaves and pumpkins found in the Itty Bitty Leaves and Itty Bitty Pumpkins sets. The berry stems are in the Country Christmas Wreath Honey Cuts (another favorite of mine), but you could use any branch and add berries to it too. The pieces were die cut from golden yellow, orange and white cardstock. 

I used the small ink blending brushes to add Distress Oxide inks to all of the pieces. Use any of the browns and warm autumn Oxides that you may have and it will be beautiful! Here's a list of the Distress Oxides I used:

  • Rusty Hinge
  • Fossilized Amber
  • Crackling Campfire
  • Spiced Marmalade
  • Wild Honey
  • Barn Door
  • Aged Mahogany
  • Fired Brick

Now, here is how I made the little berries! I inked Crackling Campfire Oxide onto some white cardstock. Then I used a 1/8" hole punch and punched until I had enough "berries" for my branches! Easy peasy!

I added layers of paper from the Grain and Grunge paper pad die cut with two of the Sweet Stacks: Rectangles to an A2 card base. I used Bee Creative glue to adhere the layers. This paper pad is filled with several different gorgeous wood plank and woodgrain papers!

Next I adhered the two Grapevine Wreaths together, offset, with dots of glue. Then first added a cute little orange gingham bow I made with ribbon from my stash. Then I began arranging and adhering the elements onto the wreath. I only added a drop or two of glue at the base of the leaves so I was able to tuck more leaves in.

I stamped the sentiment from the Bitty Buzzwords: Seasons stamp set in brown ink. I used the coordinating dies to cut the shadow once and the word "fall" three times from white cardstock. Then I die cut the stamped "fall" and adhered all of the layers together with glue. I added foam tape strips and dots to adhere the sentiment to the card.

To add a bit of shine, I added drops of Crystal Glaze to each berry.

In spite of all of the details, this really is an easy card to make--and it's fun too! I hope you've enjoyed this, and I so appreciate you stopping by today! Have a wonderful, and crafty day!!

Thank you for using my affiliate links to shop (never any additional cost to you)!

Wednesday, August 2, 2023

Hello Beautiful!! -- Floral Birthday Card

Hello crafty friends! I cannot believe it's August!  I'm staying inside, out of the heat, and having lots of crafty fun! Today I'm sharing this card I made using Honey Bee StampsAdventure Awaits paper pad along with several other previously released products.

First I created the layers for the card base by die cutting the Happy Happy Happy A2 cover plate die four times. Once was from patterned paper in the Adventure Awaits paper pad and three times from white cardstock.  Be sure to save those middle pieces from the "A's" and "P's"!!

Tip: Do what I totally forgot to do and put sheets of double-sided adhesive to the papers before die cutting! Otherwise, use Bee Creative glue to adhere the the layers and the fallout pieces for the A's and P's, like I did.

Once you have the layers adhered, add a piece of dark green paper (Adventure Awaits paper pad) to an A2 card base. Then adhere the Happy Happy Happy die cut to the card. Next adhere the center pieces of the A's and P's.

Next I chose two of the dies from the Lovely Layers: Greenery set. I die cut one greenery once, and the other two times from 80# Neenah. I used some ink blending brushes and Distress inks to color the greenery. I used Shabby Shutters, Peeled Paint, Bundled Sage, and Rustic Wilderness.

Next I die cut the poppy layers from the Lovely Layers: Wildflower set. I used a few of the same green Distress Inks as before, plus a couple of coral-orange inks in my stash to color the layers.

To defuse the business of the patterned paper, I die cut some vellum with the fourth largest Deckle Circle die. As you can see in the photo, I trimmed off the edge just a bit. Then I used dots of glue to adhere the greenery and poppy to the vellum. When the glue was dry I turned the piece over and added pieces of foam dots to the back of the vellum making sure they wouldn't show through to the front. (I just cut the foam dots in halves or quarters to make them fit where needed!)

One more step before I removed the backing from the foam dot pieces! I stamped the sentiments from the Mini Messages: Everyday in green ink and die cut them with the two coordinating dies. I used tape runner to glue the sentiments to the vellum, as shown. Then I added a narrow foam strip to the back of the sentiments. This will hold up that side of the vellum! Remove the foam tape backing and adhere the piece to the card.

I added a few pretty pearls that coordinated from the Spring Pearls pearl stickers set.

In spite of the details of this card, I had this made in a surprisingly short amount of time!  I'm still building up my low birthday card stash, and this will be perfect for a fall birthday! Thank you so much for stopping by!

I so appreciate it when you use my affiliate links to shop (never any additional cost to you)!