Friday, October 30, 2020

Spellbinders FSJ "Sweet As Honey"

 Happy Friday, my friends!  I am so happy to have been invited to help celebrate the launch of Spellbinders/FSJ's Buzzworthy Collection.  I have the Sweet as Honey stamp set and the Sweet Honeycomb stencil and created two cards sweet cards!

I had lots of fun creating this first card with some stamping and masking.  This is a one-layer card and I seriously do not remember ever making one of these ever!  Haha!!

I began with an A2 top folding card base and stamped the main floral image from the Sweet as Honey stamp set.   All of my stamping is done with Copic safe ink.  I also stamped it onto some masking paper and fussy cut it out.  I added the masking paper onto the stamped image and stamped two more leaves.  I also created masks for these leaves.  With my masks in place I used the Sweet Honeycomb stencil and inked it with some Tumbled Glass Oxide.  I took care have the stenciling darker around the flower and have the ink fade out.

Next I colored the images with my Copic markers.  Then I stamped the sentiment, bee and bee trail with black ink.  I had thought to color the bee, but then I decided I liked it a lot without coloring.  I love how this turned out and maybe I will now make more one-layer cards!  :)

-----------------------------------------------

For this next card I used some other stamps in the Sweet as Honey stamp set.   I would recommend using a MISTI or other stamping tool to create the border.


I stamped the solid honeycomb by using my MISTI.  I lined the stamp up along the bottom edge and then shifted it over each time.  It only took three stampings to create this border.  Then I trimmed it to 1" x 3-¾" and layered it over yellow card stock that measured 1-¼" x 3-¾".

Next I cut a yellow layer using the largest Spellbinders A2 Matting Basics A Card Creator die.  I cut white card stock with the largest of the A2 Matting Basics B Card Creator die and adhered the two layers together.  I glued these to a top folding A2 card base.  Using my honeycomb strip as a guide, I stamped the two flowers.  On a scrap piece of white card stock I stamped the three bees.  I colored them with my Copic markers and fussy cut the bees.  Once I decided on my arrangement, I stamped the sentiment and adhered the bees with foam tape.

Many thanks to Spellbinders for inviting me to create with this awesome stamp set.  I love it and will be definitely using it more!  Thank you, my friends for stopping by today!  Have a wonderful, and crafty, weekend!

Thursday, October 29, 2020

Slimline Card with Pretty Poinsettias | Honey Bee Stamps

 Happy Thursday my friends!  Did you see all of the new Holiday Cheer release by Honey Bee Stamps?  It's all so awesome and beautiful!!  I'm using the new Pretty Poinsettias stamps and Honey Cuts along with the Mistletoe Slimline Cover Plate die to create my slimline card.

I started by creating my card base.  Score a 7-½" x 8" card at 3-¾" and fold.  Then I die cut the Mistletoe Slimline Cover Plate three times from 80# Neenah card stock.  I adhered the layers together with the Bee Creative Precision Tip glue and adhered the stack to the card base.  I put some stamp blocks on the card to weight it down while it dried.

While the card was drying, I stamped the poinsettia, berry stems and greenery from the Pretty Poinsettias set in Copic safe ink.  I colored the images with my Copic markers.  For the flower and berries I used R59, RV29, R35, and RV13.  I colored the leaves with G28, G07, G14, and YG05.  Next I die cut them with the coordinating Honey Cuts.

I adhered the branches and leaves with Bee Creative glue and popped up the poinsettia with foam tape.  I stamped the sentiments with Versafine Onyx black ink and die cut them with the coordinating dies.  I love having dies for the sentiments!!  I "needed" (haha!) some sparkle so I added some to the berries and flower center with a Wink of Stella clear sparkle pen.  I also added some Nuvo White Blizzard Glitter Drops to the spots on the background where there would be mistletoe berries.

I love how this turned out and hope I've inspired you today!  Thanks so much for stopping by!


Sunday, October 25, 2020

Keeping Christmas Blog Hop - October 2020

 Hello friends!  Can you believe it's only two months until Christmas?  It's time for our monthly Keeping Christmas inspirational blog hop to help motivate and inspire you in your Christmas card making.


I've made a trio of slimline cards using Simons Says Stamp's Slimline Scene Builder-Christmas stamp and die set.  This was a stamp set that was released in September and I just had to have it!

I played around with varying ombré shades of inks to create the sky and ended up with three I liked.  For the snowy hill I used a different embossing powder that complimented the ink colors.  For each card I stamped the trees in the same ink colors as the sky.  I embossed the "ornaments" for each cards' trees in the same embossing powder that was used on the snowy hills.

Below the first photo of each card I've listed the products, and their links, used for that card.

I used these Distress Oxides for the sky: Chipped Sapphire, Stormy Sky, Faded Jeans, and Speckled Egg.  Using blender brushes makes this really easy!  I used WOW Diamond White embossing powder for the hill and ornaments.  (I'm sorry I cannot find a link.  It must be retired.)   I also used this for the sentiment.  I layered these onto some beautiful sparkle paper I had in my stash and then onto a dark blue card base that measures 3-¼" x 8-¼".  As if that's not enough sparkle, I added Honey Bee Stamps Bokeh Lights sequins!  Haha!  I do love all the bling!


This card, and the next, uses some Altenew ink cube sets that I recently ordered.  I LOVE these colors!!
This card is inked with Altenew's ink cube set called Tranquility.  I adhered the pieces to Honey Bee Stamps Slimline Eyelet die cut from glitter paper.  I used WOW Vanilla Sparkle embossing powder for the hill and ornaments.  I added Studio Katia's Sparkling Crystals to the sky.  The sentiment is heat embossed in white embossing powder.  I inked over it with the Nimbus ink cube and then die cut it with a Sentiment Banner die.


My final card is inked up with Altenew's Cool Summer Night ink cube set.  I used WOW White Puff Twinkle embossing powder.  It's hard to see in the photos, but this embossing powder puffs up just a bit when heat set for some fun dimension!  The sentiment is white heat embossed, inked over with Dusk ink and die cut.


These cards were so fun to make and really did not take very long!  I hope I've given you some inspiration for your holiday card making!

Thank you for stopping by and be sure to check out these awesome designers for more inspiration!

Carol Hintermeier << that's me

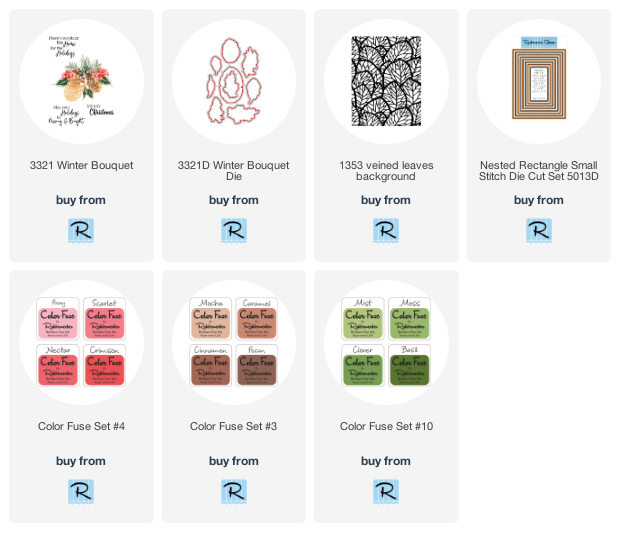
Layering Winter Bouquet and a Sparkly Background! | Rubbernecker Stamps

 Happy sparkly new week my friends!  Today I have a beautiful card featuring Rubbernecker Stamps gorgeous layering set called Winter Bouquet.  I've layered these beauties onto a sparkly background for that festive feeling!  Read on to learn how I created my card.

Card base:

  • Stamp the Veined Leaves Background stamp in Versamark clear ink onto 80# Neenah Solar White card stock.
  • Sprinkle on embossing powder (I used some gold sparkle embossing powder from my stash.)  Heat set.
  • Die cut with the largest Nested Rectangle Small Stitch die.
  • Cut a 2-½" x 6" strip of vellum.  Fold around the embossed panel and adhere on the back side.
  • Adhere the panel to a top-folding A2 card base.

Winter Bouquet:

  • Stamp the pinecone layers with Mocha, Caramel, Cinnamon, and Pecan inks from Color Fuse set #3.  The base layers are stamped in Mocha.  Stamp the second layer in Caramel, and then Cinnamon for the third layers.  The large pinecone has a fourth layer which I stamped in Pecan.
  • The leaves and pine branches are stamped in various greens from Color Fuse set #10.
  • Be sure to use the included guide to make your layering easier.  Some layers I stamped once, others 2-3 times.  You can get different looks by varying the intensity of layers.
  • For the berry branches I used Color Fuse set #5.  I used Pecan ink for the branches.
  • Die cut the pieces with the coordinating dies.

  • To make it easy to adhere your pieces to the card, arrange them first off of the card.
  • Next I pressed a piece of Press N Seal over my arrangement making sure it is stuck to all of the pieces.
  • Now you can flip it over and add glue to the back of the pieces you want adhered flat.  Pick up the Press N Seal and flip it over to adhere the pieces with glue to the vellum.  I put something heavy on it for several minutes while the glue dried.  It does take a bit longer for glue to dry on the vellum, so don't rush this part. Carefully pull up the Press N Seal keeping all of the other pieces stuck to it.
  • I added glue to the next layer of elements I wanted glued flat.  Once those were dry, I added thin foam squares to the large pinecones and a regular foam square to the small one and adhered them down.
  • To finish, I stamped and heat embossed the sentiment with the same gold sparkly embossing powder.  I trimmed it into a fishtail banner shape, added foam squares and adhered it to the card.

I hope I've inspired you to give these beautiful layering stamps a try!  Thank you so much for stopping by!  Have a wonderful, and crafty, week!


Wednesday, October 21, 2020

Spotlight Floral Birthday Card | Honey Bee Stamps

 Hello my friends!  I hope your week is going good!  Today I've made a birthday card using Honey Bee Stamps beautiful Harvest Blooms Background stamp.   I've put one of the beautiful flowers from the background stamp into the spotlight!  Read on for the details.

First I chose a piece of coral colored paper from the Autumn Afternoon paper pad.  I inked up the Harvest Blooms Background stamp with Versamark ink and stamped it onto the paper.  I sprinkled on some sparkle embossing powder and heat set it.  I repeated the steps for extra dimension (using my MISTI made this very easy).  I die cut it with the largest die from the Deckle Edge A2 dies.  Next I used a Background Blender Brush and inked up the edges, very lightly, with Simon Says Stamp Coral Reef ink.   I added a piece of foam to the back and adhered it to an A2 card base.

Next I stamped the background stamp onto a piece of Neenah in Copic safe ink.  I colored the flower with these Copic markers: R22, RV42, R11, R000, YG67, YG17, YG25, YG03.  I fussy cut it out and then used  a Tuxedo Black dual marker to go around the edges to give it a more finished look.  I added foam tape to the back and adhered it to the card.

To finish the card, I stamped the greeting from the Buzz stamp set in Versamark onto some black card stock.  I added the same sparkle embossing powder and heat set it.  I die cut it out with a Banner Sentiments dies and added foam squares to the back and adhered it to the card.  I added a few drops of Nuvo Rosewater Jewel Drops on the flower center and on the card basefor a bit more bling.

This is a fun, and quick, way to make a beautiful card!  Thank you so much for stopping by!

Supplies:

Thursday, October 15, 2020

Autumn Coffee Shop Card | Honey Bee Stamps

 Happy Thursday friends!  For my card today I used Honey Bee Stamps adorable Coffee Shop House Builder Add-on Stamp set and Honey Cuts.  I've got it all decked out for autumn with pumpkins and fall colors.

I began by die cutting three of the House Builder Card Base Honey Cuts from Neenah 80# card stock.  This set is the very first house builder set and is the base for all of the subsequent add-ons!  Die cut the hinge and adhere two of the pieces together.  I used sentiments from Latte stamp set and stamped them in Vintage Photo Distress Oxide inside the card.

My best advice for this type of card is to get your theme planned and then stamp and/or die cut all of the elements.

I decided on an autumn themed Coffee Shop, so I chose a brick patterned paper from the Autumn Afternoon paper pad.  The papers in this pad are some of my most favorite ever!  I die cut the brick paper with the House Builder base and adhered it to the remaining white card stock house base.  While I had this set out, I die cut the door, steps, tiny flowers, wreath, leafy branches and door handle from white card stock.  I colored them with Copic markers.

All of the other detail elements are die cut from either white or colored card stock and are in the Coffee Shop Add-on.  I used up a lot of scraps this way!  I used Copic markers to color the white pieces.  The pumpkins are from the so cute Itty Bitty Pumpkins Honey Cuts.  Using the Coffee Shop Add-on stamps, I stamped the sign, coffee cups, plants, and images in the window.  Then I colored them with Copic markers and die cut them with the Coordinating Honey Cuts.

You probably notice the muted images in the window, right? I began with a piece of clear acetate for the window.  As I was testing out my arrangement, those images made the card look way too busy.  I had already adhered them to the patterned paper that is the "wall" inside, so Plan B took effect and I added a piece of vellum to the acetate.  Much better now!  I'm a believer that you can just about alway save a card!   After I added all of the elements to the card front, I added foam tape to the back.  I centered up the piece behind the window first, then added it to the assembled card base.

This was SO much fun to make!  Have you tried one of the House Builder sets?  I really love all of them!  Thank you so much for stopping by!

Supplies:

Coffee Shop House Builder Add-on Stamp set & Honey Cuts

House Builder Card Base Honey Cuts

Itty Bitty Pumpkins Honey Cuts

 Latte stamp set

Autumn Afternoon paper pad


Sunday, October 11, 2020

Halloween Gnomes | Rubbernecker Stamps

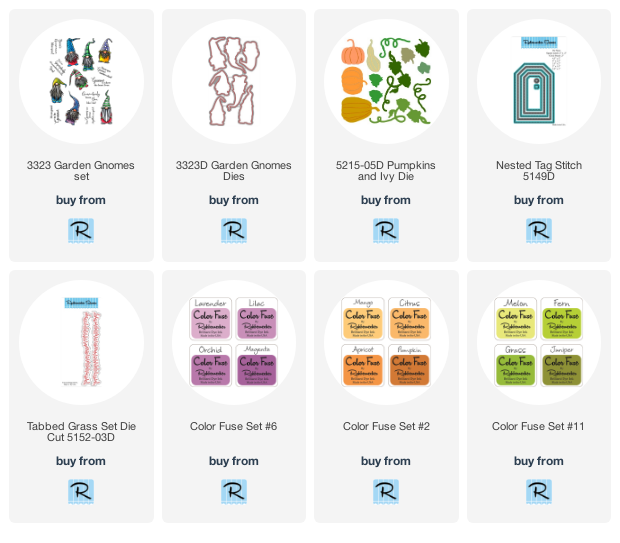
 Happy Sunday my friends!  It's getting really close to Halloween and I wanted to make these adorable gnomes from Rubbernecker Stamps into Halloween gnomes!  These are from the Garden Gnomes set and there's several included sentiments.  This sentiment "True Gnomes are alway together in spirit" was just perfect for this setting!  Read on for the steps to make this fun card!

Card base:

  • The base is an A2 size at 4-¼" x 5-½".  I used a cloud stencil, ink blending brushes and Color Fuse inks to create the cloudy background.  I used Basil ink from Set 10 and Magenta ink from Set 6.  I inked up the outer edges with Black Soot Distress ink.
  • Next I hand cut two hill layers from white card stock.  I inked them up with Fern, Basil, and Juniper inks.
  • Adhere the taller hill with glue and the shorter hill with foam tape.
  • Die cut grass with one of the Grass dies.  Ink it up with Fern and Grass inks.  Adhere it to the bottom of the card layer.

Card elements:

  • Die cut white card stock with the Pumpkin and Ivy die.  I used sponge finger daubers to color the pumpkins with Citrus and Pumpkin inks.  I colored the vines with Fern ink.
  • I'm not sure if you can tell from the photo, but I added some shine to the pumpkins and vines, which really made the colors pop!  I did this by squeezing a bit of Glossy Accents onto my craft mat and barely diluted it with water.  I brushed it onto the pumpkins and vines and set them aside to dry.
  • I stamped three of the adorable gnomes in Copic safe ink and colored them in Halloween colors with my Copic markers.  I used the coordinating dies to cut them out.  I used a clear sparkle pen to add some shimmer to their hats and clothes.  You can kind of see it in the next two photos.
  • I added the gnomes and pumpkins to the card with glue and some with foam tape.
  • I finished it off by stamping the sentiment with Versamark clear ink onto black card stock.  I sprinkled on some white embossing powder and heat set it.
  • I found that the smallest Nested Tag Stitched die was just the right height to die cut the sentiment.  It was a bit long, so after I die cut it the first time, I shifted the die (using just the squared off end) to make it the length I wanted and die cut just that end.  I popped it up with foam tape.


I love how versatile these gnomes are and how you can color them to suit whatever your need is!  It's great when a set can be used year round!!  Thank so much for stopping by!!