Tuesday, March 15, 2022

Mini Slimline Friendship Card with New Rose Background Stamp | Rubbernecker Stamps

Hello friends!  Today I'm sharing a card I made using Rubbernecker Stamps' new Bird/Rose Background stamp set.  This set has two beautiful stamps in it sized perfectly for your mini slimline cards!  I had fun creating my heat embossed/resist card layer--read on!

First I created my card base and layers:

  • Create the mini slime card by scoring a 6" x 6-¼" piece of white cardstock at 3".  Crease with a bone folder.
  • Using my MISTI, I put the Rose Background Strip stamp on the door.  Then I inked up the stamp with inks from the Color Fuse #5 set.  I used a sponge dauber to soften the edges of each ink color in order to blend them more smoothly.  I repeated the colors as needed to create the ombré effect.  Keep the stamp and cardstock in the MISTI!!
  • Next I used my anti-static bag over the piece and then stamped the image again with Versamark clear embossing ink.  I added White Satin Pearl embossing powder and heat set it. 

  • Trim the stamped background piece, leaving about a 1/8" border.
  • Place removable tape along the edges of the white border and place on some scrap paper.
  • Now for the emboss resist!  In a reverse order, using the darkest ink over the lighter  inked roses, add the inks, in an ombré pattern, over the piece.

  • Carefully remove the tape for the beautiful reveal!  (apologies that I forgot to photograph that)
  • Cut a piece of white cardstock to 2-½" x 5-¾" and ink up the edges with Fuchsia ink for a perfectly coordinating mat layer.  Adhere the embossed image to the layer, add foam tape to the back and pop it up onto the card base.
  • Die cut the Hello three times from white cardstock.  Adhere the layers together with glue.
  • Die cut the Hello shadow from black cardstock and then adhere the white Hello layers to it.
  • Die cut the Flower Pot from white cardstock with the Large Garden Pots die.  Color the edges with Copic markers for some shading.  I used C3, C1, and C00.
  • Die cut the Canterbury Bells and Stems from white cardstock.  Color the stems with Copic markers (YG17, YG25).  I love that this is all one die to cut ALL the pieces you need!
  • Using a flower shaping tool, slightly shape the flowers and then adhere to the stems with liquid glue.
  • Glue the flower stems to the back of the flower pot.
  • Die cut one Flower #6 and color with Copic Markers (YG67, YG17, YG25).  Snip it into three pieces and glue in back of the flowers.
  • Add some foam tape to the back of the flower pot and adhere it to the card.
  • Add a few foam squares to the bottom back of the Hello.  Adhere to the card.

Heat embossing over a stamped image and then inking for the emboss resist gives the stamped image such a different look!  I really enjoy this technique too!  Thank you so much for stopping by today!

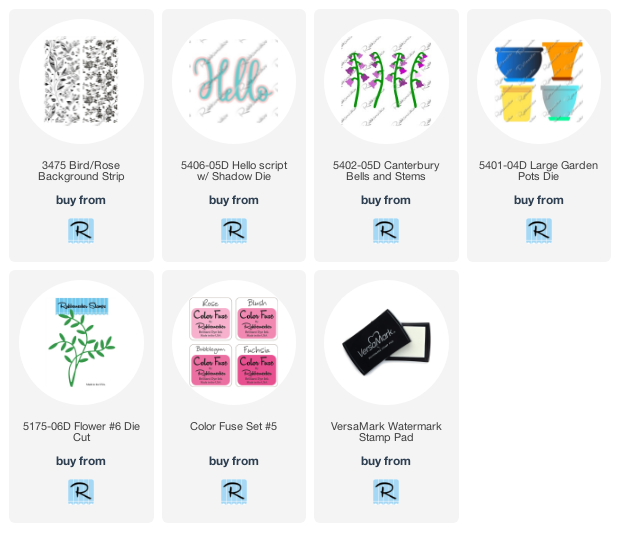
These are links to the products for my card:
Wednesday, March 9, 2022

Lovely Layers: Tulips Card & Hot Foiling on Ribbon!!
Today I'm sharing my card using the beautiful Lovely Layers: Tulips Honey Cuts by Honey Bee Stamps; and I added a bow that has foiling on it!!  I finally jumped on the hot foiling train and really love it!!  I had been wondering if the Small Card Hot Foil Plates would work on materials other than card stock, and much to my delight, they do! I tried out a few different types of ribbon and found I got the best results on the smooth satin type ribbon. I have some photos below to go along with my tutorial for the process.

First I die cut the Lovely Layers: Tulips from some coral, yellow, and green card stock. I added some shading to the pieces with Distress Oxide ink and a Detail Blender Brush. I used Mustard Seed, Squeezed Lemonade, Mowed Lawn, and Rustic Wilderness. I used a coral ink from my stash for the shading of the coral card stock pieces. I used pieces of foam strips between all of the layers for extra dimension. If you need help with the layers, check out this layering guide:

Before I adhered the leaves and stems to the assembled flowers, I spritzed a bit of white ink spray onto the flowers and set them aside to dry. I die cut some beautiful paper from the Modern Spring paper pad with the largest Sweet Stacks: Rectangles and adhered it to an A2 card base. Then I added a frame I die cut from white card stock where I taped together the two largest A2 Double Stitched Frames dies. I used Bee Creative glue to adhere the frame, tulips, stems and leaves.

As I mentioned above, I used the Small Card Hot Foil plates to experiment foiling on various types of ribbon. I wanted to foil on the bias tape type ribbon as that's what I have most of. The looser weave of that ribbon just didn't produce a very smooth foiling though. The tight weave of this satin ribbon is what has worked best for me. I didn't want to have to guess where to do my foiling, and then tie the bow, so I tied the bow first. These next photos show how I foiled it.

First, with the bow right side up, I laid down the foil (shiny side up) and then placed the sentiments from the Small Card Hot Foil Plates set face down onto the foil. I used small pieces of removable tape to hold it all in place.

You need the tape, because now you will turn it over so the plates are touching the heating plate of your machine. (If the ribbon is on the bottom, the plates will not get hot enough--ask me how I know!! LOL!) Following the directions for your machine, let the plates heat for the required amount of time. Leave the tied portion of the bow off the edge as you see below.

When the heating is finished, add the shims required for your machine, and run it through your die cutting machine with the tie bow hanging out. Like this:

I was SO thrilled that this worked! I think it adds such a unique touch to a project!

I trimmed the edges of the bow into a fishtail shape and adhered it with a glue dot. There are so many sentiments in the Small Card Hot Foil Plates set that provide lots of different options, depending on the width of your ribbon.

Oh, one last thing. In the photos you may have noticed that, yep, I foiled my plates! Evidently, just about everyone does that at some point, but good news: it does not affect the plates at all! You can remove the foil, but I just went ahead and used them and there's no difference in the results!

Foiling on ribbon? Yes, please!! This was lots of fun and has my wheels turning wondering what else can be foiled? I hope you’ve enjoyed my process and have found some inspiration too! Thank you so much for stopping by!

If you choose to use my affiliate links for shopping, thank you! 💗 (always at no extra cost to you)

<!

Tuesday, March 8, 2022

Saltwater Taffy Distress Oxide Ink Blending & Rubbernecker Stamps New Spring Release

 Today we are celebrating Rubbernecker Stamps' awesome new spring release!  There are lots of fun new stamp and die sets in several different styles--check them out here!

I made this card using one of the new release stamps called Bird/Rose Background Strip set.  There are actually two stamps in this set and I'll be sharing another card with the rose stamp soon!

First I inked up a panel of white card stock with the NEW, and beautiful, Saltwater Taffy Distress Oxide ink.  I just received my order of the Oxides and Distress inks and sprays and just had to use these on a card!  Be sure the ink is dry before the next step!

Next I used an anti-static powder pouch before stamping the Rose Background Strip stamp with Versamark ink.  I sprinkled on some gold embossing powder and heat set it.  I trimmed the piece to 2-¼" x 5-¼".  I adhered a strip of gold mirror card stock to the right edge and added foam tape to the back.

For the card base, I just sprayed a few squirts of Saltwater Taffy Distress Oxide spray across the panel.  When it was dry, I adhered the heat embossed piece to the card base.

I used the You Script w/Shadow die for my sentiment.  The You is die cut four times and the layers are adhered together with glue before adhering it to the gold mirror shadow layer.  I used a sentiment from the Sweetest Sunrise set and partially stamped the "you make my day" (with Versamark) by covering the "you" with tape while inking.  I heat embossed it with gold embossing powder.  To finish up, I carefully added a few gold spatters to the card around the sentiment area.

Thank you so much for stopping by today!


Monday, March 7, 2022

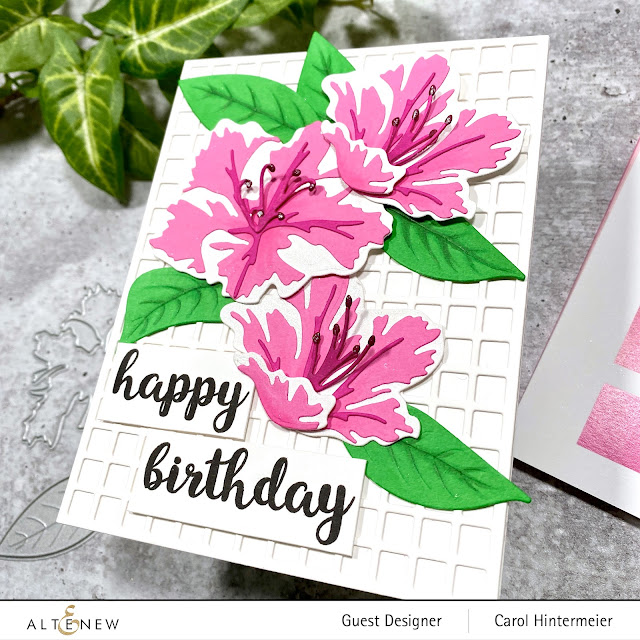
Altenew Craft-A-Flower Sunburst Azalea Release Blog Hop + Giveaway ($200 in total prizes)

 Welcome to the blog hop for the release of Altenew's beautiful new Craft-A-Flower Sunburst Azalea layering die set!

You should have arrived here from the blog of Nandini Karmarkar.  If you need to start at the beginning, head over to the Altenew Card Blog so you don't miss any of the beautiful inspiration for this beautiful new Craft-A-Flower!

Don't forget that you can subscribe to Altenew's Monthly Subscription Plan for each new Craft-A-Flower set that is released.  You will be guaranteed a spot in the monthly releases and will receive a set each month - at a specially discounted price! ($35.99 reduced to $29.99).

Check out my card details below!

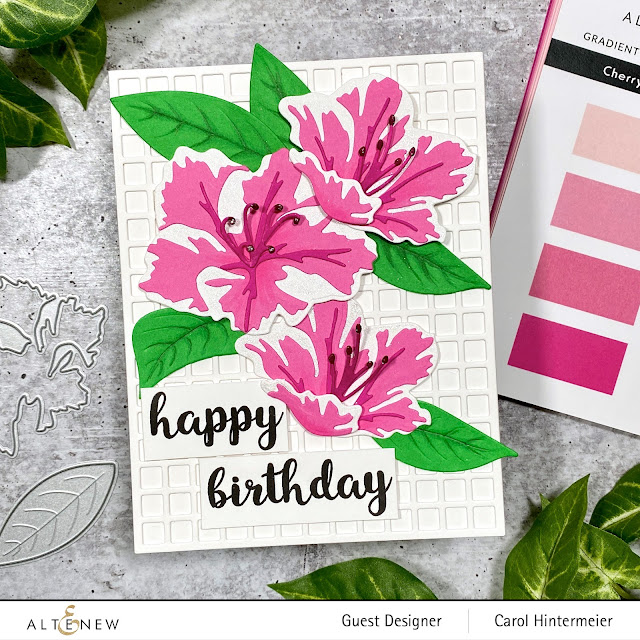
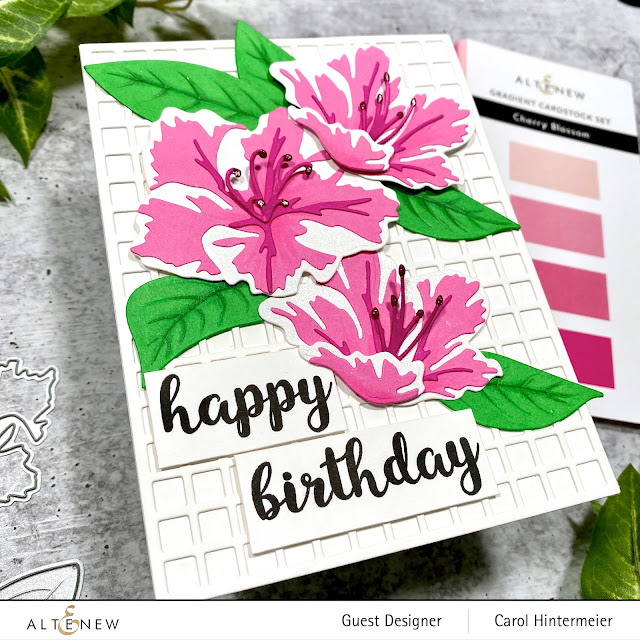
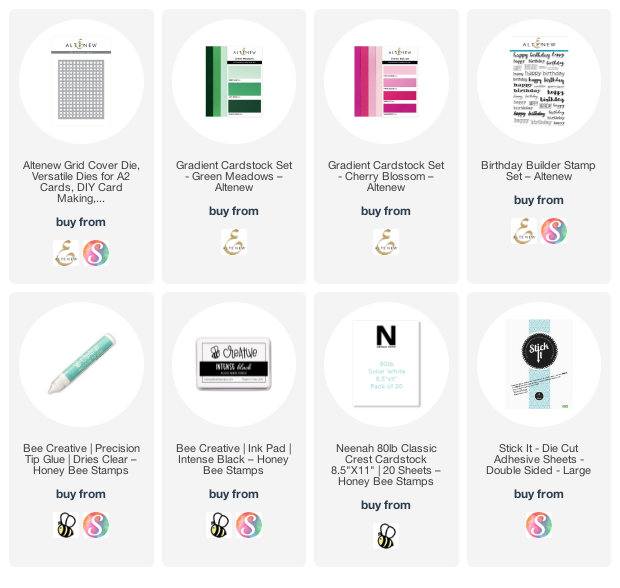
First I created my card base by die cutting the Grid Cover die twice from 80# Neenah.  I added some Stick-It double-sided adhesive to one of the pieces before die cutting it to make adhering the two layers together easier.  Next I adhered the die cut to my top folding card base.

I die cut the beautiful Craft-A-Flower: Sunburst Azalea flower layers from white card stock, and some pink card stock from the Cherry Blossom Gradient Cardstock set.  Following the included layering guide, I adhered the layers together.  I did use a few Copic markers on the stamen pieces so they would stand out a bit more.  Then I die cut the leaves from some Green Meadows Gradient Cardstock and used some green Copics to add shading.

I stamped the sentiment from the Birthday Builder stamp set in black ink and trimmed them into strips.  I added foam tape to the back of the sentiments and two of the flowers.  After deciding on my arrangement, I adhered the flowers and sentiment and added glue to the leaves to adhere.

I decided I wanted a bit of sparkle (which I wish showed in the photos) and swiped a clear glitter pen on the white layers of the flowers.

Thank you so much for stopping by!  Be sure to leave a comment here for more chances to win an awesome prize!

The next stop in the hop is the lovely and talented Bridget Casey!

Giveaway Prizes

$200 in total prizes! To celebrate this release, Altenew is giving away a $50 gift certificate to 2 lucky winners and a $20 gift certificate to 5 winners! Please leave a comment on the Altenew Card Blog and/or each designer’s blog post on the blog hop list below by 03/13/2022 for a chance to win. Altenew will draw 7 random winners from the comments left on each stop of this blog hop and announce the winners on the Altenew Winners Page on 03/15/2022.

Wednesday, March 2, 2022

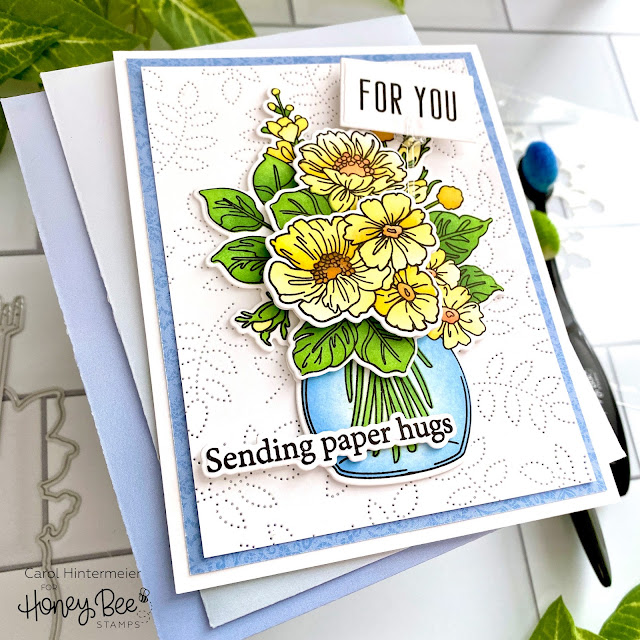
Sending Paper Hugs - Floral Vase Coloring Stencils

Hello crafty friends! Today I'm sharing a sweet card featuring Honey Bee Stamps new Floral Vase stamp set, coordinating Honey Cuts, and the Floral Vase stencils! I colored the entire image using just the Floral Vase stencils, and it was really lots of fun! The way these stencils have etched lines on them to help in lining it up makes these super easy to use! I also have a few tips for these coloring stencils, so read on for the details.

First I worked on the Floral Vase with the stencils. Now, my first tip is to stamp your images using the Bee Creative No Line Coloring ink. Why? When you leave your stamps in your MISTI, you can come back after the stenciling and re-stamp the images with Intense Black ink. (And that's my second tip: leave your stamps in place in your MISTI!) You will get a beautiful, crisp and clear stamped image over your stenciling! (This totally eliminates the worry of smearing the black ink, if you are impatient like me and don't let it dry enough--LOL!) My third tip is to let you know that these stencils will line up perfectly with the other two flower clusters in the set. I did use a few pieces of masking tape to cover up some openings before I stenciled. My fourth, and final, tip is that these Detail Blender Brushes are the perfect size for the details of these stencils! Check out this next photo for an example of my process:

The above photo shows one of the two additional floral clusters in this set in addition to the main floral vase stamp. You can use these as separate elements on a card, or you can pop them up on the main image for extra dimension as I did for this card. 

I used various inks from my stash that I've been neglecting a lot! My go to are usually the Distress inks and Distress Oxide inks. You could use Mowed LawnSqueezed LemonadeMustard Seed, and Carved Pumpkin for a similar look. After I finished stenciling and re-stamping the images with Intense Black ink, I used the coordinating Honey Cuts to cut them out. I added foam dots to adhere the layers together.

I adhered a piece of patterned paper from the Modern Spring paper pad that I trimmed to 4" x 5-¼" to an A2 card base. Then I ran the Spring Leaves A2 Pierced Cover Plate die and some white cardstock through my die cutting machine. I trimmed it to 3-¾" x 5" and used Bee Creative glue to adhere it to my card. I added some white foam strips to the back of the floral vase to pop it up a bit on the card. I tried to capture the beautiful dimension in this photo:

I die cut the floral pick from the Floral Vases Honey Cuts from some leftover clear plastic packaging and adhered the sentiment to it. I added some foam dots to the back to pop it up. Next I stamped the sentiments from the Inside: Kindnessset with Intense Black ink and used the coordinating dies to cut them out. I added foam strips to the sentiment on the front, and adhered the inside one with Bee Creative glue.

To add some decoration to the card inside, I stenciled a portion of the flowers in the bottom left corner. I think this adds a fun and pretty surprise when the card is opened!

I really enjoyed coloring the Floral Vase images with these stencils, and I hope you've been inspired to give these a try.  Thank you so much for stopping by!  Stay crafty!

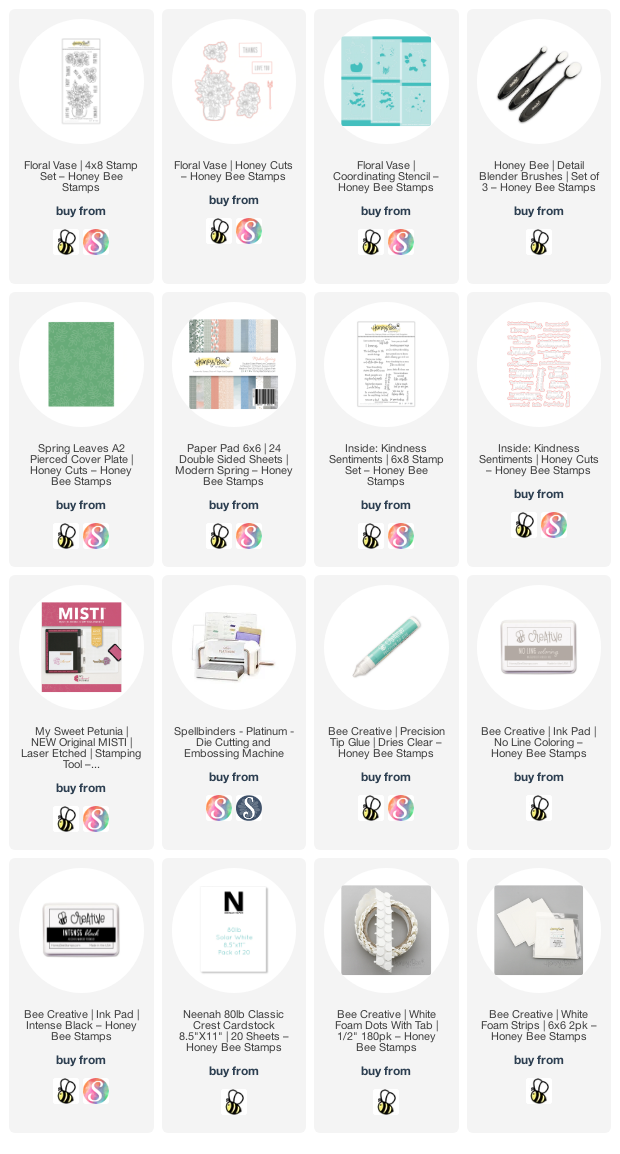
Thank you should you choose to use my links to shop (some may be affiliate links--always no additional cost to you)

Tuesday, March 1, 2022

Altenew Build-A-Flower: Giant Bellflower Release Blog Hop + Giveaway ($200 in total prizes)

 Hello crafty friends!  I'm so happy to be joining in Altenew's blog hop to celebrate the release of the beautiful Build-A-Flower: Giant Bellflower!

You should have arrived here from the very talented Virginia's blog.  If you need to start from the beginning, head over to the Altenew Card Blog.  You can find the complete hop list at the end of this post.

This gorgeous layering stamp set, along with coordinating dies, is available now in the Altenew store.  You can purchase the Build-A-Flower: Giant Bellflower Layering Stamp & Die Set, or save more by subscribing to the Build-A-Flower Monthly Subscription Plan to save 14%.

Now on to my card details!

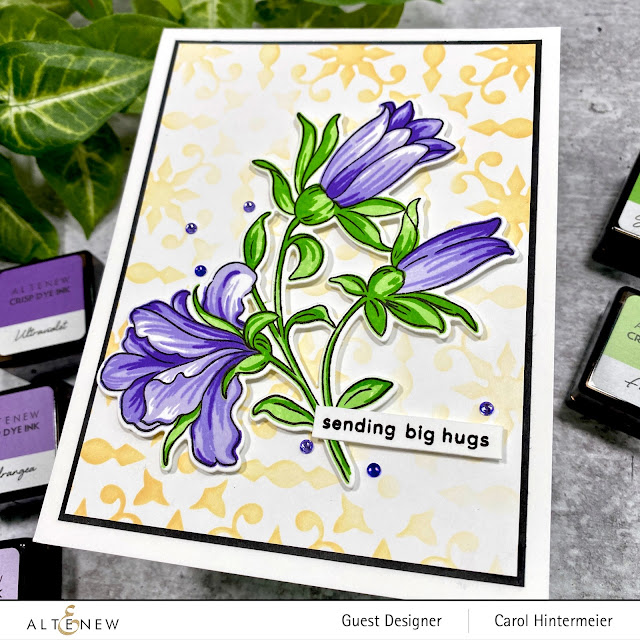
First I stenciled some warm yellow ink through the Lacy Tile stencil onto a 3-¾" x 5" piece of white card stock.  I adhered this to a black mat layer and then to a top-folding A2 card base.

Next I stamped the images of the beautiful Build-A-Flower: Giant Bellflower.  I stamped the outline with Jet Black ink.  The flower layers are stamped with Wisteria, Hydrangea, and Ultraviolet inks from the Enchanted Garden ink cube set.  I stamped the stem and leaves with Firefly and Grass Field ink from the Green Valley ink cube set.  The included layering guide makes this so easy!  I cut the image out with the coordinating die and added foam tape to the back to adhere it to the card.

I stamped one of the sentiments from the BAF Giant Bellflower set with black ink, trimmed it into a strip and added some foam tape to the back to pop it up.  I added a few crystal gems from my stash for a touch of sparkle!

Thank you very much for stopping by!  Be sure to leave a comment here, on my blog, to increase your chances to win one of the wonderful prizes!

Continue hopping to the next amazing designer:  Nanette S. Madero and leave comments at each stop!

Giveaway Prizes

$200 in total prizes! To celebrate this release, Altenew is giving away a $50 gift certificate to 2 lucky winners and a $20 gift certificate to 5 winners! Please leave a comment on the Altenew Card Blog and/or each designer’s blog post on the blog hop list below by 03/06/2022 for a chance to win. Altenew will draw 7 random winners from the comments left on each stop of this blog hop and announce the winners on the Altenew Winners Page on 03/09/2022.


Blog Hop List:

Birthday Lilies Card | Rubbernecker Stamps

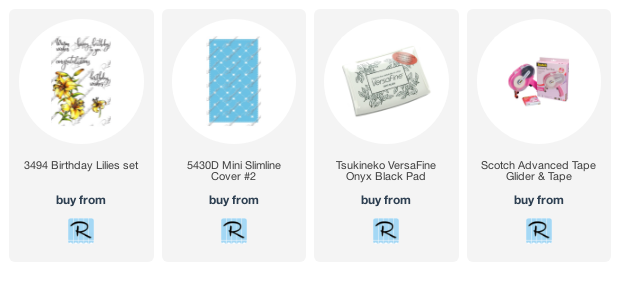
Hello my friends!  Today I'm sharing a card using Rubbernecker Stamps' gorgeous new Birthday Lilies Set.  I added them to the background using the Mini Slimline Cover #2 die--have you seen all of the new slimline dies from Rubbernecker?  They are awesome! 

  • Score a 6-¼" x 7-½" piece of white card stock at 3-¾".  Cut pink card stock to 3-¾" x 6-¼" and adhere to the card base.
  • Die cut the Mini Slimline Cover #2 from white card stock and adhere to the card.
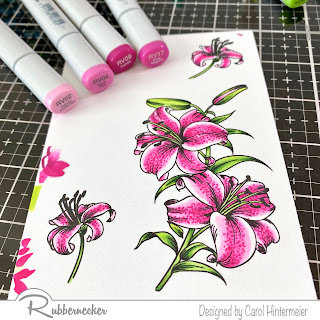
  • Stamp the flowers from the Birthday Lilies Set with Copic safe ink.  Color with Copic markers.  I used RV04 and RV02 to color the pink strips of each petal.  Then I used RV09 and RV17 to add the dots.  Check out these before and after photos to see what a difference the dot detail adds!


  • Color the leaves with G28, G07, YG17, and YG13 Copic markers.  Then fussy cut the images out.
  • Stamp the sentiment from the Birthday Lilies Set with Versafine Onyx Black ink.  Trim the sentiment into a rectangle shape.
  • Add foam tape to the back of the sentiment and the large flower image and adhere to the card.  Use liquid glue to adhere the two small lilies.

Next I added a bit of bling with a few gem around the sentiment and near the top of the flowers.  Then add Apple Green Nuvo Crystal Drops to the flower stamens.

Thank you so much for stopping by!  Have a wonderful day!