Wednesday, January 27, 2021

Hello Friend! | Honey Bee Stamps

 Hello my friends!  Today I'm sharing a card using Honey Bee Stamps beautiful Love You Bunches stamps and coordinating dies.  The sentiment I've used is one of 12 included in this set!  This sentiment makes the card so versatile for many occasions, depending on what you stamp, or write, inside!  I'm thinking of using this as a birthday card for a good friend!


To begin, I stamped the flower bouquet in Copic safe ink and colored it with my Copic markers.  I've listed the colors I used at the end.  Next I die cut it with the coordinating die and tied some twine around the stems.  I added foam tape to the back and set it aside.

For the bottom layer of my card I used the Quilted A2 Cover Plate die and die cut white card stock.  Did you know that the Quilted Hearts and Dots stencil set is made to coordinate with the cover plate perfectly?  Of course, the stencils can be used on their own as well!  I used the dot stencil from the set and a Background Blender brush to ink on some Squeezed Lemonade Distress ink.  While the stencil was in place, I spread some Nuvo Moonstone Glimmer Paste through the stencil and set it aside to dry.


Next I worked on the "table" I made using the Barn Wood Planks die set.  First I die cut the planks from Neenah Desert Storm card stock.  Then I inked them up with Tea Dye Distress ink using a foam tool.  I made sure to ink the edges with extra ink.  I wanted to create an illusion of dimension so I cut them down into thinner pieces.  The widest strip is about ¾", then the next size is ½" and the thinnest is ¼".  Be sure to ink up the cut edges!!

To make the piecing of the planks easy, I cut a piece of Neenah Desert Storm card stock to 5-½" x 1-7/8", then added a piece of double sided adhesive to the piece. I peeled the top liner off of the adhesive and then laid down the planks, cutting them to random lengths, and again, inking the cut edges.  To finish, I inked some Walnut Stain Distress Ink around the outside edges of the piece.  I adhered my "table" to the bottom of the Quilted A2 Cover Plate piece and adhered the panel to my top-folding card base.  I added foam tape to the back of the bouquet and adhered it to the card.

For the sentiment, I used the same three yellow Copic markers and colored an ombré pattern onto some white card stock.  Then I stamped the sentiment onto it with Versamark ink, sprinkled on black embossing powder, and heat set it.  I used the coordinating die to cut it out.  I die cut one more sentiment shape from black card stock and glued it offset to the back of the sentiment.   I added foam squares to the back and adhered it to the card.

To finish up with a touch of bling, I added a few Bee Pollen dew drops.  I love adding a touch of shine!


Thank you so much for stopping by today!  Have a wonderful day!


Copic markers:
Y19, Y15, Y02, V09, V06, V05, RV63, V000,
G29, YG67, YG25, YG17, YG03

Tuesday, January 26, 2021

A Hug In a Mug! | Rubbernecker Stamps

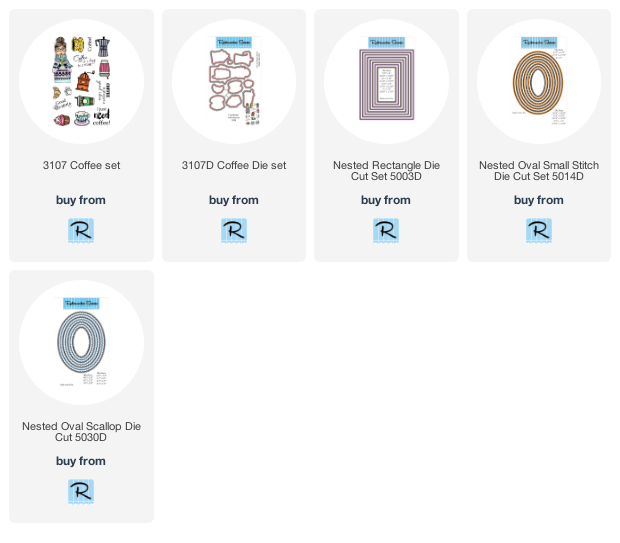
 Hello my friends!  Today I have a cozy coffee card using Rubbernecker Stamps' beautiful Coffee Set!  I created my own background using the smaller images in this set.  Keep reading for all the fun details!


I stamped the coffee cups and coffee pot in black ink randomly over a piece of 80# Neenah card stock.  I used the "coffee" sentiment to fill in a few empty spots.  I also made sure to let the images fall off the edge for more interest.

To make the background images really pop off the page, I used some gray Copic markers to add shadows around them.  I used C5, C3, C1, C00.  I used C0 to blend out the edge of C00.  You can really see the difference in these next two photos!  (Click the photos to see up close.)

Next I die cut the panel with the largest Nested Rectangle die and adhered it to a layer of blue card stock.  Then I adhered the layers to a top-folding A2 card base.


I stamped the gal in Copic safe ink and colored her with my markers.  I die cut her out with the coordinating die and adhere her to a vellum oval that was die cut using a Nested Oval Small Stitch die.
Next I added foam square to the back, keeping the behind the gal so they won't show, and adhered it to the card front.

I stamped the sentiment and die cut it with the smallest Nested Oval Small Stitch die.  This is adhered to a blue card stock layer that I cut with a Nested Oval Scallop die.  I popped it up with foam squares.  For just a touch of bling, I added a few blue crystal gem stickers.


I had so much fun making this card, especially the background!  I hope I've given you some inspiration for your next card.  Thanks so much for stopping by!


Wednesday, January 20, 2021

Fun To Make Miniature Valentine Cards | Honey Bee Stamps

Hello friends!  Today I'm sharing a set of miniature Valentine cards I made using a few sets from Honey Bee Stamps' newest Love Letters release!  When I first saw these adorable, punny and fun sets I knew it would be fun to make little Valentine cards, kind of like the ones I remember dropping into classmates' decorated Valentine boxes in school.  Anyone else remember that?  This would be such a fun and easy project for your littles too!  Read on to see how easy these are to make!


Warning--this will be a photo-heavy post!  Since the directions for each card are the same, I'll try to keep them short!

Now it's just a matter of building your cards!  I used Bee Creative glue and foam squares to adhere the adorable images and sentiments.  I added acrylic hearts to several cards and dew drops to one.

These first five photos are all from the Heart Beets For You stamps and Honey Cuts.  I've used these acrylic hearts:  Red Hots, Dappled Moss, and Sugared Peach.


I've used the Love you S'More stamps and Honey Cuts for the next two cards.  I used Strawberry Ice acrylic hearts on the pink card.


My final three cards are made with the Soy Mates stamps and Honey Cuts.  I added Red Hots acrylic hearts to the first card and Coffee dew drops on the second card.


Thank you for hanging in there and taking a closer look at these adorable cards!  I hope the rest of the week is full of crafty fun for you!


Wednesday, January 13, 2021

See Through Valentine Card | Honey Bee Stamps

Hello crafty friends! Today I have a fun see through card using Honey Bee Stamps Lovely Layers: Heart Vine as my main feature. I have been wanting to make a see through card for a long time!!  I don't know why I waited because it's really easy and lots of fun!  I created some inky watercolor paper to use too!  Read on to see how I put this card together.

To create my clear card base I used heavyweight 10 mil. acetate.  The brand I have is by Inky Antics and comes in 8-½" x 11" sheets.  I cut one sheet in half, scored it and folded it to make a top-folding A2 card base.

Next I had some inky fun!  I love smooshing watercolor paper into Distress Inks for a fun background.  I smooshed the ink pads, one color at a time, onto a craft mat.  Then I spritzed it a few times with water and pressed the watercolor paper into the ink.  The look you get will depend on how much water you add!  Experimenting is fun so just keep trying with less, or more, water until you get the look you like.  Also be sure to use your heat tool to dry after each layer of color!  I used these Distress Inks:  Spun Sugar, Picked Raspberry and Festive Berries.  Here is a photo to show my process: (click the photo to see close up.)  I ended up making four total.


When the Distress Ink panels were dry, I used the base layer of the Lovely Layers: Heart Vine die and die cut four from them.  I die cut four of the Heart Vine top layer from white watercolor paper.  I adhered them together with small dots of Bee Creative glue.

I used a heart from the Scallop Hearts Honey Cuts to die cut one from the inky card panel and three from white watercolor card.  Then I die cut one heart from the Stacking Hearts Honey Cuts from white watercolor card.

Here are the steps for assembling the card:

  • Adhere the vine pieces to the clear card with small dots of Bee Creative glue.  Set a large stamp block on top and let dry for several minutes.
  • When the vines were dry, I used my scissors to trim of the pieces that hung over the edge.  I used a few of the smaller trimmings to fill in a few places along the edges.  Be sure to save the remaining pieces for later!
  • Adhere the Stacking Heart to the inky Scallop Heart.  Adhere to the card front.
  • Open the card and adhere one white Scallop Heart to the back of the card front.  This will give a cleaner finished look inside the card.
  • Next, adhere a scallop heart to the card inside, centering it behind the heart on the card front.  This is where you can write your sentiment.
  • Adhere the last scallop heart to the backside of the card.  This will hide the adhesive from the heart on the inside.

I didn't worry about the adhesive showing (or a bit of ink) on the back of the vines.  It doesn't show that much and seeing the bit of ink gives it that handmade feel!


I used a sentiment from the Gal Pals stamp set and stamped it in black ink onto watercolor cardstock.  I used my MISTI to be able to stamp it a few times on the textured watercolor cardstock.  I die cut it out with the coordinating Honey Cut.  I popped it up with foam squares and adhered it to the card front.


I took a few of the leftover vine pieces and tucked them around the sentiment with glue.  To add some sparkle and shine, I first used a clear glitter pen on them and then filled them in with Glossy Accents.


I sure had fun making this card and hope you've enjoyed the process!  Thank you so much for stopping by!  Stay crafty!!


Tuesday, January 12, 2021

Winter Thank You Card | Rubbernecker Stamps

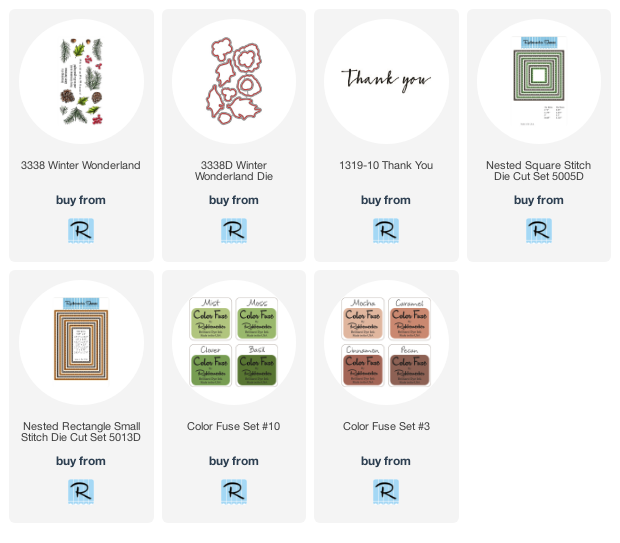
 Hello my friends, and happy 2021!  I hope your year is off to good start!  Today I'm sharing a winter themed thank you card using Rubbernecker Stamps beautiful Winter Woodland stamps and coordinating die set.  I've used a fun technique of creating a watercolor look with clear stamps and Color Fuse inks.  I sometimes find that I'm in a bit of a creative slump after the holidays and having fun with a different technique can really help get me out of that!

Here are the steps for the watercolor look:

  • A stamping tool (I use a MISTI) and watercolor paper will be needed for this technique.  Be sure to leave the stamps in the stamping tool until you are totally finished with each layer of color.
  • Using Color Fuse set #10 for the pine branches and set #3 for the pinecones, ink up the images with the lightest color first and spritz with water just until it beads up.  Use Mist, Clover and Basil for the pine branches.  For the pinecones use Mocha, Caramel and Cinnamon.
  • Ink up the stamp with the lightest color, spritz with water until you se little beads of inky water.  Stamp onto the watercolor paper and be sure to press the stamps down for a few seconds to allow the inky water to absorb into the paper.
  • Allow the images to dry naturally, or use a heat tool to dry the ink in between each layer.
  • Repeat the steps with each shade of ink and spritzing with water each time.  Repeat any layers to get the desired look.
  • Ink the stamp up with the darkest ink (Basil for the pine branches and Pecan for the pinecones) without adding water, and stamp it to add the detail back into the watercolored image.
  • Before removing the stamp, add some sparkle to the branches by swiping a clear sparkle pen over the stamp and stamp it down over the pine branches.
  • This photo shows the progression of stamping the layers.  

  • Stamp in the third pine branch when the other two are totally dry using the same steps as listed above.
  • Die cut some wood plank patterned paper with the largest Nested Rectangle Small Stitch die and then adhere it to a top folding A2 card base.
  • Die cut the dry image with the second largest Nested Square Stitch die and adhere to the card front with glue.
  • Stamp out the layers for two more pinecones using the same technique.  Die cut with the coordinating dies
  • Pop up the two additional pine cones with foam squares and adhere to the card front.
  • Here's a  closeup photo of the sparkle!

Stamp the sentiment Thank You in Versamark ink onto a 4" x 1" strip of watercolor paper.  Sprinkle on black embossing powder and heat set.

Use the same square die to die cut the edges of the sentiment strip to coordinate with the square.  Use liquid glue to adhere it to the card.

For a bit more sparkle, add some green and brown gem stickers!


I had so much fun with this technique!  I hope I've inspired you to give it a try.  Thank you so much for stopping by today!


Wednesday, January 6, 2021

Will You Be My Galentine? | Honey Bee Stamps

Hello my friends!  For my card today I'm using one of the stamps from Honey Bee Stamps Loads of Love stamp set in a bit of an unexpected way!  This set is designed to be used with the Big Pickup Tailgate stamp to add adorable things to the back of the truck.  But I had this idea in my head to use it like this!


I started by stamping and die cutting two of the flower swags from the Loads of Love stamp set and coordinating Honey Cuts.  I colored one swag with my Copic markers (colors listed below) and then decided to make sure my idea would actually work on an A2 size card!  Haha!  Here's a photo where I was trying it out.


Ok, so my idea will work!  I colored the remaining swag and then created the card base.  I die cut a piece of patterned paper from the Love Letters paper pad with the largest A2 Double Stitched Frames die.  I used the next to smallest A7 Double Stitched Frames die to cut 80# Neenah into a rectangle shape.  I die cut some gray card stock to layer behind both of these pieces and adhered the layers with Bee Creative glue.  I glued the patterned paper layer to the top-folding card base.  I added foam tape to the white card stock layer and adhered it to the card.


To adhere the two floral swags, I added bits of foam tape to the back where it extends beyond the white rectangle layer.  I added Bee Creative glue to the rest of the swags and adhered them to the card.  I took care to make sure that the flowers did not go past the edges of the card.  Next I stamped the sentiment from the Will You Be My stamp set in gray ink and die cut it with the coordinating Honey Cuts.   Then I added foam tape to the back of the sentiment and adhered it to the card.

To add a bit of bling I added some yellow gems I found in the Autumn Afternoon Gem Stickers.


Thank you so much for stopping by!  I hope the new year is off to a good, and crafty, start for you!

Copic markers:
flowers: RV17, RV25, RV13, V09, V17, V15, YR27, Y19, Y18, Y13, YG11
leaves:  YG25, YG23, YG03, YG01, YG06

Supplies:

Tuesday, January 5, 2021

So Lucky To Know You | Honey Bee Stamps Love Letters Instagram Hop

 Happy 2021 my friends!  This is my first blog post for the new year, and what a fun way to get started!  Honey Bee Stamps is celebrating their latest release, Love Letters, and today we are having an Instagram hop, with prizes!  Be sure to click over to my Instagram to get started on the hop and have a chance at winning!


My card features the just released Fortune Cookie Slider Honey Cuts and the Fortunate To Have You stamp set and Honey Cuts.  The recipient pulls out the "fortune" to reveal the full sentiment!


Here are the steps for creating this card:

  • Die cut a piece of patterned paper from the Love Letters 6x6 paper pad with the largest A2 Double Stitched Frames die.
  • Adhere the die cut paper to a top folding A2 card base.
  • Die cut 80# Neenah with a Scallop Hearts Honey Cuts.  Then dry emboss it with the Whimsical Hearts Cover Plate die.
  • Add thin foam strips to the heart and adhere it to the card base.
  • Die cut some cream color card stock using one of the fortune cookies from the Fortune Cookie Slider Honey Cuts.   I used a few Copic markers to add shading to the cookie.
  • Adhere the two fortune cookie pieces together.  Be careful to not add glue around the area where the fortune sentiment will slide.
  • I stamped three sentiments in the Fortunate To Have You stamp set in red ink.  As you can see, two are stamped within the black ink stamped banner and die cut with the coordinating Honey Cut.  The So Lucky is die cut with the die that has the tab at the end to prevent it from coming all the was out of the cookie.
  • I stamped "to know you" in Versamark onto black card stock, sprinkled on white embossing powder, and heat set.
  • I popped up all of the elements with foam squares and adhered them to the heart.
  • I adhered a few red hearts from the True Love Clay Hearts set.


Thank you so much for stopping by!  Be sure to go over to my Instagram, leave a comment, and hop along for more chances to win one of two $25 gift certificates!