Showing posts with label Lovely Layers: Heart Vine. Show all posts

Wednesday, January 21, 2026

A Beautiful 3D Heart Embossed Birthday Card (or Valentine Card)

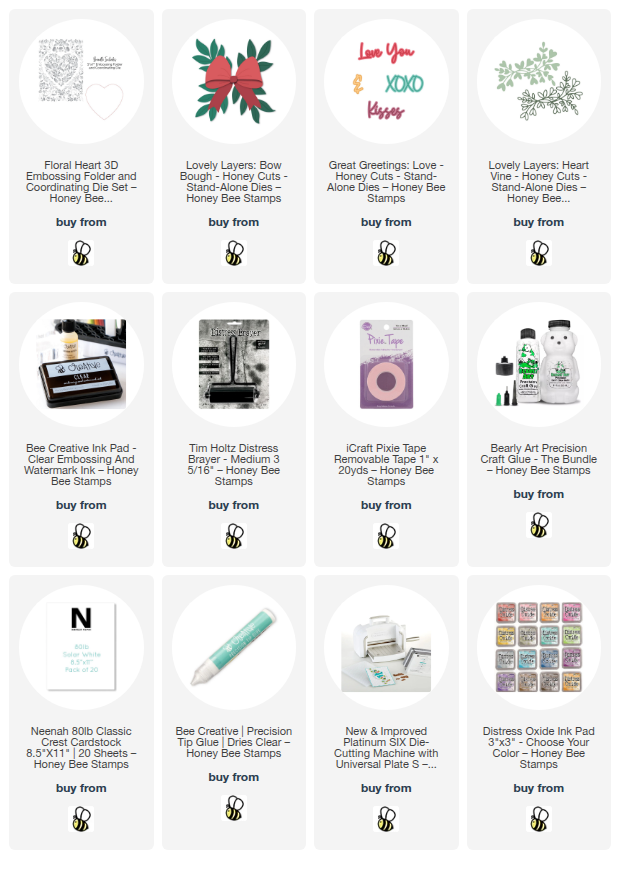
Hello Honey Bee friends!  Today I'm sharing my card that features the gorgeous Floral Heart Embossing Folder and Honey Cuts die.  This would certainly make a wonderful Valentine's Day card, but I may save it to give to our daughter for her birthday in February!  P.S.:  She loves pink!

I used the Floral Heart 3D embossing folder for the background and a brayer to make the two-color background.  For an easier read, I am putting the steps in a list for you.  

  • Before I added the ink to the folder, I prepped the de-bossed side by pressing the Bee Creative Clear Embossing Ink pad over the surface.  Then I used a clean paper towel to lightly wipe away any excess.
  • Next I rolled my brayer over the Spun Sugar Distress Ink pad repeatedly to ink it up, and then rolled the ink onto the embossed folder (de-bossed side).
  • I repeated this step until the folder was fully inked.
  • Next I placed a 5" x 7" piece of white cardstock into the embossing folder and ran it through my die cutting machine.
  • Remove the panel from the embossing folder and place the Floral Heart die onto the embossed heart.  Use removable tape to hold it in place while die cutting.
  • Die cut another heart from white cardstock, place it into the Floral Heart embossing folder.  Hold it in place with tape and then emboss it.
  • Run through your die cutting machine to cut out the heart.
  • This will flatten the embossing.  If you want, (and I did), I carefully fit the panel back into the Floral Heart embossing folder.  I used some tape to hold the panel in place while I ran it through my machine again.
  • Now you have a beautiful two-color embossed panel and heart!

Next I cut the Lovely Layers: Bow and Bough dies from white cardstock.  I used ink blending brushes with Spun Sugar and Kitsch Flamingo Distress Oxide inks to color the pieces.  The leaves were die cut from green cardstock.  All of the bow layers are adhered with glue.

I die cut the Lovely Layers: Heart Vine twice from white cardstock.  I colored the bottom layer with Kitsch Flamingo Oxide ink and adhered the layers with glue.

The Floral Heart embossed panel is adhered to a 5" x 7" card base with foam tape with the white embossed heart glued to the card.

I arranged the Bow and Bough Pieces with the Heart Vine pieces near the top of the heart and adhered them in place with glue.  Note:  I snipped each Heart Vine into two pieces for the arrangement.

The sentiment is from the Great Greetings: Love Honey Cuts.  I die cut the base from white cardstock and colored them with Kitsch Flamingo.  The top layer is die cut three times each.  I adhered all of the layers together with glue.

What do you think?  Would you use this as a birthday card or a Valentine card?  I hope you are inspired by my card and have enjoyed reading about my process!

 Thank you very much for stopping by!  Have a wonderful and crafty day!

Thanks so much for using my affiliate links to shop (never any additional cost to you)!

Wednesday, January 10, 2024

You Are So Loved -- 3D Embossing & Hot Foil Fun

Hello crafty friends! Do you send Valentine cards? Whether you do or not, my card that I'm sharing today could be a Valentine, birthday, or even an anniversary card! It all just depends on the message you add inside the card! I've featured some of my favorite sets from Honey Bee including the Spring Medley 3D embossing folder and the Lovely Layers: Heart Vine Honey Cuts!

First I die some peach colored cardstock with a Stacking Hearts die. Then I embossed the piece with the beautiful Spring Medley 3D embossing folder. Next I trimmed it to 4" x 5-¼". I used a blending brush to add coordinating ink just around the edges.

I glued a piece of acetate to the back to cover the heart opening. When it was dry, I added thick foam tape (if you don't have thick foam tape, add a double layer) around the heart, being careful to leave no gaps between the ends of the foam tape. I also added foam tape around the edges of the embossed panel.

I sprinkled some pretty bling from my stash onto the acetate and then removed the foam tape backing. I added another piece of acetate to cover the opening. Then I removed the backing of the rest of the foam tape, added glue to it, and then adhered it to an A2 card base. (I sometimes add glue to foam tape for two reasons: you can be sure it is firmly adhered and it allows you to slightly move the panel for correct placement.) I set this aside to dry.

Next I die cut a Scallop Heart from 80# Neenah. Then I die cut a darker shade of peach cardstock with a Stacking Hearts die. I placed this heart into the Spring Medley 3D embossing folder and ran it through my die cutting machine. I used glueto adhere them together.

I used my Glimmer Hot Foil System and Blush Glimmer Foil to foil the sentiment from the Foil Script: Love Hot Foil Plates. I cut it out with the included coordinating die.  NOTE: I just noticed this set is "retiring" and is now at a reduced price!

Before I die cut the outline of the Lovely Layers: Heart Vine, I added a piece of Tear Tape Sheet to the back of brushed gold cardstock. I die cut the outline from the brushed gold cardstock and also the solid layer from peach cardstock. I used glue to adhere the layers together and also to adhere it to the card. After I glued the heart layers onto the card, I adhered the sentiment with narrow foam tape strips.

For a bit more shine, I added some gold pearls from the Metallic Mix Pearl Stickers set.

Thank you so very much for stopping by today!  I hope you have lots of crafty fun this week!

Thank you so much for using my affiliate links to shop (never any additional cost to you)!

Wednesday, February 8, 2023

Two Ombré LOVE Cards with the LOVE A2 Cover Plate Die

 Hello Honey Bee friends! Today I'm sharing two cards, one more clean and simple, and the other not as much, that feature the LOVE A2 Cover Plate Honey Cuts! Even with more details, the second card was still very quick to make! I have the directions for both cards condensed together for you below.

For both of these cards I began by die cutting two pieces of 80# Neenah cardstock with the LOVE A2 Cover Plate die. I kept the die cuts in the negative spaces and added strips of removable tape to the back to hold the letters in place.

With the letters taped into place, I was able to easily blend three shades of pink ink (in the supply list at the end) onto each row of letters. These small blending brushes, and also these brushes, make it very easy to get the ombré look.

Next I smooshed the same pink inks onto my craft mat. I spritzed on some water and dipped in a piece of watercolor cardstock. I used my heat tool to dry the ink and repeated the steps until I liked the look. When the piece was dry, I die cut the base layer of the Lovely Layers: Heart Vine twice from the inked panel. Then I die cut white cardstock with the top layer and adhered them together with glue.

I went back to my ombré LOVE A2 Cover Plate die cuts and put a piece of removable tape on the front before removing the tape from the backside. This kept the letters spaced perfectly as I added strips of narrow foam tape to the back of the letters.

Next I embossed two pieces of white cardstock with the Clover Petals 3D embossing folder. I trimmed both to 4" x 5-¼" and adhered them to A2 card bases with Bee Creative glue. On the first card I adhered the Lovely Layers: Heart Vine die cut on the embossed layer first. Then I removed the backing from the foam tape and adhered the LOVE to the card over the Heart Vine. For the second card I used my t-square ruler to line up and adhere the sentiments to the card.


I adhered the Heart Vine over the sentiments of the second card with glue. Then I stamped two sentiments from the Love Love Love stamp set in black ink and die cut them with the coordinating Honey Cuts. I do love dimension so of course, I added foam tape to the back of the sentiments to adhere them to the cards.

The first card has some coordinating sparkle I added from the Bee Bliss gem stickers set.

I really LOVE (haha!) how these turned out and how easy they are to create! To make them even faster, but still beautiful, you could omit the foam tape pieces on the back of the LOVE die cuts and just use glue to adhere them.

Thank you so much for stopping by today! I always appreciate your kind comments too!

Thanks so very much for using my affiliate links to shop (never any additional cost to you).

Wednesday, September 15, 2021

Honey Bee Stamps & Waffle Flower Collaboration: Stenciling Fun!

 Hi crafty friends!  I shared this card over on Instagram for a fun hop with some of the Honey Bee team along with Waffle Flower Crafts!  We are showing off the NEW Waffle Flower Crafts stencil mats: 9" x 12" or the 6" x 9" Mini Stencil Mat.  Both of these are now available in the Honey Bee shop!  Also, be sure to check out Waffle Flower's comparison chart of all their mats below.

Now, you may be wondering, "why do I need this?"  Well, I admit, I thought the same.  However, after using it, I can say "yes!" you do need it.  Here's why: the silicone mat holds your card stock without it slipping around; the raised edges keep the card and your stencil aligned; the mat is non-stick, waterproof, and heat resistant too!  I found it very easy to clean up with water and a clean towel.  Just so you know, this is sincerely my honest opinion--I have not been paid to give it a positive review.

Now, on to my card!  I combined several products from Honey Bee and Waffle Flower to create my fun thank you card.  I have the list with links at the end.

To begin, I die cut 80# Neenah with the Honey Bee Quilted A2 Cover Plate die, then trimmed it to 4" x 5-¼".  I aligned the heart stencil from the Quilted Hearts & Dots stencil set over the card and added some purple tape to hold it in place.  Now I put it on the Mini Stencil Mat and began my ink blending my Distress Oxides.  I used Crackling Campfire, Ripe Pumpkin, Carved Pumpkin and Mustard Seed.

You may notice the the raised edges of the Mini Mat are at the bottom and right side--well, I found that, as a left-hander, that's what worked best for me!  Haha!  So another good thing about the mat is that it works just fine whichever way you place it!  I left the tape on my stencil and wiped off the ink.  Then I spread some Nuvo Moonstone Glimmer Paste through the stencil.  I set the card aside to dry and cleaned the stencil and my tools.

Next I stenciled the beautiful butterflies using Waffle Flower's Spread Your Wings Stencil and Mask set.  I used the same Distress Oxides as before.  I removed the stencil and placed the card in my MISTI.  I centered the coordinating Spread Your Wings stamps over the stenciled butterflies and picked them up with the MISTI door.  Then I stamped them with Intense Black Ink.  I used the Spread Your Wings dies to cut them out.

Then I inked some card stock in the ombré patterned and die cut it with the bottom layer of the Thanks die set.  The middle layer is 80# Neenah, and the top is glossy black card stock.  I stamped the rest of the sentiment, from Thanks stamp set, in Intense Black ink.  Then I arranged my elements, including pieces of the Lovely Layers: Heart Vine I had left over from making this card.

Next I decided to create a coordinating envelope.  I used a mask from the Rectangle Spotlight Stencils & Masks set to block off the addressee portion of the envelope and placed the Quilted Hearts stencil over it.  Again, I used the same Distress Oxides as before.  Then I used a couple pens to trace around the rectangle mask.  Here's a photo showing you the products, plus check out the new Waffle Flower Clear Acrylic 10-hold Brush Stand.  This is a really good stand for your brushes!

After I adhered my sentiments and butterflies, I added a few gem stickers from Honey Bee's Halloween Harvest set to the butterflies.  Gotta have just a bit more bling!  Haha!

Thank you so much for stopping by!  I sure hope you'll join us over on Instagram to see lots more inspiration--be sure to comment for a chance to win too!

Check out these awesome products I used:

Waffle Flower's mat comparison chart:


Wednesday, January 13, 2021

See Through Valentine Card | Honey Bee Stamps

Hello crafty friends! Today I have a fun see through card using Honey Bee Stamps Lovely Layers: Heart Vine as my main feature. I have been wanting to make a see through card for a long time!!  I don't know why I waited because it's really easy and lots of fun!  I created some inky watercolor paper to use too!  Read on to see how I put this card together.

To create my clear card base I used heavyweight 10 mil. acetate.  The brand I have is by Inky Antics and comes in 8-½" x 11" sheets.  I cut one sheet in half, scored it and folded it to make a top-folding A2 card base.

Next I had some inky fun!  I love smooshing watercolor paper into Distress Inks for a fun background.  I smooshed the ink pads, one color at a time, onto a craft mat.  Then I spritzed it a few times with water and pressed the watercolor paper into the ink.  The look you get will depend on how much water you add!  Experimenting is fun so just keep trying with less, or more, water until you get the look you like.  Also be sure to use your heat tool to dry after each layer of color!  I used these Distress Inks:  Spun Sugar, Picked Raspberry and Festive Berries.  Here is a photo to show my process: (click the photo to see close up.)  I ended up making four total.


When the Distress Ink panels were dry, I used the base layer of the Lovely Layers: Heart Vine die and die cut four from them.  I die cut four of the Heart Vine top layer from white watercolor paper.  I adhered them together with small dots of Bee Creative glue.

I used a heart from the Scallop Hearts Honey Cuts to die cut one from the inky card panel and three from white watercolor card.  Then I die cut one heart from the Stacking Hearts Honey Cuts from white watercolor card.

Here are the steps for assembling the card:

  • Adhere the vine pieces to the clear card with small dots of Bee Creative glue.  Set a large stamp block on top and let dry for several minutes.
  • When the vines were dry, I used my scissors to trim of the pieces that hung over the edge.  I used a few of the smaller trimmings to fill in a few places along the edges.  Be sure to save the remaining pieces for later!
  • Adhere the Stacking Heart to the inky Scallop Heart.  Adhere to the card front.
  • Open the card and adhere one white Scallop Heart to the back of the card front.  This will give a cleaner finished look inside the card.
  • Next, adhere a scallop heart to the card inside, centering it behind the heart on the card front.  This is where you can write your sentiment.
  • Adhere the last scallop heart to the backside of the card.  This will hide the adhesive from the heart on the inside.

I didn't worry about the adhesive showing (or a bit of ink) on the back of the vines.  It doesn't show that much and seeing the bit of ink gives it that handmade feel!


I used a sentiment from the Gal Pals stamp set and stamped it in black ink onto watercolor cardstock.  I used my MISTI to be able to stamp it a few times on the textured watercolor cardstock.  I die cut it out with the coordinating Honey Cut.  I popped it up with foam squares and adhered it to the card front.


I took a few of the leftover vine pieces and tucked them around the sentiment with glue.  To add some sparkle and shine, I first used a clear glitter pen on them and then filled them in with Glossy Accents.


I sure had fun making this card and hope you've enjoyed the process!  Thank you so much for stopping by!  Stay crafty!!