Thursday, April 30, 2020

A Kind Word Gatefold Card | Honey Bee Stamps

Hello my friends!  I hope today finds you well and safe.  I had so much fun watercoloring this beautiful Honey Bee Stamps In Full Blooms stamp!  This is part of their new release and was designed by the amazing Emily Midgett!  I'm sure you've seen this fabulous release celebrating Honey Bee's 5th year, but if you haven't click HERE--there is so much awesomeness in this release!  I had so much fun making this gatefold card to show off this beauty!


Let's get started by creating the gatefold card base! Score an 8-½" x 4-¼" piece of Neenah Solar White card stock at 2-¾" from each end.  To finish each side of the gatefold I trimmed a piece of patterned paper from the Birthday Bash 6x6 paper pad to 2 pieces at 2-½" x 4".  I centered those on the front flaps and adhered them down.

Next I used an anti-static pouch on a piece of Strathmore Bristol Smooth card stock.  Then I stamped the image with Versamark clear embossing ink.  I sprinkled on WOW! Metallic Gold Rich embossing powder and heat embossed it.  I used a No. 2 round brush to color this with just a few watercolors.  For the flowers I used Ken Oliver's Orchid Color Burst.  The leaves were colored with Jellybean Green Color Burst, along with a yellow-green watercolor from my stash.  I dotted the berries with some yellow watercolor.  When it was dry, I used the coordinating die to cut it out.


Next die cut the Polygon Thin Frames die cut with gold card stock once, and white card stock twice. I adhered the largest of these frames together with Ranger Multi Medium Matte.  Once these were dry I adhered them to the floral piece.   I love how this all coordinates together!

I stamped the sentiment from the In Full Bloom set with Versafine Onyx Black ink.  I don't usually put a sentiment on the inside of my cards but I decided that a special gatefold card needs a special sentiment inside.  I stamped the In Full Bloom in a light purple ink and used a sentiment from Grateful Each Day to complete it.


Finally, I adhered my floral image to the left panel.  Be sure to only add glue to one-half of the back of the main image!!  I added a few gold sequins from the Gold Lights Confetti Mix.


This card really was so easy to put together and I hope I've inspired you to give this beautiful set a try!  Stay well, and stay crafty!!

Supplies:
Honey Bee Stamps In Full Bloom stamps & Honey Cuts
Honey Bee Stamps Birthday Bash 6x6 paper pad
Honey Bee Stamps Polygon Thin Frames Honey Cuts
Honey Bee Stamps Grateful Each Day stamps
Honey Bee Stamps Gold Lights Confetti Mix

Let's Party! & Week 2 Art Impressions' Best Friends Challenge

Hello friends!  It's week two of Art Impressions' Best Friends challenge!  Just in time for this challenge is this new and fun set called Practically Perfect that I've used on my card today.  It's one of two new sets in this line--the other one is called We're Here Set (check back on Monday to see my card using this one!) Oh, these sets are on sale when I checked on Monday!


I stamped the image in Copic safe ink (Ink On 3 Blackout Detail ink is my favorite).  Next I die cut it with a Square Double Stitched die.  I then colored it with the crazy (Haha!) amount of Copic markers which are listed at the end, if you're interested!  I used some patterned paper for my layers.  I didn't realize this 6x6 paper is retired.  I did find a 6x8 pad of it--if you want to look it up, it's called Happy Hooray by Pebbles.

I added fun details to all the ladies tops with some fine tip pens.  I used a few pens from my Staedtler 20 pen set of finalizers, along with a Micron .005 black pen, and a couple of Cricut fine tip pens.

The bottom yellow layer is cut to 5-½" x 5-½" and adhered to a top-folding card base of the same size.  I used another square stitched die from my stash to cut the next layer.  I adhered an orange layer behind the colored image and popped it up with foam tape.


I stamped the sentiment in Versafine Onyx black ink and trimmed it into a flag shape.  I used a scrap piece of the yellow paper to layer it and popped it up with a foam squares.


I'm sure you're like me and cannot wait for the day that we can actually have that party--together!!!!  At least we can have fun with these fabulous stamp sets!  Stay safe, healthy and CRAFTY!!


Copic markers:
B00, B01, BG01, BG02, C00, C1, C3, C5, C7, C9,
E11, E21, E25, E27, E29, E31, E34, E35, E50, E51, E57, E99,
G12, G20, G40, R11, R14, R20, R21, R22
Y00, Y11, Y13, Y15, Y21, Y26, YG45, YR29

Supplies:

Monday, April 27, 2020

How to Make Paper Charms for a Watercolor Bookmark | Art Impressions

Hello my friends!  I had so much fun creating this beautiful watercolored bookmark with Art Impressions Bookmark Dies and making the little paper charms to add to it!


Here are the basic steps for creating the bookmark and the watercoloring (all watercoloring is done the "Ai way"!  See Art Impressions YouTube for specific techniques) :
  • Die cut the Bookmark Die from a piece of Strathmore Bristol Smooth card stock.
  • Ink the large birdhouse with 969-Chocolate and 565-Deep Blue and stamp it onto the die cut bookmark. Pull the color out with your brush adding shadows where needed.
  • Scribble 493-Reflex Blue onto your palette and pick up some with your brush and add to the birdhouse roof.
  • Stamp the greenery from Foliage Set-4051 with 177-Dark Jade and dab the color with a damp brush.
  • Stamp the flowers on the vine with 665-Purple.
  • Stamp the tiny grass from Foliage Set-4051 with 177-Dark Jade.
  • Stamp the flowers at the base of the birdhouse.  Use the flower bunch from Flower Set 2 and ink the top half of the stamps with 177-Dark Jade and the flowers with 933-Orange with some 055-Yellow.
  • Pick up 493-Reflex Blue and add in some sky.
  • Stamp the branch from WC Branches Set with 969-Chocolate.  Add leaves with the stamp from WC Foliage Set 2.  I inked it with 177-Dark Jade.
  • Ink up the flying bird with 969 and 565.  Stamp onto the positioner block, position it over the birdhouse, then stamp the bird onto the piece.  Stamp the bird on the ground in the same colors.  Add more color to them with a bit of 493-Reflex Blue with 565-Deep Blue mixed from your pallette.
I used dies that are included with the Bookmark die set to create my little charms.


Die cut two each of each shape you want to use.  I used Copic markers to color the butterfly and the feather.  Note:  color the backside of one feather since it's not symmetrical.  Die cut three tiny hole reinforcers from the Tag Stitched Die set.  Color two to coordinate with the butterfly and feather.  My photos that follow show my assembly for the butterfly.  Adhere one reinforcer with liquid glue to the top center of the die cut.  Add more liquid glue to adhere the two pieces, colored sides facing out.  Let dry.  Assemble the cross and feather the same way.


Next I used a Ranger Emboss It Dabber to add clear embossing ink to one side.  Holding the charm with your reverse tweezers (don't want to get burned!) pour clear embossing powder over the ink and heat emboss.  While it's still hot, dip it back into the clear embossing powder two more times to get the smooth thick finish.  Repeat for the opposite side.  I embossed the cross the same way, but used some white sparkle embossing powder.  I had some small rings in my stash that I attached to the top of the charms.

I colored the white ribbon by scribbling 493-Reflex Blue onto my mat and spritzing water into the ink, then dipping the ribbon into it.  Keep dipping and spritzing water until you have the desired shade.  Let dry, and then tie it, and the charms, onto your bookmark.


I love the added touch the little charms give to this bookmark!  I sure hope I've inspired you to give this a try.  Have a wonderful, crafty week!


Supplies:
Art Impression supplies:
Bookmark Dies
Tag Stitched Dies
WC Large Birdhouse set
Foliage Set-4051
Foliage Set 2-4867
Branches Set-4964
Flower Set 2-4868

Other supplies:
Tombow watercolor markers:
055-Yellow, 177-Dark Jade, 493-Reflex Blue, 565-Deep Blue,
665-Purple, Orange-993, 969-Chocolate
WOW Clear embossing powder
WOW Glitter Sparkling Snow embossing powder
Ranger Emboss It Dabber

Sunday, April 26, 2020

How to Use Layering Stamps with Dies | Rubbernecker Stamps

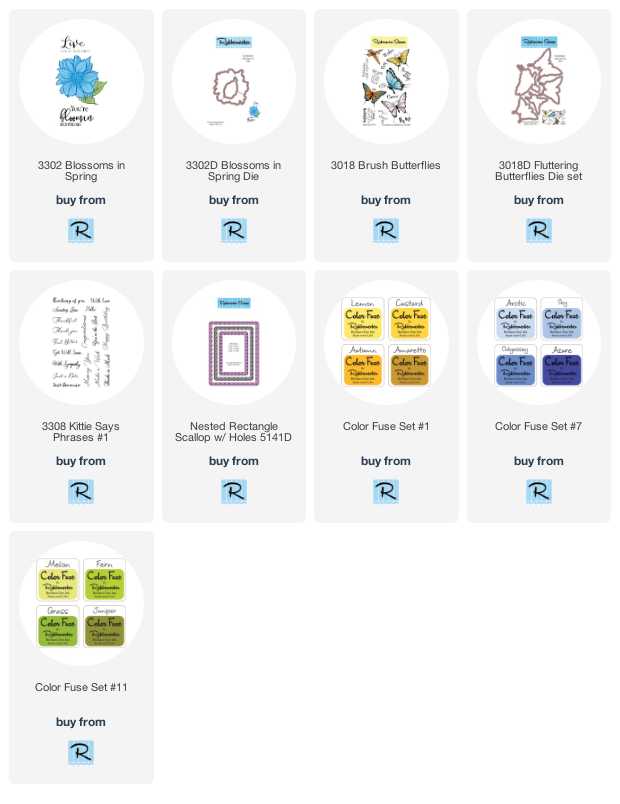
Hello Rubbernecker friends!  Today I have a bright and cheerful "Just Because" card that's sure to brighten anyone's day!  These beautiful flowers are from the Blossoms In Spring stamp set and the coordinating dies.  I added some dimensional fun with these beautiful Copic colored butterflies from the Brush Butterflies set.  My steps for creating this pretty card are going to be brief, as I hope you will continue reading to learn about using these clear layering stamps in my tips.


Create the card base:
  1. Ink the edges of a 4-¼" x 5-½" white card stock piece with Odyssey ink from Set #7.  I used an ink blending brush to get a smooth blending of the blue ink.
  2. Die cut another piece of white card stock with the largest die from the Nested Rectangle Scallop w/Holes die set.  Adhere it to the inked panel.
  3. Adhere the layered piece to a top-folding A2 card base.

Flowers, leaves, and butterflies:
  1. Ink the flower layers using the included layering guide.  I used Sky, Odyssey and Azure from Set #7.  I always use my MISTI when stamping so I can repeat if necessary.  I used Custard from Set #1 for the flower centers.
  2. Add small drops of Dandelion Yellow Nuvo Crystal Drops to the flower centers and set aside to dry.
  3. Stamp the leaves with ink from Set #11.  I used Fern and Juniper.
  4. Die cut with the coordinating dies.
  5. Stamp the butterflies with Copic-safe ink and color with alcohol markers.
  6. Die cut the butterflies with the coordinating dies.
  7. Adhere the flowers.  The top one with liquid glue, and the bottom flower with foam tape.
  8. Add a small dot of glue to the base of the leaves and tuck under the flowers.
  9. Add a thin line of glue to the center of the butterflies and adhere.
  10. When the glue on the butterflies is dry, bend up the wings slightly for some dimension.
  11. Add sparkle to the butterflies wings with a clear sparkle pen.
I LOVE these dimensional butterflies on the flowers!  This really adds so much interest.


Here are some tips that I hope will be helpful!  Click on the photos for a larger view.


These next three photo show a tip on how to be sure you have the outline stamp lined up correctly.  You will need your stamp positioner for this (I use a MISTI).  Line up the outline stamp with the layered image.  Pick up the stamp with the MISTI door.  Lay a piece of acetate over the image, ink up the stamp and stamp onto the acetate.  I can see here that I have it lined up just right!


This card has all three of my most favorite colors!  Blue, green and yellow make me happy!


I hope my tips will help you when you use your layering stamps and that you'll be inspired to give them a try!  Thank you for stopping by today and have a wonderful, crafty week!


Shop the supplies by clicking these links:

Saturday, April 25, 2020

Keeping Christmas Blog Hop - April 2020

Hello friends!  I can't believe another month has gone by and it's time for our fun blog hop to inspire you to make your Christmas cards!  The complete hop list is at the end of my post.  I hope you will check out each awesome designer as I know you will find a lot of beautiful inspiration along the way!


Last month I made a card with a wreath (click HERE if you missed it) and today I have a slim-line card with a wreath that's totally different!  


Let's get started on the card!  I have all of the supplies, and links, listed below.
  • Create the card base by scoring a 7" x 9-½" piece of Neenah Solar White 80# card stock at 3-½".
  • Use a score board and tool to emboss the lines along each edge of the card base front.
  • Layer a light gray 9" x 3" card stock with a dark gray 8-¾" x 2-¾" with liquid glue and attach to the card base.
  • Emboss a 8-½" x 2-½" strip of white card stock with the Lumber embossing folder.  This strip is longer than the embossing folder, so I just flipped it around and lined it up with the first embossing to emboss the remainder of the strip.
  • Add the embossed piece to the card base.
  • Stamp the Woodgrain Background stamp with gray ink onto white card stock.
  • Die cut the letters N, E and L from the woodgrain piece.  Die cut two more for each letter from white card stock.  Adhere all of these layers together.
  • Die cut the letters again from dark gray card stock and adhere to the other letters slightly offset.
  • Die cut the bow and berries from red card stock.  I used a piece of card stock from my stash.
  • Die cut the wreath base and leaves once from three shades of green card stock.
  • Using a ball-tipped stylus and foam pad, lightly shape the leaves and bow.
  • Build the wreath by adhering with liquid glue leaves around the wreath.  I attached the two larger sizes first and filled in with the smallest leaves.
  • Attach the bow and berries with glue.


I felt like it needed just a bit more, so I used some of the extra leaves and berries to embellish the other letters.


I hope that you are well and that you are finding relief by crafting.  I know I'm so thankful I have this hobby that I love to keep me occupied while we are home.  I always so appreciate your visit to my blog--thank you!  Here's the hop list so be sure to go leave some kindness for these talented ladies!

Vicki Finger (off this month)
Carol Hintermeier << that's me!

Supplies:

Monday, April 20, 2020

Birthday Bus Cubbies Card | Art Impressions

Happy Monday my friends!  Have you seen the new Art Impressions Cubbies sets?  My card today uses the adorable Bus Cubbies.  I just think these little animals are so cute!


This is a view with the bus doors closed.


This card was created in the usual "cubbies" way--stamp the images, color, and die cut with the included dies.  I've listed my Copic markers I used below.  I positioned the critters with liquid glue and then added foam tape to the back of the bus.

For the background, I hand cut a mask for the hill, added it to the sky portion and inked on some Picked Raspberry and Spun Sugar Distress Oxide.  I used the other piece of the mask to cover up the hill, and inked some clouds with a cloud stencil and Tumbled Glass Distress Oxide.  I sprinkled some water drops over the panel and blotted them with a paper towel.  Then I added drops of some white ink spray and let it dry.  Next I die cut it with a Rectangle Double Stitched die and attached it to a pink layer.  This was attached to a top-folding 5-½" x 4-¼" card base.

Then I attached the bus to the panel.  I popped up the balloons with foam tape and used a black pen to draw in the strings.


I stamped the cute sentiment in black ink, cut it into a flag shape and popped it up with foam tape.


Thank you so much for stopping by today!  Have a fabulous, crafty week!


Bus cubbies Copics:
bus;  BG49, BG34, BG32, N9, N7, N5, C5, C3, C1, R27, Y13
alligator:  G29, G94, YG95
turtle: YG63, G24, G21, E57, Y26, Y19
panda:  W7, W5, W3, W1, W00, R20
elephant: C7, C5, C3, C1, 100, R20, R30
giraffe:  YR18, YR14, YR21, R20
monkey: E23, E57, E59, E53

Sunday, April 19, 2020

Honey Bee Stamps Celebrating 5 Years Blog Hop Day 2


Hello Honey Bee friends!  Welcome to my blog and to Day 2 of Honey Bee Stamps "5 unBEElievable years" blog hop!  I am so honored to be a part of this amazing team and to celebrate their five years!

You should have come here from the amazing Courtney Kreeber.  There is so much wonderful inspiration on this hop, so I hope you will hop to each stop and you will find the complete list at the end of my post.  Be sure to comment here, and at each stop along the way, for your chance to win a $25 Honey Bee Stamps gift card!  If you missed the Day 1 hop, get started here, and comment on each stop for your chance to win for Day 1.

My card for today features the beautiful Farm Fresh Flowers stamps, that is illustrated by the so talented Emily Midgett, and the coordinating Honey Cuts.  Also new is the COOL and awesome Buffalo Plaid Builder stencil set.


I stamped the images with Copic safe ink and colored them with Copic markers.  The flowers were a delight to color as they are just the right size!  I used the coordinating dies to cut them out and added foam tape to the back.


I had so much fun using the Buffalo Plaid Stencil Builder stencils to create my background.  I began with an A2 Neenah card stock piece and used Peacock Feathers Distress Ink and a Background Blender brush to ink up the striped stencil.  Then I rotated the stencil 90º and brushed on more Peacock Feathers.  Next I used the second stencil in this set--the one with the squares--and lined it up over the  remaining white squares and brushed in some Squeezed Lemonade Distress Ink.  I love this stencil because you can make any color Buffalo Check pattern at all!!  I used a Double Stitched Oval Honey Cut to die cut an oval, then adhered the piece to an A2 top-folding card base.  I then adhered the flowers and pitcher.  To finish it off, I added the sentiment and a few True Blue Acrylic Hearts.


______________________________

In case you missed it on my Instagram, I'll share the other cards from each sneak peek day this past week.  I've listed the Honey Bee products for each card so you can click on any of the links to go directly to the Honey Bee Stamps shop.

(Click on any photo to enlarge.)

Sneak peek Day 1 products:  Candle Cover Plate Honey Cuts; Party stamps & Honey Cuts


Sneak peek Day 2 products: Far Out Friends stamps & Honey Cuts; Stellar Sentiments and Honey Cuts; To The Moon Scene Builder stencil set; Twinkle, Twinkle background stencil


Sneak peek Day 3 products:  Card 1:  Mommy To Bee stamps & Honey Cuts; Stacking Hearts Honey Cuts; Spring Lullaby 6x6 paper pad; Card 2:  UnBEElievable Free Bee stamps & Honey Cuts; Birthday Bash 6x6 paper pad


Sneak peek Day 4 products:  Card 1:  Farmhouse Add-on stamps & Honey Cuts;  House Builder Card Base; Home Essentials 6x6 paper pad; Card 2:  Buffalo Plaid Background stamp; Friend stamps & Honey Cuts


Sneak peek Day 5 products:  Card 1: Spotlight Rectangle stencil set; Good Friends stamp set Card 2:  Spring Bouquet Honey Cuts; Floral Vases Honey Cuts; Circle Thin Frames Honey Cuts; shape your florals with the Flower Shaping Essentials KitCard 3Circle Spotlight Stencil & Masks setBuzz stamps & Honey CutsBusy Bees stamps & Honey CutsOutdoor Scene Builder stencilsDetail Blender Brushes


Thank you for hopping by!  Be sure to leave a comment here and at all the stops for your chance to win!  Up next is the awesomely talented Leanne West!

Here is the complete Day 2 hop list:
Honey Bee Stamps
Laura Bassen
Lisa Mensing
Courtney Kreeber
Carol Hintermeier << that's me!
Leanne West
Becky Roberts
Channin Pelletier
Angelica Conrad
Lisa Cisneros
Jana Millen
Mindy Eggen

Thursday, April 16, 2020

Rainbow Clouds and Castle Cubbies Birthday Card | Art Impressions

Hello friends!  We are in week two of the Art Impressions' Kids at Heart challenge.  My inspiration card for this challenge uses the oh so adorable Castle Cubbies.

This is what it looks like with the doors and windows all closed.


This next photo shows them all open.


I just had to create a rainbow cloud for the castle's background!  I die cut the panel with a Rectangle Double Stitched die and added it to a top-folding A2 card base.  I have all of the supplies I used listed below.  I inked up a die cut grass piece and added it to the bottom of the panel.


After I colored the castle and the little people and critters, I used the included dies to cut them out.  I added foam tape to the back of the castle.  I colored some scrap paper a dark blue to put behind the window openings so the rainbow clouds didn't show through.  


I hope you'll join in our current challenge!  Thank you so much for stopping by!


Copic markers:
dragons: BV000, BV01, BV02 BV04, BV08, Y04, Y06, Y08,
YG25, YG01, YG17
Unicorns:  C02, Blender, RV13, Y08, YG25, B00, BV04
Princess:  RV10, RV13, RV21, BV01, BV02, BV04,
E000, E21, E34, Y26, Y21, Y08
Prince:  E000, E21, E34, YG25, YG01, BV01, BV04, N6, N4, N2
Castle: BV01, BV02, BV13, BV17, C1, C3, C5, C7, C9,
E40, E41, E42, E43, E27, E35, E37,
RV04, RV13, RV21, Y13, Y15, Y17

Supplies:
Distress Oxides Ink: Spun Sugar, Carved, Pumpkin, Squeezed Lemonade, Tumbled Glass, Wilted Violet, Mowed Lawn, Twisted Citron