Showing posts with label Brush Butterflies. Show all posts

Sunday, May 24, 2020

Sending Hugs Card & Stamp Masking Tips | Rubbernecker Stamps

Hello Rubbernecker friends!  Today I'm sharing this pretty floral card using the Summer Bloom stamp layering set.  I did lots of easy masking to make this beautiful card to send hugs to that special person!  This card is also a good example that when things don't go turn out exactly as you had hoped, just roll with it, and all turns out fine in the end!  Read on to see what I mean.


Here are the steps for my card:
  • Create a top-folding 5-½" x 4-¼" card base.  Open the card up and position the largest Nested Rectangle Small Stitched die on the card front.
  • Using the embossing sandwich for your die cutting machine, run this through to create the dry embossed stitched lines on the card.  This is a great way to get even more use from your dies!
  • Die cut white card stock with the second largest Nested Rectangle Small Stitched die.
  • Place this panel into a stamping tool and add some masking tape around the stitched edges.  See my photo below to see my work in progress. (This masking technique is best done with a stamping tool such as the MISTI in case you need to stamp a layer more than once.)
  • First stamp the base layer of the flower onto some masking paper and fussy cut it out.  You will need two masks.  Stamp one of the leaves base layer and fussy cut it.


Okay, now we are ready to begin stamping.  I will list which colors I used and the Color Fuse sets they are from, along with a few notations for you.  I stamped the base layer for all the flowers first so the ink would have time to dry between layers.
  • Three points to remember as you are stamping the layers: 1) "prime" your stamp by either rubbing an eraser or microfiber towel on it to remove the shine; 2) Make sure that each inked layer is totally dry before stamping the next layer; and 3) CLEAN your stamp as you go--I'll let you know soon how I learned this!  Haha!
  • Stamp the first flower using Posey, Scarlet, and Nectar from Color Fuse Set #4.  Place the flower mask onto the flower.
  • Stamp the second flower with Lemon, Custard, and Amaretto from Color Fuse Set #1.  This where I realized that I did not clean the base layer good enough after I stamped the first flower.  I was wondering why the Lemon ink looked so orange!!  I figured out that it picked up some residual pink ink from the first flower.  Oh well, I had to roll with it!  Move the mask to cover this flower.
  • Stamp the next flower with Mango, Citrus, and Apricot from Set #2.  I'm not sure why the third inked layer doesn't show up very well--oh, well, another "just roll with it"!  LOL!  Cover with the mask.
  • Stamp the blue flower with Beachside, Whisper, and Dreamer from Set #9.  Cover with the mask.
  • Stamp the last flower with Lavender, Lilac, and Orchid from Set #6.
  • Finally, stamp the leaves with Mist, Moss, and Clover from Set #10.  You will need to mask off the flowers sometimes using both flower masks.  It just all depends upon how you arranged your flowers as you were stamping them.  Use the mask for the greenery when needed.
  • Add foam tape to the back of the panel and adhere to the card front.
  • For the sentiment I die cut the Hugs four times from white card stock.
  • Leave one die cut in place to make it easier to blend ink in an ombré pattern.
  • I used an ink blending brush and the blues from Color Fuse Set #9.
  • Adhere all four layers together with liquid glue and let dry.
  • Attach it to the card front with glue.


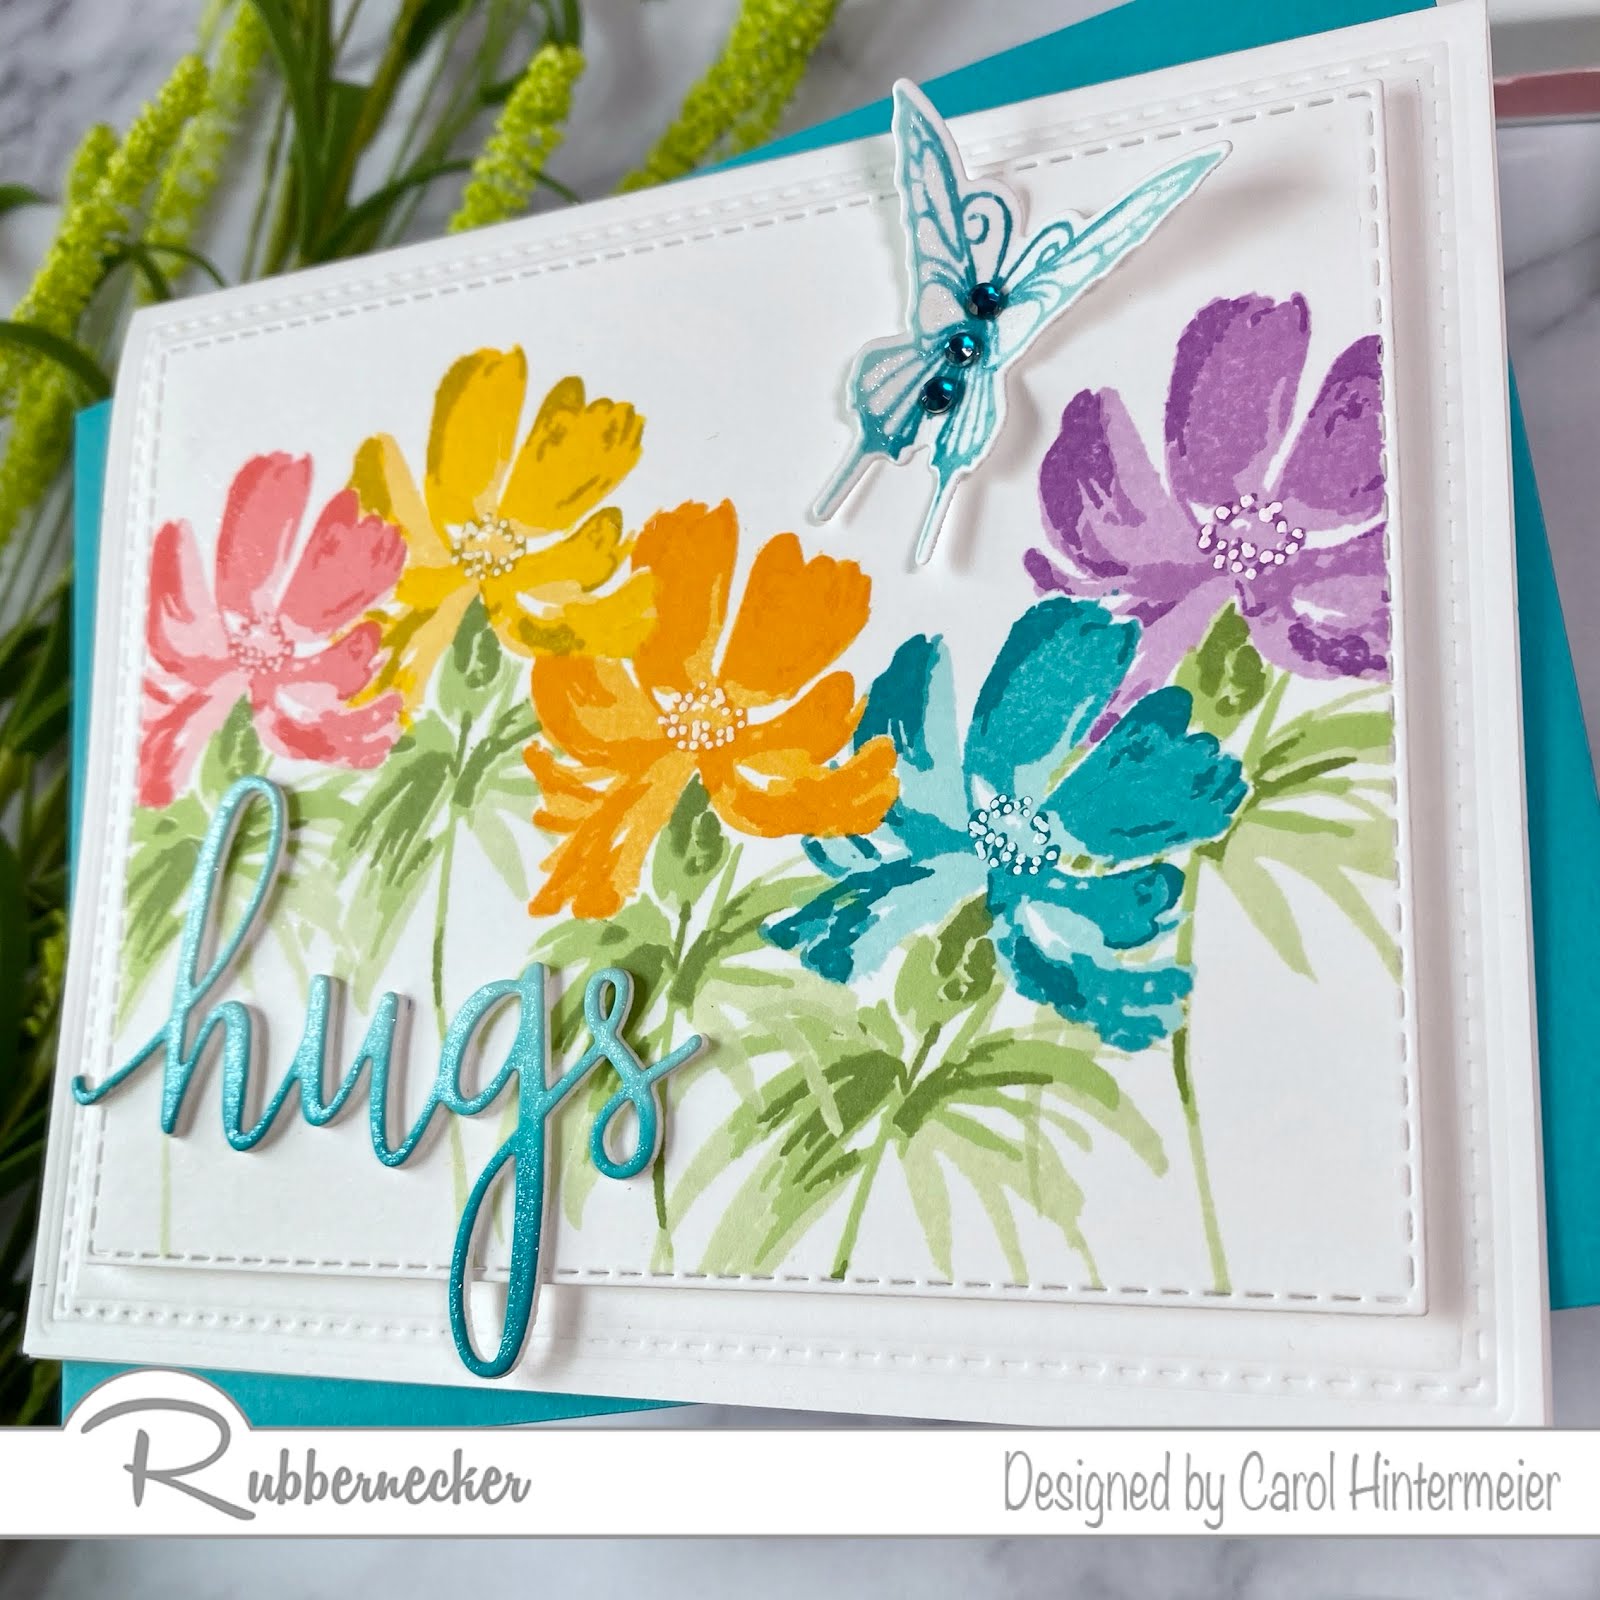
  • I stamped the butterfly from the Brush Butterflies set with the blue ink cubes, again, in an ombré pattern.
  • Cut it out with the coordinating die from the Fluttering Butterflies die set.
  • Add glue just in the center and attach it to the card slightly bending the wings up.
  • Add some crystal gems to the body and clear sparkle to the wings and the sentiment.
  • Add white dots to the flower stamens with a white gel pen.


I really love how this happy card turned out and hope I've inspired you to give these layering stamps and masking a try!  Thank you for stopping by and have a wonderful, crafty week!  Don't forget to just roll with it! :)

Sunday, April 26, 2020

How to Use Layering Stamps with Dies | Rubbernecker Stamps

Hello Rubbernecker friends!  Today I have a bright and cheerful "Just Because" card that's sure to brighten anyone's day!  These beautiful flowers are from the Blossoms In Spring stamp set and the coordinating dies.  I added some dimensional fun with these beautiful Copic colored butterflies from the Brush Butterflies set.  My steps for creating this pretty card are going to be brief, as I hope you will continue reading to learn about using these clear layering stamps in my tips.


Create the card base:
  1. Ink the edges of a 4-¼" x 5-½" white card stock piece with Odyssey ink from Set #7.  I used an ink blending brush to get a smooth blending of the blue ink.
  2. Die cut another piece of white card stock with the largest die from the Nested Rectangle Scallop w/Holes die set.  Adhere it to the inked panel.
  3. Adhere the layered piece to a top-folding A2 card base.

Flowers, leaves, and butterflies:
  1. Ink the flower layers using the included layering guide.  I used Sky, Odyssey and Azure from Set #7.  I always use my MISTI when stamping so I can repeat if necessary.  I used Custard from Set #1 for the flower centers.
  2. Add small drops of Dandelion Yellow Nuvo Crystal Drops to the flower centers and set aside to dry.
  3. Stamp the leaves with ink from Set #11.  I used Fern and Juniper.
  4. Die cut with the coordinating dies.
  5. Stamp the butterflies with Copic-safe ink and color with alcohol markers.
  6. Die cut the butterflies with the coordinating dies.
  7. Adhere the flowers.  The top one with liquid glue, and the bottom flower with foam tape.
  8. Add a small dot of glue to the base of the leaves and tuck under the flowers.
  9. Add a thin line of glue to the center of the butterflies and adhere.
  10. When the glue on the butterflies is dry, bend up the wings slightly for some dimension.
  11. Add sparkle to the butterflies wings with a clear sparkle pen.
I LOVE these dimensional butterflies on the flowers!  This really adds so much interest.


Here are some tips that I hope will be helpful!  Click on the photos for a larger view.


These next three photo show a tip on how to be sure you have the outline stamp lined up correctly.  You will need your stamp positioner for this (I use a MISTI).  Line up the outline stamp with the layered image.  Pick up the stamp with the MISTI door.  Lay a piece of acetate over the image, ink up the stamp and stamp onto the acetate.  I can see here that I have it lined up just right!


This card has all three of my most favorite colors!  Blue, green and yellow make me happy!


I hope my tips will help you when you use your layering stamps and that you'll be inspired to give them a try!  Thank you for stopping by today and have a wonderful, crafty week!


Shop the supplies by clicking these links:

Sunday, January 12, 2020

Birthday Wishes | Rubbernecker Stamps

Hello friends! I'm so thrilled to have my first card for Rubbernecker Stamps today!  One thing about me that you may notice over time is that I love flowers, butterflies, and all things nature related.  I had a lot of fun creating this birthday card using the Branch Shadow stamp and the Brush Butterflies and coordinating butterfly dies!  I also used the Nested Rectangle Small Stitch Die set and the Best Friends, Etc. sentiment set.


Here are the steps for the background.
  1. Die cut a piece of Neenah 110# Felt Ultra White Watercolor Paper using the third largest rectangle die.
  2. Tape this piece down using removable tape.  (I like the blue removable painter's tape.)  Since I was using my MISTI, I taped each edge of the panel to the MISTI so that there would be a white border.
  3. Add Tumbled Glass Distress Ink using an ink blending brush and a light hand.
  4. Position the Branch Shadow stamp on the MISTI door and apply some light green ink to the stamp.  Mist lightly with water and stamp onto watercolor paper.
  5. Use a darker green watercolor marker and "color" onto the stamp's branches and part of the leaves.  Mist lightly with water and stamp.  Repeat this step as needed until you like the look.
  6. Dry the panel with a heat tool.  I kept it about 12" away so as not to warp it (or ruin my MISTI!).
  7. Ink the stamp again with the light green ink and stamp.  This will bring back some of the details and crisp edges.  Repeat, if needed.


Steps for the butterfly and sentiment:
  1. Stamp the butterfly in Copic safe ink and color.  I used V17, V15, V12, Y19, Y15, and Y02.
  2. Die cut with the coordinating butterfly die.  While you have the butterfly die out, die cut two more from vellum.
  3. Stamp the sentiment in black ink.  Then use a paper trimmer to cut into a strip.  To get the stitching on the edges of it and the green layer behind it, I used the fifth largest die for the sentiment and the next size larger for the green layer.  The photo below will explain how I did this.  Just run it through your die cutting machine to add the stitching.
  4. Adhere the sentiment to the green layer and add some thin foam tape to the back.


Card layers:
  1. The card base is an A2 top-folding card from light green card stock.
  2. Use the largest stitched die and die cut a piece of the 110# Neenah Felt watercolor paper.  Adhere it to the green card base.
  3. Cut another piece of green card stock with the second largest die and adhere it to the watercolored panel.  Add foam tape to the back of the piece.  Adhere it to the card base.
  4. Add some adhesive only down the middle of a vellum butterfly and adhere the other on top. Next adhere the colored butterfly on top.  Once dry, slightly bend the wings up.
  5. Adhere the butterfly to the watercolored panel.  Add the sentiment piece.
  6. Add some sparkle to the butterfly with a clear glitter pen.  Finish with a "butterfly trail" of NUVO Glitter Drops Lilac Whisper.  


This card was easy and quick to make!  I need to make some more for my birthday card stash.  Do you make cards to keep on hand?  Thank you so much for stopping by today!  Stay crafty!