Monday, June 22, 2020

Get Your Happy On! | Art Impressions

Happy Monday my friends!  Do you ever just let loose and "get your happy on"?  Young, or older, we should all have these moments where we just rejoice in happiness!  This Art Impressions Be Happy Laugh Lines set with the adorable gal totally shows us how to shake it!


I stamped her in Copic safe ink and colored her with the markers listed below.  I used a white gel pen and a .005 black Micron pen to add some details to her dress and apron.  When I finished coloring, I die cut the panel with the next-to-largest Rounded Rectangle die.  Then I stamped the two sentiments near the top in Versafine Onyx Black ink.


For the blue layer, I traced around the Rounded Rectangle die I use previously, and trimmed it with my trimmer and fussy cut it around the corners.  I adhered my image to the layer and added some thin foam tape on back.  I added black card stock to a top-folding A2 card base and layered some patterned paper on top. 

For the bottom sentiment, I heat embossed it in white on some black card stock and trimmed it to a banner shape.  I pulled out my dusty mini stapler, stapled it to a coordinating blue banner and popped it up with some foam squares.


Thanks so much for stopping by!  Now, go get your happy on!


Copic markers:
B06, B04, B02, C9, C7, C5, C3, C1, C00,
E11, E21, E51, E50, R20, RV04, RV02, RV10

Supplies:

Monday, June 15, 2020

Wishing You A Bright Sunny Day! | Art Impressions

Happy Monday friends!  Today I have another mini trifold card using the new Art Impressions Tropical Circlet MTF.  I love being at the beach and this sure makes me want to be there NOW!  Haha!


I used Neenah Desert Storm card stock for my card base.  I followed the directions on the back of the package for the size and where to score the card.  I added patterned paper layers (from my stash) to the card front and the middle layer.


Next I inked up the stamps in Copic safe ink and stamped them onto a piece of Neenah 80# card stock.  I was sure to space them out enough to have room to die cut them with a Circle Double Stitched die after I finished coloring them.  I also used a circle die to cut layers for them from Neenah Desert Storm card stock.  After I colored them, used a circle die to cut them out, and adhered them to the Desert Storm circles, I used the included dies to cut the openings in each one.  I also used the same dies to cut the openings in the top and middle card layers.


These tri-fold cards are just so fun as you open the card up!


Thank you so much for stopping by today!  I hope you have a wonderful and fun crafty week!

Copic markers:
B26, B23, B21, C00, C1, C3,
Y19, Y18, Y13, Y11, Y00,
E35, E33, E55, E53, E51,
RV25, RV23, RV21
Leaves:
BG49, G18, G02
G28, G19, G07, G03
YG25, YG01
YG17, YG13, YG01

Supplies:

Sunday, June 14, 2020

Sea-ing You Brightens My Day! | Rubbernecker Stamps

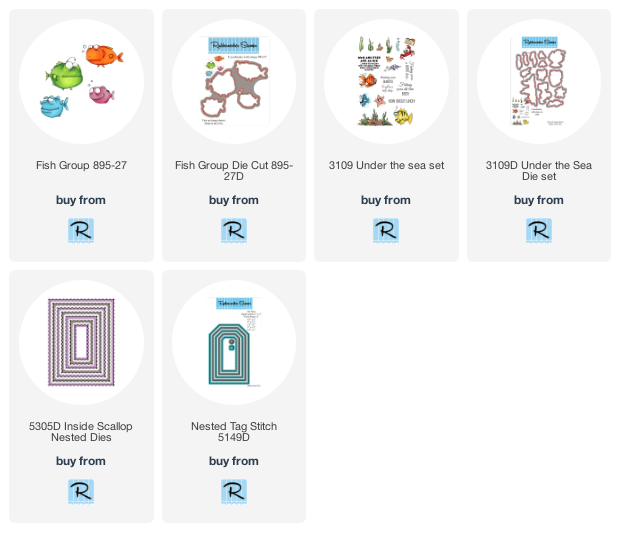
Happy Sunday my friends!  Oh my gosh the expressions on these adorable fish make me have such a big smile!!  These fun fish with an attitude are from the Rubbernecker Stamps Fish Group stamp and they have a coordinating die too!  I also have a couple of tips to show you how to make your own coordinating ribbon, add extra detail to your stamped images, and how to get more use from of your dies.  Keep reading for these easy tips!


Let's create the ocean background:
  • Ink up white card stock in a blue ombré pattern.  I used an ink blending brush and Distress Oxide inks in these colors:  Blueprint Sketch, Salty Ocean, and Mermaid Lagoon.
  • I used a "rays" stencil and inked some white pigment ink over the ombré panel.  Before removing the stencil, I spritzed some glitter spray over it and set it aside to dry.
  • When the panel is dry, adhere it to an A2 card base.
  • Ink up two strips of white card stock in the same colors for the waves.  Die cut these with two of the dies from the Waves die set.  Offset them and adhere together.
  • Die cut the ombré panel with the largest Nested Inside Scallop die.
  • Using the same Nested Inside Scallop die, place the waves at the bottom and die cut it.  This will give you the same edge as the ombré panel.  See this next photo for more explanation. This is one way to use your dies in a less conventional way!
  • Pop up the waves with some foam tape and adhere it to the card base.


Read on for another way I used my die differently for the sentiment:
  • I stamped the sentiment from the Under The Sea set in black ink on a piece of white card stock.
  • Place the smallest Nested Tag Stitch die, and the included hole die, over the sentiment and die cut it.
  • Now move the die up to cut the bottom edge. (Second photo)
  • You can feel the stitches from the die align with those on the card stock.  Run through your die cutting machine.  Here are a couple of photos for a visual explanation:
  • I inked up another piece of card stock with the Distress Oxides and trimmed it to layer behind the tag.
  • Next I dyed some ribbon from my stash to coordinate.  More photos are below to show you the process.  Smoosh the inks onto your mat, spritz with water, and gently swirl the ribbon in the ink.  The more water you spritz, the more diluted the ink will be and the lighter your ribbon will turn out.  Set it aside to dry.
  • When the ribbon is dry, loop it through the hole and tie some bakers twine in a bow.


Now onto adding a few details to your stamped images and finishing up the card.
  • I stamped the fish from the Fish Group set and a couple plants from the Under The Sea set in Copic safe ink.  I LOVE how the four fish are on one stamp and the one die cuts them all out together!  Makes it so easy!  The coordinating die sets are Fish Group 895-27D and Under The Sea 3109D.
  • Next, I added some stripes and dots to two of the fish.  For the striped fish, I penciled in the stripes, erasing and fixing them until I was satisfied.  I used a .05 black Micron pen to trace over the pencil lines.  I colored the fish and plants with my Copics.
  • Then I used the same pen to add dots in the shadows of the orange fish.  It's a subtle detail, but makes a big difference!


  • I popped up three of the fish and the sentiment tag with foam tape and adhered them to the card base.
  • I used liquid glue to adhere the other fish and plants.
  • I used Distress Collage Medium Matte adhesive to glue the clear acrylic droplets.


I hope you've enjoyed my tips and that this card makes you smile like it does me!  Thank you so much for stopping by!  Have a fabulous and crafty week!


Thursday, June 11, 2020

Beep! Boop! You Light Up My Life! | Honey Bee Stamps

Today I have a fun light-up card using the adorable Honey Bee Stamps Build-A-Bot set!  Have you ever made a light-up card?  These Pear Blossom Press EZ-Lights make it so easy! Keep reading to see how to make this fun card.

This is the card as you would see it out of the envelope.


Push where it says "press here" and ta-da!


Here are the steps I took to make my card.  I hope this makes it easy to understand!
  • Die cut Neenah Solar White card stock with the largest A2 Double Stitched Frames die.
  • Create the galaxy background by blending Distress Oxide inks on the die cut panel.  I used Picked Raspberry, Blueprint Sketch, Mustard Seed, and Black Soot.  The blending brushes make this so easy!
  • I used an ink blending tool to add some Distress Micro Glaze to the inked background and used a paper towel to wipe off the excess.  I love how this enhances the colors and also takes away the chalky look of the Oxide inks.
  • I used the Twinkle, Twinkle stencil and some texture paste to add the stars to the background stencil, sprinkled on some glitter, and set it aside to dry.  When it was dry, I adhered it to a pink card stock layer.
  • I used stamps and dies from these sets for the scene on my card:  Build-A-Bot, Far Out Friends, Gear Up, and One-Of-A-Kind (for the press here).
  • The Bot pieces were colored with Copic markers and the moon with Distress Oxides using the To The Moon Scene Builder stencil set.  Distress Oxides for the moon are Weathered Wood, Black Soot, Festive Berries, Picked Raspberry and Spun Sugar.
  • I used a craft knife to cut out the grid in the middle piece for the Bot.  I stamped that piece again, this time on vellum, with StazOn black ink.  I colored the back of the grid with Copics, die cut it, and adhered it to the back of the Bot middle.  Now I can adhere the Bot pieces together with glue.  See first photo below.
  • I planned out where to place my pieces to know where to add three holes for the lights and marked the spots with a black marker.  I used a craft pick to punch the holes.  Align the panel over the card base and use a pencil to mark the spot for the lights through the punched holes.  See the next photos for the lights, battery pack, and foam tape placement.  I used double-sided adhesive to hold the battery pack in place.
Click the photos to see larger images.


Once I double-checked that I had the lights in the correct spot, I removed the foam tape backing and adhered the galaxy panel.  Now it's just a matter of adding foam tape to your pieces and adding them to the card!


I could play with this card all day!  Haha!  I hope I've inspired you to play with this fun Build-A-Bot set and add some lights for more fun!  Thank you so much for stopping by!


Supplies:
Honey Bee Stamps:

Other:
Distress Oxide inks:  Spun Sugar, Picked Raspberry, Festive Berries, Weathered Wood, Black Soot, Blueprint Sketch, Mustard Seed

I Find You "Ribbiting!" | Art Impressions

Hello friends!  It's week two of the Animals and Nature Challenge over at Art Impressions.  For my inspiration card today I'm using the oh, so adorable Frog Set!  The frogs in this set remind me of the cute green tree frogs in my backyard!


I used a Rectangle Double Stitched die to cut a piece of 80# Neenah Solar White card stock.  I stamped the frog and the tulip stamps onto some masking paper and fussy cut them out.  I stamped the frog first onto the card panel and then applied the mask.  Now I can stamp the tulip and it will be behind the frog!  I left the masks on both stamped images for the next step.  I used an oval masking stencil and a grass stencil to ink on some Distress Oxide inks.  I used an ink blending brush with Tumbled Glass and Mowed Lawn inks.  To create a grass stencil, I used a Grass Border die and die cut some masking paper.


I colored the images with the Copic markers listed below and stamped the sentiment in black ink.  I  added foam tape to the back of the panel.   I die cut some striped paper with the largest Rectangle Double Stitched die and adhered it to an A2 card base.  For a bit of bling, I added some Dandelion Yellow Nuvo Crystal Drops.


This set is SO adorable and has several other sentiments and cute frog images!  Thanks so much for stopping by!  I hope to see your entry into the Animal and Nature challenge over at Art Impressions!

Copic markers:
G28, G46, G24, G21,
YG17, YG25, YG03, YG01
Y19, Y15, Y13, Y11

Supplies:

Monday, June 8, 2020

Birthday Cake Twist Set with No-line Coloring | Art Impressions

Happy Monday friends!  Well, I went WAY outside my comfort zone to create this card using the beautiful Cake Twist Set by doing some no-line coloring!


I created my A2 card and added some patterned paper that I die cut with a die from the Rectangle Double Stitched die set.  Then I die cut the Twist Frame Die on the card front.  I stamped the cake images onto Neenah Solar White 80# card stock in some light colored ink.  While you can still see the stamped images, the lines disappear and blend into your colors.  My Copic colors are listed below.  When I finished coloring, I die cut the cakes with the dies included with the stamp set.  I also added some Ripened Pumpkin Nuvo Crystal Drops to the flower centers and clear sparkle to the cake icing.


It's so cool how the two cake images are mirror images!  All you need to do next is to adhere them back to back.  It's very easy to now slip it into the die cut frame.


I stamped the sentiment and trimmed it into a banner shape along with a yellow banner-shaped layer.  I adhered the banners and popped it up with some foam tape.  Add in a few yellow enamel dots, and I'm done!


I like how this turned out--what do you think?  Thank you so much for stopping by today!  Have a fabulous and crafty week!


Copic markers:
C00, C1, C3, E29, E27, E25,
YG67, YG17, YG25, YG23, YG03, YG01,

Monday, June 1, 2020

Just A Note to Say Hi! | Art Impressions

Hello friends!  Today I have a sweet card to just say, "Hi!" to that someone special that may need some happy mail!  I've used the beautiful Exclusive Hydrangeas set by Art Impressions that's available at Scrapbook.com.  My hydrangeas are pink with green in the middle because, in my part of Texas, we have alkaline soils and water, not acidic that makes them a blue shade.  Keep reading to see a photo that I took a few days ago of my hydrangea in my backyard.  I love hydrangeas and my photo was my inspiration!


I stamped the hydrangeas in my favorite Copic safe ink--Inkon3 Blackout Detail ink onto some Neenah Solar White 80# card stock.  I've listed my marker colors below.  (Make a note of how few markers I used--LOL!)  When I finished my coloring, I used a Rectangle Double Stitched die to cut it out.  I added some Apple Green Nuvo Crystal Drops to the flower centers and set it aside to dry.


Here is my backyard photo!  It's an older bloom, therefore, not as much green in it as what I colored.


So, onto my card!  I started with an A2 card base and added a black card stock and pink gingham layer and adhered it to the card base.  I added another black layer to the die cut hydrangeas panel.  I stamped one of the several sentiment from this set at the bottom of this panel in Versafine Onyx Black ink.  I added foam tape and adhered it to the card.


Thanks for stopping by today!  Now you know about my love for hydrangeas and also, this beautiful stamp set!  Happy crafting!


Copic markers I used:
G85, YG63, G43, RV21, RV10, RV00

Supplies: