Showing posts with label Waffle Flower stamps. Show all posts

Wednesday, July 5, 2023

Game Changer For Your Stenciling! New Waffle Flower Grip Mat

 Hello!  I was gifted and invited to share Waffle Flower's new product called the Grip Mat!  This amazing new product eliminates the need for using removable tape with your stencils!  It comes in six different sizes and can be used more ways than I had time for today! 

This will be a super short post today, as I am sharing a reel over on my Instagram showing how I used the Grip Mat to create my card shown in the photo.  Check out the reel by clicking HERE.

Here is a photo of the Grip Mat fit guide to help with choosing a size:

I highly recommend this awesome new Grip Mat!  I will definitely be ordering another size.  I think I want the 5.5" x 8.5" that will fit into my original MISTI, replacing the foam pad it came with!


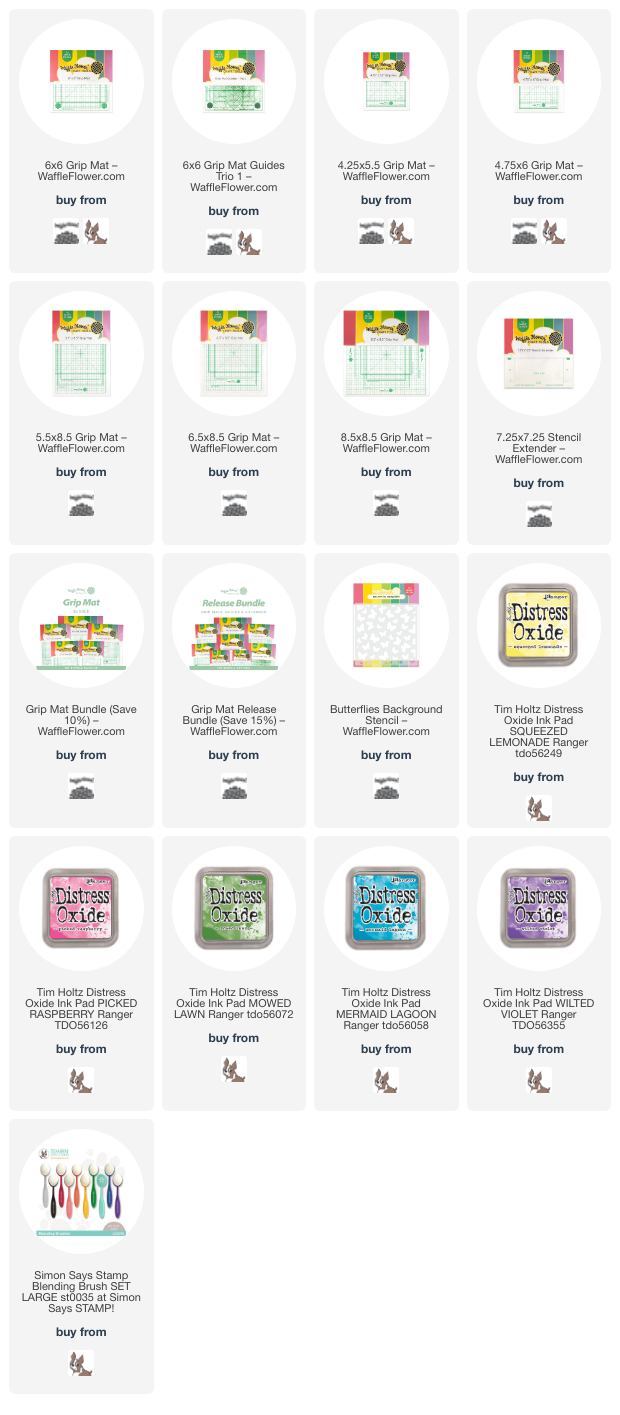
Check out these amazing new products by clicking a graphic below (affiliate links-never any additional cost to you)!

Wednesday, January 25, 2023

Waffle Flower Sneak Peak Club 2023 Blog Hop

 Hello friends!  I'm excited to be a Waffle Flower guest designer to help kick off their new Sneak Peek Club!  This is a new monthly subscription service that allows the club members (subscribers) to play with new items about a month before they are released!

The card that I'm sharing below was made with 2023 Kit #1, and if you leave a comment below, you will be entered to win this same adorable January Sneak Peek kit!  On 1/30/2023, I will choose one person from all comments as a winner!  AND for a second entry, go comment on my Instagram post!

Also, be sure to visit the Waffle Flower Blog for more inspiration and links to other designers that will also offer a giveaway!

For your information, this is not a complete kit!  Check out all of the details here.  It is a sampling, for valued customers, of some not-yet-released items that will coordinate with the next release.  If you sign up over at Waffle Flower, you will receive the upcoming Sneak Peek Kit, not the one I'm using today.

PLEASE NOTE:  If you leave a comment, I need your email to contact you if you are the winner. Because of the way Blogger (my blog platform) is set up, I get a lot of comments that I cannot reply to because their email shows up as "noreply-comment@blogger.com".  It will do this if you have an established blog profile, but have no actual blog.  Not your fault, I know, but it's how Blogger is.  To be certain I can contact you if you are the winner and send your email to Waffle Flower, please use the "Contact me here" form in the left column with your comment!  I will keep a list of all received and enter you into the drawing.  So sorry, but thank you!!

-----------------------------------------------------------------

Now for my card!  This particular Sneak Peek Kit includes:  Bunny Ears Die, Layered Bows stencils, 1 piece of Shaker Cover - 3.75" x 5" oval, and 1 piece of Shaker Cover - 2.5" x 3.75" oval.  Plus an awesome Waffle Flower storage pouch to keep it all in!  These fabulous products will also be available for everyone over in the Waffle Flower shop on 2/5/2023.

I know this post is full of details, so I'll keep my card description brief!  I used the adorable Layered Bows Stencil (which can be used for lots of occasions) and added Saltwater Taffy and Abandoned Coral Distress Inks through the two layers with ink blender brushes.  Easy peasy, but so totally adorable!

I used two Nesting Circle dies for my layers to stamp a sweet sentiment from the Little Birdies Sentiments.  I layered the die cut bunny ears from the Sneak Peek Kit around the circle layers and popped it all up with foam tape.

For an extra cute touch, I used the two Layered Bows stencils from the Sneak Peek Kit to ink one more bow.  I fussy cut it out and glued it on between the two bunny ears.

I sure do thank you for stopping by today!!  After you leave a comment, or fill out the "Contact me here" form in the left column, be sure to go back to the Waffle Flower Blog to see more wonderful inspiration with this new Sneak Peek Kit!

Thursday, January 5, 2023

Waffle Flower January 2023 Release & Blog Hop

Welcome to the Waffle Flower January Release Blog Hop! I’m happy to be hopping with the folks from Waffle Flower to show you all the fun new stuff awaiting you on the Waffle Flower website! Be sure to check out each stop in today’s blog hop for fun, inspiration, and chances to win some of these new release goodies!

You should have arrived here from the blog of Delay Nacar.  If you'd like to start at the beginning of the hop, head on over to the Waffle Flower blog.

Now for my card!  I've used several different awesome new products for this sweet card!

First I created my background by running some 80# Neenah through my die cutting machine with the new Quilted Zigzag Texture die.  Then I used the coordinating Zigzag Stencil Trio to add Spun Sugar, Kitsch Flamingo, and Picked Raspberry Distress Oxide inks.  I trimmed it to 4" x 5-¼" and adhered it to an A2 card base.

I die cut the pieces of the Little Branches and Little Birdie die sets from white cardstock.  I used a blender brush and Mowed Lawn, Rustic Wilderness, Squeezed Lemonade, and Mustard Seed Oxides to color the pieces.  I colored the bird with a few blue Copic markers.  (B24, B26, B12).  I added some details with a white gel pen.  After I adhered the flowers and branches together, I added gem stickers to the flower centers and adhered the pieces to the card.

The sentiment is from the Little Birdie Sentiments set and is stamped with Versafine Onyx Black ink.  I popped it up on the card with some foam tape.

Thank you for stopping by!  Be sure to leave a comment for your chance to win a fabulous prize before hopping to the next stop.

Your next stop will be Jeanne Jachna!

Giveaways:

For today’s hop, Waffle Flower is giving away $25 gift certificate to THREE lucky winners. You can leave a comment on this blog and along the hop by 11:59pm EST on Tuesday January 10th, 2023 for your chances to win. Winners will be chosen at random from the comments left on any of the posts in this blog hop and will be announced on the Waffle Flower Blog on 01/11/2023.

Check out these specials:

From now till January 8th, 2023, all orders placed at waffleflower.com will receive a mysterious gift (No code required!).

For those of you who are new to Waffle Flower, they have a Last Chance section on their website that lists many goodies for 25% off until they are gone! This would be a great place to start your collection!

Friday, August 5, 2022

Waffle Flower August 2022 Release Blog Hop

 Hello crafty friends!  Welcome to the Waffle Flower August Release Blog Hop!  I'm so thrilled to be hopping with the amazing folks from Waffle Flower to show you all the fun new crafty goodies awaiting you on the Waffle Flower website!

You should have arrived here from Tiffany Pryce Russom's awesome blog.  If you want to start at the beginning you can go to the Waffle Flower blog, or check out the hopper list at the end of my post.  Be sure to keep reading for the details of the wonderful prizes from Waffle Flower!

------------------------------------------------------------------------------------------

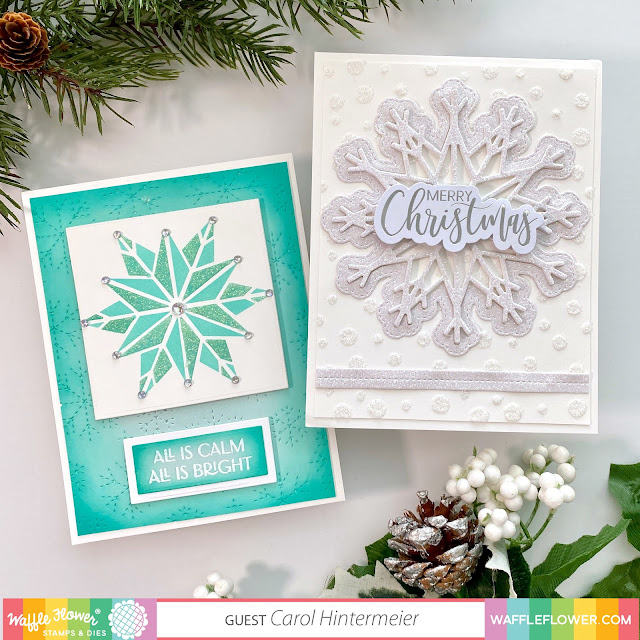
I love all things snowflakes for holiday cards and was thrilled to get to create with the products in the Star Snowflake Christmas bundle!  These are gorgeous dies and a coordinating stencil, all designed by super talented JJ Bolton!  

I made two cards to share from the Star Snowflake Christmas bundle.  I decided to use the Star Snowflake stencil set separate, even though it coordinates with the Star Snowflake die.  I love finding ways to stretch the use of my products!

This first card features the Star Snowflake Kit dies.  They look so beautiful die cut from some silver sparkle cardstock!  

I added a background I made with the Snowfall Background stencil and some iridescent glitter gel.  The sentiment is so quick and easy by using one from the silver foiled Essential Christmas Die Cuts.

For my next card I used the Star Snowflake Stencil Duo to show how beautiful it is on its own!

First I die cut light blue cardstock with the Dashed Snowflake Panel die.  Then I inked it up with Salvaged Patina and Peacock Feathers Distress Oxide inks.  I adhered it to an A2 card base.

I used the same Distress Oxide colors to ink through the Star Snowflake Stencil Duo.  Then I used a palette knife to spread some iridescent glitter gel through the second stencil.  When it was dry I used a square die to cut the snowflake out and popped it up on my card.

The sentiment from the Star Snowflake Stamp set was stamped with Versamark onto light blue cardstock and heat embossed with white embossing powder.  I used an ink blender brush to add shading with the Distress Oxides I used on the main panel.  I added a white layer and adhered it with foam tape.

I do love my bling, so I added some sparkly gem stickers to the snowflake!

Waffle Flower will be giving away $25 gift certificates to three lucky crafters.  Be sure to leave a comment here, and on each stop of the hop to increase your chances to win!  The winners will be announced on the Waffle Flower Blog on 8-10-2022.

Your next stop on the hop is the blog of Cheiron Brandon!

NOTE the specials from Waffle Flower:

From now till Monday August 8th, 2022, all orders placed at waffleflower.comwaffleflower.com will receive a mysterious gift (No code required!).

For those of you who are new to Waffle Flower, they have a Last Chance section on their website that lists many goodies for 25% off until they are gone! This would be a great place to start your collection! And don’t forget to check out their monthly Flash Sales!

Blog Hop Order:

Waffle Flower blog

Cathy Zielske

Galina Filippenko

JJ Bolton

Nichol Spohr

Dilay Nacar

Amy Rysavy

Jeanne Jachna

Rebecca Keppel

Channin Pelletier

Joy Baldwin

Angelica Conrad

Tiffany Pryce Russom

Carol Hintermeier <<< that's me!

Cheiron Brandon

Friday, May 28, 2021

Waffle Flower Challenge - Use Vellum

Hello friends, and happy Friday!  I'm so very thrilled and honored to have been invited to join Galina Filippenko, from the Waffle Flower Design Team, for this week's Waffle Flower Challenge - Use Vellum.  I had so much fun creating my cards with vellum and some products from Waffle Flower's latest Social Butterfly release!


I was able to make three cards in just one day for this challenge!  Trust me, that never happens! LOL!  Since I have a lot of photos, I'll keep the description brief, and link all of the products I used at the end of my post.

For my first card I used these Waffle Flower products:  Spread Your Wings stamp set and matching dies; JJ's Rainbow paper; Thank You stamp and matching dies; and JJ's Rainbows Sample Pack paper.

First I heat embossed the butterflies on vellum.  I used a white sparkle embossing powder on 40# vellum for some fun sparkle!  (Be sure to use heavy vellum to minimize the warping.)

Then I used a couple of sentiments from the Thank You stamp set.  I love how the two large "thank you's" have coordinating dies!  I added all of the elements to a piece of patterned paper from JJ's Rainbows Sample Pack.

My second card features stenciling with Distress Oxide inks.  I had never tried using a stencil with vellum before, but I love the results!!

Waffle Flower products: Spread Your Wings stencil; and Thank you stamps and matching dies.  First  I used a blending brush to ink Distress Oxides with the Butterflies Background Stencil.  I used Kitsch Flamingo, Squeezed Lemonade, Cracked Pistachio, Salvaged Patina, and Wilted Violet Distress Oxides.  I love how EASY it is to blend inks on vellum and the soft look you get!  I added the stenciled vellum over a white card base.

Then I stamped the thank you sentiment with Kitsch Flamingo Distress Oxide.  I added foam tape to the back of both sentiment pieces for dimension.


For my final card, I used the vellum behind the window of the Flying Butterflies die cut to mute the patterned paper behind the vellum.  I also die cut some vellum butterflies and added them as an embellishment!

Waffle Flower products: Flying Butterflies die; Thank you stamps and matching dies; and JJ's Rainbows Sample Pack.  First I die cut the Flying Butterflies Die on a piece of Woodgrain card stock.  I added a piece of vellum behind the opening, then a rainbow patterned paper from JJ's Rainbows Sample Pack.  I adhered the outline from the Flying Butterflies die on top of the vellum.


Thank you so much for stopping by!!  I hope you'll pull out your Waffle Flower products and some vellum and  join us in the Use Vellum challenge!  There's a $25 gift card for a prize and you can play along three different ways!  Either link your project, via Link Party, to the Waffle Flower Blog, at the Waffle Flower Garden Facebook Group, or on Instagram using #WFC2105W4.  

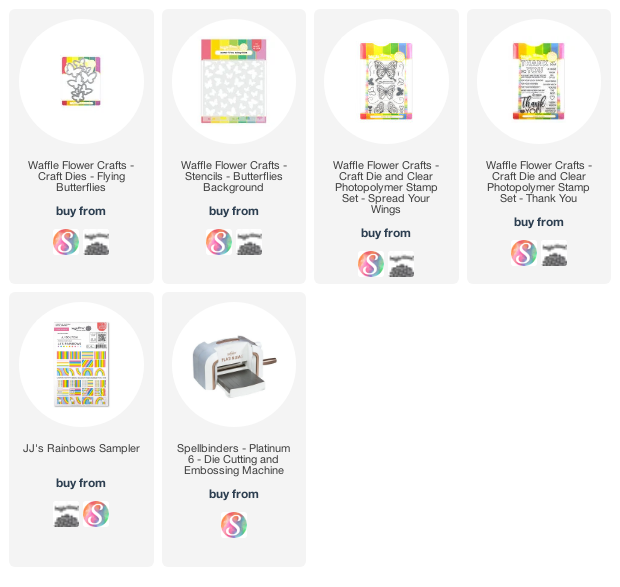
Here are links to the supplies I used:

Friday, September 25, 2020

Keeping Christmas Blog Hop - September 2020

 Welcome back to the monthly Keeping Christmas blog hop!  Have you started your holiday cards?  Just a reminder that it's only three months until Christmas!


I was so happy to finally get to use this ADORABLE set called Holly Bird from Waffle Flowers!  I love birds, and bird stamps, and snapped this one up as soon as it was released!  What is cuter than a sweet bird holding a warm cup of coffee or hot chocolate?!!


I began by stamping the bird with InkOn3 Fadeout No-line Coloring detail ink.  I'm trying to practice no line coloring as often as I can.  If you haven't seen this stamp, it stamps the the hexagon and the bird all together.  The coordinating die cuts out just the bird.

I colored just the bird with my Copics, then die cut it.  I used my B39 Copic to color the white border that die cuts usually leave.  I stamped another image with InkOn3 Blackout Detail Ink (which is Copic safe and stamps nice and dark images).  I used some blue Copics to color just the background.  It was super easy as I used my paper trimmer to cut the hexagon shape and popped up the colored bird image over it.


For the card base, I started with a top folding A2 card.  I added a coordinating blue layer cut to 4" x 5-¼".  I used one of my most favorite EVER embossing folders--Sizzix 3-D Winter Snowflakes for the next layer.  I adhered the bird to the card.

Next I added Glossy Accents to the coffee/hot chocolate and berries.  Then I used a .08 white Jelly Roll pen to add snowflake dots and a clear sparkle pen to add shimmer to the hat and more dots to the background.  I wish it was easier to capture all the shimmer in a photo!

I colored a scrap of white card stock with the same dark blue Copic (B39).  When it was dry, I stamped the sentiment with Versamark, added white embossing powder and heat set it.  I used a Sentiment Banners die to do partial die cutting to the length I wanted and popped it up with small foam squares.


Thank you so much for stopping by today!  Be sure to check out these talented designers in the list below for what I know will be some wonderful inspiration!


Kelly Lunceford (Creator)

Claire Broadwater

Lori Tecler

Nance Salkeld

Nina Forsyth

Marybeth Lopez

Nancy Penir

Carol Hintermeier <--that's me :)