Saturday, August 17, 2024

Gorgeous Stenciled Butterfly Card in Autumn Colors

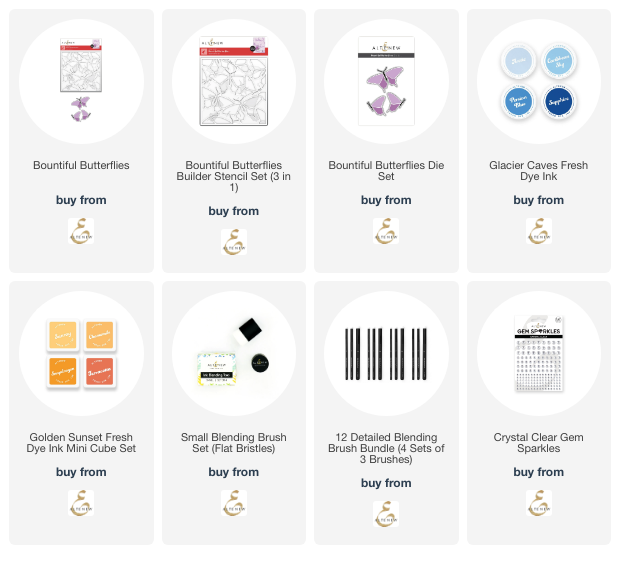
Happy Saturday!  Today I'm sharing this card I created for a reel over on my Instagram.  If you would like to see it, just click that link!  It features Altenew's gorgeous Bountiful Butterflies dies and coloring stencils.

I used one of my most favorite color combinations, blue and orange, on this card!  I used Altenew's inks and blending brushes to color through the Bountiful Butterflies stencils.  The Glacier Caves inks make a beautiful deep sky blue background!

Before I removed the stencil for the blue layer, I added water drops for that bokeh look.  When I finished stenciling, I trimmed the piece to 4-¼" x 4" and adhered it to an A2 card base.

Next I die cut a butterfly with a Bountiful Butterflies dies from vellum.  I used the Bountiful Butterfly stencil to color it in the same colors I used previously.  The inks take a bit longer to dry, so I set it aside while I finished other elements.

I die cut the Handwritten Hello shadow three times from white cardstock and glued the layers together.  I inked up a scrap piece of white cardstock with Sapphire ink and die cut the top Hello die from that and glued it to the layers.

I blended Sapphire ink and Marigold ink onto white cardstock and trimmed a narrow strip from each to glue at the top of the white space.  Then I glued the sentiment and vellum butterfly in place.

For a bit of sparkle I added some Clear Gem Sparkles to the card.

I absolutely love how this turned out with the vibrant orange/yellow butterflies and the deep blue background!  I hope you do too!  Thank you so much for stopping by.  

Thank you very much for using my affiliate links to shop (never any additional cost to you)!

Wednesday, August 14, 2024

Sending Warmest Wishes (And Dreaming of the Beach)

Hello crafty friends! With schools beginning and summer vacations taken, I thought how nice it would be to have one last trip to the beach! I'm dreaming of going to the beach with this Honey Bee Stamps Lovely Layers: At The Beach dies as the star of this card. Check out these details!

First I made the background layer for the card. I die cut the pieces of the Beach Break A2 Cover Plate dies. Then I used Distress Oxide inks and blender brushes to add the color through the Beach Break stencils. I used Mermaid Lagoon, Salty Ocean, Brushed Corduroy, and Antique Linen. I added Star Dust Stickles to the white portions of the waves and set it aside to dry.

Next I die cut various colors of cardstock (in list below) with the dies in the Lovely Layers: At The Beach Honey Cuts. I used three Copic markers (RV14, Y13, E02) to color the stripes on the flip-flops. I die cut the top layer of the umbrella three times from three different colors of cardstock. I added a bit of shading with blender brushes and coordinating inks. Then I used my scissors to trim the yellow and coral layers and adhered them to the base with glue.

This is a very easy Lovely Layers set to assemble. However, if you'd like you can download and print the helpful Layering Guide found just after the product description.

With all of the card elements complete, I used glue and foam dots to adhere them to the background layer.

I chose one of the awesome sentiments from the Sunkissed Summer stamp set. After I stamped it in black ink, I cut it out with the coordinating Sunkissed Summer die.

For a bit more sparkle and shine, I added gems from the Grab Your Passport Gem Stickers to the water and the umbrella. For the shine, I put Crystal Glaze on the sunglasses.

I hope you've enjoyed our last trip to the beach, because next week we dive into all things fall with the sneak peaks of the next fabulous Honey Bee release! Thank you so much for stopping by and be sure to subscribe to the blog for updates on the new release!

I so appreciate you using my affiliate links to shop (never any additional cost to you)!

Sunday, August 11, 2024

Silver, Gold, and White Poinsettia Christmas Card

Hello!   Today I'm on the blog at Brass & Bliss to share this beautiful poinsettia Christmas card with a stenciled background.

This card features the beautiful Large Stacked Poinsettia Die set with a gold, silver, and white Confetti Stencil background.

I added details to the Poinsettia petals with gold pigment ink.  First by swiping the crease of each petal over the ink pad and then by blending the ink in the centers of each layer.

The sentiment is from the Christmas Berry Delight stamp set and is heat embossed in gold to coordinate with the rest of the card.

The poinsettia is backed by a pretty gold and silver stenciled background I made with the Confetti Stencil.

Check out all of the detailed instructions over on the Brass & Bliss Blog!  Thanks so much for stopping by.  Have a fabulous, and crafty week!

Wednesday, August 7, 2024

Beach Themed Clear Acetate Card

Hello crafty friends! Have you ever made a card with a clear acetate base? Today I'm sharing how I made my clear acetate card featuring the beautiful Anchor of Hope stamps and coordinating dies!

I began by assembling the elements for the clear card base. First I stamped the image from the Anchor of Hope stamp set with Copic marker safe black ink. Then I used Copic markers to color it. Next I cut it out with the coordinating Anchor of Hope die. I die cut white cardstock with the same shell die three more times.

I chose a very light shade of coral cardstock and die cut the Netting A2 Cover Plate from it twice.

Next I stamped two sentiment from the Anchor of Hope stamp set in a coral color ink. I cut them out with the coordinating dies.

The card base is one of these pre-folded acetate A2 cards. First I added tiny drops of glue to the back of one of the A2 Netting die cuts. I placed it at an angle on the acetate card base and then trimmed off the overhang. Next I added dots of glue to the front of the other Netting die cut. I adhered this on the front inside of the card making sure to line it up with the Netting on the front. Again, I trimmed off the excess.

Next I glued the Copic colored shell image to the front. Then I glued another of the white shell die cuts on the inside back. To easily line up the shell die cut on the inside (to use for your message), add a bit of removable adhesive to the inside front shell. Next, place another shell die cut on this, face down. Add glue to the back of the shell and close the back acetate over it. Allow plenty of drying time and open the card, using an adhesive eraser to take off the temporary adhesive.

Here's a photo of the inside for a visual of the above directions. I glued the last shell die cut on the back of the card to hide the glue.

I used glue to adhere both of the sentiments to the front of the card.

I added a bit of sparkle with a Wink of Stella pen and some gems from the Grab Your Passport gem stickers.

This is really an easy card to make, and I hope I've inspired you to give it a try! If you have any questions, please be sure to drop it in the comments. Thank you for stopping by!

Thank you so much for using my affiliate links to shop (never any additional cost to you)!

Tuesday, August 6, 2024

Your Kindness Brightens My Day

Hello friends!  Today I'm sharing my card that features two of Spellbinders' August Club Kits.  The Stitched Colorful Palette Stitching Die and the Hand Drawn Lines Embossing Folder are use to create this colorful card!

With this fun paint palette, of course I had to go with a rainbow of colors!  First I went through my stash of cardstocks to choose the colors I wanted.  Then I used the die in the Stitched Colorful Palette to cut out one of each color.  Then I went through my stash of embroidery thread and chose coordinating thread for each color.

These were stitched with the very easy straight stitch.  Now, if you want, you can create a paint palette with no stitching!  There is another die you can use that is solid, with no stitching holes.

I die cut the paint holder from mat silver cardstock and glued the stitched paints to it.  Note:  The paint holder die embosses lines to make the placement easy.

Next I used the die that cuts the strip below the "paints".  I die cut it from watercolor cardstock so that I could use various watercolors to paint the spots that makes it look like a real paint palette!  I love how this turned out.

I put another piece of watercolor cardstock, cut to 5" x 7", into the Hand Drawn Lines embossing folder and ran it through my embossing folder.  I used glue to adhere it to my 5" x 7" card base.

I looked through my sentiments and thought this one from the Autumn Floral Corner Press Plate and Die Set fit perfectly!  I had not ever tried any Press Plate with regular watercolor cardstock and wasn't sure if the impression would be as crisp as when pressed on the Cotton Cardstock.  After I set it up in my BetterPress Letterpress System and ran it through my Platinum die cutting machine,  I was very happy to see that the impression is just as beautiful on watercolor cardstock!

All of the Club Kits will be available for new subscribers on August 6, so be sure to check it out!  Thank you for stopping by!  I hope you have a wonderful day!

Thank you for using my affiliate links to shop (never any additional cost to you)!

Monday, August 5, 2024

Big Exciting News + An Autumn Stenciled Card

I'm so thrilled to be sharing my first reel on my Instagram as part of Altenew's new Crafty Creator Team!  Everyone on this team will be sharing card making reels with lots of tips, tricks, and inspiration!

My reel was all about how I salvaged the stenciled piece after a crafty accident and I thought I would share a bit of that here!

I began by using the Dynamic Duo: Wildflower Bouquet layering stencil set with a beautiful autumn palette of ink colors.

I finished the stenciling and was getting ready to use the coordinating Wildflower Bouquet stamp set to add the stamped details to the flowers.

You may be wondering what is the big deal?  Well, just look at this:

Now you see it, right?!  The lid to the ink pad was not secure and the ink pad landed upside down onto my stenciling!

However, you can't tell it from the other photos because, after staring at it in dismay for a while, I thought to myself, "what can I do to save this?"

First I decided to try a sand eraser.  Well, that helped just a bit.  I didn't want to rough up that spot too much with that eraser.

Next I decided to make the flower a darker shade of yellow.  I got the Wildflower Bouquet stencil out and added a darker more golden yellow.  While that helped, those little spots were light bright glaring headlights to me!

After more thinking, my thoughts were that there are flower petals with dots on them.  So, I embraced those accidental dots by using some Prismacolor pencils to add more dots!  The dots I added are subtle but effective a totally hiding the accidental dots!

The card was saved!

I created the masked blue background with blue splatters.  Then I cut out the flowers with the Wildflower Bouquet die.  The sentiments are also in the Wildflower Bouquet stamp set.

So, my moral here is, don't give up on a card, ever!  I'm quite pleased with how this turned out and hope you've been inspired too!  Thanks so much for stopping by!

Thank you for using my affiliate links to shop (never any additional cost to you)!

Thursday, August 1, 2024

Autumn Is My Favorite Color

It's the first day of August and that means this summer heat is that much closer to being gone!  I'm sharing a few details of my card that I created a reel for over on Instagram.  This features Picket Fence Studios' new die called Autumn Is My Favorite Color.  I've used a few previously released products here too.

The background is made with the Simple Plaid stencil and Marigold Orange Paper Glaze.  I love the variety of colors Paper Glaze comes in!

I used Pint-Sized Paper Pouncers, along with the Paper Inking Palette, to color the Corn Stalk die cuts.

I used a piece of pretty Sweet Gingham A2 card fronts to die cut the Autumn is My Favorite Color die.  This gingham layer is adhered to a stack of three die cuts from white cardstock.

I layered the background and sentiment with coordinating orange and purple cardstock layers.  I die cut the sub-sentiment from the Autumn is My Favorite Color die from the same orange cardstock for a cohesive look.

Creating autumn cards definitely takes my mind off of these hot temperatures!  Thanks so very much for stopping by!

Thank you for using my affiliate links to shop (never any additional cost to you)!