Showing posts with label Sunkissed Summer stamps. Show all posts

Wednesday, August 14, 2024

Sending Warmest Wishes (And Dreaming of the Beach)

Hello crafty friends! With schools beginning and summer vacations taken, I thought how nice it would be to have one last trip to the beach! I'm dreaming of going to the beach with this Honey Bee Stamps Lovely Layers: At The Beach dies as the star of this card. Check out these details!
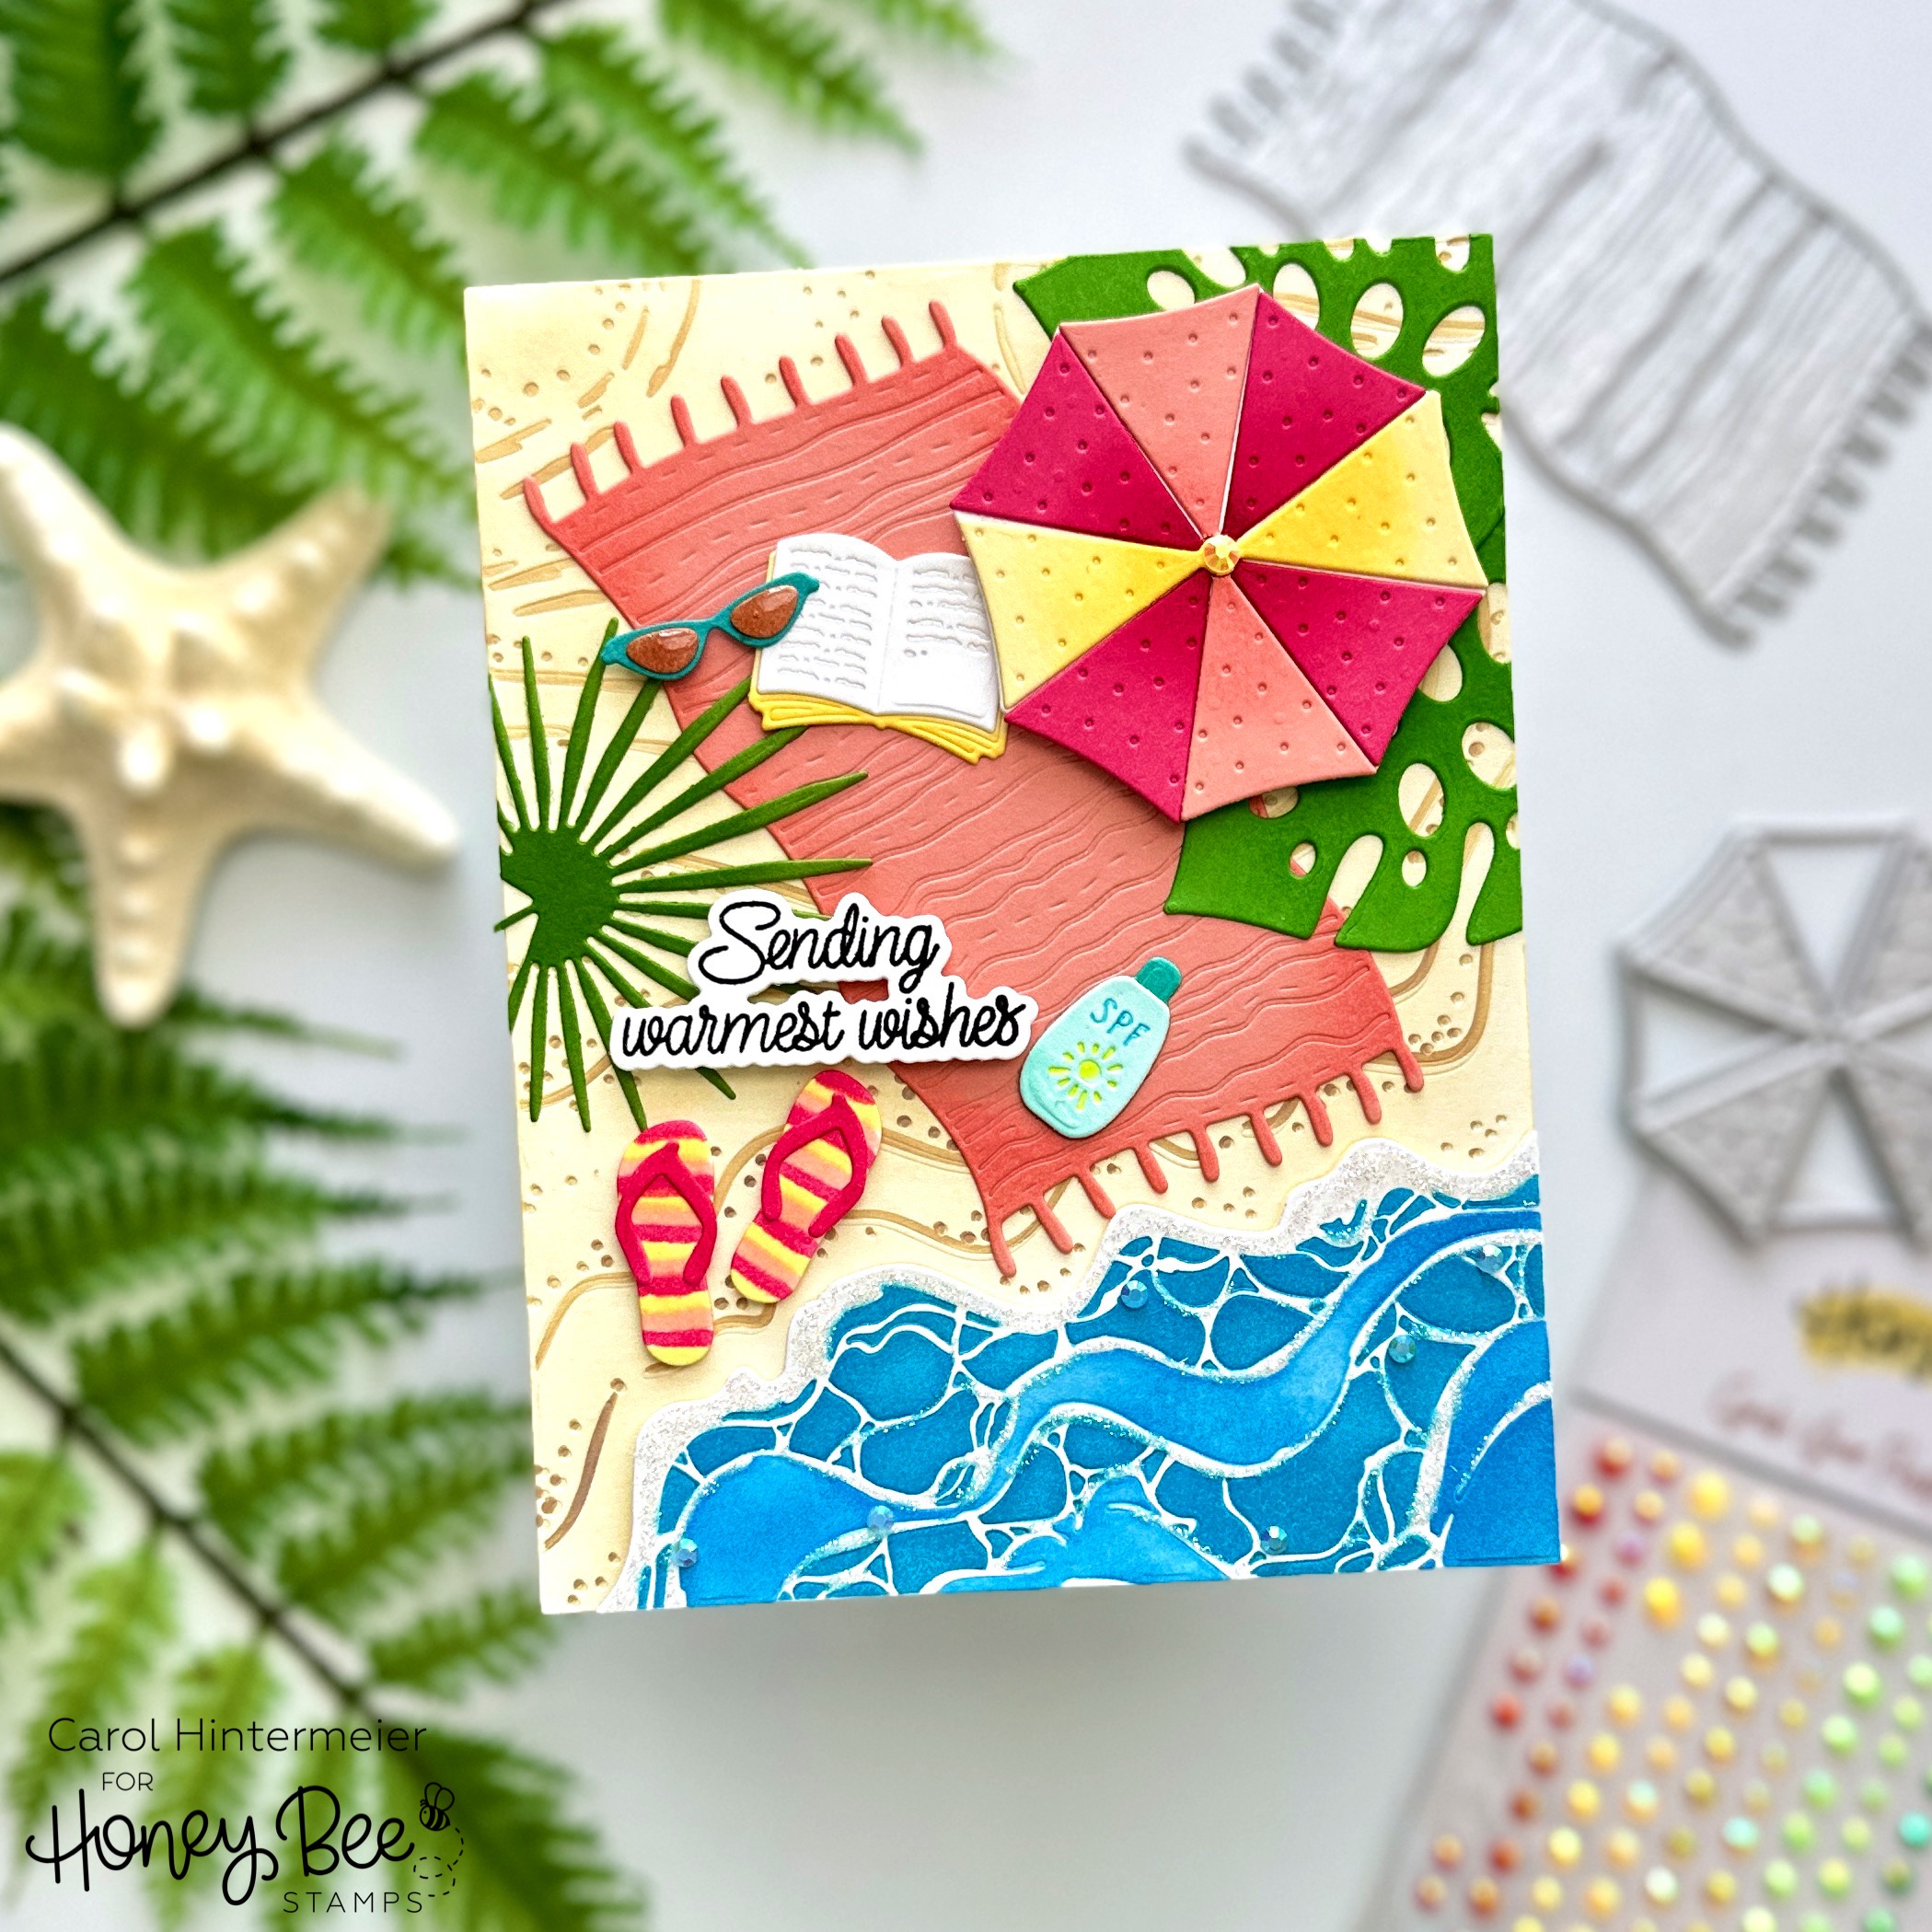
First I made the background layer for the card. I die cut the pieces of the Beach Break A2 Cover Plate dies. Then I used Distress Oxide inks and blender brushes to add the color through the Beach Break stencils. I used Mermaid Lagoon, Salty Ocean, Brushed Corduroy, and Antique Linen. I added Star Dust Stickles to the white portions of the waves and set it aside to dry.

Next I die cut various colors of cardstock (in list below) with the dies in the Lovely Layers: At The Beach Honey Cuts. I used three Copic markers (RV14, Y13, E02) to color the stripes on the flip-flops. I die cut the top layer of the umbrella three times from three different colors of cardstock. I added a bit of shading with blender brushes and coordinating inks. Then I used my scissors to trim the yellow and coral layers and adhered them to the base with glue.

This is a very easy Lovely Layers set to assemble. However, if you'd like you can download and print the helpful Layering Guide found just after the product description.

With all of the card elements complete, I used glue and foam dots to adhere them to the background layer.

I chose one of the awesome sentiments from the Sunkissed Summer stamp set. After I stamped it in black ink, I cut it out with the coordinating Sunkissed Summer die.

For a bit more sparkle and shine, I added gems from the Grab Your Passport Gem Stickers to the water and the umbrella. For the shine, I put Crystal Glaze on the sunglasses.

I hope you've enjoyed our last trip to the beach, because next week we dive into all things fall with the sneak peaks of the next fabulous Honey Bee release! Thank you so much for stopping by and be sure to subscribe to the blog for updates on the new release!

I so appreciate you using my affiliate links to shop (never any additional cost to you)!
Wednesday, June 19, 2024

Summer Birthday Card with Ink Blended Plumerias

Hello crafty friends! Today I have a card for those that have a summer birthday! I've used Honey Bee Stamps gorgeous Bold Background: Plumeria for this summery birthday card!  Plumerias are one of my favorite flowers and I was excited to use this set today!

I die cut all of the flower layers of the Bold Background: Plumeria Honey Cuts from 80# white cardstock. Then I used various small ink blending brushes to color the layers with Distress Oxide inks. My inspiration for the colors came from a web search of plumeria images! First I brushed on Spun Sugar Distress Oxide with a small blending brush. Then I added Picked Raspberry Oxide ink to the edges. I was able to achieve the detailing by using a size 5 Beeluxe Detail Blending Brush. I love how that tiny brush makes it easy to color a small area!

I used another size 5 brush to dab on Squeezed Lemonade and Mustard Seed Oxide to the centers of the flowers.

I die cut the background and leaves of the Bold Background: Plumeria from green cardstock. This made it super easy and quick to blend on Mowed Lawn and Rustic Wilderness to add a bit of shading to the pieces.

I used glue to adhere the layers of the flowers. The Layering Guide was very helpful for assembling the flower layers. I noticed a great tip on the Guide that said to adhere the leaves to the background first!

I embossed white cardstock with one of my favorite -- the Spring Medley 3D embossing folder. I trimmed it to A2 size and glue it to a card base. Then I adhered the background with leaves to the card. Next I adhered the Plumerias to the base with glue.

I chose one of the sentiments from the Sunkissed Summer stamp set and stamped it with black ink. Then I cut it out with the coordinating die and glued it to the card.

I added a few coordinating pearls from the Travel Pearl Stickers set to the center of the open plumeria.

I really appreciate you stopping by to check out my card!  Have a wonderful and crafty day!

Thank you for using my affiliate links to shop (never any additional cost to you)!