Saturday, July 25, 2020

Keeping Christmas Blog Hop - July 2020

It's now only five months until Christmas and time for another Keeping Christmas blog hop!  Eeek, where does the time go?

For this month's cards, I've used Altnew's Holiday Bows stamp set and coordinating dies.  I've never used the poinsettia from this set and I'm glad I did because it was very easy to use and make three cards!


I wanted to used these two-layer stamps and coordinate them with these gold ovals I had saved from a previous project. The Oval Thin Frames die from Honey Bee Stamps die cuts a bunch of ovals in one pass that you can save for multiple projects!  I stamped the base layer in Altenew's Heart Beat ink and then stamped the second layer in Versamark clear embossing ink.  I sprinkled on some gold glitter embossing powder and heat set it.  I added some foam tape to the back of the poinsettias to pop them up.

For my card bases I scored some lines around the edges of the card front with a stylus and my scoring board.  Next I adhered the ovals.  I stamped the sentiments with Versafine Onyx black ink.  Two are listed below, but the Christmas Wishes sentiment is from an older Hero Arts kit.


I stamped the berry branches and greenery with the inks shown in my supply list below.  You probably know this tip, but after I arranged everything around the oval, I used a piece of Press 'N' Seal to pick them up.  It's now super easy to add glue to the back and flip it back over and adhere.

To finish the cards, I used a Gel  Roll gold metallic pen to add the dots.

 
I'm so happy to have three more cards to add to my Christmas card stash!!  If you missed any of the stops along the way, here is the hop list for you!  I know you will be so inspired by these awesome card designers!  Thank you so much for stopping by!


Supplies:
Ellen Hutson Mondo Holly stamp (Happiness & Cheer)
Concord & 9th O Christmas Tree stamp set (Merry Christmas

Thursday, July 23, 2020

A Tropical Anniversary Card | Honey Bee Stamps

Happy Thursday my friends!  Raise your hand if you're loving the new Hello Summer release by Honey Bee Stamps!  I have SO many ideas for cards using the stamps and dies in the awesome release!  One of my ideas was to have a birdhouse for this tropical pair of lovebirds!  I used the Chick Coop Honey Cuts and the lovebirds from the new Birds of Paradise stamp set for my card today.


I began by creating my card base with the Chicken Coop die.  As you can see from the photo below, I placed the die on top of an A2 card base.  Make sure the top of the die extends above the fold line and use a pencil to trace around the outside of the die.  Next fussy cut along the pencil line.


While I had the Chicken Coop die out, and the die for the roof, I die cut a piece of patterned paper from the Hot Tropics paper pad.  (Save the door opening!)  I also die cut one more from white card stock.  Next I adhered the patterned paper coop to the white coop.  I adhered the roof and then the entire piece to the card base.  Now take the reserved door opening, flip it over the show the other pattern, and adhere it in the opening.

Before finishing the outside of the card, I stamped a sentiment inside using the stamps from Tropical Tweets.  I also stamped a few flowers from the Birds of Paradise set.


I stamped the birds from the Birds of Paradise set with Copic safe ink.  Taking my cue from nature, I colored the male birds much more colorful than the female.  The Copic markers I used for him are BG07, BG05, BG02, BG01, Y15, Y08, Y02, and Y00.  I used the Birds of Paradise Honey Cuts to die cut it out.

Now for the extras!  I die cut some flowers and greenery with a few dies from Tropical Bouquets Honey Cuts.  Since I used yellow and green card stock to die cut these, it was easy to add a few details with my Copic markers!  I used tools from the Flower Shaping Essentials Kit to add some shape and dimension to the flowers.  I stamped the sentiment from Tropical Tweets and die cut it with the coordinating Honey Cuts.


I adhered the branches and layered flower on the roof with liquid glue.  I added some foam tape to the back of the birds and adhered it in the birdhouse opening.  Next I adhered the palm fronds and flowers around the birds.  For a bit of bling, I added some gems from Hot Tropics Gem Stickers.


I hope you've enjoyed seeing my tropical birdhouse card today!  Thank yo so much for stopping by!


Copic markers:
bird on left:  BG07, BG05, BG02, BG01, Y15, Y08, Y02, Y00
bird on right: BG07, BG05, BG02, BG01, BG000

Supplies:

Wednesday, July 15, 2020

Welcome Little One Slimline Card | Honey Bee Stamps

Today I have a sweet slimline baby card using Honey Bee Stamps new Slimline Sentiments Eyelet die.  I have a quick tip on how to extend the die cuts for the hills and grass, which are not as long as the slimline cards are.  I'll give you a few more details about my card along the way!


The Slimline Sentiments Eyelet die cuts out the center portion and the scalloped edge separately.  I love this because it makes it easy to use the cloud stencil from the Outdoor Scene Builder set on the center portion without inking the scallop frame.  This is the first time I've used the new Speckled Egg Distress Oxide ink and I think I really like it!

It's so easy to extend these border dies to fit the slimline sized card.  I used Honey Bee's Grass Border and Hill Border dies.  As you can see from the photo below, I began with 8-½" long card stock and die cut the borders once.  I repositioned the dies and once I felt the cutting edge slip into the first cut, I taped them in place and ran it through my machine again.  Then you can trim the length to fit your card!  Easy, peasy!


All of my cute critters are colored with Copic markers and die cut with their coordinating dies.  The critters are from two sets:  Woodland Babies and Way To Goat.  The flowers are from Way To Goat too.


I popped up several of the elements, including the sentiment.  I love how there are coordinating dies for these sentiments!  I added a few gems from the Perfect Petals Crystal Gem Stickers set.  FYI, the finished card is 8-½" x 3-½".  Perfect fit for a standard business envelope!


I hope you've found this little tip for extending your dies helpful!  Thank you so much for stopping by!


Honey Bee Stamp supplies:

Other supplies:

Sunday, July 12, 2020

Under The Sea Slimline Shaker Card | Rubbernecker Stamps

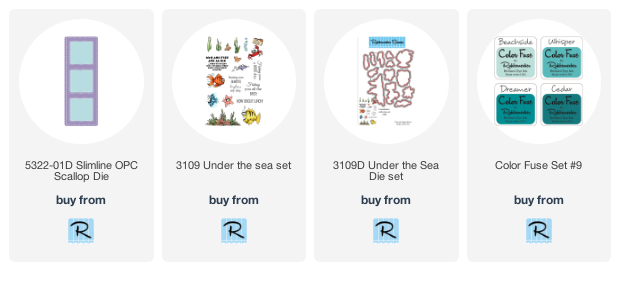
Hello my friends!  Today I have a super fun slimline shaker card with one of the new Rubbernecker Stamps  Slimline Scallop dies! This die is SO awesome and there are four other beautiful slimline dies available too!  I've paired the Scallop Die with the adorable Under The Sea set for my card.


Steps for the card base:
  • With removable tape, mask off a rectangle shape with a ½" border on the edges  on the front of a teal 3-¼" x 8-¼" card base.  I used a pre-cut and scored piece from The Paper Cuts Festive Variety Scored Slimline Cards set.
  
  • Use an ink blending brush to blend blue ink in an ombré pattern, light to dark at the bottom.  I used Whisper, Dreamer, and Cedar inks from Set #9 Color Fuse ink set.
  • Carefully peal back the tape from the card front.
  • Die cut four of the Slimline Scallop Dies from 80# white card stock.
  • Adhere three of the die cuts with glue.
  • Next, trim a piece of acetate to fit behind all three openings and adhere to the stacked die cuts.
  • Adhere the final Scallop die cut to the top.
  • Add foam tape to the back of the stacked die cuts, but not in-between the windows, just the four sides.  I wanted the shaker bits to go freely from one window to another.

Finishing the shaker:
  • Stamp and color your images from the Under The Sea set in Copic safe ink and color with Copic markers.
  • Use the coordinating dies to cut them out.
  • To aid in planning of where to place the images, I die cut a piece of printer paper with the slimline die.  I used a bit of temporary adhesive to stick it down.  Once I had the arrangement I wanted, I adhered them to the card base.
  • I added some clear droplets for the "bubbles" with Ranger Distress Collage Medium Matte.
  • Now, let's talk about the shaker bits.  I've had these super fun micro beads in my stash for an amount of time I won't admit to!  LOL!  I really wanted to use them and they match the colors I was using too.
  • The downfall:  these things roll EVERYwhere!!!   Don't ask me how I know! Hahaha! Normally with shakers, you can just put your bits where you want them, then cover them with the stacked die cut piece.
  • Plan B:  Remove the foam tape backing from the bottom and sides.  Adhere it in place.
  • Since the top foam isn't stuck down, I added these beads through the top by sticking in a paint brush handle to keep it open and funneled them in with a coffee filter.
  • Phew!  I used tweezers to pull off the top foam tape to trap the beads in!


To finish up, I stamped the sentiment in black in and trimmed it into a flag shape with a turquoise layer.
Adhere the sentiment and the crab with some glue.


Have you created a slimline card yet?  If not, I hope you will try Rubbernecker Stamp's slimline dies--these really make it easy for your card making!  Thank you so much for stopping by today!  Have a fabulous, crafty week!

Rubbernecker products I used for my card:
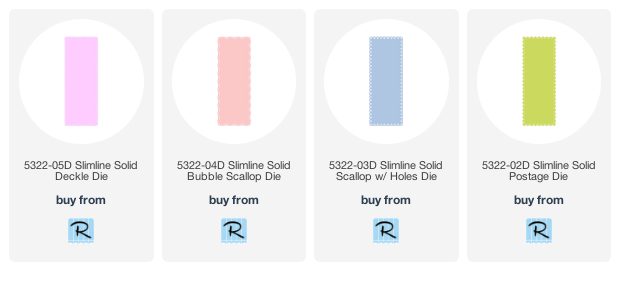
Here are links to the other fabulous slimline dies:

Thursday, July 9, 2020

Waving Hello from My Beach House | Honey Bee Stamps

Hello my friends!  The beach is one of my most favorite places, and if I had a beach house, I'd invite you to join me at the beach!  (Socially distanced, of course!)   For my card today, I'm using the awesome new Beach House Add-on stamps and Honey Cuts that compliments the House Builder Card base set.  These are from Honey Bee Stamps amazing Hello Summer release!


Using the house shape from the House Builder Card Base set Honey Cuts, I die cut two house pieces and one hinge.  I used a piece of woodgrain paper from the Beach Vibes 6x6 paper pad and die cut just the lower portion of the house.  I adhered this to the lower portion of the house.

I stamped the images from the Beach House Add-on set from 80# Neenah Solar White card stock.  After I colored them with Copic markers, I die cut them with the coordinating dies.  I used two shades of green card stock to die cut the leaves.  The windows, shutters, porch and door knob are from the House Builder Card Base set.  I used some brown and two shades of green card stock for the palm trees and coconuts.  Be sure to cut an extra tree trunk if you want to make a taller tree like the one on the right.  To assemble the tree, I adhered the bottom layer for the leaves to the trunk and then shaped the leaves with my fingers and glued them onto the base.  I adhered a portion of the extra trunk to the bottom of another (it will be hidden by the surfboards.)  After I adhered the windows, I added some Glossy Accents to them and set it aside to dry.

I die cut the roof from the Beach House Add-on from some 80# Neenah and colored it with my Copic markers.  I had lots of fun practicing my flicking motions here!  I used the embossed lines in the roof die cut to plan my shading.  My copic marker colors for the roof are E33, E53, and E31.  When I finished coloring the roof, I added some thin foam tape to the back and adhered it on the beach house.


Before adhering the two house pieces with the hinge, I used a sentiment from the Flippin' Fabulous set and stamped it in black ink, along with the starfish from the same set.  After I colored it, I adhered the hinge and attached the card front to it. 


Now all you need to do is have fun arranging the front of your beach house!  I popped up the bicycle and beach ball with a thin foam square.  The sentiment on the card front is from the Beach House Add-on stamp set.  Before I stamped "Hello" I die cut the two wooden sign pieces and colored them with Copics.  I love how there are coordinating dies for the sentiments, as you see here for "waving".


Have you seen the new Honey Bee Stamps Hello Summer release?  If you haven't, you are missing some fun, summertime stamps and dies and should go check them out HERE!!  I sure appreciate you stopping by to take a look!  Thank you!


Supplies:
Honey Bee Stamps:

Wednesday, July 8, 2020

Honey Bee Stamps & Hero Arts Collaboration Blog Hop

Hello friends!  I'm so happy to be a part of the Honey Bee Stamps and Hero Arts blog hop! This is to celebrate their beautiful collaboration stamp set called You Are Amazing. They will be giving away TWO $50 shopping sprees during this hop--one to the Hero Arts store, and one to Honey Bee Stamps!  Winners will be drawn from the comments left across the hop--comment on more blogs for more chances to win.  So keep on reading until the end where you will find the entire hop list!


I love this set so much that I made three cards!  These were so quick and easy to make!  (I have the supply list for each card, with links, at the bottom of my post.)


For this first card I heat embossed the heart with white embossing powder onto a panel I die cut with the Honey Bee A2 Scallop die.  Then I blended on Distress Inks in Squeezed Lemonade, Mowed Lawn, Tumbled Glass, Wilted Violet, Spun Sugar.  Then I used the Honey Bee Fluttering Hearts stencil and inked the same Distress Ink colors through it.  It's easy to wipe any ink off of the embossing.


The sentiment is stamped with Versafine Onyx Black ink, fussy cut, and popped up with foam tape.


For this next card, I used various inks and applied them one by one in a rainbow pattern.  I used my finger to soften the edges left by the ink pads.  I added a shadow around the hand with a couple of gray Copic markers and fussy cut the heart.


I used the Honey Bee Stamps Fluttering Pierced Hearts Cover Plate die to add pattern to the card base.  It's on an A2 top-folding pink card base.  I love this beautiful sentiment that's in the You Are Amazing set!


For my final card, I used Hero Arts Tide Pool ink to stamp the heart onto white card stock and die cut it with the Honey Bee Stacking Pocket die.  I stamped the stitching from the Honey Bee Pocket Full of Love set.  Then I die cut the flap with the coordinating die. 


The pocket is layered on patterned paper from Honey Bee's Spring Lullaby paper pad.  Again, I stamped the sentiment in black ink and fussy cut it out.


Thank you so very much for stopping by!  Be sure to comment by Wednesday, July 15 at 11:59pm PST for your chance to win a sweet prize!  Winners will be announced on the Hero Arts and Honey Bee Stamp blogs the following week.  Happy hopping!!!

Carol Hintermeier <---that's me!


Supplies:
You Are Strong card:
Distress Inks:  Squeezed Lemonade, Mowed Lawn, Tumbled Glass, Wilted Violet, Spun Sugar

That is All card:

Monday, July 6, 2020

Honey Bee Stamps "Hello Summer" Blog Hop - Day 1


Hello and welcome to Day 1 of Honey Bee Stamps Hello Summer blog hop!  I'm so happy to be here to share my creations with this amazing release!  There will be a $25 gift card given away from both days' commenters so be sure to leave a comment at each stop for more chances to win!  There is lots of inspiration from the awesome and talented designers in this hop so keep reading until the end where you'll find the entire hop list!


I was so excited when we found out that this new release would include some slimline dies!  These are such a fun way to create a different style card!


I really like how this Slimline Salutations: Eyelet Border Honey Cut cuts the center panel separate from the scalloped eyelet frame.  I used a couple of Blender Brushes to ink up the sky background with Distress Oxides in Squeezed Lemonade, Mustard Seed, Tumbled Glass and Peacock Feathers.

I die cut the Making Waves Border Honey Cuts from some colored card stock and the sand from patterned paper from the Beach Vibes 6x6 paper pack.  These dies are 8-¾" long so you can use them lengthwise on your card.  I added some texture paste to the waves and sprinkled with some glitter before it dried.


The Flip Flop Builder Honey Cuts is just the most fun to play with!  This patterned paper is also from the Beach Vibes paper pad.  I added some greenery and a plumeria flower from the Paradise Blooms set.  The sentiment from the Flippin' Fabulous set is stamped in coordinating ink.


I find it interesting how much smaller the flip flops look on this card versus the one you'll see next!  It's all about the perspective I guess!

----------------------------------------------

In case you missed them, here are the cards I've shared on my Instagram for each sneak peek day.  I have the links to shop the Hello Summer products I used below each photo.


Thank you so much for hopping along!  Be sure to leave a comment for your chance to win and then head over to the amazingly talented Channin Pelletier!

Hop list:

Honey Bee Stamps <--click here to start at the beginning
Carol Hintermeier <--that's me!