Thursday, March 5, 2020

Hug in A Mug Floral Coffee Mug | Honey Bee Stamps

Happy Thursday friends!  Those that know me know I love a pretty decorative coffee cup to have my morning coffee in.  That's what inspired me to make a pretty coffee mug with flowers on it for my card today!  I used the beautiful Mother's Day stamp set and the Coffee Cup Card Honey Cuts.


Here are the steps for my coffee cup card:
  1. Die cut one Coffee Cup Card base, three of the lids and the two pieces for the sleeve from Neenah Solar White 80# card stock.
  2. Adhere the three lids together and also the two pieces for the sleeve.  Set aside to dry.
  3. Stamp the flowers from the Mother's Day set onto the front of the coffee cup with a Copic safe ink.  I used my MISTI, to help in getting it lined up just right and to stamp it twice for a good impression.  Be sure to leave the stamp in your MISTI for the next step.
  4. Slide the sleeve onto the coffee cup and place into the MISTI.  Use some scrap paper to cover the coffee cup, leaving the sleeve exposed.  Ink up the stamp and stamp the sleeve.
  5. Next I colored the florals on the coffee cup and the sleeve with my Copic markers.  I used a pencil and ruler to draw a very light line on the lid and at the bottom of the cup to help me get some shading in those areas with my gray Copics.


When my coloring was finished, I adhered the lid to the coffee cup.  The sentiments are from the Perfect Blend set and are stamped in Versafine Onyx Black ink.  For the inside sentiment, I did a bit of stamp surgery and masking.  I cut apart the sentiment "and friends".  I positioned them all and before inking them up, I masked off the "s" from friends.  No stamps were harmed in this process!  Haha!!


I had so much fun coloring this and love how you kind of get a bonus when the sleeve is removed by the full image on the card front!


Thank you so much for stopping by today!  Have a wonderful day and lots of crafty time!


Supplies:

Happy Camper card & Week 2 of Home Sweet Home Challenge | Art Impressions

Hello my friends!  Today begins week two of Art Impressions Home Sweet Home challenge!  For my inspiration card, I've used the so fun Happy Trails set.


Here are the steps for my card:
  1. Stamp the camper onto some masking paper and on the front of a top-folding 5-½" x 4-¼" card base.
  2. Fussy cut the camper on the masking paper and apply the mask to the other stamped image.
  3. I used THIS masking stencil to create the framed, inked background.  These are so helpful in centering and inking a background!  I used Tumbled Glass, Salty Ocean and Mowed Lawn Distress Inks and blender brushes.
  4. Remove all of the masks and Copic color the image.  My Copic colors are listed below.
  5. I used my green Copic to add in some grass sprigs here and there.
  6. Add a die cut sun to the top left corner.


I stamped the sentiment in Versafine Onyx Black ink and die cut it with a Flag Double Stitched die.  I die cut a second one and colored the edges with a yellow Copic to layer behind the sentiment.  I used my Tiny Attacher stapler to connect them and popped it up with some thin foam squares.  I used a white gel pen to add some highlights here and there on the camper and the chair.  I also used a red pen to add the dots to the curtains.


Will you be entering this challenge?  I hope I've given you some inspiration for this challenge.  Check out the details here and I hope to see your project entered!  Thanks so much for stopping by!

Copic markers:
B52, B93, BG01, BG02, BV13,
C7, C5, C3, C1, C0, E25, E31, E34,
RV29, R35, R59, RV63, V04, Y06, Y18
YG03, YG25, YR04, YR15,
N8, N6, N4

Supplies:

Monday, March 2, 2020

Happy Mail Gift Card Holder | Art Impressions

Hello Ai friends!

I have a fun card today using the adorable Mailbox Gift Card Holder set.  This is another versatile set that will be great to use for so many different occasions!


I stamped the images with Copic safe ink and used some Copic markers to color them.   I've listed the markers I used below.  Next I used the included dies to cut them out (except the latch, which I fussy cut).  I also stamped the mailbox onto some patterned paper from my stash and fussy cut it out.  I used the alphabet set (5284) to stamp out the words.


I followed the directions on the back of the package for the easy assembly.  I added foam tape to the back (be sure to leave the gift card area open) and popped it up onto my layered card base.  This card turned out to be 5" x 4-3/4".  I adhered the flowers with liquid glue and popped a few up with thin foam squares.  I also added a flower to cover the hole that is die cut for the flag since I didn't use that.  I added the latch with a silver brad.


Thanks so much for stopping by today!  I hope you have a wonderful, crafty week!


Copic markers:
C5, C3, C1, C0, C00, E27, E57, E23,
G43, R24, R22, R21, R20,
Y17, Y08, Y04, Y00, YG67, YG17, YG61

Supplies:
Art Impressions Mailbox Gift Card Holder set
Art Impressions silver brads
Art Impressions Small Alphabet set

Tuesday, February 25, 2020

Keeping Christmas Blog Hop - February 2020

Hello friends!  It's February 25 and that means it's time for another Keeping Christmas inspirational blog hop.  Be sure to visit each stop (listed below) for much more beautiful inspiration.  

My post today is short as I've just returned from a warm and sunshiny almost two-week vacation and I'm kind of moving in slow motion.  Haha!  I've used WPlus9's Most Wonderful stamps and dies for my card.  This is an easy card to put together though, and it would be easy to mass produce!


Here are the steps for the card.  All of the supplies are listed at the end with links to shop.

  • Die cut some blue card stock with the Snow Day Cover Plate die.  Spray with silver Glitter Dust and allow to dry.
  • Adhere the die cut to a top-folding A2 card base.
  • Stamp the snowman and trees in colors of your choosing and die cut with the coordinating dies.
  • Hand cut a hill from white card stock and adhere to the blue panel.
  • Pop up two of the trees and the snowman with foam squares.
  • Adhere one tree with liquid glue and add the popped up trees and snowman.


I stamped the sentiment in Versafine Onyx Black ink and used my paper trimmer to cut it into a square shape.  Use a corner rounder on each corner.  Add a few foam squares and adhere to the card base.


That's it for me today!  I hope my quick-to-make card has given you some inspiration to build your stash of your Christmas cards for the upcoming season!


Check out these fabulous card makers for more inspiration!

Kelly Lunceford (Creator)


Carol Hintermeier << that's me!

Supplies:


Monday, February 24, 2020

Elegant Floral Twist Card | Art Impressions

Hello friends!  Today I have another card featuring the Floral Twist Set.  This is one of eight sets in the new Twist Line!


I began by building my card base:
  1. Use a Copic (V06) to add color to the edge of an 4-¼" x 5-½" white card stock piece.
  2. Attach this to a top-folding A2 card base.
  3. Position the Twist Frame die onto another A2 white piece of card stock and die cut.  Then lay that on top of your card base and trace the opening with a pencil.
  4. Emboss this with an embossing folder.  The one I used is listed in the supplies below.  Trim it to 4" x 5-¼".
  5. Unfold the card and line up the Twist Frame die with the pencil lines on the base.  Run it through your die cutting machine.
  6. Adhere the embossed piece to the card base.


Now all you need to do is stamp the two floral images with Copic safe ink.  I colored it with the markers listed below.

I stamped the sentiment and die cut it with the smallest die from the Rectangle A2 Double Stitched dies.  I layered this onto a piece I colored with one of the yellow Copic markers I used.  Pop it up with thin foam tape and add a few yellow sequins to finish.


As always, I so appreciate you stopping by today!  Have a fun, crafty week!


Copic markers:
C3, C1, C00, V09, V06, V05, RV63, 
Y19, Y15, Y13, Y11,
YG67, YG17, YG25, YG03, YG01

Supplies:

Sunday, February 23, 2020

Daisies & Gingham? Yes Please! | Rubbernecker Stamps

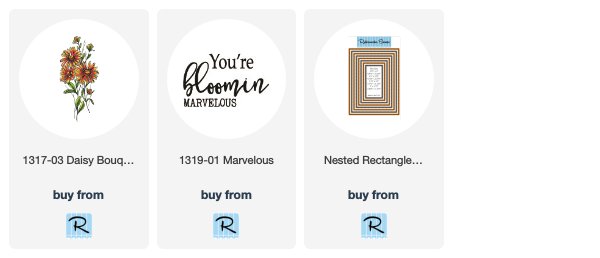
Hello friends!  Today I have a sweet card today using Rubbernecker Stamps beautiful Daisy Bouquet #2 stamp.  I've paired this awesome stamp with my favorite type of patterned paper--gingham!!


I love it when you have a beautiful stamp and it's also an easy one to use to make a quick card!

I began by creating the card base:
  1. Layer a 5-½" x 4-¼" piece of yellow card stock on a top folding A2 card base.
  2. Add gingham paper trimmed to 5-¼" x 4".
  3. Stamp the Marvelous sentiment in black ink and die cut it with a die from the Nested Rectangle Small Stitched die set.
  4. Layer the sentiment onto a black piece of card stock.
  5. Use liquid glue and adhere it to the card base.


The Daisy Bouquet:
  1. Stamp the daisy onto Neenah Solar White 80# card stock with Copic safe ink.
  2. Color the image with Copic markers.  I've listed the markers at the end of this post.
  3. Die cut the piece with a Nested Rectangle Stitched die.
  4. Layer it onto a piece of black card stock with liquid glue.
  5. Add a piece of ribbon around the panel and tie into a knot.  I've had this ribbon forever in my stash!
  6. Add foam tape to the back of the panel and adhere it to the card base.
  7. I added a few Yellow Dandelion NUVO Crystal Drops for a bit of embellishment.

I love the daisies with the sentiment and gingham!  I hope this card makes you smile.  Thank you so much for stopping by today.  Have a wonderful, crafty week!


Copic markers:
C5, C3, C1, C00, YG17, YG25, YG03, YG01,
Y19, Y06

Thursday, February 20, 2020

Birthday Card, Butterflies & an Inky Background | Honey Bee Stamps

Hello friends!  I don't know about you, but I'm ready for spring and my card today reflects that!  I've used two beautiful sets from Honey Bee Stamps to create my card today, Spring Peony and Fluttering By.


It had been a while since I made a heat-embossed, ink-smooshed background.  I love this fun technique!  Here are my steps for the background:
  • Place a piece of watercolor card stock in your MISTI or other stamp positioning tool.
  • Lay out the butterfly stamps from the Fluttering By set and pick up with the MISTI door.
  • Use an antistatic bag on your card stock, then ink the stamps with Versamark clear embossing ink and stamp.  Repeat, if needed.
  • Sprinkle on white embossing powder and heat set.
  • Smoosh Distress Inks onto your craft mat.  I used Squeezed Lemonade, Abandoned Coral, Worn Lipstick and Spun Sugar.  Mist the ink with water.
  • Place your embossed piece into the ink and lift.  Air or heat dry.  Repeat until you are happy with the look.
  • I die cut the piece with the largest of the A2 Double Stitched Frame dies.
  • TIP:  I almost always prepare at least two embossed pieces to play and experiment with.  It seems to help me not feel so much pressure to get the first one just right!

I used one butterfly from the Fluttering By set and some greenery from the Spring Peony set for the card front.  Stamp in Copic safe ink, color and die cut with the Spring Peony and Fluttering By coordinating dies.  I've listed the Copic markers I used at the end of this post.  I played around with the arrangement of the pieces until I liked it and took a photo to remember the placement.  Before I adhered the greenery, I used my fingers to slightly curl them to add dimension.  For the butterfly, I added liquid glue to just the the middle so the wings would stay raised.


To finish, I added some clear Wink of Stella to the butterfly's wings and the berries.  Then I added Glossy Accents to the berries.


I love how this turned out and had so much fun making the inky background!  Thank you so much for stopping by today!


Copic markers:
butterfly:  R24, R22, R32, Y18, Y02, RV10, RV00
greenery:  YG67, YG17, YG25, YG03

Supplies:
Distress inks:  Squeezed Lemonade, Abandoned Coral, Worn Lipstick, Spun Sugar