Wednesday, May 21, 2025

Hello, Beautiful!! A Dramatic Heat Embossed Card

Hello, crafty friends!  Today I decided to go with a rich dark colored cardstock for a dramatic look to use as a background for Honey Bee Stamps beautiful Lovely Layers: Topiary.  I used their Always and Forever red rubber stamp to add a subtle heat embossed background!  Read on for the details!

First I chose a dark teal blue cardstock and placed an A2 size piece into my stamp positioner. I used an anti-static powder over the cardstock. Then I inked up the Always and Forever background stamp with clear embossing ink and stamped it onto the teal cardstock.

For this card I used some white satin pearl embossing powder. If you don't have that, a clear embossing powder would also be beautiful. After I poured the powder over the stamped image, I used my heat tool to set the powder.

After the panel had cooled off, I cut it out with the coordinating Always and Forever die. I found an ink that was about the same color and used a blender brush to darken the edges of the die cut piece. I glued this to an A2 sized panel of teal cardstock, and then to an A2 card base.

I die cut all of the pieces of the Lovely Layers: Topiary from white cardstock except for the top layer of the planter. I die cut that from a scrap of the same teal cardstock I used before. It was easy to use blender brushes and various ink colors to quickly color the layers of the topiary. I love how the bright yellow of the lemons and bow contrast with the green and teal!

The sentiment is one that is in the So Special stamp set. There are so many wonderful sentiments in the set, I had a hard time deciding which one I wanted to use. LOL. I cut the stamped sentiment out with the coordinating So Special die.

The topiary and the sentiment are all popped up with foam tape. I wanted that lift so the teal planter would not blend into the background so much.

There are several other dies in the Lovely Layers: Topiary for more options other than the lemons.  You can choose two more planters, a different style leafy topper along with pears, flowers, and oranges!  Be sure to check it out!  I hope you are having a wonderful week and I so appreciate you stopping by my blog!

Thank you for choosing to use my affiliate links to shop (never any additional cost to you)!

Wednesday, May 14, 2025

You Are So Special To Me -- Framed English Cottage Scene

Hello crafty friends! Today I'm sharing my card that features the beautiful English Cottage stamp and the Lovely Layers: Bird Bath Honey Cuts from the new Honey Bee Stamps Cottage Countryside release.

The idea I had in my mind was to create a scene with the English Cottage as a background for the Bird Bath. My original thought was to just stamp the cottage in one subtle color as a background. But I decided to go with light colors and use my markers color the stamped image.

Once I decided to color the English Cottage I stamped it with Lost Shadow Distress Ink. This was much easier to use than one of the no-line coloring inks since it is darker than those. I think I still achieved a no-line coloring fairly well, do you? I used lots of lighter colors and a kind of "loose" coloring technique. This made my coloring session fun and relaxing without any stress!

Here's the Copic marker colors I used for the main areas:

  • Cottage: W4, W3, W1, W0, W00
  • Stones: T5, T3, T2, T0
  • Path: E44, E43, E42, E41
  • Vines/bushes on and around cottage: G94, YG61, G24, G20
  • Background trees, grass: YG67, G07, YG17, YG25, YG03
  • Door, windows: BG23, BG11, BG10
  • Purple flowers: BV11, BV000, BV00
  • Bird bath: C3, C1, C00
  • Birds: E59, E57, E55, E53, E51

Next I die cut the Wood Frame Builder dies three times from white cardstock. I glued the layers together and then glue them to my colored English Cottage scene, and glued the panel to an A2 card base.

I die cut the Lovely Layers: Bird Bath dies from white cardstock. After I colored the bath and the birds with my markers, I used glue to adhere the layers together.

Then I added a bit of foam to the back of the Bird Bath to adhere it to the card. I used glue to attach the birds at the top of the bird bath.

The sentiment is from the new So Special stamp set. I adore all of these sentiments! After I chose one and stamped it with black ink, I cut it out with the coordinating die. I added a few pieces of foam strips to adhere the sentiment at the bottom of the card.

I really hope this inspired you to try this idea for a background with the English Cottage. The coloring is really fun--just don't stress and be loose with your coloring and it will be fantastic!

Thank you so much for stopping by today! I hope you are having a wonderful week with lots of crafty time!

Thank you for using my affiliate links to shop (never any additional cost to you)!

Saturday, May 10, 2025

May The Wind Always Be At Your Back...

 Happy Saturday!!  Today I'm sharing my card that features several of the products from Spellbinders beautiful Field Notes Collection.

The Field Notes 3D embossing folder makes such a gorgeous background in white.  I used my old corner rounder to round all four corners for a bit of a different look!  This embossing folder will be used many times for my cards, I predict!

Next I die cut the Field Notes Twine from light brown cardstock.  I folded the tabs around to the back of the embossed panel and used glue to secure.  Then I glue the piece to a rounded-corner A2 card base.

Then I used some pretty teal, yellow, green, and purple cardstocks (available colors in the list below) to die cut all of the pieces from the Field Notes Tools and the Field Notes Wildflowers die set.

There is a die that resembles washi tape in the Field Notes Wildflowers set.  I put some black and white polka dot washi tape from my stash onto a piece of white cardstock.  Then I die cut two washi tapes from this.  So fun!

I die cut a piece of vellum for the magnifying glass center and silver cardstock for its handle.  I die cut more silver cardstock with the scissors die.

After I glued the various layers of all of the die cuts together, I tucked them umber the twine die cut and adhered with glue.

The sentiment is from the Hummingbird Sentiments stamp set.  After I stamped it with black ink, I trimmed the piece and adhered it with foam tape.  Then I adhered the washi tape die cuts with small pieces of foam tape.

I finished the card up by adding the cutest Butterfly Mini 3D wax seal to the center of the twine die cut bow.  Two wax beads from the Teal Mix was just the right amount for this mini seal.

I love how this turned out and hope you do too!  I think there are so many ways to use these Field Notes Collection sets for many different occasions.  Have a wonderful weekend!!

Thank you for using my affiliate links to shop (never any additional cost to you)!

Friday, May 9, 2025

Two Sweet Uplifting Cards Feat. Simon Hurley Sky's The Limit

 Hello!  Today I'm sharing two sweet cards that features Spellbinders Simon Hurley Sky's The Limit collection.  This collection has coordinating dies, embossing folders, stencils, and press plates that give you endless combinations!

For this first card I used the Fly A Kite dies and the Flying Kites 3D embossing folder to this encouragement card.

I added the Flying Kites 3D embossing folder white cardstock layer to an A2 card base with glue.

I die cut the Fly A Kite dies from 80# white cardstock.  Then I used ink blending brushes and some pretty shades of orange, pink and yellow inks to color the layers.

I glued the kites together and then I added Star Dust Stickles to the kites' tails and a dot on each kite.  I haven't used any of my Stickles in FOREVER!  LOL.

I popped up the kites with foam tape to adhere each one to the card.  The sentiment is from the Soaring Sentiments Press Plate & Die Set.  I so appreciate that all of the sentiments are on one press plate and the included die cuts them all out at once!

----------------------------------------------------------------------------

The second card I made uses the Flying Kites 3D embossing folder again along with the Up And Away die set.

After I embossed white cardstock with the Flying Kites 3D embossing folder, I used a sky blue Copic marker to color in the sky.  I just took my time to color carefully and not get any on the kites.  I really didn't take too long!

I trimmed the embossed piece to 3-¾" x 5" and adhered it to my A2 card base with foam tape.

Next I die cut the Up And Away dies from white cardstock.  There are specific dies to use to make a variety of children that are included in the set.  I colored the pieces with Copic markers and used glue to adhere the layers.

I muted the background a bit by adding vellum I die cut with an Essential Arches die.  Then I adhered the girl and her kite.

I chose one of the previously pressed sentiments from the Soaring Sentiments to add to the card with foam strips.

I added a bit of sparkle with some gem stickers I have in my stash.

The Sky's The Limit collection is so adorable and perfect to make all kinds of encouragement cards suitable for all ages!

Thanks so very much for stopping by!  Have a wonderful and crafty weekend!!

Thank you for using my affiliate links to shop (never any additional cost to you)!

Thursday, May 8, 2025

Altenew May 2025 Release Blog Hop + $300 In Total Prizes!

Hello friends!  Have you seen the May 2025 Release by Altenew?  If not, you are in the right place for lots of inspiration for this release!

You can check out the entire release over at the Altenew Website!  I think you will love it as much as I do!  I have all of the stops for this hop below, but if you'd like to start at the beginning, please head over to the Altenew Card Blog.

I have two cards to share with you today that feature gorgeous new Altenew products!

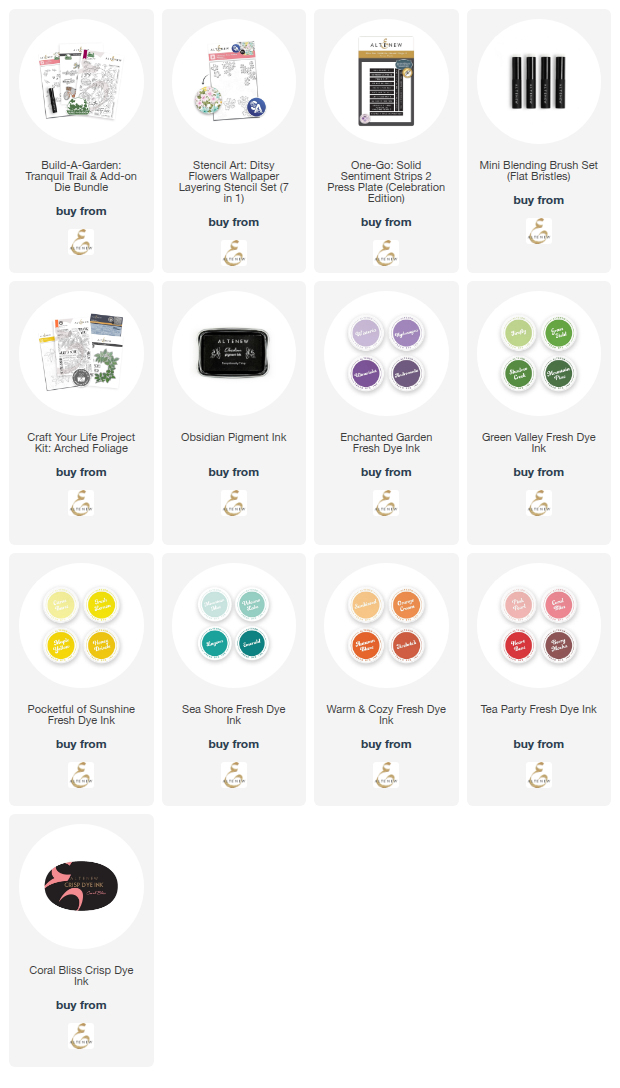
I really have no words for how much I LOVE this Build-A-Garden Tranquil Trail collection of stamps, stencils, and dies!  And the large arched floral arrangement is perfect to use with scrapbook pages too!  One of the several things I do other than card making, and love, is riding my bicycle!  In our neighborhood we have many trails with a connection to a trail that follows along a river.  This set reminds me of my peaceful, mindful bike rides!

The Tranquil Trail arched floral and bicycle are stamped with Obsidian pigment ink.  I used inks from the Enchanted Gardens Fresh Dye Ink and Green Valley Fresh Dye Ink and my MOST favorite Mini Ink Blending Brushes to color through each of the seven stencils included with the Tranquil Trails layering stencil set.

I just had to color the bicycle a bright yellow (that's the color of my bike!) and the Citrus Burst Fresh Dye ink was perfect.  (It's from the Pocketful of Sunshine Fresh Dye Ink collection.)

As much as I love the Build-A-Garden: Tranquil Trail, I love this amazing Stencil Art: Ditsy Flowers Wallpaper stencil set even more!  There are SEVEN stencils in this set for you to use to create endless combinations and styles for your cards.

While this card may appear to be a challenge to make, it was so easy!  The Stencil Art: Ditsy Wallpaper  stencils are so fun and easy to use for cards.

I used these Fresh Dye Ink sets and my favorite brushes (Mini Blending Brushes) to color through the stencils:  Green Valley, Sea Shore, and Warm and Cozy.  I also used some of my Crisp Dye inks: Coral Bliss, Heart Beat, and Vineyard Berry.

I thought I'd carry on the color theme by using some of the same inks with the One-Go Solid Sentiment Strips 2 Press plate set.  The Fresh Dye Inks work great with the press plates!  (I used Orange Cream, Emerald, and Coral Bliss.) I love how the sentiments pop without distracting from or hiding the beautiful background!

I hope you've found some inspiration for this awesome May 2025 Release from my cards.  Be sure to leave a comment and visit all of the other stops for your chance at a wonderful prize!

Check out the details below for the awesome prizes and hop list!


Check out all of the awesome inspiration by these designers!

Thank you for using my affiliate links to shop (never any additional cost to you)!

Wednesday, May 7, 2025

Beautiful and Easy-To-Make Sympathy Card Set

Hello my crafty friends! I'm sure by now you have had time to check out the amazing Cottage Countryside release by Honey Bee Stamps, right?  Today I am sharing the details of my sympathy card set I made with the new Ginger Jar Details stencils and the Chinoiserie 3D embossing folder.

I wanted to see if I could find another way to use the Ginger Jar Details stencils other than with the Ginger Jars. I also wanted to make sympathy cards for my stash using the beautiful sentiments in the Heartfelt Condolences stamp set. I love the font of these stamps!

These were all made exactly the same way! The only difference being the colors of the inks and cardstocks.  (I've linked all available products in the list below.)  I chose muted colors to use as I wanted the sentiments to be the focal point of the cards. After all, the words are what matter most when expressing sympathy.

I will list out the directions below, while showing you the individual photos.

  • First I cut three strips of white cardstock to 1-¾" x 5-½".  I cut three more strips measuring 2" x 5-½".
  • I used two of the stencils in the Ginger Jar Details stencil set.
  • I noticed that the floral stencil is especially delicate so I sprayed the back of the stencils with Pixie Spray to hold the tiny pieces to the paper.
  • I used Detail Blender brushes to add my blue, gray, and mauve inks in an ombre pattern on each of the 1-¾" strips.
  • Next I blended the inks around the edges of the 2" strips to create coordinating mat layers.
  • I glued each of the stenciled and mat layers together.  I embossed blue, gray, and mauve cardstocks with the gorgeous Chinoiserie 3D embossing folder.
  • After I ink blended coordinating inks lightly around the edges of the embossed cardstocks, I glued each one to an A2 card base.
  • Next I glued the stenciled strips to the cards and set them aside.
  • I added foam strips to the back of each strip to adhere them to the cards.
  • I felt that the cards needed something extra and decided to add pearl stickers.
  • I was so pleased to find various sets of pearl stickers that had the perfect colors!
  • The sets of pearl stickers I used are: WinterOcean Waves, and Fall Is In The Air.

I'm so happy to have these sympathy cards for my stash. While I never like the reason for the need, I am so glad to have a card to use at those moments.

I hope I've given you inspiration for your card stash! Thank you so very much for stopping by!

Thank you so much for using my affiliate links to shop (never any additional cost to you)!

Monday, May 5, 2025

Sending Hugs -- An Easy Die Cut Card

Hello crafty friends!  Today I'm sharing this easy card that features Spellbinders beautiful Yana's Daisies die set.

I made the card base layer by embossing Violet cardstock with the Perforated Stamp Edges embossing folder (this was the April Embossing Folder of the Month club kit).  I glued it to my A2 card base and then added white splatters.  I set it aside to dry.

The Yana's Daisies die set includes two dies--one that die cuts the petal and leaves with a narrow border and the other cuts a solid shadow layer to use adhere the flower pieces to.  I die cut white cardstock with both dies.

I used a few Copic markers to shade the petals and color the flower centers and leaves.  First I glued the outline die cut to the shadow layer.  Then I glued the individual petals and centers.  I added foam tape to the back of the daisies and adhered it to my card.

For the sentiment, I pressed the Ideal Moments Sentiments Press Plate with black ink onto 110# white cardstock with my BetterPress Letterpress system.  Then I die cut the sentiments with the coordinating die.

I added a foam strip to the back of the sentiment to adhere it to my card.

And that's how easy it is to make this card!  Thank you very much for stopping by!  Have a wonderful week!

Thank you for using my affiliate links to shop (never any additional cost to you)!