Thursday, July 9, 2020

Waving Hello from My Beach House | Honey Bee Stamps

Hello my friends!  The beach is one of my most favorite places, and if I had a beach house, I'd invite you to join me at the beach!  (Socially distanced, of course!)   For my card today, I'm using the awesome new Beach House Add-on stamps and Honey Cuts that compliments the House Builder Card base set.  These are from Honey Bee Stamps amazing Hello Summer release!


Using the house shape from the House Builder Card Base set Honey Cuts, I die cut two house pieces and one hinge.  I used a piece of woodgrain paper from the Beach Vibes 6x6 paper pad and die cut just the lower portion of the house.  I adhered this to the lower portion of the house.

I stamped the images from the Beach House Add-on set from 80# Neenah Solar White card stock.  After I colored them with Copic markers, I die cut them with the coordinating dies.  I used two shades of green card stock to die cut the leaves.  The windows, shutters, porch and door knob are from the House Builder Card Base set.  I used some brown and two shades of green card stock for the palm trees and coconuts.  Be sure to cut an extra tree trunk if you want to make a taller tree like the one on the right.  To assemble the tree, I adhered the bottom layer for the leaves to the trunk and then shaped the leaves with my fingers and glued them onto the base.  I adhered a portion of the extra trunk to the bottom of another (it will be hidden by the surfboards.)  After I adhered the windows, I added some Glossy Accents to them and set it aside to dry.

I die cut the roof from the Beach House Add-on from some 80# Neenah and colored it with my Copic markers.  I had lots of fun practicing my flicking motions here!  I used the embossed lines in the roof die cut to plan my shading.  My copic marker colors for the roof are E33, E53, and E31.  When I finished coloring the roof, I added some thin foam tape to the back and adhered it on the beach house.


Before adhering the two house pieces with the hinge, I used a sentiment from the Flippin' Fabulous set and stamped it in black ink, along with the starfish from the same set.  After I colored it, I adhered the hinge and attached the card front to it. 


Now all you need to do is have fun arranging the front of your beach house!  I popped up the bicycle and beach ball with a thin foam square.  The sentiment on the card front is from the Beach House Add-on stamp set.  Before I stamped "Hello" I die cut the two wooden sign pieces and colored them with Copics.  I love how there are coordinating dies for the sentiments, as you see here for "waving".


Have you seen the new Honey Bee Stamps Hello Summer release?  If you haven't, you are missing some fun, summertime stamps and dies and should go check them out HERE!!  I sure appreciate you stopping by to take a look!  Thank you!


Supplies:
Honey Bee Stamps:

Wednesday, July 8, 2020

Honey Bee Stamps & Hero Arts Collaboration Blog Hop

Hello friends!  I'm so happy to be a part of the Honey Bee Stamps and Hero Arts blog hop! This is to celebrate their beautiful collaboration stamp set called You Are Amazing. They will be giving away TWO $50 shopping sprees during this hop--one to the Hero Arts store, and one to Honey Bee Stamps!  Winners will be drawn from the comments left across the hop--comment on more blogs for more chances to win.  So keep on reading until the end where you will find the entire hop list!


I love this set so much that I made three cards!  These were so quick and easy to make!  (I have the supply list for each card, with links, at the bottom of my post.)


For this first card I heat embossed the heart with white embossing powder onto a panel I die cut with the Honey Bee A2 Scallop die.  Then I blended on Distress Inks in Squeezed Lemonade, Mowed Lawn, Tumbled Glass, Wilted Violet, Spun Sugar.  Then I used the Honey Bee Fluttering Hearts stencil and inked the same Distress Ink colors through it.  It's easy to wipe any ink off of the embossing.


The sentiment is stamped with Versafine Onyx Black ink, fussy cut, and popped up with foam tape.


For this next card, I used various inks and applied them one by one in a rainbow pattern.  I used my finger to soften the edges left by the ink pads.  I added a shadow around the hand with a couple of gray Copic markers and fussy cut the heart.


I used the Honey Bee Stamps Fluttering Pierced Hearts Cover Plate die to add pattern to the card base.  It's on an A2 top-folding pink card base.  I love this beautiful sentiment that's in the You Are Amazing set!


For my final card, I used Hero Arts Tide Pool ink to stamp the heart onto white card stock and die cut it with the Honey Bee Stacking Pocket die.  I stamped the stitching from the Honey Bee Pocket Full of Love set.  Then I die cut the flap with the coordinating die. 


The pocket is layered on patterned paper from Honey Bee's Spring Lullaby paper pad.  Again, I stamped the sentiment in black ink and fussy cut it out.


Thank you so very much for stopping by!  Be sure to comment by Wednesday, July 15 at 11:59pm PST for your chance to win a sweet prize!  Winners will be announced on the Hero Arts and Honey Bee Stamp blogs the following week.  Happy hopping!!!

Carol Hintermeier <---that's me!


Supplies:
You Are Strong card:
Distress Inks:  Squeezed Lemonade, Mowed Lawn, Tumbled Glass, Wilted Violet, Spun Sugar

That is All card:

Monday, July 6, 2020

Honey Bee Stamps "Hello Summer" Blog Hop - Day 1


Hello and welcome to Day 1 of Honey Bee Stamps Hello Summer blog hop!  I'm so happy to be here to share my creations with this amazing release!  There will be a $25 gift card given away from both days' commenters so be sure to leave a comment at each stop for more chances to win!  There is lots of inspiration from the awesome and talented designers in this hop so keep reading until the end where you'll find the entire hop list!


I was so excited when we found out that this new release would include some slimline dies!  These are such a fun way to create a different style card!


I really like how this Slimline Salutations: Eyelet Border Honey Cut cuts the center panel separate from the scalloped eyelet frame.  I used a couple of Blender Brushes to ink up the sky background with Distress Oxides in Squeezed Lemonade, Mustard Seed, Tumbled Glass and Peacock Feathers.

I die cut the Making Waves Border Honey Cuts from some colored card stock and the sand from patterned paper from the Beach Vibes 6x6 paper pack.  These dies are 8-¾" long so you can use them lengthwise on your card.  I added some texture paste to the waves and sprinkled with some glitter before it dried.


The Flip Flop Builder Honey Cuts is just the most fun to play with!  This patterned paper is also from the Beach Vibes paper pad.  I added some greenery and a plumeria flower from the Paradise Blooms set.  The sentiment from the Flippin' Fabulous set is stamped in coordinating ink.


I find it interesting how much smaller the flip flops look on this card versus the one you'll see next!  It's all about the perspective I guess!

----------------------------------------------

In case you missed them, here are the cards I've shared on my Instagram for each sneak peek day.  I have the links to shop the Hello Summer products I used below each photo.


Thank you so much for hopping along!  Be sure to leave a comment for your chance to win and then head over to the amazingly talented Channin Pelletier!

Hop list:

Honey Bee Stamps <--click here to start at the beginning
Carol Hintermeier <--that's me!

Monday, June 29, 2020

Friendship Blooms | Art Impressions

Happy Monday my friends!  Today I have a sweet card for that special friend using Art Impressions beautiful Poppy Border set.  This is in their Bible Journaling line, but as you can see, it's perfect for so many occasions!  This card is for you all!  I have some news to share so keep reading until the end!


I die cut some Neenah Solar White 80# card stock with the next to largest Rectangle Double Stitched die.  Then I began as usual, stamping in Copic safe ink and coloring with my markers listed below.  I've been working on coloring with different color families and hey, these are my poppies and I colored them in yellow and a coral shade.  Isn't that the best thing about beautiful floral stamps like this?!!  I decided to try something new--instead of adding a typical shadow around the image, I used the yellow markers and added tiny dots.  What do you think?  


I chose a sentiment from the WC Sentiment Set-4903 and stamped it in Versafine Onyx Black ink.  I layered it onto a coordinating colored card stock from my stash and popped it up on foam tape to my card base.  I added a few Dandelion Yellow Nuvo Crystal Drops for a bit of bling.


So, if you've read this far, thank you!  I have felt so very honored and blessed to be on Art Impressions amazing design team and the ladies on this team are just the absolute BEST!  I made my first Ai post on June 4, 2018 and have felt so welcomed and supported by my teammates for these two years.  I've decided to step down from the team for now, as I've just felt the need to have more free time to work on other things--one of those being improving my watercoloring--including the Ai way!  I'm SO thankful for YOU, and your kindness!  Sending many crafty hugs to you all!


Copic markers:
R24, R14, R22, R20, R30,
Y15, Y11, Y00,
G07, YG67, YG23, YG03, YG01

Supplies:

Sunday, June 28, 2020

A Slimline Summery Birthday Card | Rubbernecker Stamps

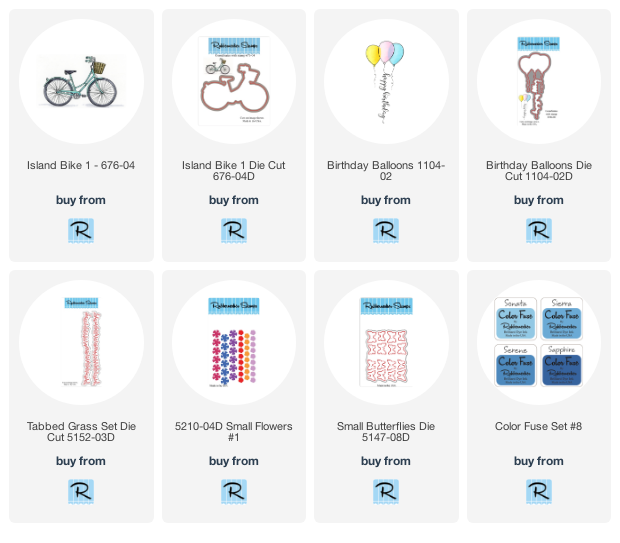
Hello friends!  Today I have a slimline card that's sweet and summery--perfect for those summertime birthdays!   I've used Rubbernecker Stamps adorable Island Bike stamp and die along with the Birthday Balloons stamp and die for my card.  Keep reading for the details.


Here are the steps for this quick and easy card:
  • Score 7" x 8-½" piece of 80# Neenah Solar White card stock at 3-½".
  • Ink some Sonata blue ink (from Color Fuse Set #8) with a blender brush to create a blue sky.
  • I smooshed some of the Sonata ink onto my glass mat, added a bit of water with a paint brush, and spattered some blue droplets onto the sky.
  • Stamp the Island Bike 1 and the Birthday Balloons with Copic safe ink on 80# Neenah. (I've listed my marker colors below.)
  • Color with Copic markers and die cut with Island Bike 1 Die and Birthday Balloons Die.  Add some foam tape to the back of the die cuts.
  • Die cut the grass layers, using Grass Die Cuts, from two shades of green card stock.  Trim the pieces to 3-½", adhere together, and then to the card base.
  • Adhere the bicycle, slightly offset, and trim off the excess.
  • Die cut flowers with the Small Flowers #1 die and butterflies with the Small Butterflies Die from white card stock.  Using some of the markers I had out, I colored the flowers and the butterfly.
  • Shape the flowers with a rounded stylus and foam mat.


I adhered the flowers around the bicycle with liquid glue.  I added glue just to the center of the butterfly so I could shape the wings upwards.


I love this summertime birthday card and hope you've been inspired to give these awesome stamps and dies a try!  Thank you for stopping by today--I appreciate you.  Have a fabulous and crafty week!


Copic markers:
BG07, BG15, BG32,
RV13, RV21, RV10,
C9, C7, C5, C3,
Y26, Y19, Y15, Y13, Y08, Y02, Y00, YG00, YR16

Thursday, June 25, 2020

Keeping Christmas Blog Hop - June 2020

Hello friends!  How is June almost over?!!  It's the 25th of the month and time for your monthly Christmas card making inspiration!  I hope you will check out each talented designer in this hop because I know you will see some wonderful creations!  You'll find the hop list at the end of my post.


I hope you will forgive the brevity of this blog post.  This is the third post I needed to have scheduled for today!  I was way behind on my project for this post so I turned to one of my favorite Concord & 9th dies, Ornamental Dies, to make these shiny and sparkly cards.  This set makes is so easy to make several cards quickly!  I know I'll be so glad to have these later this year.


I used several things from my stash for these cards:  some foiled woodgrain patterned paper, silver mirror card stock (yes, they're all silver--you know how hard this is to photograph, right?), red glitter card stock, and red gingham ribbon.


I die cut the tags from a set by Gina K. Designs called Decorative Tag Dies.  Then I stamped the sentiment from Concord & 9th's O Christmas Tree set.


Super easy cards to make and "Yay me!" for using things from my stash!  LOL!  Thank you so much for stopping by--I always appreciate it so!

Check out these awesome designers for more inspiration:


Carol Hintermeier <<< that's me!

Patriotic Barn Scene Card | Honey Bee Stamps

Hello friends!  Today I have this adorable card using Honey Bee Stamps Barn Scene Builder set!  My barn today is all ready for the Fourth of July with the festive red, white and blue colors!  This set is so fun, especially when you add in some of the elements from the Way To Goat set!


The Barn Scene Builder set makes a stand alone barn-shaped card.  However, I wanted more space for my scene, so I added it to a 6" square card base.  I created this base by cutting two pieces of white card stock:  one 6"x 6" and another 6" x 6-¼" (score this one at ¼").  Adhere the 6x6 piece to the tab.   On the card front I used the cloud stencil from the Outdoor Scene Builder stencil set and blended on some Salty Ocean Distress Oxide ink with a Background Blender Brush.  I used the Grass Border die to create a mask and blended on Mowed Lawn and Twisted Citron Distress Oxide ink.  Turns out that the grassy edge barely shows!  Haha!

My next step was to build was this adorable windmill.  I die cut the blades and five of the circle pieces from silver card stock.  Stack and adhere the circle pieces and then adhere the blades to the circle.   The other portions are die cut from Woodgrain card stock.  I blended some Distress Oxides to color and shade this piece.  I wanted this windmill to be movable, so I punched holes with the pokey tool in the center of the blades and windmill base.  See the photo for a visual explanation.  I used a tiny brad to connect the pieces.


Next I die cut the barn pieces from patterned paper in the Home Essentials 6x6 paper pack.  I die cut the door frames, the window, and window box from white woodgrain card stock.  I used a Blending Brush to add some Walnut Stain and Ground Espresso Distress Ink to color and shade these.  I offset the barn on the card base, adheredit, and then trimmed off the extra.  Next adhere the doors, window, and roof.


I stamped the flowers and critters from the Way To Goat set, along with the banners from the Farmhouse Add-on set, in Copic safe ink.  I colored them with Copic markers and die cut them with the coordinating Way To Goat Honey Cuts and Farmhouse Add-on Honey Cuts.  I stamped the sentiment from the United We Stand set in black ink and die cut it with the Coordinating Die.  I die cut two more of the sentiment piece and colored them with a red and a blue marker that I used to color the flowers.  I layered these all together and popped it up with foam tape.


If you haven't tried a scene building set like this one, you really should!  It's so much fun customizing it however you like!  Thank you so much for stopping by today!  


Supplies:
Distress Oxide inks:  Salty Ocean, Mowed Lawn, Twisted Citron
Distress inks:  Walnut Stain, Ground Espresso