Showing posts with label Copics. Show all posts

Tuesday, September 29, 2020

National Coffee Day Blog Hop | Rubbernecker Stamps

Hello friends!  Today Rubbernecker Stamps is part of the Coffee Loving Cardmakers National Coffee Day Blog Hop.  There are many sponsors in this hop so be sure to check them out!

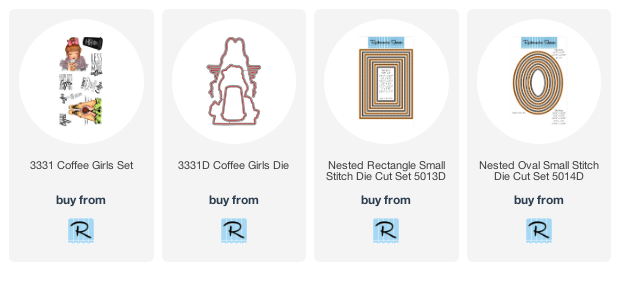
For my card today I've used a new set from Rubbernecker called Coffee Girls.  There are two main images and several sentiments perfect for making your "coffee" cards!  I love this image and can just imagine how peaceful it would be to sit on a dock at a lake with my morning coffee!


This was a quick card to make--the best kind, right?!!  I colored the image with Copic markers (colors are listed below) and die cut it with a Nested Oval Small stitch die.  I added foam tape to the back.


I added the image to an A2 card base with patterned paper layers from Honey Bee Stamps Great Outdoors paper pad.  The green patterned layer is die cut with a Nested Rectangle Small stitch die.  I stamped the sentiment and used my trimmer to cut it out.  I also popped this up with foam tape.  For a bit of shine I added Glossy Accents to the coffee and a few clear green dots from my stash.

Thank you so much for stopping by!  Be sure to go back to Rubbernecker's blog to see much more fabulous inspiration.  

Copic markers:

B0000, B21, B24, B26, BG11, BG13,
E11, E21, E23, E27, E29, E47, E49, E50, E51, E59, E84, E87, E89,
G99, R30, R32, YG95, YG97, YR20, YR21, YR23, YR24

Monday, April 6, 2020

It's A Girl.....& Boy!! | Art Impressions

Happy Monday friends!  Today I have a sweet card using Art Impressions Baby Girl and Baby Boy sets.  Be sure to keep reading to find out how I fixed two pretty big oopsies!  I decided to make a slimline card using the clothes on the line stamps from both sets to make a card to welcome twins!


I created a slimline card base by cutting some Neenah Solar White to 7" x 8-½" and scoring at 3-½".  I positioned both clothesline stamps and stamped them with Copic safe ink.  Next I stenciled the clouds with Distress Inks.  I really didn't want to create masks for all of the little clothes, so I just tried to go lightly with the ink blending brush around them.  I have a tiny blending brush that helped with that too.  I knew my coloring would cover any of the clouds I might get on the clothes.


I colored the clothes with the Copic markers listed below.  Then I stamped the sentiments Girl and Boy.  I had thought to color them like translucent balloons, but let me tell you, that was a HUGE fail! Haha!  So I re-stamped them onto scrap paper that I Copic colored in ombre shades of pink and blue. I fussy cut them out then went around the edges with a Memento Tuxedo Black pen to give them a finished look.  Then I adhered them over my "bad" balloons!  I rummaged through my stamp stash to find the ampersand and "It's a" sentiments.

Another BIG goof happened right after I finished coloring the little clothes.  I got up to do something else and when I came back I saw the card sitting ON TOP OF the open Distress Ink pad!!  Gah!  A big blue blob had seeped through to the front!  Hence, the birds.  As it turns out, I love having the birds holding the clotheslines!  Happy accident!

To finish it all off, I used a white gel pen to add doodles to the clothes and highlights on the sentiments.


I hope you've enjoyed my card today and that I've shown you that most times, those oopsies can be fixed!!  Thank you for stopping by today.  I hope you have lots of crafty time this week and that you and yours are well and healthy!


Copic markers:
B00, B000, BG01, BG02, C3, C1, C00, E31, E34,
RV00, RV02, RV10, RV13, RV52, RV63,
Y13, Y15, Y18, Y19, YG11, YG13, YG17

Supplies:
Art Impressions:  Baby Boy Set, Baby Girl Set,
Woodland Tree Cubbies (for the birds)
Distress Inks:  Tumbled Glass, Spun Sugar

Monday, February 10, 2020

You're Paw-some! | Art Impressions

Happy Monday friends!  I have one last card (well for a while-LOL!) using the Art Impressions' Lovable Animals set.  This cute little fox is perfect for a birthday card, or switch up the colors, and it would be just right for Valentine's Day!


I stamped the fox and other images in Copic safe ink with my MISTI and colored them with the Copic markers listed below.  I started with an A2 top-folding card base and added blue, black, and patterned paper layers with liquid adhesive.  I cut two thin strips of the blue card stock and adhered them on each side of the black striped paper.  


Then I used the included dies to cut out the images.  I love how the die cuts the slits for the fox to hold a treat, a cupcake in this case.  I popped up the fox and second cupcake with foam squares.


Stamp the sentiment with black ink and die cut it with a Flag Double Stitched die.  I then die cut the end again to shorten the overall length.  Matt this on a blue layer then pop it up with foam squares.  For a bit of sparkle and shine I added some clear sparkle with a glitter pen to the cupcake icing and Diamond Glaze to the cupcake sprinkles.


Thank you so much for stopping by!  I hope you've enjoyed seeing these cards using each cute animal from the Lovable Animals set.  Thanks for stopping by and I hope you have a fun, crafty week!


Copic markers:
BG15, BG13, BG11, BG10, C3, C1, C00,
E99, E97, E95, E53, E51, E50, E33, E27,
RV23, RV21, RV10, R00, Y19, Y04

Supplies:

Monday, January 27, 2020

New Lovable Animals | Art Impressions

Hello friends!  Today I have two cards using the new Lovable Animals set.  This is an absolutely adorable set that has four cute critters, several accessories for them to hold, and sentiments for each critter.  It even comes with all the dies you need to cut them out.  The dies for the animals cut around their paws/feet so they can hold whatever you'd like to tuck in!  I love how this set has a large heart die to use in various ways.


This first card features the oh, so cute elephant.  Both critters and the accessories are stamped in Copic safe ink and colored with the markers I've listed below.  I used the Rectangle A2 Double Stitched dies to cut a white rectangle, and a red one.  These were layered onto a top-folding A2 card base.  I die cut the heart from the same red card stock and added some white stitching and sparkle with a clear Wink of Stella.  I layered the heart onto a black striped strip and cut off the over hanging part.  The elephant is popped up with foam squares on top of the heart.


I stamped the sentiment in Versafine Onyx Black ink and die cut it with a Tag Stitched die.  I cut a larger red tag to go behind it and tie them together with red gingham ribbon from my stash.  I used foam squares to pop it up.


This next card has the cute kitty with the sentiment made just for him!


After I colored the cat and die cut it out, I worked on the background.  I die cut pink card stock with a Rectangle A2 Double Stitched die and inked on clouds with a cloud stencil and white pigment ink.  This layer adhered to a white rectangle, and this is on a top-folding red A2 card base.  I popped the cat up with foam squares.


The heart he is holding was die cut with an included die.  I added white stitching, clear sparkle, and Glossy Accents.  Once it was dry I tucked it into his paws.

The sentiment was die cut with a Rounded Rectangle A2 Double Stitched die and also popped up.


I love the size of the critters in this set.  They are easy to color and so fun for your Valentine cards.  Be sure to check back next Monday as I will have two more cards using the other two critters in the set.  Have a wonderful, crafty week!

Copic markers:
Elephant card:  C5, C3, C1, RV25, RV25, RV14, RV13,  RV25, RV14, RV13, C3, C1, C00
Cat:  YR24, YR31, YR20, R32, R21, R20, R00, W3, W1, W00

Supplies:
Elephant card:

Cat card:

Monday, June 10, 2019

AECP, Color Your Day

Hello friends!  I've completed another class in the Altenew Academy towards my Level 2 certification!  The class is Color Your Day and the lessons discuss how to add color to your projects in various ways.  Ideas such as using photos for inspiration, your color wheel, and different mediums were just a few of the great ideas.


I decided to challenge myself and work on my no-line coloring.  I pulled out a not yet used set called Frilled Petals.  I stamped the lined flower onto masking paper twice and fussy cut them out.  Then, using my MISTI, I stamped the first flower with some very light ink.  I placed the mask onto it and stamped the bottom left flower.  I added a mask to it and stamped the third flower.  To stamp the leaves I left the masks in place and stamped a couple leaves and moved one of the masks for the next one.

So, this is where I have to say that twice I almost abandoned and trashed this after I colored the purple flower.  I had colored maybe five or six petals and thought it looked awful!  So I pushed the project aside and did something else.  I came back to it the next day thinking, "well if I'm just going to toss it, I may as well just practice."  Funny thing is is that the more I worked on it, the more I liked it.  I also remembered I could use my colored pencils to add in shading in the darkest areas.  That just makes all the difference!  I have those listed below too.


When I was finished coloring the flowers and leaves, I knew I wanted to add just a bit of a shadow around them to give the look of dimension.  After all that work, I was a bit nervous.  So what I did was swatch out the Copics I used onto some scratch paper and try out a few different shades until I was brave enough to proceed!  Haha!

For the sentiment I used the Birthday Builder set and stamped it with black ink.  I cut a flag at one end and layered it with the same purple paper I used for my colored panel.  I added a few Nuvo Glitter Drops in Lilac Crystal for a bit of sparkle.


I'm happy with how this turned out.  While I know I have plenty of room to improve my no-line coloring, I did learn and won't be quite so hesitant to try again!  Thank you so much for stopping by!


Copic markers:
V01, V12, V15, V17
Y11, Y13, Y15, Y19
YG03, YG17, YG25, YG67

Prismacolor Pencils:
Goldenrod, Dioxazine Purple Hue, Olive Green, Dark, Green

Supplies: