Showing posts with label Bitty Buzzwords stamps & dies. Show all posts

Wednesday, December 29, 2021

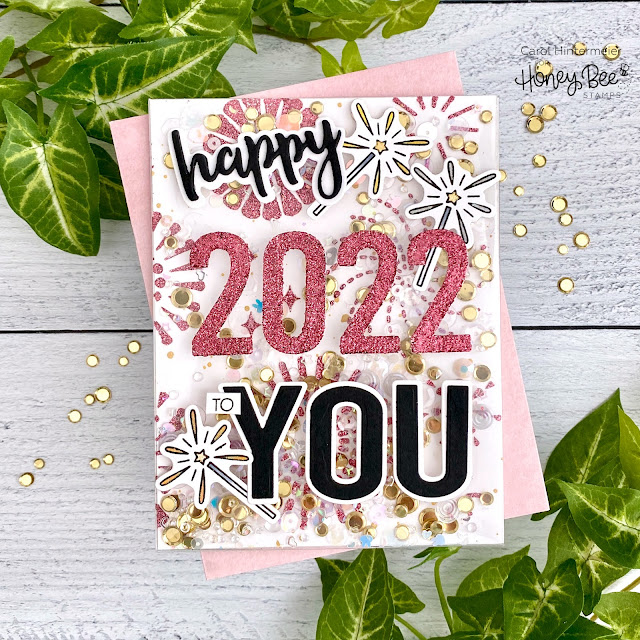
Happy 2022 To You Shaker Card | Honey Bee Stamps

It's almost the new year, so I thought I'd make what is probably my last card for the year a fun and sparkly one!  I've created an edge-to-edge shaker card using several different Honey Bee Stamps products.  The background features the fun Layering Fireworks stencils with some Glitz Glitter gel!


First I created the background layer that will be inside the shaker.  I spread some Bubblegum Glitz Glitter Gel through one of the Layering Fireworks stencils and set it aside to dry.  Be sure to wash up the stencil and your tools immediately!

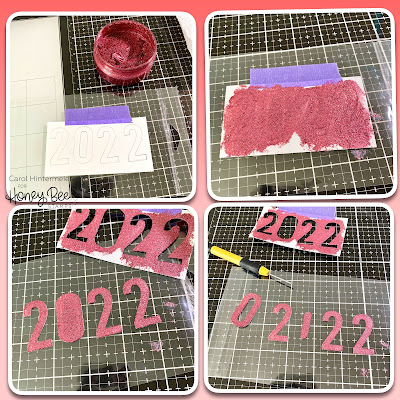
I wanted the numbers to have the same pink glitter gel, but didn't want a huge mess.  First I die cut the Bee Bold Numeric dies from 80# Neenah--be sure to save the negative portion.  I added some temporary adhesive to the back of the numbers and stuck them back into the negative piece on an acetate package I retrieved from my trash.  Then I taped the piece to the acetate with some purple tape.  Next I spread the glitter gel over it all and removed the negative piece when I had the gel smoothed out.  TAH-DAH!  Nice, neat and clean numbers!!  I used my craft pick to pick them up and move them to my silicone mat for drying.  Check out these photos for a visual!  (You can click the photo to enlarge it.)

Next I die cut "happy" from the Bitty Buzzwords dies and "you" from the You Die set from white card stock for the shadows and black card stock for the top layers.  I adhered the layers together with Bee Creative glue.

I stamped the sparkler from the New Year Cheers set with Intense Black ink.  I colored the wand with a few gray Copics and the sparklers with silver and gold metallic pens.   I used the coordinating dies to cut them out. The tiny "to" sentiment is from the You Buzzword stamp set and I just taped off the "you" that's a part of the stamp, inked it up, removed the tape and stamped with Intense Black ink.

Now it's time to assemble the shaker!  It is so very easy with the Shaker Creator Shaker Pockets!  Before I added my stenciled panel to the shaker, I spattered on some gold metallic paint and dried it with my heat tool.  I did find that my background panel fit the shaker pocket better if I trimmed a sliver off of the top and one side.  I placed it face down in the pocket and removed all but the top adhesive liners and folded the tabs over to adhere.  Then I added some of Honey Bee's Charming Sequin Mix and Gold Lights Confetti Mix to the pocket and then adhered the top tab.  I added some very strong double-sided adhesive to the back of the shaker and added it to an A2 card base.
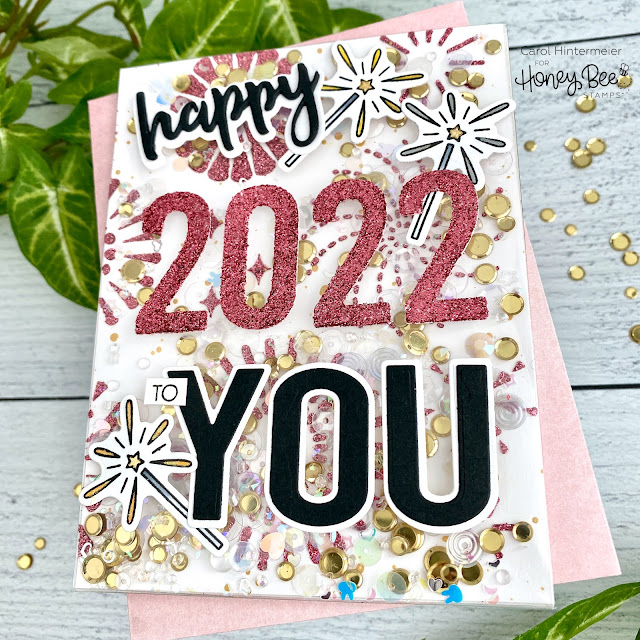
I used Bee Creative glue to adhere the sentiments and sparklers to the front of the pocket.  I used my t-ruler to get them all straight.  I love all of the sparkles!!!

I sure hope you've enjoyed my easy shaker card today!  I'm wishing you all the best with lots of crafty and happy times in 2022!  Thank you for stopping by!
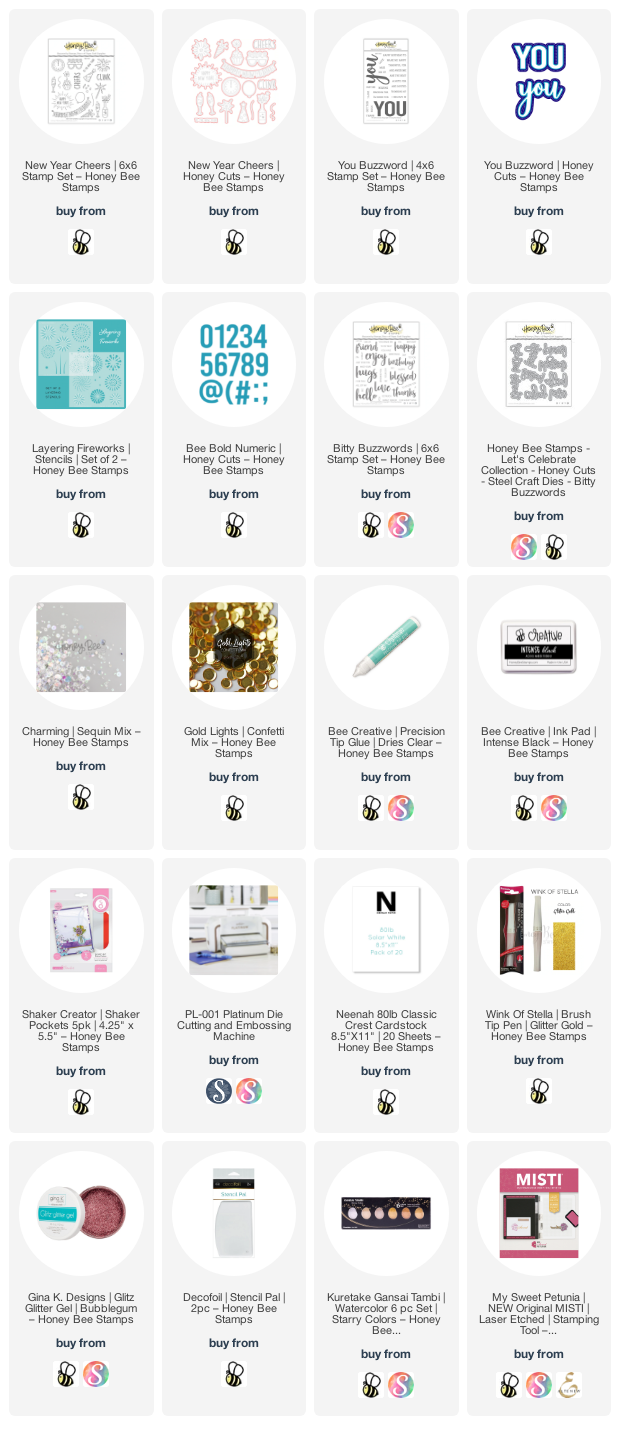
Thank you so much, should you use my affiliate links!

Wednesday, July 28, 2021

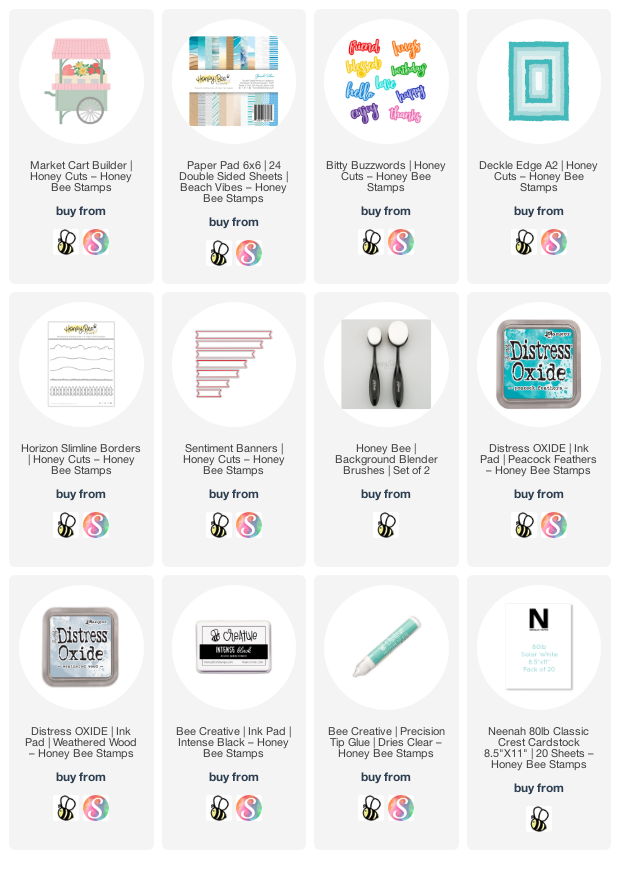
The Market Cart is on the Beach | Honey Bee Stamps

 Hello crafty friends!  Today I have a fun card using Honey Bee Stamps Market Cart Builder Honey Cuts! I've moved the market cart from the flower market to the beach to sell some sea shells!  Anyone thinking of the old tongue twister "she sells seashells by the seashore..."?  Good!  Now it'll be stuck in your brain like it has been mine--LOL!

For the card's background I chose a pretty pattern paper from the Beach Vibes 6x6 paper pad and die cut it with the largest Deckle Edge A2 Honey Cut.  I had a scrap of paper left (it looks like sand) and I die cut it at the bottom of the Deckle Edge die.  Then I used a hill die from the Horizon Slimline Borders die set to cut the top.  I glued the layers together with Bee Creative glue and then glue them to a top-folding A2 card base.

Next I used more of the beautiful Beach Vibes paper to die cut the Market Cart.  I just placed the die at the top edge of the paper so that I would not have the awning it normally cuts.  Then I used a background blender brush to add a bit of Peacock Feathers Distress Oxide ink around the edges.

Then I die cut the wheel and tire from some Distress Woodgrain card stock and added Peacock Feathers and Weathered Wood Distress Oxide inks to them with a blending brush.  I adhered them together with glue and added them to the cart.

I die cut the bottom awning from the Market Cart die set from white card stock.  Next I chose some images from the awesome Hello Summer stamp set and inked them up with Bee Creative Intense Black ink (the umbrella, grass, and shells.)  Then I colored them all with my Copic markers.  I die cut the Hello Summer images with the coordinating Honey Cuts.

To finish up the cart, I adhered all the pieces together with Bee Creative glue, added foam tape to the back and adhered it to the card.  I also popped up the grass pieces with foam tape for more dimension.

Then I used the same BG Copic markers that I used on the umbrella and colored a scrap of white card stock in an ombré pattern.  I used the hello from Bitty Buzzwords Honey Cuts and die cut the top layer of the sentiment.  For some extra dimension I die cut the top layer twice more and the shadow layer once from white card stock.  I adhered all of the layers together with Bee Creative glue.  I stamped the rest of the sentiment in some coordinating teal ink, die cut it with a Sentiment Banners Honey Cut and added foam tape to the back of both sentiments.

Of course, I had to add a bit of sparkle!  I used a clear glitter pen to add that pretty sparkle and shine to the "hello" and also all of the seashells.  I sure wish photos would capture how pretty it is!

I love this Market Cart set so much!  I can see it filled with pumpkins in the fall--what ideas do you have? Thanks, as always, so very much for stopping by!  Stay crafty!!


If you choose to use my affiliate links (at no extra cost to you), I thank you so much!

Wednesday, July 21, 2021

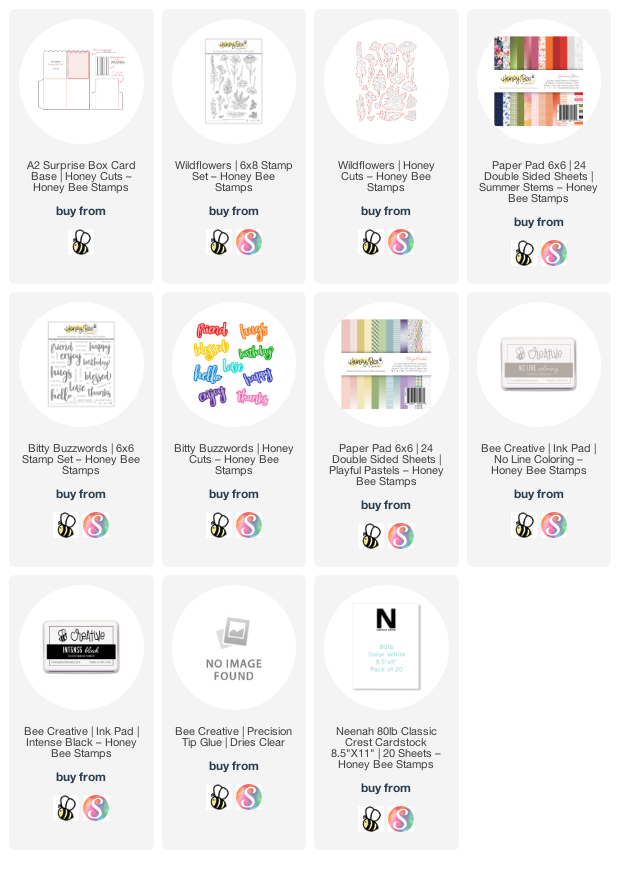
Wildflower Surprise Box Birthday Card | Honey Bee Stamps

 Hello friends!  Today I'm sharing a fun Surprise Box card featuring Honey Bee Stamps A2 Surprise Box Card Base with the Wildflower Stamp set and coordinating Honey Cuts.  It's been quite a while since I've created a surprise box card, and this was so fun to make, I don't know why I've waited so long!

First I created my box by die cutting the A2 Surprise Box Card Base from some light gray card stock.  Then I used the included scalloped layering dies to cut some white card stock and green gingham patterned paper (from the Summer Stems paper pad).  I adhered these layers to the box flap with Bee Creative glue.  Next I cut the pretty purple floral paper and purple layer from paper in the Playful Pastels paper pad.  I cut the purple paper into four rectangles measuring 1-7/8" x 2-5/8".  I also cut the floral paper into four rectangles measuring 1-5/8" x 2-3/8".  I adhered these to the outside of the box.  See the photo below that shows the card in my 5" x 7" envelope.

Next I used the die for the box inserts and cut it three times from white card stock.  I folded the ends along the scored line and glue them to the inside of the box.  I set it aside to dry while I worked on the flowers and sentiment.

I stamped the flowers from the Wildflower stamp set with Bee Creative No Line Coloring ink.  I stamped the butterfly with Bee Creative Intense Black ink as I didn't know how I would show the details in no-line ink.  I colored the images with my Copic markers.  Here are the Copics I used:  purples: V05, V04, V12, V01; yellows:  Y35, Y13, Y00; greens: YG17, YG25, YG23, YG03, YG01.  Then I die cut the images with the coordinating Honey Cuts.

Next I used Bee Creative glue to adhere the flowers and greenery to the box inserts.  For the butterfly and sentiment, I cut three strips of heavy acetate from some packaging I'd saved.  Then I used double-sided tape to adhere the butterfly to the acetate strips and also to adhere the strip to the box insert.

I used the Bitty Buzzwords stamp set and coordinating Honey Cuts for the sentiment.  I die cut "birthday" twice from white card stock and once from the same purple paper in the Playful Pastels paper pad.  I glue the layers together with Bee Creative glue.  I die cut the shadow from white card stock and adhered the top layer.  Next I stamped "happy" with some coordinating purple ink and trimmed it to a rectangle.  I adhered it to the shadow layer with glue.  Then I added double-sided tape to the acetate strips, adhered it to the sentiment and to the back off the inside of the box.

If you don't go crazy (like I did--LOL!) with your decorative pieces, the box is made to fit in an A2 sized envelope.  This is such an adorable Surprise Box die set that you can use for any occasion you need!  I hope you've found some inspiration here today!  Thanks so very much for stopping by!


Here are my affiliate links to the products I've used today:

Wednesday, May 26, 2021

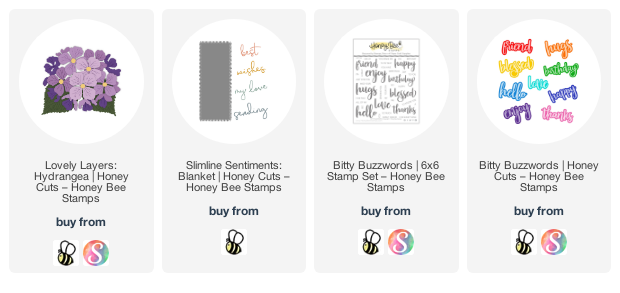
Slimline Birthday Card with Hydrangeas | Honey Bee Stamps

 Happy Wednesday friends!  Today I'm sharing a slimline birthday card I made using Honey Bee Stamps gorgeous Lovely Layers: Hydrangea die set.  I love these layering dies and this made for a fairly quick card!  Read on for the details.

First I created my card base by scoring a piece of 8" x 9" 80# Neenah at 4".  After I folded it, I added a coordinating layer of purple card stock.  Then I die cut 80# Neenah with the Slimline Sentiments: Blanket die and adhered it to the purple layer.  All of the layers are adhered with the fantastic Bee Creative glue. (All products are linked below.)

Next I die cut all of the pieces of the Lovely Layers: Hydrangea from 80# Neenah.  I die cut five leaves.  Then I colored all of the pieces with my Copic markers.  For the flowers I used: BV17, BV04, BV13, BV02, BV31, G14, YG41, and YG11.  I colored the leaves with G28, YG17, YG25, and YG03.

I adhered the layers of the hydrangea together with thin foam squares.  OK, I'll admit to being pretty nervous for this next step, LOL!  I took my Tim Holtz scissors and cut the flower down a line I drew with my pencil.  These scissors were able to easily cut through the layers and the foam squares too!

I adhered the leaves and the flowers with Bee Creative glue.  Then I used a sentiment from the Bitty Buzzwords stamps and Honey Cuts, stamped them in black ink, and used the coordinating die to cut out "birthday".  The Bitty Buzzwords is such a fabulous set and one I will always keep!  I added thin foam strips to the back to the sentiments and adhered them to the card.

Thank you so very much for stopping by!  Have a wonderful, and crafty, rest of your week!


Links to the products I used:

Wednesday, May 19, 2021

Garden Apron Birthday Card | Honey Bee Stamps

 Happy Wednesday friends!  When Honey Bee released the awesome Apron A2 Card and the Apron: Garden Tools Add-on Honey Cuts, I couldn't wait to create with these!

I love all of the little gardening tools and the scalloped apron pocket that comes with the Apron Garden Tools Add-on!

First I created a white apron card base with the dies from the Apron A2 Card die set.  Next I die cut the pocket and two apron ties from gingham paper in the Sweet On You 6x6 paper pad.  Then I added the tie to the top of the apron and adhered the floral apron die cut to the card front.  The floral paper is from the Spring Fling 6x6 paper pad.  I adhered the second tie to the back of the card, making sure it lined up with the one on the card front.

Then I used the largest Scallop A2 Card Frames Honey Cut and die cut a few strips of the scallop edges.  I adhered them to the apron top and bottom with liquid glue.  To hide all of the pieces that were showing on the back of the card, I adhered another white apron die cut to cover it and give a clean look.

Next I stamped the sentiments on the inside in black ink.  I love all of the various sentiments found in the Inside: Birthday sentiments set!

Now it's time to add the adorable elements to the card front!  I die cut the gardening tools from some mat silver card stock.  Then I die cut them once more with coral and green card stock from my stash.  I trimmed off the handles and adhered them to the silver tools.  Next I adhered the apron pocket pieces together and glued it to the card front.  I only added glue around the curved edge so I could tuck the tools into the pocket.

I even created little paper flower buttons for the apron!  I die cut three flowers for each button and adhered the layers together.  Then I pulled out a needle and embroidery thread and added a French knot to each button.  

Next I used the Bitty Buzzwords stamp set and coordinating Honey Cuts and die cut "enjoy" three times from white card stock.  I adhered the layers together with glue and added them to the shadow.  I stamped "your day" with Mowed Lawn Distress Oxide to coordinate with the rest of the card.

I had a few extra pieces and added those to the inside of the card for that special touch!

I think the handwritten plant tags add a personal touch!

I hope you've enjoyed my card and have found some inspiration today!  Thanks so very much for stopping by!

Wednesday, May 5, 2021

Hydrangea Birthday Card & Treat Box | Honey Bee Stamps

Happy Wednesday crafty friends!  Today I'm sharing a card I made with some NEW products from Honey Bee Stamps newest release called Let's Celebrate!  I'm using the gorgeous Lovely Layers: Hydrangea Honey Cuts!  I have lots of photos for you and hope it helps you to see how I created this gorgeous set!

To begin I created some inky watercolor background pieces.  I used watercolors in my stash in shades of a pinky red, purple and lavender on two pieces of watercolor card stock.  On a third piece, I watercolored in two shades of green.  I set these aside to dry.

Then I used the same pinky red watercolor and added droplets to my card front.  While that was drying, I cut a strip of black striped paper from the new Funfetti Birthday 6x6 paper pad and added it to a black layer.  Then I adhered that to my card front.

Next I die cut the same black striped paper with the Hexagon Box Cover die.  I centered and taped the window dies in place before die cutting the paper.  Next I trimmed the tabs so they wouldn't show in the windows and adhered them together.  You can add acetate to the windows, but Honey Bee now carries these heavy weight acetate boxes that coordinate perfectly with the die cuts!  I assembled the acetate box and slipped my decorative cover over it.  To hold it in place I added dots of glue along the top inside edge of the paper.

Now it's time to have fun creating the hydrangeas!  There are four layers for the hydrangea and I die cut the pink watercolor background with these.  I also die cut the three extra single flowers from the pink paper.  I die cut several leaves and the flower centers from the green watercolor background.

After you have the layers die cut, if you look at the center of each layer, you will see a shape that all of them have in common to help you in your layering.  Check out this next photo to see what I mean.

I added foam squares between each layer to give it lots of beautiful dimension!  I adhered the hydrangea and the leaves to my card front with Bee Creative glue.  I glued the little flower centers on and added a drop of Nuvo Sunlit Meadows Glitter Drops.

Next I created the little floral topper for my treat box.  I used the single flowers and snipped a few apart. For the base I die cut the lid from the Hexagon Box Cover die set from white card stock and cut the tabs off.  Then I intertwined a few of the petals and gluedthem together.  I adhered these to a 1" circle of white card stock and added a foam circle to the back.  Then I adhere it to the hexagon.  I arranged the remaining flowers, snipping some apart, and gluing them around the top piece until I was happy with the look.  Here's a look at my pieces and the top flower cluster.

I adhered the flower piece to the treat box with Bee Creative glue.

I used the new Bitty Buzzwords stamp set and coordinating Honey Cuts for my sentiment.  These are the same buzzwords that Honey Bee has but in a smaller size!!  I love these!!

I absolutely love the dimension you can achieve with this Lovely Layers: Hydrangea!


I hope you've enjoyed the process of making this beautiful dimension card!  Be sure to check out the full Let's Celebrate release!  Thank you so much for stopping by!