Wednesday, December 29, 2021

Happy 2022 To You Shaker Card | Honey Bee Stamps

It's almost the new year, so I thought I'd make what is probably my last card for the year a fun and sparkly one!  I've created an edge-to-edge shaker card using several different Honey Bee Stamps products.  The background features the fun Layering Fireworks stencils with some Glitz Glitter gel!


First I created the background layer that will be inside the shaker.  I spread some Bubblegum Glitz Glitter Gel through one of the Layering Fireworks stencils and set it aside to dry.  Be sure to wash up the stencil and your tools immediately!

I wanted the numbers to have the same pink glitter gel, but didn't want a huge mess.  First I die cut the Bee Bold Numeric dies from 80# Neenah--be sure to save the negative portion.  I added some temporary adhesive to the back of the numbers and stuck them back into the negative piece on an acetate package I retrieved from my trash.  Then I taped the piece to the acetate with some purple tape.  Next I spread the glitter gel over it all and removed the negative piece when I had the gel smoothed out.  TAH-DAH!  Nice, neat and clean numbers!!  I used my craft pick to pick them up and move them to my silicone mat for drying.  Check out these photos for a visual!  (You can click the photo to enlarge it.)

Next I die cut "happy" from the Bitty Buzzwords dies and "you" from the You Die set from white card stock for the shadows and black card stock for the top layers.  I adhered the layers together with Bee Creative glue.

I stamped the sparkler from the New Year Cheers set with Intense Black ink.  I colored the wand with a few gray Copics and the sparklers with silver and gold metallic pens.   I used the coordinating dies to cut them out. The tiny "to" sentiment is from the You Buzzword stamp set and I just taped off the "you" that's a part of the stamp, inked it up, removed the tape and stamped with Intense Black ink.

Now it's time to assemble the shaker!  It is so very easy with the Shaker Creator Shaker Pockets!  Before I added my stenciled panel to the shaker, I spattered on some gold metallic paint and dried it with my heat tool.  I did find that my background panel fit the shaker pocket better if I trimmed a sliver off of the top and one side.  I placed it face down in the pocket and removed all but the top adhesive liners and folded the tabs over to adhere.  Then I added some of Honey Bee's Charming Sequin Mix and Gold Lights Confetti Mix to the pocket and then adhered the top tab.  I added some very strong double-sided adhesive to the back of the shaker and added it to an A2 card base.

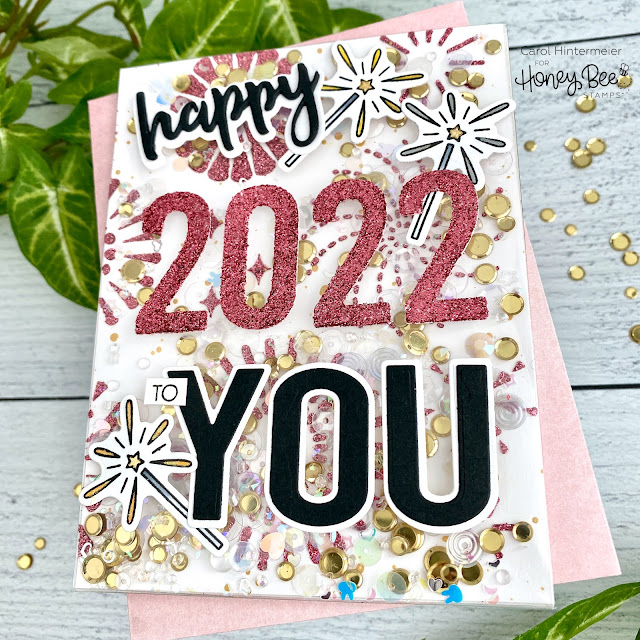
I used Bee Creative glue to adhere the sentiments and sparklers to the front of the pocket.  I used my t-ruler to get them all straight.  I love all of the sparkles!!!

I sure hope you've enjoyed my easy shaker card today!  I'm wishing you all the best with lots of crafty and happy times in 2022!  Thank you for stopping by!

Thank you so much, should you use my affiliate links!

1 comment:

  1. Wonderful shaker card -- fun & festive! Love the colors too

    ReplyDelete

Thank you so much for using my product links to shop. Some of the product links I've provided may have what is called an "affiliate" link. By using my links to purchase products, I may earn a bit of a commission, at absolutely no additional cost for you. Thank you for supporting my blog.