
Hello friends! Today my card is featuring one of the beautiful new Rubbernecker Stamps floral stamp sets! This one is called Fresh Breeze, and it is a gorgeous set with solid stamp images and additional layering stamps that add so much dimension!

First created the background piece:
- I "conditioned" the Fresh Breeze stamps by rubbing a white eraser over them until the shine was gone. This really helps to minimize any beading up of the ink!
- Stamp the base layer using two of the flower stamps from the Fresh Breeze set and the stems randomly over the A2 sized white card stock. I used the lightest shade of ink from the Color Fuse ink Set #s 5, 6, and 9. I stamped all of the stems with Clover ink from set #10. I have these and all products linked at the end of my post.
- Here's a peek at it all in progress:

- I used an acrylic stamp block for this to make it quick and easy. I was sure to let some of the flowers hang off of the card stock edge to create more of a natural background look.
- I adhered the piece to a top-folding card base.
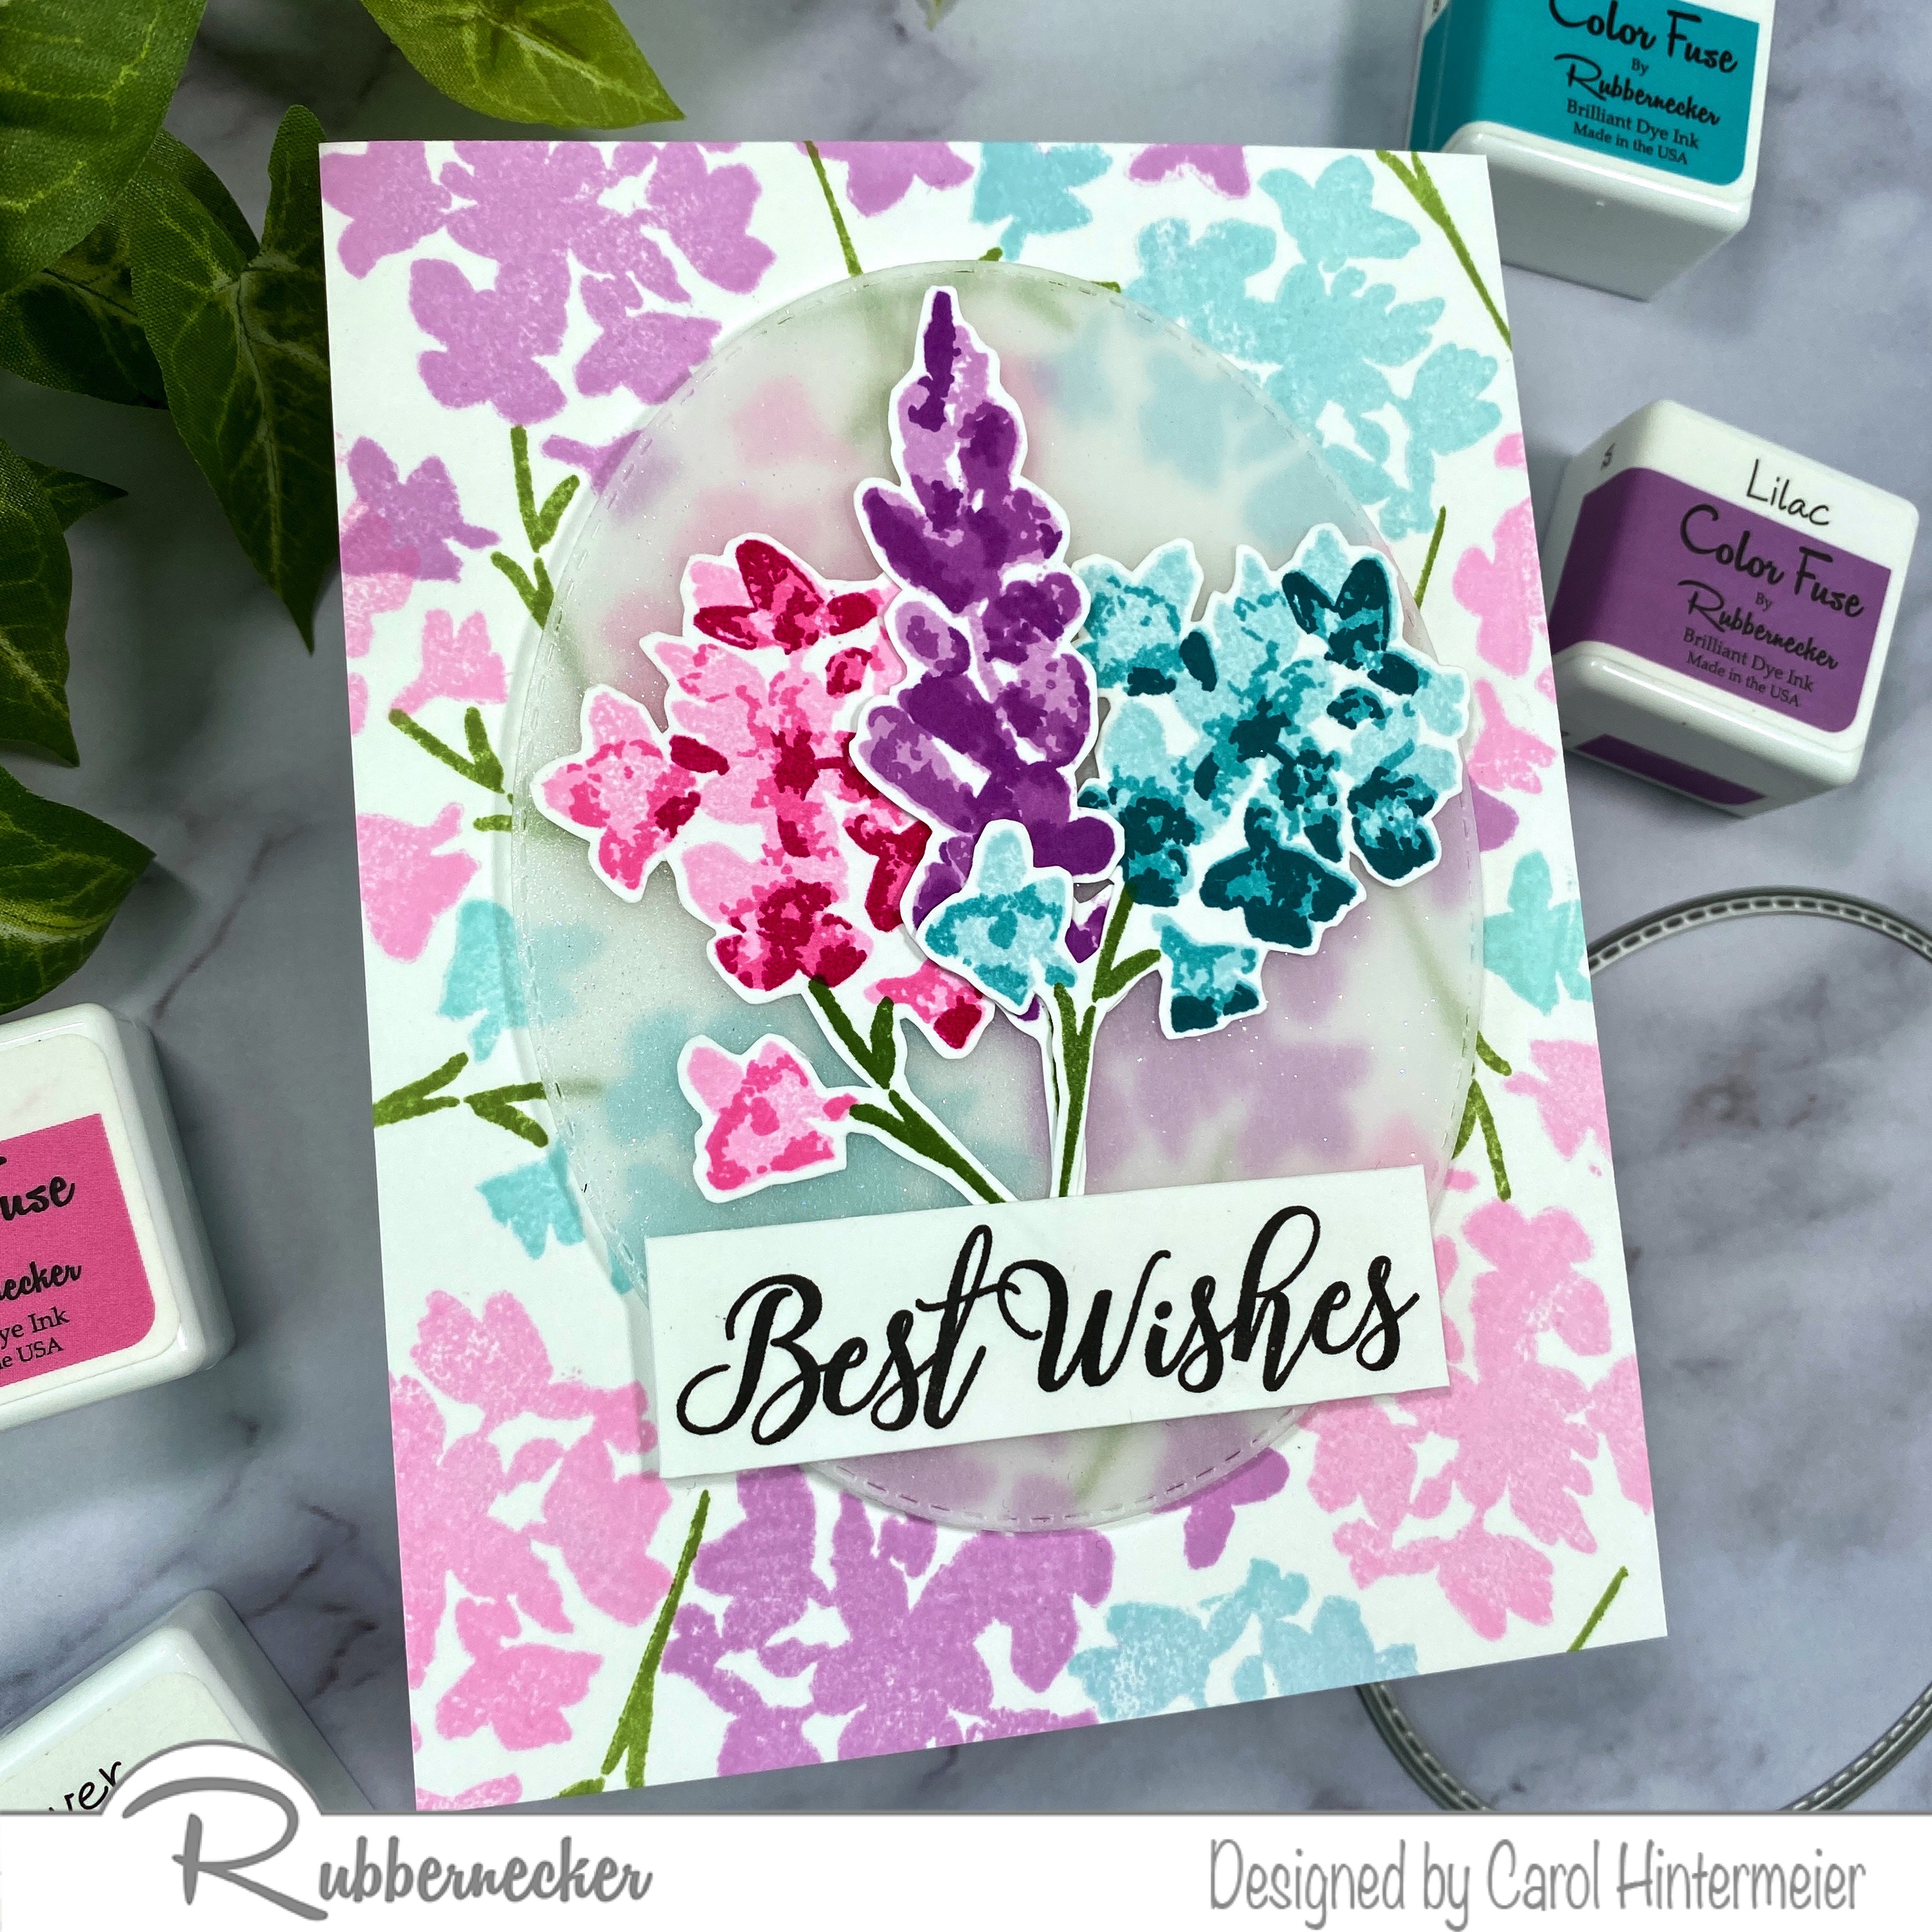
- Next I stamped all of the layers for each of the two flowers creating three flowers and stems. I switched to my MISTI for stamping the layers in case I decided to stamp the layer more than once. I used the same Color Fuse sets as above, but for the three layers, I used shades 1, 2, and 4. (Don't you love how the ink cubes are labeled 1 through 4?!! I used Basil from ink set #10 for the stems. Then I fussy cut them out.
- I had a piece of sparkly vellum leftover from another project. It was a piece that I had sprayed with Therm O Web Iridescent Glitter Dust. It creates such a pretty, yet subtle sparkle! I die cut the vellum with the next to largest Nested Oval Small Stitch die.
- Next I adhered the flowers to the vellum oval with liquid glue.
- Then I stamped the sentiment from the Fresh Breeze stamp set in black ink. I trimmed it to a rectangle shape and adhered it to the oval.
- I added foam tape to the back of the oval, but only behind the flowers and sentiment. Don't want that to show through! I adhered the piece to the card.

I love how this turned out! It was really fun creating the background too! Thank you so much for stopping by! Have a wonderful, crafty week!
Wow this is !, Carol -- love the wonderful colors you've chosen
ReplyDeleteP.S. Not sure what happened with that comment, but it shoulda said "wow this is gorgeous"
ReplyDelete