Showing posts with label Altenew Academy. Show all posts

Saturday, August 3, 2019

AECP, Polychromatic Class

Hi!  I've finished another Altenew Academy class for my AECP (Altenew Educator Certification Program) Level 2 requirements.  Well, I have had this absolutely beautiful Build-A-Flower: Hibiscus set since April 2018 and have never used it!!!!  Shame on me!  LOL!


The Altenew Academy Polychromatic class is about different ways to use color.  There are six lessons full of great ideas.  My card today uses the idea of having your colored images really pop by having a bright white background.  I feel confident I've achieved that!!  Another lesson is about using colors within, or close to, the same family and my hues of orange do that.

I used my MISTI to stamp all the images.  For the flower I stamped the solid base layer first in Altenew's Sunday ink.  I continued with the subsequent layers in Chamomile, Snapdragon, Marigold, Vineyard Berry, and Heartbeat for the last small layer.  Even though the Vineyard Berry and Heartbeat inks are in a different ink cube set, I was happy to find that they were fabulous with the yellow colors!  I always stamp extra, mainly because I'm bound to mess up one, and then I just call that one my "practice" flower to test layering and colors on.  The leaf has four layers and the green inks I wanted to use just have the three cubes: Limeade, Lime and Fresh Leaf.  So I just used the Fresh Leaf for the final dark layer and stamped it about four times.  You can see from the photo below that it really stands out right after I stamped, but once they are dry, it blends very well.


Once everything was stamped and die cut, I arranged them on the front of an A2 top-folding card base.  I wanted to plan out where to place the sentiment from the Birthday Builder set.


Once I had everything in place I used some Press-N-Seal to pick up my arrangement.  Then I stamped the sentiment with some Versafine Onyx Black ink.  I flipped the Press-N-Seal with the images over so I could put glue on all the leaves.  Then, flip it back over and press it in place.  I wait a minute before removed the Press-N-Seal with the flowers so the glue on the leaves will be dry.  I popped up the two large flowers with foam squares.  The buds have a couple thin foam squares at the top are glued down at the stem end.  


I added just a few clear droplets in order to add a bit of shine while keeping the white background.


I haven't used layering stamps in quite a while it seems, and I totally LOVE this Hibiscus! I sure won't wait as long to use this one again!   This class is full of inspiration for your stamps and I highly recommend it!  Thank you for stopping by!  Carol :)

(P.S.: I saw Cindy's  beautiful butterfly card over on a Flickr challenge and found out about a challenge called a2z Scrapbooking with the prompt of "birthday".  So I'm entering this card.)

Supplies:
Altenew Inks:

Monday, May 6, 2019

AECP, Beyond Basic Backgrounds

Hi friends!  I have two cards inspired by Altenew Academy's Beyond Basic Background class.  This is one of the required classes working toward my Level 2 certification.

I actually took this class when it originally was offered and completed three cards that are in the gallery and on my blog post HERE.  This go round, I went for a technique I couldn't do in Lesson #4 called Matt Watercolor Resist.  This technique uses a laminator and I now have a Minc Mini and really had a lot of fun with this.


I die cut a mask from freezer paper using the Cover Die A from Altenew's Layered Medallions A set.  By folding the letter size paper in half, you get two die cuts.  After placing the mask onto watercolor paper, I ran it through my Minc Mini on setting 5.  Here is a tip for you that I learned:  After you have painted over the masked panel, let it air dry!  I thought I'd speed up the drying process on the pink card and used my heat tool to dry the paint.  Well, that actually made it quite a struggle to remove the mask.  In the lesson, Lydia Evans shows us how she used her heat tool to warm up the freezer paper mask to remove it.  Even using the heat tool on the pink card, it was very hard to get off.  However, I let the blue panel air dry, and it was super easy to get off!

The sentiment is from the Floral Shadows stamp set.  I layered it and the die cuts onto vellum die cut from an oval die.


The panels for both cards were watercolored in the same manner using Altenew's Watercolor 36 Pan Set create the ombre wash over the background.  For the first card above I used just one color--Mountain Mist.  I put a puddle of the color on my glass mat and I added a drop or two of Ken Oliver Craft's Liquid Metals in Platinum.  I've had this product for a few months and hadn't used it.  I have to say that it added a beautiful shine to the paints.  Here are some process photos that I took when painting the pink panel.  Click on the photo if you'd like to see it larger.


I used one stamp from the Floral Shadows Stamp Set to watercolor the piece you see on the blue card above. I ended up not using this pink one, but both were done the same way.  Since I still had some paint mixed with the Liquid Metals on my mat, I used my brush to dab it onto the stamp.  I used my MISTI so I could stamp multiple times onto the watercolor paper.  Once I was satisfied and it was dry, I used the coordinating die to cut it out.


For this card I used Puffy Heart and Pink Diamond paints from the set.  I cut a diagonal strip in the panel and popped the pieces up with foam tape.  The sentiment is from the Birthday Builder stamp set.   I added some pink sequins and a drop of White Blizzard Nuvo Glitter Drops to the center of the sequin.


Monday, March 11, 2019

AECP, Beautiful Details

Hello!  I'm so excited to be starting the Altenew Academy classes to fulfill the requirements for  Level II in AECP.

My card today is for the Beautiful Details class.  The instructor, Marika Rahtu, is an amazing artist and shares many ways to add details to enhance stamped images.  The lesson my card is inspired by is one using colored pencils on a stamped image.


I used the Spring Daisy stamps and dies and stamped the outline in Hero Arts Soft Granite ink.  I used a softer ink for the outline to kind of get a no-line coloring look.  I then used the layer stamp and stamped it in SSS Steel Blue.  The leaves were stamped in SSS Willow.


I used Prismacolor Pencils for the added personal touch.  I added shading to the flower petals where the shadows would be and did the same for the stem and leaves.  I also added some Spectrum Noir Clear Sparkle to portions of the petals (it was hard to capture that in the photo). 

The sentiment is the Thanks die and I embossed it three times with WOW Metallic Silver embossing powder.  I definitely think this adds another beautiful detail to this card!


I really enjoyed this class and highly recommend it.  There are many techniques I still want to try!  Thank you very much for stopping by to take a look!

Carol :)

Supplies:
Hero Arts Soft Granite Ink
Simon Says Stamp Steel Blue ink
WOW Metallic silver embossing powder


Wednesday, February 20, 2019

Final Level 1 Challenge, AECP

I'm very happy to be sharing my project for my Level 1 final assignment for the Altenew Educator Certification Program.

My challenge was to create a gift set of at least six coordinated cards with a matching package to gift them in.  I also was to focus on three of the techniques from the ten classes in Level 1.  As you will see in my process, I'm focusing on techniques from Altenew Academy classes Let It Shine, Irresistible Inking Techniques and Easy Ink Blending Techniques.   The focus of my cards in this set is my most favorite thing of Altenew's, and that is their florals.


The techniques from the classes are as follows:
Easy Ink Blending Techniques - using emboss resist
Let It Shine - I used Rose Gold embossing powder for the shine
Clean & Simple Boutique Cards - dry embossing and creating gifts

To begin, I prepped several pieces of watercolor paper with an anti-static bag. (All supplies, with links, are listed below.)  I used my MISTI to stamp the flowers using Versamark clear ink.  I sprinkled on Altenew's Rose Gold embossing powder and melted it with my heat gun to set.  I like to use a coffee filter to catch the excess embossing powder as it makes it easy to pour it back into the bottle.  The embossed images will now resist any paint or ink that is applied to them.  The Easy Ink Blending class talks about using ink pads to color with.  Since my Altenew ink stash is very small, I used Altenew's beautiful Watercolor 36 Pan Set.  The colors in this set are just so vibrant and perfect for these flowers!


I began by taping my paper to my glass mat to help reduce warping.  I used some low-tack removable tape.  I didn't do that for the remain pieces as I didn't have too much warping.    As you can see from the photos (click to enlarge) I sometimes put some of the paint onto my mat with some water to reduce the intensity of the color.  It really is amazing how I just used a handful of paint colors to achieve the varying shades on each flower.  I used these colors for the flowers:  Coral Berry, Grapevine, Fresh Lemon, and Warm Sunshine.  By combining these colors in differing levels, you can get different looks. The leaves were painted with various combinations of: Forest Glades, Evergreen, and Bamboo.  Once all of the flowers and leaves were colored and thoroughly dry, I used the coordinating dies to cut them out.


Before assembling my cards, I needed to get the sentiments ready.  I wanted each sentiment strip to have a gold layer behind it so I smooshed my Versamark pad onto a piece of scrap 80# card stock and dumped the Rose Gold embossing powder all over it and heat set it--twice--gives it a more solid embossing!  Then I used my MISTI and arranged the sentiments so I could stamp them all at once.   I used my paper trimmer to cut them into strips and hand cut a few into banner shapes.  I cut the gold embossed paper to layer behind each one as you can see on the finished cards.


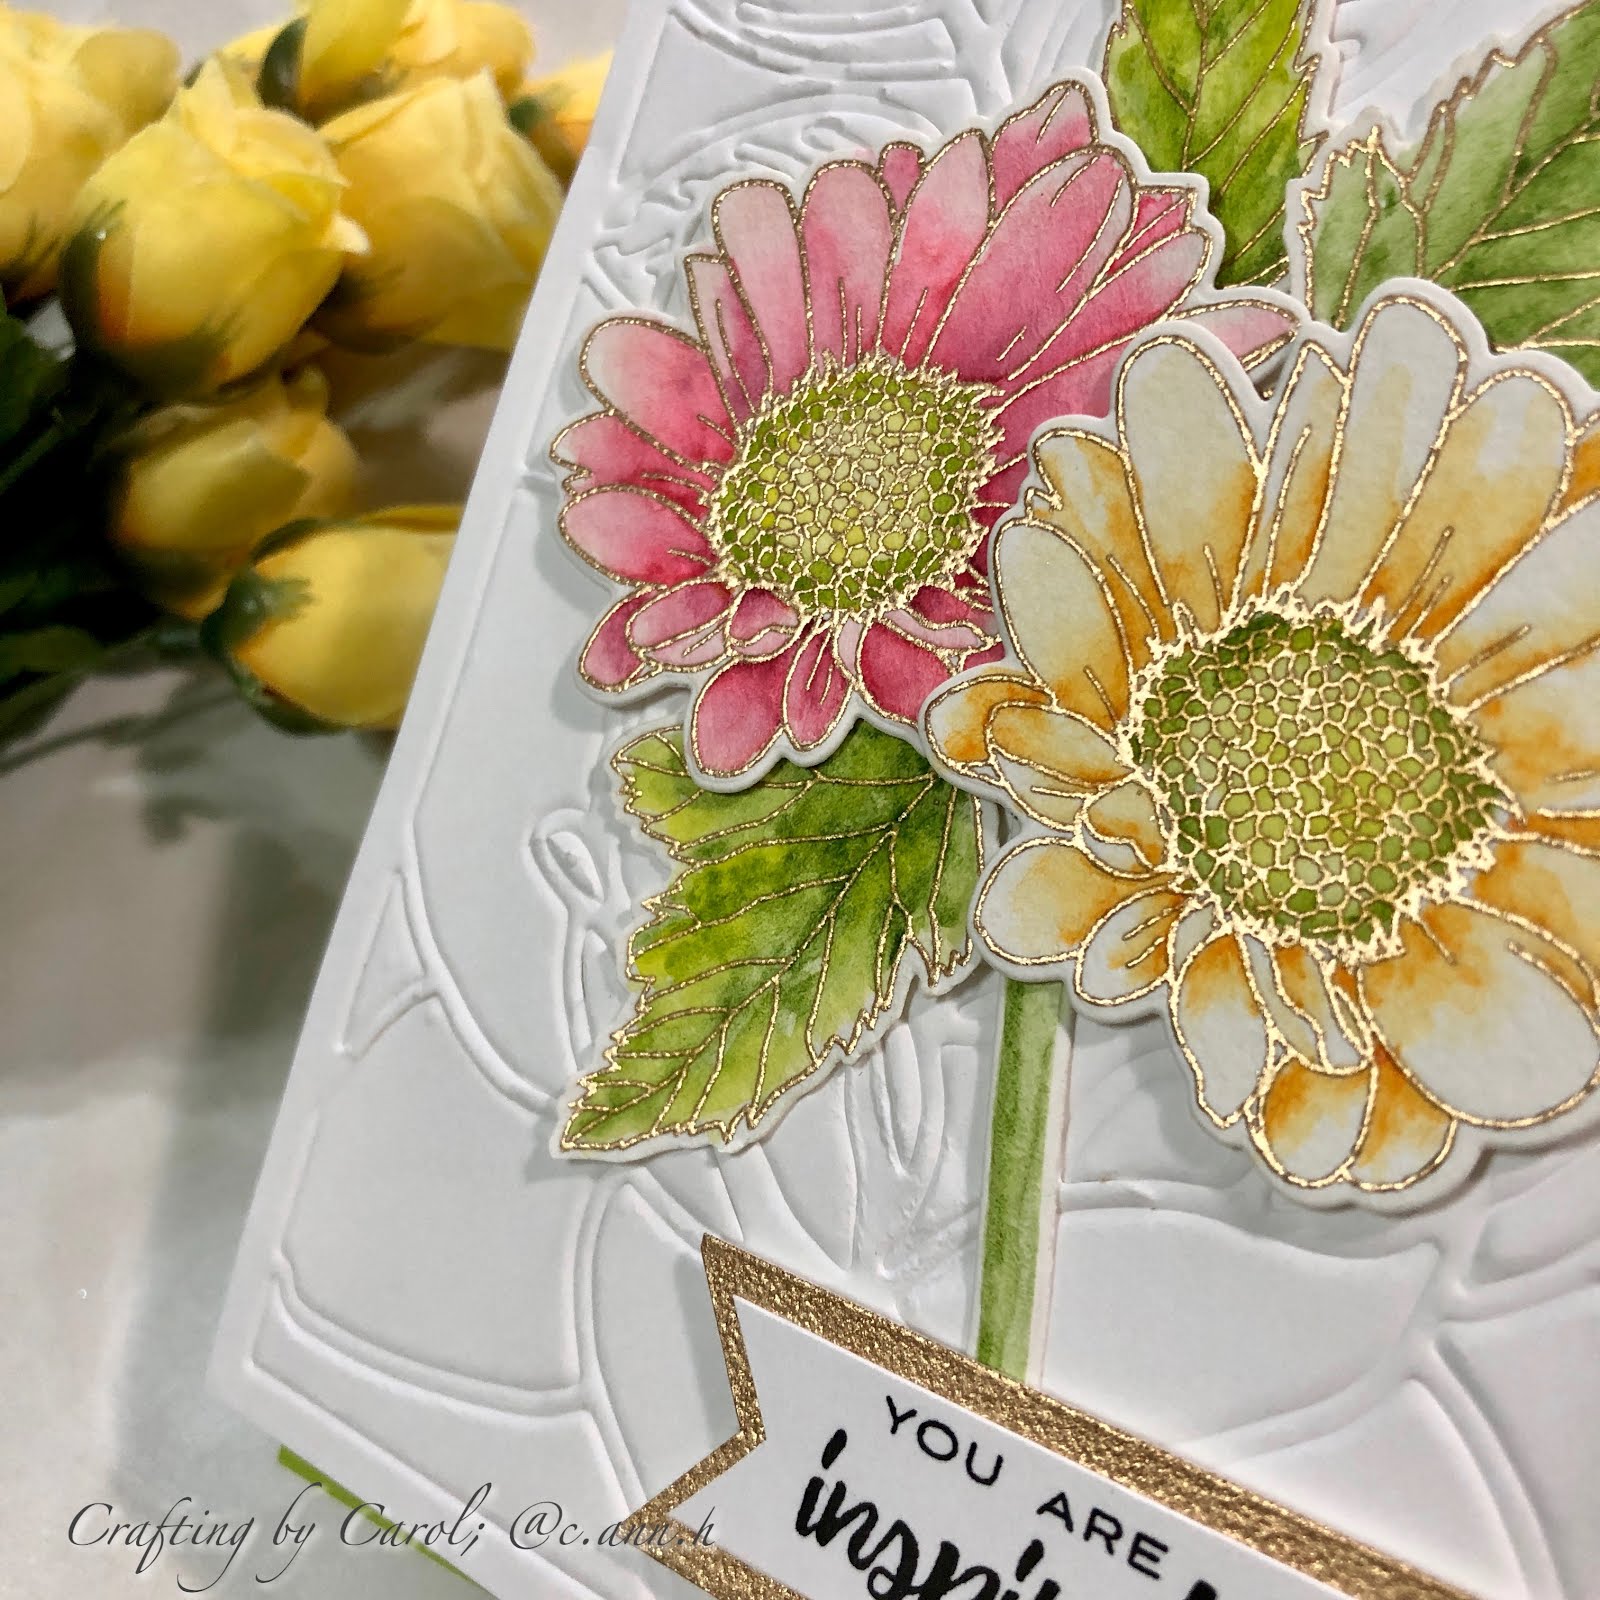
Next I decided to use the beautiful Layered Blossom Cover Die A to dry emboss a base layer for each card.  I used 80# Neenah Solar White paper.  You will need a rubber embossing mat to do this and follow your machines layering directions.  If you find that your paper cracks after embossing it, try spritzing both sides of the paper, VERY lightly, with a mist of water.  Then run it through your machine to dry emboss.  This helps to minimize any cracking that may happen.  To arrange the flowers and leaves for each card, a tip is to use Press N Seal after you have arranged your pieces the way you want.  Put the Press N Seal on top of your arrangement, flip it over, apply your adhesive to desired pieces, flip it back over and place it where you want to glue it.


Each card was assembled using a standard A2 top-fold card base with the dry embossed panel adhered onto it.  Most of the flowers are popped up with foam squares over the glued leaf clusters.  The sentiments are also popped up.  So here are all the photos of my cards.  I love how they turned out!!


This card is my bonus card that I made for our sweet and beautiful daughter.  Her birthday is today and we celebrated this past weekend, which is why it's not in the photo with the other cards.  She loved it!


And, finally, the gift box I made to present the set in.


The box was easy for me to make.  I did some searching in Pinterest and didn't find the size I wanted.  However, seeing how these were made I was able to create my own measurements for this box.  Before I glued the flaps of the yellow top, I centered a rectangle die (the die was slightly smaller than the Layered Blossom Cover Die A) on the top and cut it out.  Then I adhered the Cover Die A on the inside of the yellow top.  Because this post is already VERY long, and I wanted to easily find this myself, I created a page for my blog titled How To with the photos showing everything you need to make one of these yourself.  You can find that page by clicking "How To" at the top of my blog page or click HERE to go there now.


I stamped a sentiment from the Extra Special stamp set with Versamark and heat embossed it with Rose Gold embossing powder.  I then cut it out with a tag die, tied some ribbon on it, and adhered it with a glue dot.


And that all!  If you are reading this, I just have to say thank you so much!  I am very pleased with how this card set and box turned out.  If you have any questions, please leave a comment.  If you are a "no-reply" commenter, I won't be able to reply directly.  Otherwise, I'd love to hear what you think about my project!  I so appreciate all kind comments.

Carol :)

Supplies:

Wednesday, January 30, 2019

AECP, Seasonal Scene Building

I have a card here today for another class in the AECP.  This card is inspired by the lesson in Irresistible Inking Techniques where you create a background for your scene.  You can check out all the fabulous classes in Altenew Academy HERE.

I purchased Altenew's Kind Words set right after it came out.  I can't believe this is the first time I've used it.   It has the most beautiful sentiments along with some beautiful starry stamps.  I thought a starry night time background fit perfectly.


I inked the Distress Oxides onto Strathmore Bristol Smooth paper using the lightest color in the center and working out to the darkest.  I kept blending the inks with the foam blending tools until I was happy with the look.  I wanted to keep the background kind of uncluttered, so I placed the stamp where I wanted it, spritzed some water into my palm and used my fingers to scatter the droplets around.  By having the stamp in place, it kept that area free from the water drops that I felt might distract from the sentiment.


Once the card was thoroughly dry, I used my anti-static powder bag and swiped it all over the card to minimize the stray embossing powder bits.  Using my MISTI, I positioned the stamps and picked them up with the door.  Next I stamped with Versamark clear sticky embossing ink, added white embossing powder and heat set it.  I repeated these steps to add another layer of white embossing powder for dimension and a more solid coverage.  


The Fine Frames Cover Die is awesome!  This is the first time I've used this one too.  It cuts many frames in one pass, some thinner than others.  I used one of the wider frames to help me position the thin frame straight.  I adhered it with Collage Medium as it will dry with a matte finish and won't show if any seeps out.  I added foam tape to the back and adhered it to my top folding A2 card base.

As a finishing touch, I used a white gel pens to add tiny stars.


Thanks so much for stopping by and taking a look.  I really appreciate it!

Carol :)

Supplies:
Distress Oxide Inks:  Black Soot, Chipped Sapphire, Faded Jeans, Shaded Lilac
Simon Says Stamp Fine Detail White Embossing Powder
Ranger Distress Collage Medium - Matte

Saturday, January 26, 2019

AECP, Irresistible Inking Techniques

I have another card in my progression of classes for the Altenew Educator Certification Program.  This one is for the class called Irresistible Inking Techniques in Altenew Academy.

All four lessons of this class are great ways to use your inks in different ways.  For my card here I combined two techniques.  One from Lesson 2 called Painting with Ink Pads and the other from Lesson 3 called Stamp Block Inking.


I began by stamping one floral from the Botanical Garden set two times using waterproof ink.  I like Versafine Onyx Black.  I then smooshed my inks onto my glass mat and used them along with a few colors from the Altenew Watercolor 36 half pan set.  All of the colors I used are listed below under the supplies list.

This photo shows the yellow flower.  I started by added a very light yellow base layer of paint.  I added more intense yellow where I wanted to emphasize the shadows and add the shading.  I watercolored the purple one in the same manner.  After the flowers were dry I fussy cut them, which was very easy with the shape of these.


My next step goes like this:  1) Smoosh your ink pad onto a stamp block (any size/shape will do--just depends upon the look you want and your design), 2) spritz the stamp block with a bit of water, 3) pick up the stamp block and invert inked side down and smoosh onto your card stock.  Let it sit there a few seconds, or more and then pick it straight up.  You can let your card dry naturally, or use your heat tool to speed up the drying.  This technique is really fun!  I like to get several pieces of paper, different sizes/shapes of stamp blocks and just experiment.  No two will be alike and there's no wrong look--they will all be so pretty!

For the finishing touch I added purple splatters to the panel after it was dry.  When the splatters were dry, I stamped the sentiment from the Altenew Extra Special set with Versafine Onyx Black ink.   I then layered it onto some green card stock from my stash and adhered that to a top folding A2 card base.  I used my fingers to curl the flowers just a bit and added just a bit of glue to the center of the flowers to retain the dimension.  I also added a few drops of Nuvo Jewel Drops in Pale Periwinkle.  It was hard to capture in the photo but I added some clear sparkle to the shadowed parts of the flowers with a Spectrum Noir clear sparkle pen.


Thank you so much for stopping by!  Let me know if you've tried this technique, or plan to!
Happy crafting!

Carol :)

Supplies:
Altenew stamps:  Botanical Garden; Extra Special
Altenew Watercolors 36 half-pan set: Citrus Burst, Fresh Lemon, Iris Fields, Deep Iris
Altenew Crisp Dye Inks:  Forest Glades, Frayed Leaf
Nuvo Jewel Drops Pale Periwinkle
Versafine Onyx Black ink