Hello friends! Have you jumped on the BetterPress Letter Press train? Well, it's been a minute since I've had mine out, and let me tell you, creating these cards reminded me of why I love it!!! The new Spellbinders Cosmos Backdrop BettterPress Press Plates with the coordinating coloring stencils are just absolutely beautiful!!!
I've combined both Cosmos Backdrop cards with the Sealed Cord & Faux Seal Sentiments BetterPress Press Plates and Die set in two different ways here. The sharp and crisp image impressions you get with the Press Plates is just amazing!
First I cut a strip of masking paper to 1-½" x 4-¼". I placed it across the center of a Porcelain Cotton Card panel. I used removable tape to adhere the piece to the Platen (clear top plate). Then I placed the Cosmos Backdrop onto the magnetic Chase platform and inked it up with BetterPress Black Ink.
Please note: After running this through my Platinum die cutting machine, the masking paper was really, really stuck to the cotton card! In all honesty, I had to use Un-Do to get it off!!! Did you know this product will remove anything adhered with sticky adhesive (not liquid glue), without damaging the image?!! Next time I will just use a strip of thin printer paper!
I repeated the steps with the Sealed Cord and purple dye ink to impress the image into the area that was masked. Yes!! The ordinary die ink worked!!! The Sealed Cord also includes six sentiment press plates and I pressed one with purple ink. I cut it out with the included circle die.
I really was curious about how the ink blending with the stencils would work with the Cotton Card. It is a specialty cardstock that impresses beautifully with the Press Plates. I used ink blending brushes and a few shades of purple and green inks through each layer of the stencils that come with the bundled Cosmos Backdrop set.
At first I thought that the inks blended pretty good, if not totally smooth. However, after the ink settled into the paper and dried, I couldn't believe how smooth the blends looked!!! My photos are NOT retouched at all.
As you can see from the photos, I created a few different wax seals with the new Purple Wax Bead Mix. I adhered the die cut pressed sentiment into the center of one of the wax seals with an Adhesive Circle.
Here are a couple of process photos for you:
I really like how you can see the de-bossing of the press plate in the area that was masked.
Now for the details of my second card!
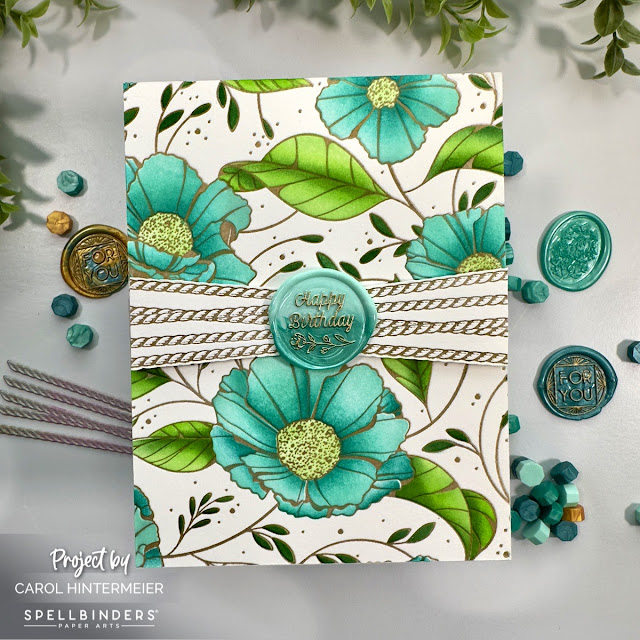
For my second card with the Cosmos Backdrop Press Plate I inked up the Press Plate with a gold pigment ink. On a separate piece of Porcelain Cotton Card I pressed the Sealed Cord with the gold ink. I used my scissors to cut it out and set it aside.
For this card I used three shades of teal ink and some green inks to color the Cosmos Backdrop through the stencils.
Another new wax mix is the Teal Wax Bead Mix. I had fun experimenting with the various colors in this mix. I chose this one pressed with the Sweet Happy Birthday wax seal stamp--I really like how the two colors are kind of separate here! I used a silver metallic marker to go over the details of the wax seal to make them stand out more.
Thank you so much for stopping by today! I your weekend is filled with lots of crafty fun!
Thank you for shopping with my affiliate links (never any additional cost to you)!


These are absolutely gorgeous! I do not have a BetterPress but it's very tempting when I see beauties like these -- however the money only goes so far. So I'll have to enjoy yours
ReplyDelete