Showing posts with label stencils. Show all posts

Wednesday, September 17, 2025

A Day To Remember -- A Fun Stenciled and Die Cut Autumn Card

Hello, crafty friends!  I'm still loving to create autumn themed cards and I've made one today with Honey Bee Stamps Maker's Mix stencil set and coordinating dies!  I've added in a favorite older set called Lovely Layers: Autumn Bouquet for the floral details.

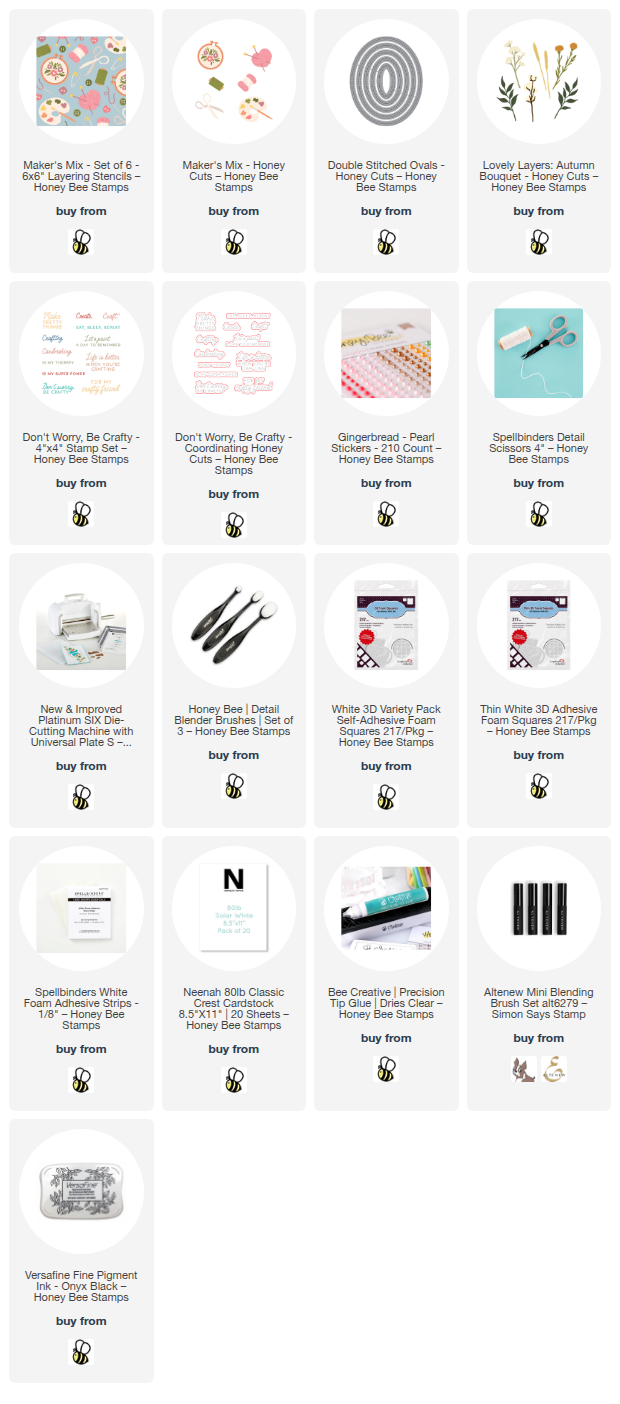
I began with an A2 sized piece of colored cardstock for my stenciling with the Maker's Mix stencil set.  I used mini blending brushes to add coordinating autumn colored inks through each of the six stencils.  Then I trimmed the piece to 4" x 5-¼".  I have all of the cardstock and inks in the list below.

Next I die cut colored cardstock with the middle sized Double Stitched Oval die.  I added foam tape to the back and adhered it to the stenciled panel.  Then I used my scissors to trim off the oval overhanging the panel.  I used glue to adhered this to an A2 sized piece of cardstock in the same color and then glued it to an A2 card base.

Next I die cut several different colored cardstocks with the dies in the Lovely Layers: Autumn Bouquet Honey Cuts.  Then I used glue to adhere the layers together.  I played around with various arrangements of the florals and then used a piece of Press N Seal to pick them all up.  I LOVE doing this to retain the arrangement I made!  I used foam squares and glue to begin adhering the bottom most die cuts.  I continued until all of the florals were adhered to the oval.

I die cut white cardstock with the pallet die from the Maker's Mix .  Then I used the Maker's Mix stencils to add color to the pallet with inks in colors that coordinate with the Autumn Bouquet die cuts.  I added thin foam tape to the back to adhere it at the bottom of the floral arrangement.

The sentiment is from the Don't Worry, Be Crafty stamp set and is stamped in black ink.  I cut it out with the coordinating Honey Cut.  To adhere it the sentiment, I added a double layer of foam strips on the right back and glue to the left to bring the sentiment to the same height as the paint palette.

I added a bit of bling with pearls from the Gingerbread Pearl Stickers set.

Would you have thought to create an autumn card with the Maker's Mix stencils?  If not, I hope you've been inspired to try this out!  Thanks so much for stopping by!  I hope your day is wonderful and filled with fun crafty times!

Thank you so much for using my affiliate links to shop (never any additional cost to you)!

Wednesday, July 16, 2025

Back In The Saddle -- Get Well Scene Card

Hello crafty friends!  Today I'm sharing my card that features Honey Bee Stamps new Lovely Layers: Tack Honey Cuts along with a new stencil set.  Read on for all of the details!

I started by die cutting the dies in the Lovely Layers: Tack from white and teal cardstocks.  I used a few Copic markers to color the white cardstock.  See how I managed to keep the debossed areas of the die cuts white?  To do that, I laid the nib of the marker almost flat and lightly colored over those areas.  I was very happy it worked out!!

I used glue to adhere all of the Lovely Layers: Tack pieces together.  Be sure to refer to the handy layering guide while you assemble the saddle!

Next I created the background layer with the Range Scene stencil set.  I used blending brushes and Distress Inks on an A2 white cardstock panel.  The colors I used are Mowed Lawn, Rustic Wilderness, Lost Shadow, and Tumbled Glass.  NOTE:  I intentionally did not stencil the fence post section.

The idea in my head was to have the saddle hanging over a fence.  So I die cut white cardstock with the Lovely Layers: Barn Wood Fence dies.  Then I used my scissors to trim off the top picket sections even with the top rail.  Then I colored it with a blender brush and Walnut Stain Distress Ink.

I glued the rails onto the fence, added foam tape to the back, and then adhered it to the card with a portion of the bottom of the fence hanging off.  I just used my scissors to trim it even with the bottom of the card.

The sentiment stamped in black pigment ink is from the Saddle Up stamp set.  I cut it out with the coordinating die and popped it up on the card with foam strips.

I blinged out the saddle with some pretty coordinating gems I found in the Vitamin Sea Gem Sticker set.

I love it when I have an idea for a card actually turns out to be like I wanted!  I hope I've given you some inspiration too!  Thanks so very much for stopping by!!!

Thank you for choosing to use my affiliate links to shop (never any additional cost to you)!

Wednesday, February 5, 2025

Lilacs and Roses Card With Stencils and Copic Markers

Hello crafty friends! Today I'm sharing my card featuring the so beautiful Nancy's Lilac Bouquet stamps and Honey Cuts. These were so fun to color! I used stencils to create a subtle heart background--read on for the details!

First I stamped all of the images from Nancy's Lilac Bouquet stamp set with Intense Black ink onto 80# Neenah. I colored them with various shades of pink, purple, and green Copic markers. Here's a list of the markers I used:

  • Lilacs: RV66, V06, V05, RV63 (Altenew marker R705)
  • Roses: RV17, RV13, RV23, RV02, RV10
  • Leaves: G28, YG67, YG17, YG25, YG03
  • Crate: E59, E27, E25

I cut them all out with the coordinating Nancy's Lilac Bouquet dies.


Next I made the background layer. I trimmed 80# Neenah to 4" x 5-¼". Then I used ink blending brushes to add two shades of pink ink through the Scattered Hearts stencils in the upper left and bottom right corners of the panel. I used a very light hand to keep the pink inks a light shade so it wouldn't distract from the main image.

Then I added black splatters to the piece. You can use a drop or two of a black ink pad re-inker or diluted black acrylic paint to do this.

When the paint splatters were dry, I used glue to adhere it to an A2 card base. Then I used foam dots to adhere the colored images of Nancy's Lilac Bouquet to the card. I adhered the extra leaf and lilac bunch with glue behind the main image.

The sentiments are two of seven that are included with the stamp set. After I stamped them with black ink, I cut them out with the coordinating dies.

Can you believe that this card was with created with one stamp set, one die set, and one stencil set? And with the Nancy's Lilac Bouquet set there are so many possibilities for different looks you can make using the extra florals and leaf that's included!

Thank so very much for stopping by today. I hope your week has been a good one!

Thank you for using my affiliate links to shop (never any additional cost to you)!

Wednesday, January 22, 2025

You're My Queen Of Hearts Valentine Card

Hello crafty friends! Today I'm sharing my vintage Valentine card that features Honey Bee Stamps' beautiful Queen of Hearts stamp set. This set is made from red rubber and I totally love the crisp stamped image you get! You can also stamp the entire piece all at one time!

First I worked on my stenciled background. I inked up a 4" x 5-¼" piece of white cardstock with three pink Distress Oxide Ink colors. For my ombre pattern I used Picked Raspberry, Kitsch Flamingo, and Spun Sugar.

After using my heat tool to dry the ink a bit, I placed one of the two Scattered Hearts stencil over the inked panel. I added Picked Raspberry Oxide ink through the stencil with an ink blending brush.

Before I added the texture paste with the second stencil, I stamped the four hearts in the Queen of Hearts set with the pink Distress Oxides randomly over the panel.

Next I placed the second Scattered Hearts stencil over the panel. Then I added some pretty Frosted Petal Glacier Paste through the stencil with a palette knife. I carefully removed the stencil and set piece aside to dry.

Next I stamped the Queen of Hearts girl with Intense Black ink onto white cardstock. (Did you know that the Queen of Hearts set is made so you can use all of the images separately?) Next I colored her with my Copic markers. I used these colors:

  • dress: C5, C3, C1, C00
  • parasol & other pink elements: R39, RV25, RV06, RV04, RV02, RV10, RV00
  • hair: E59, E57, E55
  • leaves/grass: G17, G25
  • skin: E11, E51, E50

I used glue to adhere the dry stenciled panel to an A2 folded card base.

Next I cut out the Queen of Hearts with the coordinating Honey Cut. I added foam dots to the back to pop it up on the A2 card.

I stamped extra hearts from the Queen of Hearts with Picked Raspberry Oxide ink and cut them out with the coordinating dies. I used foam squares to adhere them to the card.

The sentiment is also another separate stamp in the Queen of Hearts stamp set. It is stamped with black ink and cut out with the coordinating die.

Since I was thinking her pretty white dress would have a sparkly overlay in real life, I used a clear glitter pen to add lots of sparkles on her dress!

I hope you've found some inspiration today for your card making!  Be sure to check out the entire Perfect Match release for other fun themed products.  Thank you for stopping by!!

Thank you for using my affiliate links to shop (never any additional cost to you)!

Monday, November 25, 2024

Fast & Easy Encouragement Card!

Happy Monday friends!  This card features a few new products from Picket Fence Studio's latest release!  Want to know the secret for this super quick card?  Read on for the details!

First I used Paper Pouncers and Distress Oxide inks with the On A Cloudy Day stencil to create the background.  I used Festive Berries, Kitsch Flamingo, Squeezed Lemonade, Mowed Lawn, Evergreen Bough, and Dusty Concord.

Before removing the stencil, I spread some Twinkle Lights Clear Paper Glaze with a palette tool.  You could skip this step to avoid the drying time for an even quicker make!

While the stenciled piece was drying, I chose two of the Adventures in Hot Air Ballooning Glossy A2 card fronts.  These are beautiful preprinted sets of 12 sheets with 3 different designs.  I used my scissors to cut out the balloons.

When the Paper Glaze was dry, I trimmed the piece and added it to an A2 card base with a black layer.  I popped up all but two of the hot air balloons with foam tape.

The sentiment from the Freckle Friends: Climbing Calliope set.  After I stamped it with black ink I cut it out with the coordinating die.  I added some of the pretty gems from the Starry Skies gem mix for a bit of fun sparkle!

Be sure to check out my reel for this card over on my Instagram (click the image in the left side of this blog).  Also, be sure to check out the 25% off the entire Picket Fence site (except the latest release items).


Saturday, November 16, 2024

Beautiful Butterfly Birthday Card

Happy Saturday!  Today I'm sharing some details about my card that features Altenew's beautiful Craft Your Life Project Kit: Wings & Petals.  I love monarch butterflies!  Each October they migrate through our area here in Texas and I always think of my mother.  We would always tell each other when we saw the first monarchs passing through.  I miss her, but I know she would love this card!

The Craft Your Life Project Kit is one of several of Altenew's monthly subscriptions.  The reason this particular one is my favorite is because it includes a few of my most favorite products!  I love 3D embossing folders and having the layering stencils to color the embossed image is awesome!  You can purchase this Kit separately, but if you subscribe, you will save $16.  Check out this subscription and the other options on the Altenew website.

First I die cut the Wings & Petals butterfly dies from Sunkissed and Jet Black cardstock.  I used blending brushes to add shading with Autumn Blaze and Orange Cream inks (Warm & Cozy collection) to the solid die cut.  After gluing the black top layer to each piece, I glued them together.

I embossed white cardstock with the Wings & Petals Botanical 3D embossing folder and trimmed it to 4" x 4-¼".  Then I stamped the sentiment from the Wings & Petals stamp set at the bottom of an A2 card base with Obsidian black ink.

I added a strip of Jet Black cardstock to separate the embossed cardstock from the sentiment.  The Intertwining Leaves layers are die cut from Grass Field and Hunter Green cardstock.

I used foam tape to adhere the butterflies to the card.

I absolutely love the details of the Wings & Petals butterfly dies!!  Thank you so much for stopping by.  I hope you have a wonderful and crafty weekend!

Thank you for using my affiliate links to shop (never any additional cost to you)!

Wednesday, November 13, 2024

Altenew Stampwheel 2.0 Blog Hop & Giveaway ($300 in total prizes!)

I'm so thrilled to be part of the blog hop to feature the brand new and totally awesome Stampwheel 2.0!

Thank you for joining us on this fabulous hop!  If you would like to start at the beginning, please head over to the Altenew blog.  You can check out all of the details of the larger, new Stampwheel 2.0 here.

Be sure to check out the prize details below!  You won't want to miss out on your chance to win either a $100 gift certificate or one of four $50 gift certificates!

For the first time using the Stampwheel 2.0, I used the beautiful, and large, stamp set from the Build-A-Garden: Magnificent Branch collection.  Check out the photos of the Stampwheel 2.0 in use and compared to the original Stampwheel (which I do still use!).

This card is a slimline card I made with the awesome Build-A-Garden: Magnificent Branch in black.  I used the coordinating stencils and blending brushes to color the image.  Because of the size of the Stampwheel 2.0, I was able to keep the stamped image on the sticky mat, remove the side piece, and color through the stencils with ease!

As you can see in this photo, there is a significant difference in the sizes of the original Stampwheel and the new Stampwheel 2.0!

When you remove the detachable side, you can stamp on a full 8-½" x 11" piece of cardstock.

I really enjoy being able to keep the sticky mat in place and use the coloring stencils by removing the side.

I have used the Stampwheel 2.0 many times recently, and I highly recommend it as part of your crafting tools necessities!

Be sure to leave a comment here on my blog, and at all of the other stops, to increase your chance to win a prize!

Click this link to continue on each stop of the hop and leave your comments!  You don't want to miss the awesome inspiration from the designers!

You are invited to the Inlinkz link party!

Click here to enter

Sunday, November 10, 2024

Quick and Easy Stenciled Thank You Card

Hello crafty friends!  I love making quick and easy thank you cards in bright and cheerful colors!  I'm sharing all of the complete details of this card over on the Brass & Bliss blog today.

The stenciled layer uses the pretty Fall Flourish stencil set.  It includes three layering stencils that you use to create your background.

I love how in spite of the name "Fall Flourish" this set can absolutely be used for any season!  I only had to use four ink colors!  I used these colors from the Color Fuse ink line:  Dreamer, Grass, Juniper, and Pecan.

Next I've used the new Thank You Die set.  I inked up white cardstock with the teal ink and die cut the top layer of the Thank You die set.  I cut it twice more from white cardstock and glued the layers together.  I love dies that have a shadow layer as it helps the sentiment stand out from a more busy background!

This was really that easy!  If you would like to see lots of step-by-step photos and directions, join me over on the Brass & Bliss blog.  Thank you so much for stopping by!

Wednesday, October 30, 2024

Noel Christmas Card

 Hello crafty friends! Have you been as amazed by the Honey Bee Stamps new Cozy Christmas release as I am? One of my favorites (one of many) is the Floral Noel set of stamps, Honey Cuts, and coordinating stencils. So I reached for that set to make my card for this post.

Please note: After I made this card, I was getting links and discovered that the stencils are currently out of stock. The good news is that there will be more available in about a week. So please come back here and click THIS link to check.

I placed a 6" x 6" piece of white cardstock onto my sticky mat. Then I used my ink blending brushes and a few Distress Oxide Inks to color through each of the Floral Noel stencils. I used these colors: Spun Sugar, Worn Lipstick, Festive Berries, Candied Apple, Bundled Sage, and Rustic Wilderness. The flower centers are stenciled with Bee Creative Metallic Silver ink.

When I finished the stenciling, I cut out the images with the coordinating Honey Cuts.

I chose a sentiment from the Floral Noel stamp set to stamp with clear embossing ink onto the inked banner. After sprinkling on silver embossing powder, I used my heat tool to set it.

Next I embossed white cardstock with the awesome Wood Planks 3D embossing folder! I just love the detail!! I trimmed it to 4" x 5-¼" and glued it to an A2 card base.

I added foam dots to the back of each letter of Noel. Tip, I use my nonstick scissors to cut strips of the large foam dots to whatever size I need! Before adhering the letters, I used glue to add the floral cluster.

To finish the card and add a bit of bling, I added pearls from the Gingerbread Pearl Stickers set.

I absolutely love this Floral Noel set! There are so many options to use this with different colors and arrangements! Be sure to check out all of the Cozy Christmas release to find your favorites!

Thank you so much for stopping by!!

Affiliate links (never any additional cost to you)!

Thursday, October 17, 2024

Bold Bouquet Birthday Card

Y'all, I am super thrilled to be a guest designer over on Altenew's blog!  I'll show you a photo, but you will need to join me on their blog for more photos and all of the fabulous details.

Also, if you'd like to go ahead and check out the products I used, I linked them below.

Be sure to leave a comment over on Altenew's blog so I'll know you stopped by!  I sure appreciate you!

Here's a list of the products for my card (thank you for shopping with my affiliate links-never any additional cost to you)!

Monday, October 7, 2024

It's Your Day -- Embossing, Stencils, & Ink Blending Fun!

 Hello friends!  Today I'm sharing my card featuring Altenew's beautiful Fairyland Florals 3D embossing folder and the Simple Coloring Stencil Set.  I've also used the new One-Go: Solid Sentiment Sentiment Strips Press Plate which can also be used with your hot folding!

I think y'all know how much of a fan I am of 3D embossing folders and I love this Fairyland Florals 3D embossing folder!  After I embossing a 6" x 6" piece of white cardstock, I used various Fresh Dye Inks and the Mini Blending Brushes I ordered (love these!) to color in each of the four Fairyland Florals stencils.

I used these ink colors:

A note about these Mini Blending Brushes.  I paid for these and these were not part of my being on the team.  My honest opinion here.  I think these are some of the best brushes out there.  I really like how the brush is short and flat, plus the bristles are thick.  I really do recommend these.

I trimmed the panel and used glue to adhere it to a black layer and a Sweet Leaf cardstock layer.

The sentiment is one from the One-Go: Solid Sentiment Strips Press Plate.  The awesome thing about the is that not only does it give you all the sentiments in one pass, it has a coordinating die and can be used as a hot foil plate too!

I placed the press plate onto my BetterPress plate, tapped on Obsidian pigment ink, and pressed it with my Platinum onto 80# Neenah.  I cut the sentiments out with the coordinating Sentiment Strips die.

I used foam tape to adhere the sentiments to my card and added a few Crystal Clear enamel dots for a bit of bling!

If you'd like, I would love for you to check out my reel for this card over on Instagram!  Thank you for stopping by, and I hope you have a wonderful week!

Thank you for using my affiliate links to shop (never any additional cost to you)!

Thursday, September 26, 2024

I Used One Set of Inks to Stencil A Card! Sisters Of The Heart

Hello crafty friends!  Sometimes when I am using a previously released product I feel a bit stumped on ideas so the project doesn't look just like any other.  I have Altenew's Mediterranean Glow Fresh Dye Ink set and I wondered if I could make a card with just those four ink colors.

These colors are so pretty, but also very unique, I think, and I am quite pleased with how this card turned out!

I used the Sisters of the Heart stamps and coordinating stencils for this card.  I colored the flowers using the stencils and blending brushes with the two lightest shades in the Mediterranean Glow set, Honeydew Glow and Antique Olive.  The leaves are colored with the two darkest shades, Olove (not a typo :) and Sugar Kelp.

I stamped the sentiment from the Sisters of the Heart stamp set in Sugar Kelp ink.

Then I trimmed the panel to 4" x 5-¼" and adhered it to an A2 sized piece of Moss cardstock.  These layers were then glued to an A2 card base.

This card was super quick to make, I love the sentiment, and the colors too!  Thanks so much for stopping by.

I know you have many choices for shopping and I so appreciate you using my affiliate links (never any additional cost to you)!

Wednesday, September 4, 2024

Are You Team Sweet or Spooky For Halloween?

Hello card making friends! Today I'm sharing this sweet and not too spooky Halloween card that features a few of the products from the Honey Bee Stamps Falloween Release.  I used the adorable Happy Haunting Stencil set for the background and the Too Cute To Spook Honey Cuts for the sentiment.

I started out with a 5-½" square piece of white cardstock. The Happy Haunting Stencil Set has six stencils. I used five of them, omitting the stencil with the spider web. I used ink blending brushes to add a mix of Distress Inks and Distress Oxide inks through the stencil layers.

On a scrap piece of white cardstock I stenciled two of the pumpkins (only used one), a ghost, bat, and hat.

I cut these out with the coordinating Happy Haunting Honey Cuts.

Here is a list of the inks I used:

  • Distress Inks:
    • Squeezed Lemonade
    • Saltwater Taffy
    • Salvaged Patina
  • Distress Oxide Inks:
    • Wilted Violet
    • Mowed Lawn
    • Antique Linen
    • Lost Shadow
    • Black Soot

Next I die cut the shadow layer of the Too Cute To Spook dies from more teal cardstock. The top layer of the sentiment is die cut from glossy black cardstock. I used glue to adhere the two together.

I added foam dots to the back of the sentiment and adhered it to my card. Then I added foam tape to the back of the Happy Haunting die cuts and placed them around the sentiment

To finish up, I added black and white gems from the Sweet and Spooky Gem Stickers to the eyes of the ghosts and pumpkins. I placed a few turquoise gems around the sentiment.

I love stencil sets (if you can't tell--haha!) and the Happy Haunting stencil set is so versatile! It can be used for a more traditional holiday card, or just stencil the items you want and then die cut those out!

Thank you, always, for stopping by. I hope your day is a good one with fun crafty time!

There are many options for shopping and I really appreciate it when you use my affiliate links (never any additional cost to you)!