Thursday, January 30, 2025

A Very Happy Easter To You! featuring Hoppy Poppy

Hello friends!  Yes, today I have an Easter card!  Picket Fence Studios' January release is filled with flowers, bunnies, and gardens perfect for your springtime card making!

Please note:  I have all available supplies, with links, in the list below.

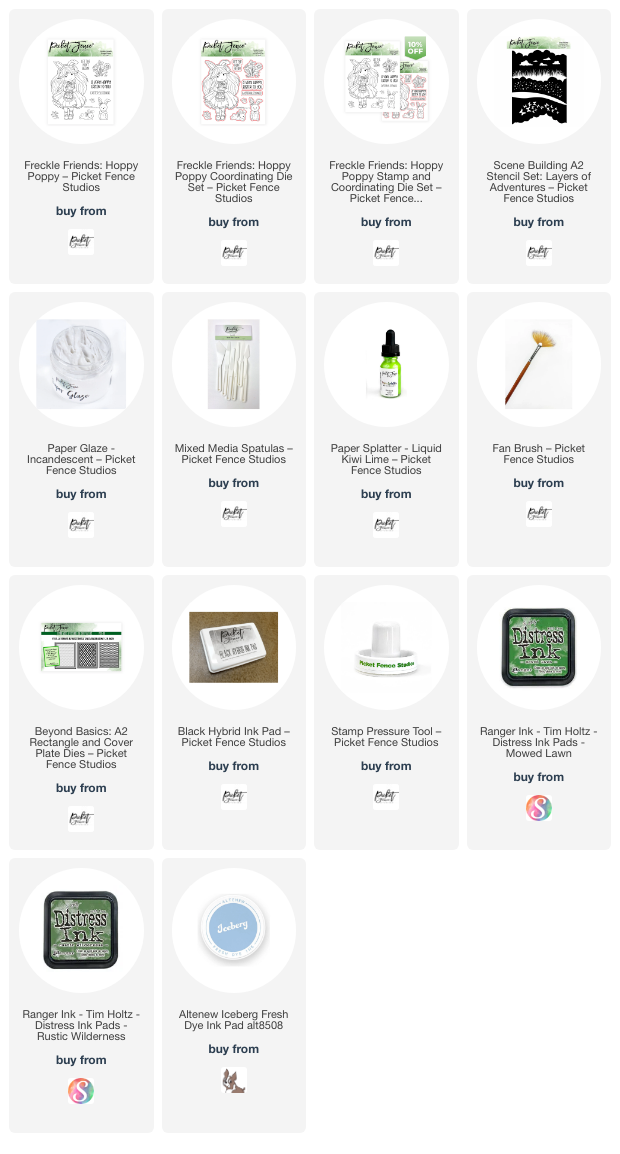
First I created a fun stenciled scene for my card featuring Freckle Friends: Hoppy Poppy.  I used the stencils in the  Scene Building A2 Stencil Set: Layers of Adventure.

I began by blending on two shades of green inks with blending brushes and the Layers Of Adventure stencils.  Then I blended the blue clouds in the sky.

Next I masked off the sky portion of the background to add some shimmery splatters to the grass.  I diluted a few drops of Kiwi Lime Paper Splatter with water and used a fan brush to splatter the mixture onto the card.

Another stencil in this set has clouds and I added the Incandescent Paper Glaze through the stencil and set it aside to dry.

Next I stamped the images from the Hoppy Poppy stamp set with Black Hybrid Ink and colored them with my Copic markers.  I cut them out with the coordinating dies.

I trimmed the dry stenciled panel with a die from the Beyond Basics: A2 Rectangle & Cover Dies set.  I used glue to adhere it to my A2 card base.

The other images and sentiment are popped up with foam tape.  I added a few highlights to the girls dress and shoes with a white gel pen.

The shimmer and shine that the Kiwi Lime Paper Splatter and the Incandescent Paper Glaze gives is SO pretty!  These are wonderful products and I hope you will check them out by clicking the links in the list below.

Thank you for stopping by today!  I hope it's a good one for you!

Thanks so very much for using my affiliate links to shop (never any additional cost to you!)

Wednesday, January 29, 2025

I 🩷 U -- A Sweet Card For Someone You Love!

Hello Honey Bee friends!! I had lots of fun getting inky to create my card that features the beautiful Bold Background: Vines Of Love Honey Cuts!!  Read on for how to create these inky backgrounds for your die cuts!

I used two pieces of 80# Neenah for the backgrounds. I chose three shades of green ink pads (light, medium, and dark) and three of pink ink pads. Then I used Detail Blending Brushes and blended the green inks in spots all over one piece of the white cardstock, blending until the piece was covered in the shades of green. I repeated this for the pink inks.

Next I added some water splatters to each piece. I used my heat tool to dry them. Then I spritzed Fossilized Amber Distress Spritz onto the green piece. For the pink panel I spritzed on Picked Raspberry Distress Spritz. These Distress Spritzes add such a beautiful shimmer!

I die cut the panels with the dies in the Bold Background: Vines Of Love. Using the Layering Guide found in the product description, I used glue to adhere the layers. Then I glued the piece to a white A2 card base.

I die cut the sentiment with dies from the BEE Playful Lowercase Alphabet and the Stacking Hearts dies from the pink inked panel. Then I die cut two more each from white cardstock and used glue to adhere the layers together. Next I added glue to the bottom part of each die cut and sprinkled on some chunky glitter. When the glue dries, I die cut an oval from the Sweet Stacks: Ovals and glued the sentiment to it.

I had a bit more inky fun dying my white ribbon to coordinate with the Vines Of Love. It's easy to do! Just use a small container/dish and place your ribbon in it. Then add drops of alcohol ink to the ribbon. Add several drops of rubbing alcohol to dilute. I used my die pick tool to move the ribbon around to fully saturate it. Use your tweezers to pick up the ribbon and place it onto a clean paper towel to dry. (I don't have many alcohol inks, but do have Alcohol Pearl in the color called Intrigue, and this worked quite nicely.  All supplies are linked in the list below.)

After I tied the ribbon around the card front, I added foam tape strips to the back of the sentiment to adhere it to the card.

This photo really shows the beautiful shimmer of the Distress Spritzes! This was so fun to make and I hope you are inspired by my card. Thanks so very much for stopping by!

Thank you for using my affiliate links to shop (never any additional cost to you)!

Sunday, January 26, 2025

Little Things Make Big Moments

 Hello crafty friends!  I adore all things Winnie the Pooh!  I'm so happy to get to make this card that features the Spellbinders & Simple Stories - Say Cheese Classic Pooh Collection sets!

For this card I've used the Friendly Moments BetterPress Press Plates set that features two press plates to use on your cards.  I've used one of them to create a background for this adorable Tigger from the Tigger & Eeyore die set.

First I used my BetterPress Letterpress System to press the image from the Friendly Moments set with BetterPress black ink onto porcelain cotton card.  (All supplies are linked in the list below.)  After using my heat tool to dry the ink, I used a few Copic markers to color Pooh and Piglet.  While this image is in the background, I wanted them to stand out and coloring them helps that.

I die cut the dies from Tigger & Eeyore die set for Tigger and the butterfly.  Tigger is die cut with black and a dull orange cardstock.  I used a few Copic markers to add shading to Tigger and to color the white cardstock of the butterfly. 

I used two shades of green ink and a blending brush to add a ground for Tigger.  I trimmed the background panel to 3-¾" x 5" and adhered it with foam tape to a layer of black cardstock.  I adhered this piece to an A2 card base with glue.  I used foam tape to adhere Tigger to the card.

There is a sentiment set called Silly Old Bear Press Plates & Die Set that coordinates with this collection.    However, I do not have it, (This set is sitting in my cart right now!) but I did find a sentiment that works just great in the Woodland Tales Impressions Press Plates.  After cutting the pressed sentiment out with the coordinating die, I used foam tape to adhere it.

I just love this card!  I hope you do too, and are inspired by it!  Have a wonderful, and crafty, week ahead!

Thank you for using my affiliate links to shop (never any additional cost to you)!

Wednesday, January 22, 2025

You're My Queen Of Hearts Valentine Card

Hello crafty friends! Today I'm sharing my vintage Valentine card that features Honey Bee Stamps' beautiful Queen of Hearts stamp set. This set is made from red rubber and I totally love the crisp stamped image you get! You can also stamp the entire piece all at one time!

First I worked on my stenciled background. I inked up a 4" x 5-¼" piece of white cardstock with three pink Distress Oxide Ink colors. For my ombre pattern I used Picked Raspberry, Kitsch Flamingo, and Spun Sugar.

After using my heat tool to dry the ink a bit, I placed one of the two Scattered Hearts stencil over the inked panel. I added Picked Raspberry Oxide ink through the stencil with an ink blending brush.

Before I added the texture paste with the second stencil, I stamped the four hearts in the Queen of Hearts set with the pink Distress Oxides randomly over the panel.

Next I placed the second Scattered Hearts stencil over the panel. Then I added some pretty Frosted Petal Glacier Paste through the stencil with a palette knife. I carefully removed the stencil and set piece aside to dry.

Next I stamped the Queen of Hearts girl with Intense Black ink onto white cardstock. (Did you know that the Queen of Hearts set is made so you can use all of the images separately?) Next I colored her with my Copic markers. I used these colors:

  • dress: C5, C3, C1, C00
  • parasol & other pink elements: R39, RV25, RV06, RV04, RV02, RV10, RV00
  • hair: E59, E57, E55
  • leaves/grass: G17, G25
  • skin: E11, E51, E50

I used glue to adhere the dry stenciled panel to an A2 folded card base.

Next I cut out the Queen of Hearts with the coordinating Honey Cut. I added foam dots to the back to pop it up on the A2 card.

I stamped extra hearts from the Queen of Hearts with Picked Raspberry Oxide ink and cut them out with the coordinating dies. I used foam squares to adhere them to the card.

The sentiment is also another separate stamp in the Queen of Hearts stamp set. It is stamped with black ink and cut out with the coordinating die.

Since I was thinking her pretty white dress would have a sparkly overlay in real life, I used a clear glitter pen to add lots of sparkles on her dress!

I hope you've found some inspiration today for your card making!  Be sure to check out the entire Perfect Match release for other fun themed products.  Thank you for stopping by!!

Thank you for using my affiliate links to shop (never any additional cost to you)!

Sunday, January 19, 2025

Hugs With Cookies and Flowers

Hello crafty friends!  Today I'm sharing my card I made that features Altenew's beautiful Sweet Nasturtium Layering Die Set.  Nothing like hugs surrounded with cookies and flowers, right?!!

Please note:  This beautiful set is a limited edition.  When it's gone, it's gone!

I die cut the Sweet Nasturtium dies from colored cardstocks.  I used these cardstock colors by Altenew:  Warm Sunshine, Forest Glades, Coral Bliss, and Blush.

Next I added shading with Mini Blending Brushes and a few coordinating inks.  The ink colors are in the list below.

I used glue to adhere the layers of the cookies and flower together.  I made my cookies a bit more fancy by using a gold gel pen to add gold lines and dots to them all.  (There is edible gold after all! Haha!)

Next I stamped a sentiment from the Craft Your Life: Butterfly Garden stamp set with Obsidian black ink.  I used my detail scissors to trim around the sentiment.

After I added some black splatters to my A2 card base, I adhered all of the elements with either foam tape or glue.  I used the same gold gel pen to add gold dots amongst the black dots.

I hope you've found some inspiration here today.  Thanks so much for stopping by!

Thank you for shopping with my affiliate links (never any additional cost to you)!

Saturday, January 11, 2025

Bold Blooms Floral Die Cut Card

Happy Saturday!  Today I'm participating in an Instagram hop with Altenew to celebrate their January 2025 release!  Of course, Altenew is offering amazing prizes to be drawn (January 16) amongst all of the comments!  Click the Instagram photo in the left side bar here to join us for lots of beautiful inspiration!

I wanted to share a few details about my card.  This features the absolutely beautiful, and limited edition, die set call Bold Blooms!  Limited edition means that once it's gone, it's gone, and will not be restocked!

The Bold Blooms die set has dies for the florals and outline piece plus a solid die to use as a backer to build your die cuts upon!  I die cut each twice.  Once from 100# white cardstock and again from Brushed Gold cardstock.

I used Mini Blending Brushes (my favorite brushes!) to add purple ink from the colors in the Shades of Purple set.  I colored the leaves with Olive and Moss inks from the Tropical Forest collection.

I love the font of this sentiment from the Craft Your Life Butterfly Garden stamp set!  After I stamped it with embossing ink and added gold embossing powder, I set it with my heat tool.  I used detail scissors to hand cut it out.

After I adhered the sentiment with foam tape, I decided to add a bit of bling!  I used a few gems from the Rhodonite Gem Sparkles set to add just a touch of sparkle.

I love this Bold Blooms set for the many possibilities there are for creating with it!  Thanks for stopping by, and don't forget to check out the Instagram hop!

Thank you for using my affiliate links to shop (never any additional cost to you)!

Thursday, January 9, 2025

Spellbinders January 2025 Club Kit Cards

I'm thrilled to have the honor of creating with three of Spellbinders' Club Kits for 2025!  I'll be sharing the monthly club kits for the BetterPress, 3D Embossing Folder, and the Embossing Folder of the month!

There's nothing better than getting two cards from one Press Plate set!  The Take Flight BetterPress Club Kit for January includes press plates for two butterflies and three sentiments.  There are dies included to cut out each one too!

This first card features the Take Flight BetterPress Club Kit with the Stylized Lattice 3D Embossing Folder of the Month.

For the BetterPress Plates and sentiments, I used Porcelain Cotton card for all with my BetterPress Letter Press System.

The A2 card base is layered with Splash cardstock and white cardstock, both embossed with the Stylized Lattice 3D embossing folder.  This was trimmed to 3-¾" x 5" and adhered to the card with glue.

A note about the stencils I used to color the butterflies:  This stencil set is the "bonus item" for January for those in the Deluxe Caboodle Value Club.  Here is Spellbinders' description of this club:

Join the Deluxe Caboodle Value Club and receive expertly designed kits, complete with inspiration each month. Plus, members get store savings, extra deals, gifts, and more. Click Here to learn more about club membership. The Deluxe Caboodle Club Value Club Membership includes ALL TEN club options plus an additional monthly BONUS item. The bonus item will sometimes be a cardmaking essential & sometimes it will be an exclusive item ONLY available in this club.

This club is the most affordable way to snag the Small Die + Large Die+ Stitching Die + Clear Stamp & Coordinating Die + Glimmer Hot Foil Kit and Embossing Folder (2D) & 3D Embossing FolderWax SealBetterPress + NEW Stencil Clubs. Create unique projects individually or combine them together for even more creative utility. $315.00 Value!

I used the large butterfly from the Take Flight BetterPress of the Month and inked it up with a coordinating blue ink from my stash onto Porcelain cotton cardstock.  I used ink blending brushes and two shades of buttery yellow inks to color the butterfly.  All available inks are in my list below!

I added glue just to the center of the butterfly to adhere it to the card.  The Take Flight sentiment was inked with BetterPress Black ink onto Cotton card.

I added black dots with a black Micron 08 pen for some fun details.  Sparkle was added with a few gem stickers!

This next card features the Faceted Petals Embossing Folder of the Month.

I inked up white cardstock with the same blue inks in an ombre pattern before I embossed it with the Faceted Petals embossing folder.  This time I inked up the Take Flight butterfly with Tuscan ink.  I used the coordinating stencils to add shades of blue ink to the butterfly.

I chose another sentiment included with the Take Flight Betterpress of the Month.  After I die cut it with the coordinating die, it was popped up with foam tape strips.

I added sparkly gem stickers for some fun bling!

Have you ever looked into all of the monthly Club Kits Spellbinders has to offer?  If not, I really think  you should!  The terms are so flexible and you can read all about them here.

I hope you are staying warm (it's actually sleeting/snowing here in N. Texas!).  It's a great day to be in the craft room!  Thanks so very much for stopping by!

Thank you for using my affiliate links to shop (never any additional cost to you)!

Wednesday, January 8, 2025

Thank You Card with Winter Florals

Hello crafty friends!! Is it cold where you are at?  It's even cold here in north Texas and it might even snow here tomorrow!  Today my card features Honey Bee Stamps beautiful Lovely Layers: Mini Holiday Florals die set. The colors in my card today were inspired by the cold and my love for flowers. As you can see, these beauties are not just for holiday cards!

I die cut all of the Lovely Layers: Mini Holiday Florals from white cardstock. I used all of the florals except the poinsettia and the berries that go on the branch. I wanted a winter feel to this card, but with a little pop of bright color, so I went with cool blues, pinks, greens, and yellow for that pop! 

I used ink blending brushes to add shading to the die cut Holiday Florals. The pink shading is done with Victorian Velvet and Spun Sugar Distress Inks. The other colors are dye inks I have in my stash.

I wanted some sparkle on some of the die cuts and I have had these Ice Crystal Embossing Glitters for a few months now. These are so gorgeous that when I first saw them on Instagram, I ordered them right away! These give a bit of any icy feel with the large chunks of glitter that's in them. To help that chunky glitter adhere better, I put a few drops of the Versamark re-inker onto my craft mat. Then I used an old paintbrush to paint it onto the pieces before sprinkling on the embossing powder. I used my heat tool to set the embossing powder.

I die cut the wrap with the Floral Bouquet Wrap die from Neenah Desert Storm cardstock. After I scored it along the score links, I used glue to hold it closed.

Next I die cut a piece of paper from the Textiles & Textures: Celebrate paper pad with the largest of the Lace Heart Layering Frames dies. After I glued it to an A2 card base, I adhered the floral wrap to the card with glue.

I spent a few minutes deciding on the arrangement of the flowers and stems, then used glue and a few foam dots to adhere the pieces into the Floral Bouquet Wrap.

For the sentiment, I used one from the Miss You Big Time stamp set. I stamped it with one of the blue inks I used in the flowers for a cohesive look. Then I die cut it with the coordinating die. I die cut three more from white cardstock and glued all of the layers together. Because the floral wrap is not totally flat, I added pieces of foam strips to the parts of the sentiments that were off the edges of the wrap. Then I added glue to the rest of the sentiment and adhered them to the card.

My goodness I had so much fun creating this card! There is something about taking white die cuts and creating a bouquet of color that is so satisfying to me! Thank you so much for stopping by today. You are so appreciated!!

Thank you so much for using my affiliate links to shop (never any additional cost to you)!

Wednesday, January 1, 2025

Hoosier Cabinet Shaped Birthday Card

Happy 2025 crafty friends!!!  I didn't have a chance to use Honey Bee Stamps awesome Lovely Layers: Hoosier Cabinet Honey Cuts to make a holiday card, but today I'll show you how I turned it into a birthday card!

To make the Lovely Layers: Hoosier Cabinet into a birthday card, I thought about what elements I would want to decorate it for a birthday party. I looked through my various sets for a banner, bows, gift, cake, and flowers that would be small enough to be in scale with the size of the hoosier cabinet.

To my delight, there were plenty of sets to choose from! Here is a list of the name of the set, along with what dies I used from each.

Of course, you may have other sets with dies that will work just as well as these. I die cut the Lovely Layers: Hoosier Cabinet from light pink, dark pink, and white cardstocks. The only piece that I colored with Copic markers is the mixer (inside the bottom cabinet).

All of the elements from the other die sets were cut out from white cardstock and colored with Copic markers.

For a fun little surprise, I tucked the mixer on a shelf behind the bottom right cabinet door. I realized that the flower pots were just a bit too large to be in scale with the Hoosier Cabinet, so I used my scissors to trim just a bit off the top of each.

I made a shaped card base by die cutting a top-folding A2 card base with the outline die of the Hoosier Cabinet. NOTE: Just be sure that the top edge of the die is just above the card base fold!

I stamped a sentiment inside the card from the What's Cookin' stamp set with black ink. (I didn't want to put a sentiment on the outside of the card and cover up any of the cabinet!)

To finish up, I used a white gel pen to add highlights to several of the elements of the card.  I added some Crystal Glimmer Enamel Stickers to each of the drawer/door knobs for a bit of sparkle.

I want to share with you about my new die cutting machine.  A few weeks ago, my much loved and heavily used Spellbinders Platinum decided to only work in one direction.  So I asked my husband if I could order my Christmas gift early (LOL)!  I had heard great reviews about the Anna Griffin Empress die cutting machine.  When I saw it on sale at Scrapbook.com, I ordered the Elite version as it comes with a lazy Susan piece.  I absolutely LOVE it!  The magnetic plate it comes with is a game changer!  No more taping down dies!  Plus with it being electric that makes it even better!  I did go ahead and get a new Spellbinders Platinum 6" since I need that for the BetterPress and Glimmer machines I have.  Check them out with the links below!

I'm wishing you all the best for 2025.  Thank you so much for stopping by!

Thank you for using my affiliate links to shop (never any additional cost to you)!