Monday, March 30, 2020

Just Hopping By! | Art Impressions

Happy Monday my friends!  I am sure hoping you all are well and adjust to our current "normal".  I hope my card for today using the new Art Impressions Easter Bunnies set will bring you a smile and some cheer.  .  This is an adorable set that has several images so you can use it for many more occasions other than Easter!  Also, as I write this post, this is one of the new release sets that are on sale!  Be sure to check out the new release 20% off sale and the 60% off sale of so many other awesome sets!


Here are the steps for my card:
  1. Stamp, in Copic safe ink, the bunny that's laying down on an A2 piece of white card stock.
  2. Stamp the jumping bunny onto a separate piece of card stock.
  3. Color with the Copic markers listed below.
  4. I used a cloud stencil and some Tumbled Glass Distress ink to add clouds to the background.
  5. Die cut this panel with a Double Stitched Rectangle die and adhere to a black card stock layer.
  6. Fussy cut the jumping bunny.
  7. Adhere polka dot paper to a top-folding A2 card base and then the layered panel to that.
  8. Affix an action wobbler to the back of the jumping bunny and add it to the card front.
  9. Use a black pen to draw the dotted line.


I created a short little video clip to show the fun action of the bunny!


I stamped the sentiment in black ink and used a small Rectangle Double Stitched die to cut it out.  I layered it onto some black card stock and popped it up with foam tape.


I really had a lot of fun making this sweet interactive card!  Thanks so much for stopping by!  Crafting is such a great stress reliever and I sure hope I've inspired you to make something!


Copic markers:
C3, C1, C00, Y08, Y04, Y00,
YG67, YG17, YG25, YG03, YG01,
V05, RV55, RV63, RV02, RV10

Supplies:
Honey Bee Stamps Balckground Blender Brushes
Honey Bee Stamps Back To Basics 6x6 paper pad

Wednesday, March 25, 2020

Keeping Christmas Blog Hop - March 2020

Hello friends!  I hope today finds you safe and healthy!  It's time for the monthly Keeping Christmas blog hop and I have a card with a beautiful dimensional wreath for you.  The blog hop list is below and you don't want to miss the awesome inspiration by the so very talented designers!


Today I've used Concord & 9th's Magnolia Wreath stamps and die to create this card.  I have always loved creating dimensional projects and shaping the flowers and greenery!


Create the card base:
  1. Cut a piece of patterned paper to 4" x 5-¼".  Adhere it to a top-folding A2 card base.
  2. Stamp the sentiment near the bottom with Versafine Onyx Black ink.
  3. Die cut the ledge from white card stock.
  4. Score a line on the ledge for some dimension.  Add thin foam tape to the back and adhere it above the sentiment.


Create the wreath:
  1. Stamp the first layer of the wreath with Mist (the lightest green ink).  I used the wonderful new Rubbernecker Stamps Color Fuse inks.  Each set has four ink cubes that are shaded from light to dark.  Links to the specific sets I used are in the product list below.
  2. Stamp the second layer of the wreath with Basil (the darkest green ink).
  3. Stamp and die cut the leafy branch several times in various shades of green and die cut.
  4. Die cut the berry branches and twigs from white card stock.  Ink them with Moss green ink and Caramel brown ink.
  5. Add Red Berry Nuvo Crystal Drops to the berries and set aside to dry.
  6. Die cut the flowers and stamp the center with Mocha (the lightest brown ink).
  7. Adhere a small flower to the center of the larger flower.
  8. Add a small puddle of glue to the layered flower and two small flowers and drop in some Gilt Trip Mini Prills.


Shaping the greenery and flowers/assembling the wreath:
  1. To help shape the flowers and leaf branches, working with a few pieces at a time, very lightly (just one spritz!) mist the back of each piece.
  2. Use the stylus and pull it across the back of each leaf and the flower petals.  Flip them over and lightly press the stem of the branch to shape.
  3. Press the stylus in the center of the flowers in a circular motion.  Let the pieces dry for a few minutes.
  4. Add thin foam tape to the back of the wreath base.
  5. I arranged and adhered five full pieces of the the leafy branches in a circular shape.
  6. Cut the remaining leafy branches in half and adhere around the wreath.
  7. Adhere the flowers, twigs, and berry branches as shown.
  8. I used some brown ink to "color" some twine, tied a bow, and adhered it to the wreath.
  9. To finish, I added thin lines of liquid glue here and there on the leaves and sprinkled on some Hero Arts Icicle Glitter.  I just love the subtle sparkle this glitter gives!


I sure hope I've inspired you to get going on the Christmas cards.  I know that I will be very happy to have these come December!  Thank you for stopping by; and now be sure to check out these fabulous and talented designers to see their Christmas creations:
Carol Hintermeier << that's me!


Supplies:

Monday, March 23, 2020

Some Bunny Loves You | Art Impressions

Happy Monday friends!  Today I have a sweet square card that would be great to send to a family member or a friend.  I used the so sweet Art Impressions Easter Blessings Set.  There are three other images in the set, two of which could be used for any other occasion besides Easter!


I stamped the image in Copic safe ink and colored it with my markers.  I used a white gel pen to add dots to the flower stamens and centers.  Next I die cut it with a Square Double Stitched die and layered it onto some blue gingham paper.  This was adhered to a die cut scallop square.


I stamped the sentiment with black ink in the upper left corner.  I adhered it to a top folding 4-1/8" top folding card base.  The overall size of this sweet card is 4-½" square.


Thank you so much for stopping by today!  Have a fabulous and craft week!


Copic markers:
Background: B000, B0000
blue flowers:  B79, B66, B63, B60
yellow flowers:  Y19, Y08, Y13, Y11, YR23
leaves:  YG67, YG17, YG25, YG03, YG01;
G28, G17, G07, YG09, YG05, YR18
bunny:  N4, N2, N0, RV21, RV10

Supplies:

Sunday, March 22, 2020

Beautiful Color Fuse Inks and Floral Cards | Rubbernecker Stamps

Happy spring my friends!  Today I have TWO cards to share with you using the awesome new Rubbernecker Color Fuse inks!  I'm also featuring two of the new layering stamp sets that are so easy to line up and stamp to create quick and beautiful cards!

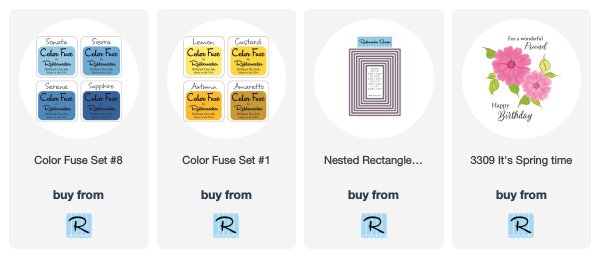
My first card features the new It's Spring Time set and Set #1 and #8 in the Color Fuse line.


The steps to create this are quite easy using the included layering guide:

  1. I use my MISTI and Neenah Solar White card stock for my stamping.  Using a stamp positioner is very helpful as you can re-stamp if needed.
  2. Stamp the first layer with Lemon ink from Set #1 and again with Sonata from Set #8 for the blue flower.
  3. Following the layering guide, stamp the second layer in Custard for the yellow flower and Sierra for the blue flower.
  4. Stamp the third layer in Autumn for the yellow, and Serene for the blue.
  5. Stamp the flower centers in the darkest ink color for each flower.
  6. Cut a square shape for each flower.
  7. Cut black card stock ¼" larger and adhere to the flower layer.
  8. Die cut black card stock with the largest Nested Rectangle Die and white card stock from the second largest die.
  9. Stamp the sentiment in black ink.
  10. Adhere layers to a top-folding A2 5-½" x 4-¼" card base.
  11. Adhere the yellow flowers to the card base with liquid glue and pop up the blue flower with foam tape.


I love how the black layers really set off the flowers!


Now, onto my second card using the beautiful Summer Bloom set.


The steps for this card are quite similar to the previous card.

  1. Follow the Layering Guide to stamp the flower, stems and leaves.  Instead of using the darkest blue ink, I just stamped the final layer with Serene blue two times to deepen the color.
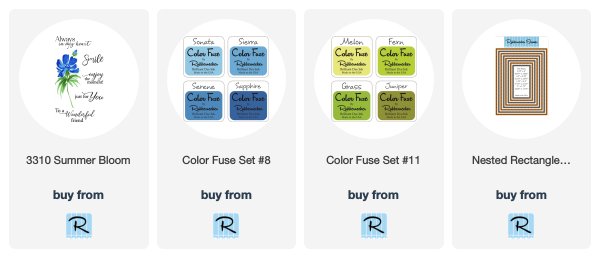
  2. I used the first three shades of green from Set #11 for the leaves.
  3. Stamp the sentiment in black ink.
  4. Die cut the panel and a piece of black striped paper with Nested Rectangle Small Stitched dies.
  5. Adhere the layers to a top-folding A2 card base.


I added a few blue crystal gem stickers for a bit of sparkle!


I love these new inks and layering sets, and I hope I've given you inspiration to give them a try!  Thank you so much for stopping by!  Have a wonderful, and crafty, week!


Products for Happy Birthday Card:


Products for Wonderful Friend card:

Thursday, March 19, 2020

Hugs, Kisses, and Rainbow Wishes | Honeybee Stamps

Happy first day of spring my friends!   Today I have a cheerful card using Honey Bee Stamps Rainbow Wishes stamps and Honey Cuts.  It has been cloudy, with off and on rain, for over a week where I am!  I emptied 7" of rain from my rain gauge yesterday!!   With the gloomy weather and news, I just had to make a bright, cheerful card!


I began with a top-folding A2 card base.  I masked the edges with purple tape and stenciled some clouds with Tumbled Glass Distress ink and the cloud stencil from the Outdoor Scene Builder stencil set.  The Honey Bee Background Blender brushes make this so easy!  I added the polka dot strip and the green strip to the bottom of the card base.  These papers are from the Over The Rainbow 6x6 paper pad.


I die cut, from Neenah Solar White card stock, the rainbow, sunshine, and cloud pieces.  I also die cut two more cloud pieces from a foam sheet to make the shaker.  Next I colored the rainbow and sunshine with some Copic markers.  I added double-sided tape to the back of the rainbow pieces to hold it together.  I hand cut some foam to fit behind the rainbow and adhered them together.

For the cloud shaker, I used Ranger Multi Medium Matte adhesive and glued the foam cloud border pieces together.  I adhered the white card stock cloud to my card base and then adhered the foam borders to it.  I added some blue sequins from the Rainbow Deluxe Sequin set, covered it with a cloud-shaped piece of acetate, and topped it with a card stock cloud border.  So fun!!


The sentiments are also from the Rainbow Wishes stamp set and I used the coordinating die for the large sentiment and the black layer behind it.  I used my paper trimmer to cut down the "sending you".  I adhered a black card stock piece behind this one too.  Both are popped up with foam squares. For a bit more sparkle, I added some clear Wink of Stella to the rainbow.


I hope my card brings you as much cheer today as it did me when I was making it!  Sending YOU hugs, kisses and rainbow wishes (and lots of fun crafty time!)  Thank you for stopping by--I appreciate you!


Supplies:
Honey Bee Stamps:

New Easter Bunnies Set & Spring Celebrations Challenge | Art Impressions

Hello friends!  It's week two of Art Impressions' Spring Celebrations challenge!  We are showcasing the newest releases of the Easter Bunnies set and the Graduation set.  My card today is using the adorable Easter Bunnies set.


I stamped these images and colored them with the Copic markers that I've listed below.  I used a cloud stencil (carefully!) and stenciled in the clouds with Tumbled Glass Distress ink and a blender brush.  I used a few pieces of Post-It tape to cover up a few of areas to protect them from the blending.  Then I used the largest of dies in the Rounded Rectangle Double Stitched die set to cut it out.  I traced around the die on the patterned paper and trimmed it and rounded the corners by hand.  I did the same thing to a top-folding A2 card base and then adhered the layers on top.


I stamped the sentiment in black ink and die cut it out with a die from the Tag Stitched die set.  I cut two more tags from white card stock and used a couple of my Copic markers to color them to coordinate with the images.  I added a brad and some foam squares to pop it up for fun!  Finally, I added some clear sparkle to the eggs and the butterflies wings.


I hope you've been inspired to join in our Spring Celebrations challenge.  It doesn't need to be Easter either!  Be sure to check out the details over at Art Impressions, and then enter!  Thank you so much for stopping by today!

Copic markers:
bunnies: E57, E23, E55, E53, E51, E50
grass, leaves:  YG67 YG17 YG25, YG03, YG01
jacket, other purples:  BV13, BV02, BV01, B60
pinks:  RV14, RV13, RV21, RV10, RV00
yellows:  Y19, Y08, Y13, Y11
basket:  YR27, Y26, Y08

Wednesday, March 18, 2020

Pear Blossom Press EZ-Light Blog Hop | Lighting Up the Treat Shop!


Hello friends!  I'm so happy to be joining so many awesome crafters for the Pear Blossom Press Light-Up Card Hop with EZ-Lights.  Trust me when I say, "You will be using these all the time once you see how EZ they are to assemble!"  There are prizes for commenters too!  You will need to visit each stop and comment for your chance.  Please see the complete list of hoppers and prize information at the end of this post.


I have lots of photos for you, so on to the fun part!  I have always been impressed by the light up cards I've seen; however, I've been totally intimidated by trying to make one.  The EZ-Lights really are SO easy to use.


Check out these COOL lights!!!


I used the Honey Bee Stamps Treat Shop Add-On set that coordinates with their House Builder dies for my card.  (Links to all products are below.)  I created my card base from the House Builder dies.  I die cut one more house to use all of my elements on and to add the EZ-Lights to.

Next I have some photos of my assembly.   The top left is a photo of the back of the top layer showing how I laid out the unit and situated the wires, taping them down as I went along.  The next photo show how I used a small hole punch to make a hole for the umbrella light to stick through before adhering the roof .  The bottom right photo shows the foam tape (doubled up) and the Scar-Tape I used on the battery pack.   Finally, CHECK the lights before adhering it to your card base!!


After I had the top layer adhered to my card base, I could finish up with the cute little details to complete my treat shop!  So the recipient knows this is an interactive card, I stamped "press" onto the shrub on the left.


I don't really do videos, but I here's a short one that I hope works!  Haha!


I'm so glad you stopped by for a look, and I hope I've given you some inspiration to give these AWESOME EZ-Lights a try!  Be sure to go to  each stop and comment along the way for your chance to win!  See the prize information below this list.

Carol<<that's me!
Tanna<<your next stop

Now, who wants to win an awesome prize from Pear Blossom Press?  Two prizes will be awarded to two separate winners, chosen at random, from comments left on participating blogs and videos.  No purchase is necessary to win.  Comments must the posted by 11:59 p.m. PST on March 25, 2020.  Only one comment per blog or video will be counted, but you can comment on multiple blogs and videos in the hop for additional entries. (This is to prevent spam.)  Contest is open internationally to participants over 18 years of age.  Void where prohibited by law.  Any personal information collected will only be used for the purposes of contacting winners, your information will never be shared or sold.  Comments left on YouTube videos must not violate community guidelines.  This contest is not sponsored by YouTube.  Winners will be announced on April 1, 2020 at pearblossompress.com and prizes must be claimed within 30 days of announcement, or new winners will be drawn.

Supplies:
Distress Oxide inks:  Cracked Pistachio, Evergreen Bough

Honey Bee Stamps products:

Monday, March 16, 2020

Watercolor Daisy Wreath Thank You Card | Art Impressions

Happy Monday my friends!  I'm back with the promised card using another image from the beautiful Art Impressions Exclusive Daisies set  available only at Scrapbook.com.  This time I used the daisy wreath image from the set.


I stamped the wreath in Versa Fine Onyx Black ink onto watercolor paper.  I used my long neglected Zig Clean Color Real Brush Markers to watercolor it.  The colors are listed below.  I stamped the sentiment from the set in the same black ink.  Then I die cut it with a Circle Double Stitched die.


For the card layers, I began with a top-folding A2 card base.  I trimmed some blue gingham paper to 5-½" x 3-7/8" and adhered it to the card base.  Then I cut a strip of white card stock to 5-½" x 2" and used a stitched edger die (sorry, I didn't know until checking after I made the card, it is sadly retired) to add the stitching to the edges.  I think you could easily use a black pen and add stitching to the white strip for a very pretty effect.  I added foam tape to the back of the circle and added it to the card front.


I hope you've enjoyed seeing another idea using this awesome set!  You will probably see another card sometime in the future as there are many more sentiments and images I've yet to use!  Thanks for stopping by!  Have a fabulous, crafty week!


Zig Clean Color markers:
Light Green, Dull Blue, Bright Yellow,

Monday, March 9, 2020

Oopsie Daisy! | Art Impressions

Happy Monday friends!  I'm on the blog over at Art Impressions today and have this card featuring the new, and so beautiful, Scrapbook.com exclusive for Art Impressions Exclusive Daisies set.  This set is only available at Scrapbook.com and you can find the link at the end in the supply list.

I love daisies and couldn't wait to play with this set!  I've used one of the several images in the set to make a sweet birthday card that I've Copic colored.  I've listed the markers I used below.


After I finished coloring the daisies, I used a few BG markers to add a shadow effect around the bouquet.  This helps to make the white flowers pop more!  I die cut the panel with a Rectangle Double Stitched die.  This is adhered to a black layer and then onto a card base with a polka dot layer added to it.


I stamped the cute sentiment from the set in black ink.  I die cut it with a die from the Flag Double Stitched die set.  I die cut some black card stock with the same die and offset it.  I also popped it up with some 3D foam squares.  For the heart embellishments, I took a few clear acrylic hearts and colored them with my Y19 marker.  Once they were dry I adhered them with some Distress Collage Medium Matte.


Thanks so much for stopping by today!  Check back next week as I'll have one more card using another image from this set.  Until next week, stay crafty!!

Copic markers:
BG000, BG0000, C3, C1, C00,
Y19, Y13, YG67, YG17, YG15,
Colorless blender

Supplies:

Sunday, March 8, 2020

NEW Rubbernecker Color Fuse Inks and Layering Stamps

Hello friends!  Today I have a card using the beautiful NEW Color Fuse Inks by Rubbernecker Stamps!   There are four sets out with more coming soon.  These inks are perfect for inking up the fabulous new layering stamp sets!

For my card today I've used the gorgeous new Happy Mother's Day set.  I love that there are other sentiments included to use any other time of the year!  Also, if you are new to using solid layering stamps, keep reading as I've included a list of tips that I find helpful.


Steps to make the card:
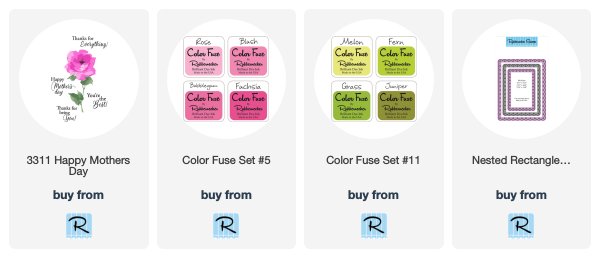
  1. Following the included layering guide, stamp the bottom layer in the lightest ink color.  I used the pink set and began with Rose.  I did stamp each layer twice as I love a vibrant color!
  2. Stamp the second layer with Bubblegum and the third with Fuchsia.
  3. Stamp the flower center with Melon from the green set.
  4. Stamp the stem with leaves in Melon, then Fern, and the last layer with Grass.
  5. Die cut the panel with the largest die in the Nested Rectangle Scallop w/Holes die set.
  6. Stamp the sentiment in black ink.
My tips for using solid layering stamps:
  1. "Season" the stamp. (Not with salt and pepper--LOL!)  I have tried several ways, but what seems to work the best for me is to use an eraser all over the stamp.  Use a dry microfiber cloth to wipe off the eraser debris.
  2. Next stamp Versamark Clear ink onto the stamp.  Use your dry microfiber cloth to very lightly wipe some of it off.  See the photos below for a before and after "seasoning".
  3. I use a MISTI to do my stamping, especially layering stamps.  It's handy to use a stamp positioner so you can do a second stamping if needed.
  4. Ink up the stamp.  Tap the ink pad lightly to the stamp.  If you mash the ink pad down too hard, it will leave lines in the ink from the edges of the ink pad.
  5. I always do a trial run of my stamping on scratch paper.
  6. Stamp the layer a second time, if needed.
  7. LET EACH LAYER DRY (or use your heat tool) before stamping the next layer!  If you stamp the second layer before the first is dry, the edges of the second layer will kind of feather out.  
   

Did you notice the perfectly matched pink layer?  Well, these inks blend LIKE BUTTER!!  I used an ink blending brush with the Bubblegum ink and inked up the edges of an A2 sized white card stock piece.  Adhere the card panel to the pink card and add to a top-folding A2 card base.


I added a few clear pink acrylic hearts for a bit of embellishment.


I absolutely LOVE the watercolored look of this floral stamp!  It's so easy to line up and create a beautiful image!  I hope my tips help you when you give these beautiful new stamps and inks a try!  Thanks so much for stopping by today!  Have a wonderful, crafty week!


Thursday, March 5, 2020

Hug in A Mug Floral Coffee Mug | Honey Bee Stamps

Happy Thursday friends!  Those that know me know I love a pretty decorative coffee cup to have my morning coffee in.  That's what inspired me to make a pretty coffee mug with flowers on it for my card today!  I used the beautiful Mother's Day stamp set and the Coffee Cup Card Honey Cuts.


Here are the steps for my coffee cup card:
  1. Die cut one Coffee Cup Card base, three of the lids and the two pieces for the sleeve from Neenah Solar White 80# card stock.
  2. Adhere the three lids together and also the two pieces for the sleeve.  Set aside to dry.
  3. Stamp the flowers from the Mother's Day set onto the front of the coffee cup with a Copic safe ink.  I used my MISTI, to help in getting it lined up just right and to stamp it twice for a good impression.  Be sure to leave the stamp in your MISTI for the next step.
  4. Slide the sleeve onto the coffee cup and place into the MISTI.  Use some scrap paper to cover the coffee cup, leaving the sleeve exposed.  Ink up the stamp and stamp the sleeve.
  5. Next I colored the florals on the coffee cup and the sleeve with my Copic markers.  I used a pencil and ruler to draw a very light line on the lid and at the bottom of the cup to help me get some shading in those areas with my gray Copics.


When my coloring was finished, I adhered the lid to the coffee cup.  The sentiments are from the Perfect Blend set and are stamped in Versafine Onyx Black ink.  For the inside sentiment, I did a bit of stamp surgery and masking.  I cut apart the sentiment "and friends".  I positioned them all and before inking them up, I masked off the "s" from friends.  No stamps were harmed in this process!  Haha!!


I had so much fun coloring this and love how you kind of get a bonus when the sleeve is removed by the full image on the card front!


Thank you so much for stopping by today!  Have a wonderful day and lots of crafty time!


Supplies: