Wednesday, January 26, 2022

Antique Layering Roses Birthday Card | Honey Bee Stamps

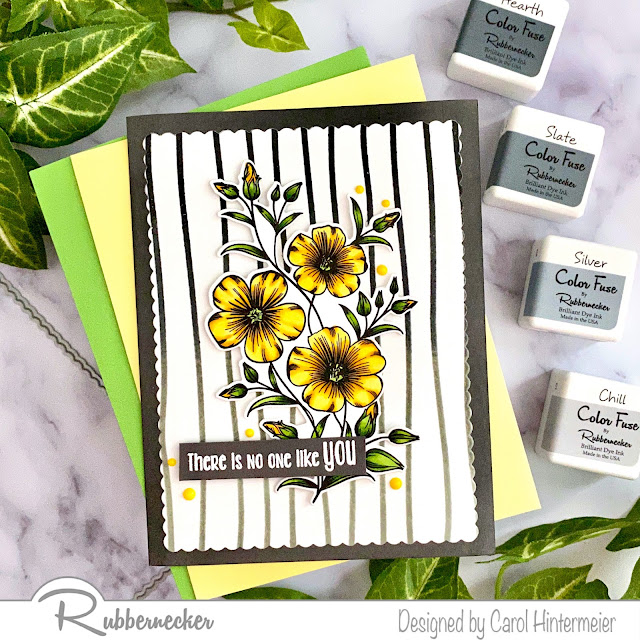
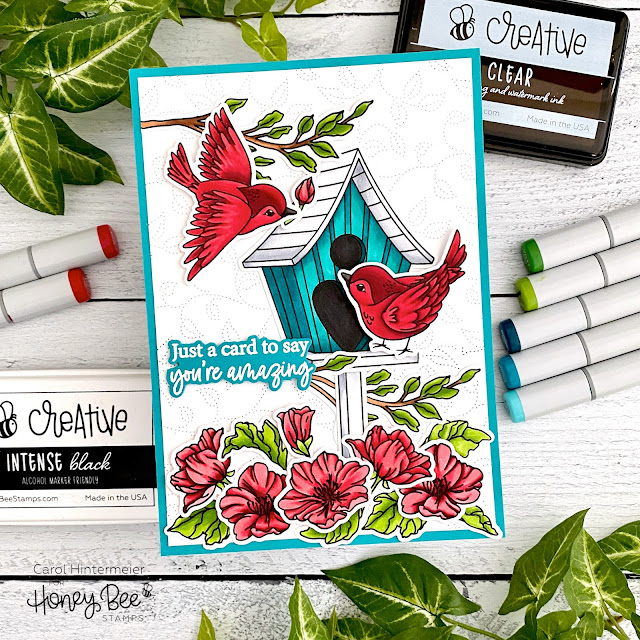
Hello my crafty friends! Today I'm sharing a birthday card I made using the gorgeous Antique Layering Roses stamp set and coordinating Honey Cuts. The sentiment on the inside makes this into a perfect birthday card for your special friend!

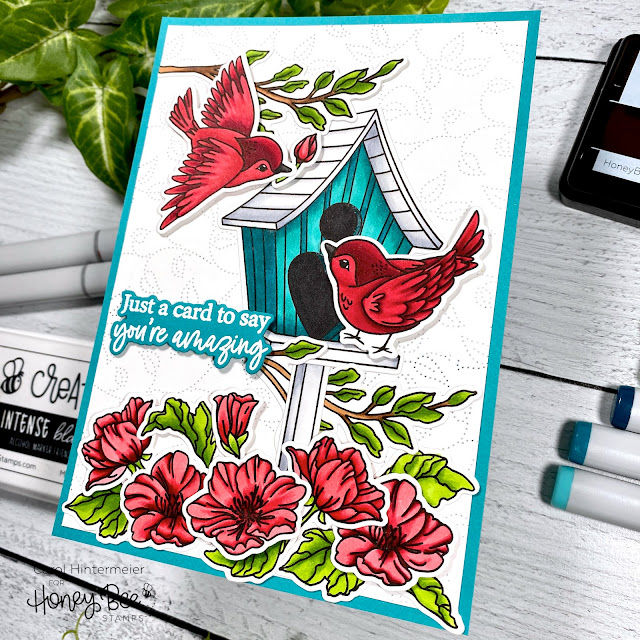
I created my card base and layers by die cutting the Fluttering Hearts Cover Plate die three times from 80# Neenah. I adhered the layers together with Bee Creative glue and then adhered that to a piece I die cut with the Fluttering Hearts Pierced Cover Plate. I added this to my A2 card base with glue.

Next I stamped the images from the Antique Layering Roses stamp set with Intense Black ink. I highly recommend using a stamp positioning tool such as the MISTI with these layering stamps. Then I followed the included layering guide and stamped each layer with various inks in my stash. I experimented with my inks by stamping some layers multiple times. When I stamped the final layer, I discovered that I didn't have an ink that was card enough. So I stamped it a couple times with a cranberry red ink, and then stamped over it with a mahogany ink that helped to define that layer! Another tip is to do your experimenting on cheap paper, such as printer paper. It won't be exactly as stamping on Neenah, but you will be able to see if the colors work.

Before I added the images to the card front, I used the Inside: Birthday Sentiments stamps to add my greeting inside the card. I added also added one of the rose buds to make it pretty!

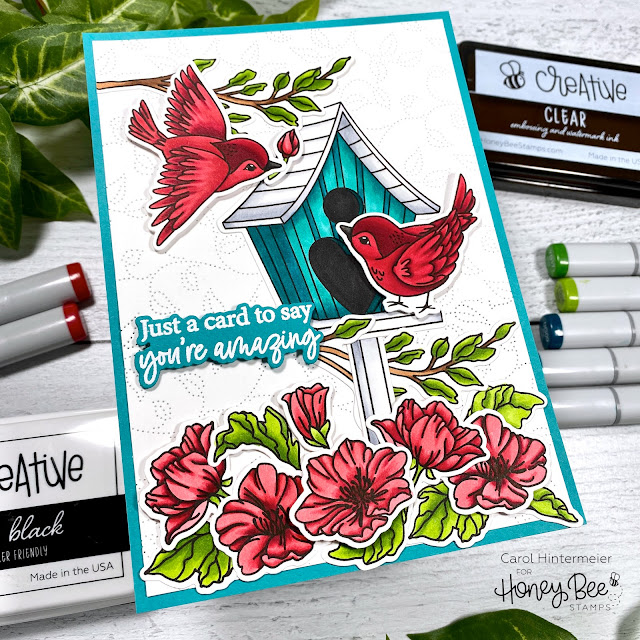
After I used the coordinating Honey Cuts to die cut the images, I arranged them on the card front. I used Bee Creative glue to adhere the center rose and leaves. I am loving the new Honey Bee foam dots to use for dimension like I did for the other two roses and the rose buds.

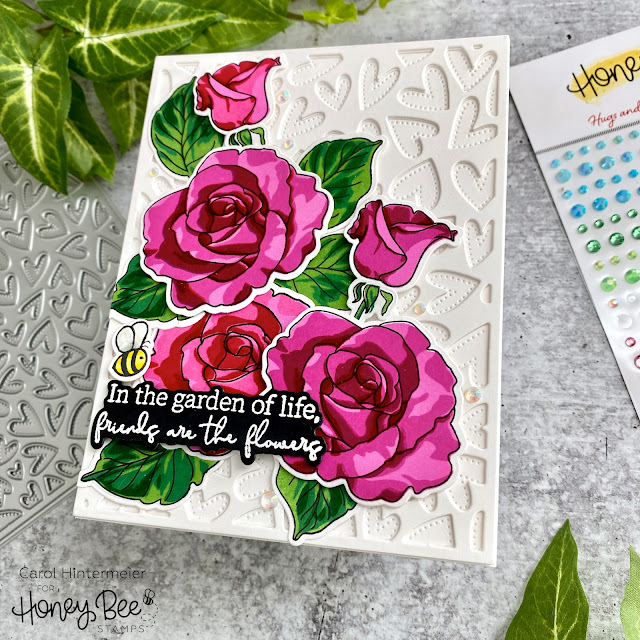
I stamped the sentiment from the My Favorite Flower set with Bee Creative Clear embossing ink onto black card stock. Then I heat set the white embossing powder, die cut it with the coordinating Honey Cut, added foam dots and adhered it to my card. I love adding sparkle to my cards and these gems from the Hugs and Kisses Gem Stickers were just right!

I couldn't resist adding the cute little bee from the Busy Bees stamp set.  I have several of these little guys saved from previous projects!

Layering stamps are lots of fun and I hope you've found some inspiration here today!  I always appreciate you stopping by!  Have a fabulous, crafty day!

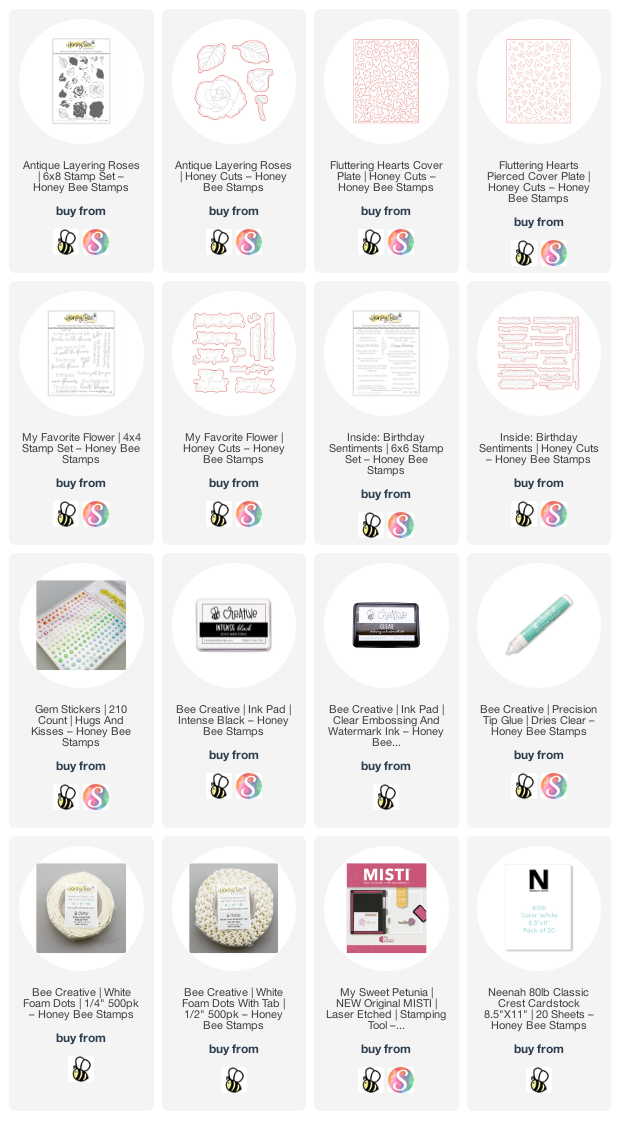
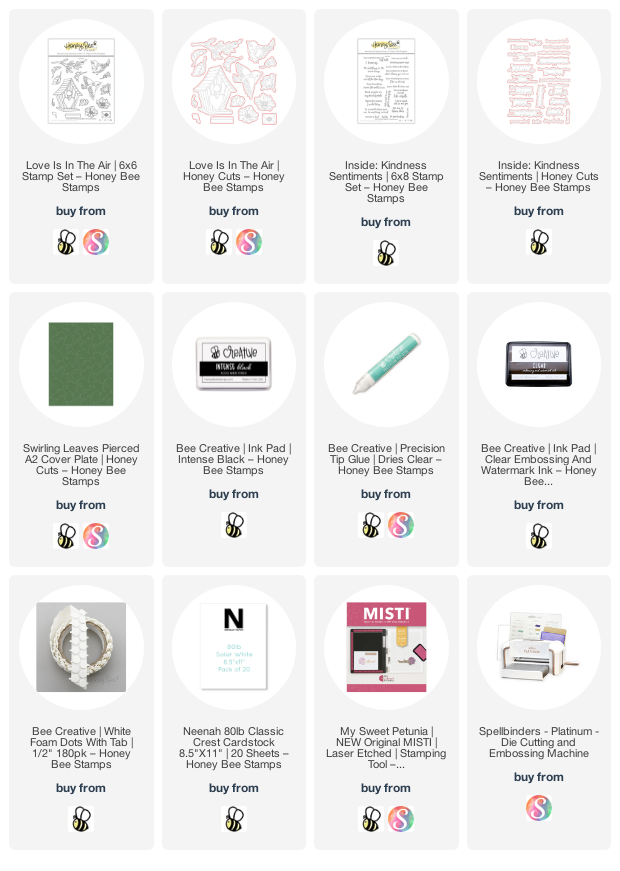
Check out the products I've used here:

Tuesday, January 25, 2022

There Is No One Like You! | Rubbernecker Stamps

Hello friends!  My card today features the beautiful Sweetest Sunrise set by Rubbernecker Stamps!  This was such a quick and easy card to make with a stamped and embossed background to set off the flowers!

I've made a quick list for you of my steps to make this sweet card:

  • Place an A2 card panel into a MISTI stamping tool.
  • Stamp the Wavy Vertical Lines with the gray inks from Color Fuse #12 in an ombré pattern.  Ink the lightest color at the bottom about ¼ of the way up and continue with each darker ink.
  • Leaving the card panel and stamp in place, re-stamp it again with Versamark Clear embossing ink.  Add clear embossing powder and heat set.
  • Die cut the striped panel with the largest Nested Rectangle Scallop Die.
  • Adhere to an A2 card base after inking the edges with Hearth ink.  Just swipe the ink pad around the edges for a coordinating look!
  • Stamp the image from the Sweetest Sunrise Set in Copic safe black ink.  Color with alcohol markers.
  • Use the coordinating die to cut the flower bunch out.  Add foam tape to the back and adhere to the card.
  • Stamp the greeting from the Sweetest Sunrise set onto some coordinating dark gray card stock with Versamark ink.  Add white embossing powder and heat set.
  • Trim the sentiment into a strip, add foam tape, and then adhere it to the card.
  • Add dots of Dandelion Yellow Nuvo Crystal Drops.

Thank you so very much for stopping by today!  Have a wonderful, blessed day!


(If you use my links to shop, I can't thank you enough!)


Wednesday, January 19, 2022

Enjoy Your Day! | Honey Bee Stamps

Hello Honey Bee friends! I'm still adding to my birthday card stash with this card featuring the gorgeous Hello Sweetheart stamps and coordinating Honey Cuts. Instead of using the coordinating stencils to color the flowers, as I did here, and here, I had some fun coloring with my Copics. Read on to learn how I added more popped up dimension to this beautiful image!


 First I stamped the Hello Sweetheart image twice with Intense Black ink onto two pieces of 80# Neenah. To get the fabulous dimension of the flowers, I fussy cut the main flowers from the second stamped image. Then I colored the flowers and the image with my Copic markers.

For the flowers I used: RV99, R56, RV34, R83, RV11, and RV32. If you've ever wondered, I list the colors from dark to light because that's how I color my images. To get the really rich depth in my coloring, I have learned that repeating my coloring a second time makes all the difference! I colored the leaves with YG17, YG25, YG23, and YG13. (The flowers that are underneath the popped up flowers are colored just with R56 around the edges.)

I used the coordinating Hello Sweetheart Honey Cut to cut out the heart shaped image. Then I added foam circles on the back of the fussy cut flowers and adhered them to the heart. I used thin foam strips to adhere the heart to a panel I die cut with a Double Stitched Squares Honey Cut. Next I created my own color-coordinated mat layer by coloring the edge of 4-½" square with Copic marker R56. I adhered it beneath the heart panel and then adhered that to a 4-¾" top-folding square card base. Bee Creative glue is perfect for adhering your layers!

I used the Bitty Buzzwords stamps and Honey Cuts for my sentiment. I die cut the shadow from white card stock and "enjoy" three times from black card stock. I adhered all of the layers with Bee Creative glue and adhered it to the card with foam circles. I stamped "your day" from the Bitty Buzzwords stamp set with Intense Black ink. I trimmed it into a little banner shape and adhered it with glue.

I added some sparkle to my card with some beautiful gems from the Hugs and Kisses Gem Stickers pack. I love the various sizes of these new gems and how they are SO sparkly!! LOL!

Thank you so very much for stopping by today!  Have a wonderful, and crafty, week!

Thank you should you choose to use my affiliate links: 💗

Wednesday, January 12, 2022

Lovely Layers: Roses Birthday Card | Honey Bee Stamps

 Hello Honey Bee friends! Since I'm so very low on birthday cards I've made one using the gorgeous Lovely Layers: Roses Honey Cuts. All of the Lovely Layers series are absolutely beautiful, and today I took a bit more time to Copic color my layers to get the look of even more dimension!

I began by die cutting all of the Lovely Layers: Roses dies from 80# Neenah. Then I used Copic markers to color each layer. I used R22, R32, R21, and R20 for the rose and rose bud layers and G28, G07, YG25, and YG03 for the stem and leaves. I used some thin foam strips in-between each layer for even more dimension. (This will most likely be a card that I hand deliver, or I could place it in a padded envelope for mailing.)

Next I created my card base and panel. I scored a 6-½" x 6-¼" piece of 80# Neenah a 3-¼" and folded it with my bone folder. Then I used the next to largest Sweet Stacks: Mini Slimline Honey Cut to cut another piece of 80# Neenah. I used a Detail Blender Brush to ink on Salvaged Patina Distress Oxide in a light-to-dark ombré pattern. Then I spritzed a bit of water onto it, let it set a minute and pressed a paper towel to the piece to soak up extra water. Next I placed the top layer Garden Lattice stencil over the panel and blended more Salvaged Patina through the stencils on the bottom left and upper right of the panel.

I mixed a bit of white Perfect Pearls with a few drops of water and used a paint brush to add spatters to it. I also added a few drops of the Perfect Pearls mixture to the rose and leaves. I used Bee Creative glue to adhere the rose, rose bud and leaves to the card. Then I added a few sequins from the Hugs and Kisses sequin mix to add more sparkle!

I stamped the sentiment from the Tag, You're It: Celebrations stamp set with Intense Black ink. I used the coordinating Honey Cut to cut it out and popped it up with a few foam squares.

Thank you so very much for stopping by! I hope you have a wonderful, creative day!

Thank you for choosing to shop with my affiliate links:

Tuesday, January 11, 2022

Coffee and Then The World!

Hello crafty friends!  I hope 2022 is off to a good start for you!  Today I'm sharing this cute card using Rubbernecker Stamps Coffee Lover Set where I created a relaxing scene for the girl with her coffee!

  • Stamp the images from the Coffee Lovers Set and the Woodland Animals #2 set with Copic safe black ink.
  • Color the images with Copic markers and die cut with the coordinating dies.
  • Stamp the tree branch and leaves outline from the Woodland Animals #2 set with Copic safe black ink onto an A2 sized card.
  • Color the tree with various green Copic markers by randomly dabbing the tip while holding the marker at an angle.  I used G07, YG25, YG23, and YG03.
  • Die cut the tree panel with the largest Nested Rectangle Small Stitch die.  Then adhere it to a top-folding A2 card base.
  • Die cut a strip of white card stock with a Slimline Grass Border die.  Then color it with the same green Copic markers as listed above.  I used the Rectangle Small Stitch die to cut it out to match the background layer on the card.
  • Stamp the sentiment from the Coffee Lovers Set with black ink and die cut the with the third smallest Nested Square Stitch die.
  • Add foam tape to the back of the girl and the sentiment to adhere to the card.
  • Use liquid glue to adhere the rabbit on the left and foam tape for the rabbit on the right.

I sure appreciate you stopping by today and hope I've inspired you with an idea for your cards!  Have a wonderful day!


Wednesday, January 5, 2022

You're Amazing! | Honey Bee Stamps

 Happy 2022 crafty friends!  I hope the new year is off to a good start for you!   For my first card of the new year, I'm using Honey Bee Stamps' beautiful Love Is In The Air stamps and coordinating dies.  Once I had the images colored, this card came together very quickly!  Read on for the details.

First I created my 5" x 7" card base.  I adhered some teal card stock to the side-folding base.  Then I trimmed 80# Neenah to 4-¾" x 6-¾".  Then I used the Swirling Leaves Pierced A2 Cover Plate die to add the piercing to the card.  Now you may be saying, "wait, this is a 5" x 7" card and the cover plate is A2 sized!"  Well, I just turned the cover plate and placed it over the top half of the white card stock, ran it through my machine, then carefully positioned it on the bottom, and ran it through again.  Works like a charm!  I adhered the piece to my card with Bee Creative glue.

I stamped the images from the Love Is In The Air set with Intense Black ink and colored them with my Copic markers.  Here are the colors I used:  flowers and birds: R59, R29, R27, R35, & R43; birdhouse: BG09, BG49, BG15, C3, C1, & C00; leaves: YG17, YG25, & YG03.  I used the coordinating dies to cut them out.

Next I stamped the sentiment from the Inside: Kindness set with Bee Creative Clear Embossing ink, sprinkled it with white embossing powder, and heat set it.  I used the coordinating die to cut it out.

I used a combination of foam dots and Bee Creative glue to adhere the images and sentiment to the card front.  

Thank you so much for stopping by today!  Have a wonderful day!

Thank you so very much if you use my affiliate links (which are never any extra cost to you):