Showing posts with label Hello Sweetheart set. Show all posts

Wednesday, January 19, 2022

Enjoy Your Day! | Honey Bee Stamps

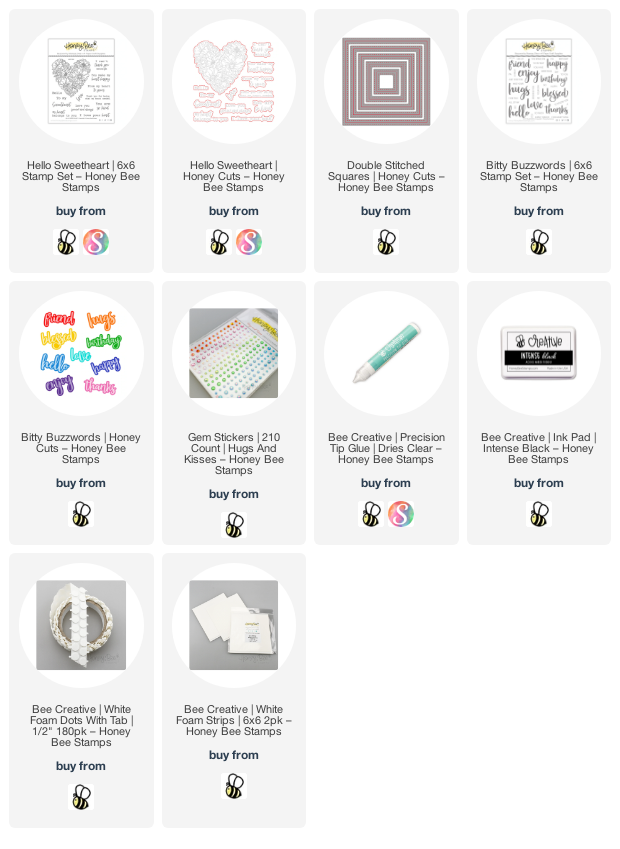
Hello Honey Bee friends! I'm still adding to my birthday card stash with this card featuring the gorgeous Hello Sweetheart stamps and coordinating Honey Cuts. Instead of using the coordinating stencils to color the flowers, as I did here, and here, I had some fun coloring with my Copics. Read on to learn how I added more popped up dimension to this beautiful image!


 First I stamped the Hello Sweetheart image twice with Intense Black ink onto two pieces of 80# Neenah. To get the fabulous dimension of the flowers, I fussy cut the main flowers from the second stamped image. Then I colored the flowers and the image with my Copic markers.

For the flowers I used: RV99, R56, RV34, R83, RV11, and RV32. If you've ever wondered, I list the colors from dark to light because that's how I color my images. To get the really rich depth in my coloring, I have learned that repeating my coloring a second time makes all the difference! I colored the leaves with YG17, YG25, YG23, and YG13. (The flowers that are underneath the popped up flowers are colored just with R56 around the edges.)

I used the coordinating Hello Sweetheart Honey Cut to cut out the heart shaped image. Then I added foam circles on the back of the fussy cut flowers and adhered them to the heart. I used thin foam strips to adhere the heart to a panel I die cut with a Double Stitched Squares Honey Cut. Next I created my own color-coordinated mat layer by coloring the edge of 4-½" square with Copic marker R56. I adhered it beneath the heart panel and then adhered that to a 4-¾" top-folding square card base. Bee Creative glue is perfect for adhering your layers!

I used the Bitty Buzzwords stamps and Honey Cuts for my sentiment. I die cut the shadow from white card stock and "enjoy" three times from black card stock. I adhered all of the layers with Bee Creative glue and adhered it to the card with foam circles. I stamped "your day" from the Bitty Buzzwords stamp set with Intense Black ink. I trimmed it into a little banner shape and adhered it with glue.

I added some sparkle to my card with some beautiful gems from the Hugs and Kisses Gem Stickers pack. I love the various sizes of these new gems and how they are SO sparkly!! LOL!

Thank you so very much for stopping by today!  Have a wonderful, and crafty, week!

Thank you should you choose to use my affiliate links: 💗

Wednesday, December 22, 2021

Can't Thank You Enough! | Honey Bee Stamps

Hello crafty friends! Today I'm sharing a thank you card I made using the beautiful new Hello Sweetheart stamps, coordinating Honey Cuts and layering stencils! These are all part of the awesome Sealed With Love release! I used the stencils to color the flowers and then stepped it up a bit by adding shading and depth with a few Copic markers. Keep reading for the details!

First I created my card base and layers. I used the Mod A2 Cover Plate die to dry emboss a piece of A2-sized purple card stock. Just use the die with your rubber embossing mat in the sandwich for your die cutting machine! (TIP: spritz a fine spray of water on your card stock before dry embossing to help eliminate cracks in the paper.) I inked Villainous Potion Distress Oxide around the edges and added spatters of diluted white gauche. I trimmed a bit around the edges and adhered it to a top-folding A2 card base.

Next I stamped the floral heart onto 80# Neenah with some Bee Creative No-line Coloring ink. The reason I used no-line ink is that I've found that when inking Distress Oxides over black ink, it really dulls the black stamped lines. So I left the stamp in my MISTI and re-stamped the image with Intense Black ink after I finished the stenciling.

The no-line ink shows just enough to easily line up the stencils!

I almost didn't re-stamp this in black--I think it's kind of pretty like this too!

I used these Distress Oxides through the layered stencils: Villainous Potion, Rustic Wilderness, Mowed Lawn, Squeezed Lemonade, and Mustard Seed. To be able to add shading with the inks, I used sponge daubers. Then I created more dimension to the flowers and leaves with some Copic markers. When you already have your flowers stenciled, this such a quick and easy way to add a bit of Copic coloring! I used these Copic markers: V17, V15, V09, V01, Y19, Y15, Y08, YG17, and YG25.

I stamped the sentiment from the Hello Sweetheart set in Intense Black ink. Next I die cut it with the coordinating Honey Cut. I added some foam tape to the back of the sentiment and heart to pop them up onto the card. For a touch of bling I added a few gems from the new Back To Basics Gem Stickers. I love how there are different sizes of gems in these new sets!!

I really love these coloring, layering stencils! They are really lots of fun to use! I hope you have the Merriest Christmas, if you celebrate; and if not, I'm wishing all the best for you during this season! Thank you so much for stopping by today!

Thank you so very much should you choose to shop with my links 💗