Friday, August 30, 2024

Altenew September 2024 Release Blog Hop + Giveaway ($300 in Total Prizes!)

Welcome, crafty friends, to the blog hop celebrating all of the awesome new products in Altenew's September 2024 Release!  This release is filled with beautiful florals that Altenew is so well known for, gorgeous cardstock colors, inks, and holiday products too!  Be sure to keep reading as there are some awesome prizes to be chosen from the commenters.

The complete hop list is below.  If you would like to start at the beginning, start at the Altenew blog!

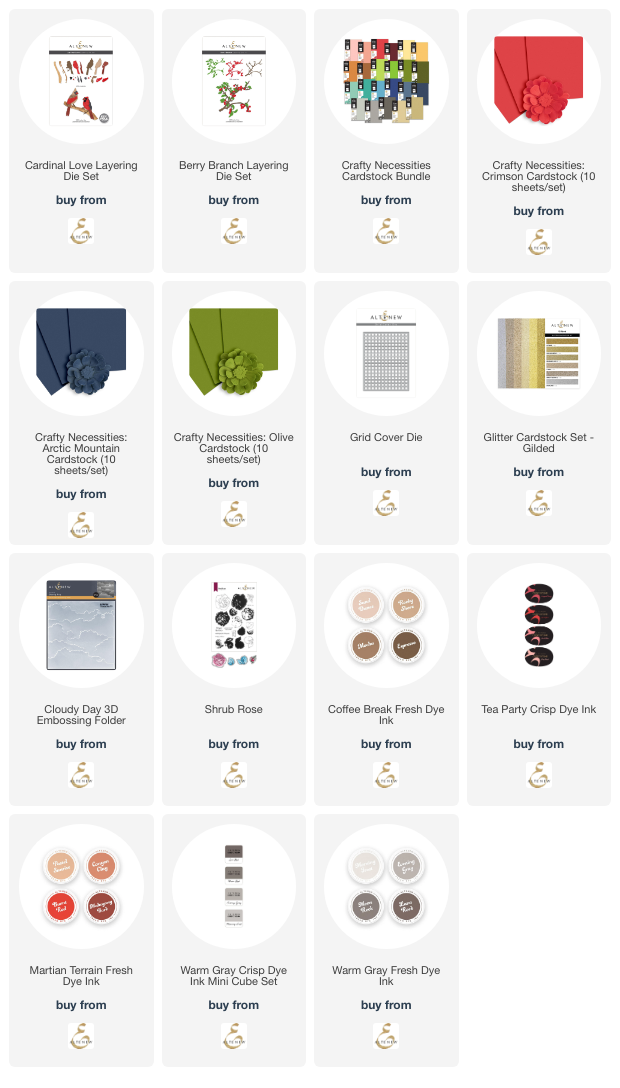
For the hop today, I have created two holiday cards featuring the Berry Branch Layering Die Set and the gorgeous Cardinal Love Layering Die Set.  These products, and all the others are available now in the Altenew shop!

This card features the beautiful Berry Branch Layering Die Set and the Timeless Sentiments Die Set: Holiday Edition.

I die cut the Berry Branch Layering Die Set from some of the new Crafty Necessities Cardstock colors.  I used Crimson and Olive colored cardstocks.  The brown cardstock is from my stash.

I layered a piece of Arctic Mountain cardstock with layer die cut with the Grid Cover Die.  Then I added opaque white paint splatters to the card layers and the Berry Branch die cut.

The sentiment is from the Timeless Sentiments Die Set: Holiday Edition.  I cut the shadow layer from more Arctic Mountain cardstock and the top layer from Topaz glitter cardstock.


I love cardinals, my most favorite bird!

This card features the so beautiful Cardinal Love Layering Die Set, and again, the Berry Branch Layering Dye Set.  The Berry Branch works wonderfully with the branch that is included with the Cardinal Love dies.

All of the Cardinal dies were cut from white cardstock.  I used the following Crisp dye inks (linked below) to color these beautiful birds:  Clay Canyon, Burnt Red, Heart Beat, Rocky Shore, Mocha, Expresso, Jet Black

I added a white panel that I embossed with the Cloudy Day 3D embossing folder onto a panel that I color coordinated with Heart Beat ink.

The sentiment is from the Shrub Rose stamp set and popped up with foam tape.  For more dimension and interest, I added Ruby Slippers Nuvo drops (yes, I still have those--LOL!).

I hope you've been inspired by my cards today!  Keep hopping along to see much more beautiful inspiration for this release!

Giveaway Prizes

$300 in total prizes! To celebrate this release, Altenew is giving away a $100 gift certificate to 1 lucky winner and a $50 gift certificate to 4 winners! Please leave a comment on the Altenew Card Blog and/or each designer’s blog post on the blog hop list below by September 5th for a chance to win. Altenew will draw 5 random winners from the comments left on each stop of this blog hop and announce the winners on the Altenew Winners Page on September 7th, 2024.

*The winner of the $100 gift certificate will be chosen from comments left on the Altenew blog.

You are invited to the Inlinkz link party!

Click here to enter
Thank you for using my affiliate links to shop (never any additional cost to you)!

Wednesday, August 28, 2024

Autumn Scene Card With The New Lovely Layers: Scarecrow

Hello crafty friends! Have you see the awesome new Honey Bee Stamps "Falloween release"?  It is filled with beautiful autumn stamps, dies, stencils and more!  Also there are some sweet and not too spooky Halloween items too!  I can't even begin to choose a favorite, but this adorable Lovely Layers: Scarecrow is definitely one I love!

Also, I don't want to forget to tell you about an awesome Instagram hop we are having today to celebrate Honey Bee's new release! When you are done here, be sure to join me on Instagram and leave a comment on each stop for your chance to win! Two winners, drawn from the comments, will each win a $50 gift certificate!

I created my autumn background for the adorable Scarecrow with the Farmhouse Fields Scene Builder die and the coordinating stencils. I used ink blending brushes and a lot of my favorite autumn color Distress Inks. I used Peeled Paint, Faded Jeans, Tumbled Glass, Scattered Straw, Carved Pumpkin, Aged Mahogany, Antique Linen, Gathered Twigs, and Black Soot.

I stenciled the black birds in the sky by using a stencil from the Palm Beach stencil set. But I think these could easily be hand drawn too.

Next I die cut the Lovely Layers: Scarecrow dies from 80# white cardstock. I used blending brushes and Distress Inks to color the layers. Using a sticky mat to hold the small pieces while inking is so helpful! I used the Layering Guide for assistance in assembling the scarecrow for the first time. After I glued the layers together, I added a few foam dots to the back of the scarecrow to adhere it to the card.

The sentiment is from the new Something To Crow About stamp set and stamped in black ink. I love that Honey Bee has coordinating dies to cut out the sentiments!

I thought the crow would look super cute perched on the sentiment so I popped him up with a small piece of foam tape.


Thank you so much for using my affiliate links to shop (never any additional cost to you)!  Note: In order for me to receive credit, you need to have your browser set to allow cookies.

Tuesday, August 27, 2024

Gilded Rose -- Using A Hot Foil Plate As A LetterPress Plate

Hello!  Today I'm sharing some details of my card that I created for my reel for Altenew and shared over on my Instagram.

I've used a set I've had a while, but only one time!  The Gilded Rose is a Hot Foil Plate that also has coordinating stencils for coloring the image.  I always like trying to find a different way to use products and I wondered if this would work as a letterpress press plate.

NOTICE:  I have been informed, rather sternly, by a few people that Spellbinders does not recommend using hot foil plates with the BetterPress Letterpress system.  My machine is old enough to not be under any warranty.  If you choose to try this, please be aware of the recommendation from Spellbinders.  My machine was not harmed, fyi.  

I'm very happy with how the pressed image turned out!  I set up the Gilded Rose hot foil plate in my Betterpress Letterpress system, inked it up with Mahogany Bark Crisp Dye Ink.  I ran it through my die cutting machine with an A2 size piece of 80# Neenah.

Then I used the coordinating stencils and blending brushes to add Pastel Sunrise, Canyon Clay, and Burnt Red Crisp Dye inks. (Linked in the list below.)

Next I embossing white cardstock with the Angled Mosaic 3D embossing folder.  I added metallic watercolor splatters with two colors in the Metallic Watercolor 14 Pan Set.

I also added a few splatters to the Gilded Rose piece.  When the splatters were dry, I used my scissors to cut it out.

I used glue to adhere the embossed panel and the Gilded Rose image to my A2 card base.

The sentiment is the Wonderfully Made die and is die cut from Brushed Gold Metallic cardstock and layered up with three more white cardstock die cuts.  I just love the font and size of this!

Thanks so much for stopping by!  I hope you are have a wonderful week!

Thank you for using my affiliate links to shop (never any additional cost to you)!

Sunday, August 25, 2024

Snowman Cheer Snowy Shaker Card

Happy new week crafty friends!  Today I'm over on the blog at Brass & Bliss (to be posted soon--the owners were ill) to share all of the details to make this cute shaker card that features the Snowman Cheer stamps and dies!

First I die cut a Classic Nested Oval from a piece of paper from the Snowflake Fun paper pad.  Then I used the Christmas Lights Stencil to create the texture paste background.  See that sparkle?  I gently pressed glitter into the paste before removing the stencil!

The shaker window was filled Distress Mica Flakes and iridescent glitter.

This adorable snowman from the Snowman Cheer set was Copic colored and die cut with its coordinating die.  He's having fun swinging from a Branch die cut!

I white heat embossed the sentiment with white embossing powder and die cut it with a Nested Scallop Oval Die.  This is one of six sentiments included with the Snowman Cheer stamp set.

Be sure to check out all of the details over on the Brass & Bliss blog!  Thank you so much for stopping by!

Friday, August 23, 2024

Beautiful New Cardstock Colors For A Floral Autumn Birthday Card

Hi crafty friends, and happy Friday!  Today I'm participating in an Instagram hop to celebrate Altenew's new Crafty Necessities Cardstock Bundle!  They now have cardstock that coordinates with some of their inks!  Keep reading to get the awesome prize details for the hop!

I used several of the new cardstock colors, which by the way, are available in individual packs!  It's great to be able to choose the colors you want.  If you are like me and want them ALL, all colors are available in a discounted bundle.

Okay, the card details!  I've used four gorgeous colors of cardstock for this card that I made with the Craft-A-Flower: Cape Marguerite layering die set.  I used Warm Sunshine, Caramel Toffee, Paper Bag, and Olive.

Before I assembled the die cut layers, I used the coordinating ink colors (in the list below) to add a bit of depth to the pieces.   I can't believe how well the cardstock and inks match!

I stamped a sentiment from the Birthday Builder stamp set at the bottom of an A2 size panel.  Then I partially embossed the A2 layer with the Deck Planks 3D embossing folder.

I trimmed three small strips of Caramel Toffee, Olive, and Paper Bag card stocks to adhere above the sentiment.

I finished up the card with some coordinating green enamel dots.  Such a fun card to make!

I hope you will join me over on Instagram for the hop!  There are amazing prizes to be chosen and lots more beautiful inspiration with the new cardstocks in the Crafty Necessities Cardstock Bundle!

Here are links to the items I've used in my card today.  These are affiliate links, never any additional cost to you.  (For me to get the credit if you use my links, please allow cookies on your browser for shopping).

Thursday, August 22, 2024

A Beautiful Stitched Pumpkin with Flowers by Poshta Design

I'm back with another adorable stitched project for Poshta Design's August 2024 release!  On this project I've used the Harvest Pumpkin Autumn Floral Details II Die.  This coordinates with the previously released Harvest Pumpkin Die.  Yes there is another die set that also coordinates with this!

I used more beautiful felt and thread from the Autumn Color Story felt collection for this one.  To add more interest to the details, I stitched a chain stitch for the vine.  If you aren't sure how to do a chain stitch, just do a search on the internet and you will find helpful sites for this.  It has been a while since my embroidery day, so I needed just a little reminder!

Please be sure to stop by the Poshta Design blog to see more awesome sets in this release!  Don't forget to leave a comment over there for your chance at a $50 store credit prize!!

Thank you for stopping by, and I hope I've inspired you with my project today!

Wednesday, August 21, 2024

An Autumn Card and A Fun Technique for Coloring Embossing Folder Images

Hello crafty friends! Autumn really is my favorite season! It's a promise of cooler weather after the extreme heat we have in August here in Texas. I used a fun technique with the Fall Leaves 3D embossing folder!

First I embossed white cardstock with the Fall Leaves embossing folder. Then I used several Distress Inks and a variety of small ink blending brushes to color the leaves on the de-bossed side. It's okay to go outside the "lines". A later step will hide all of that!

I used these Distress Inks: Fossilized Amber, Peeled Paint, Aged Mahogany, Rusty Hinge, and Gathered Twigs.

Next I repositioned the panel back into the Fall Leaves embossing folder. When I had it lined up with the colored side facing up, I used removable tape to hold it in place. Then I used a brayer and Potting Soil Archival Ink to add ink to the other side of the embossing folder. This step will add the dark brown ink to all the veins of the leaves after you run it back through your embossing folder!

This next step is where I crossed my fingers since I had never done it before! Haha! I took the Gathered Twigs Distress Oxide ink pad and, holding it flat, rubbed it all over the panel and it filled in the background and covered up the ink colors that were beyond the edges of the leaves!

Distress Oxide inks are opaque and that's why it works for this technique!

The sentiments are from the Bitty Buzzwords: Seasons Honey Cuts. They are die cut from brown and brushed gold cardstocks. I used foam tape to pop them up on the card.

A few gems from the Vintage Love Gem Stickers adds some fun sparkle!

I love how this turned out! I will definitely be using this technique again and hope I've inspired you to try it! Thank you so much for stopping by!

Thank you for shopping with my affiliate links at no extra cost to you! (your cookie settings need to be enabled for me to get credit)

Guest Designing for Poshta Design!

 I'm thrilled to be a guest designer for Poshta Design, creator of beautiful dies for stitching felt projects!  The August 2024 release will be available on Saturday, August 24 at noon EDT.  I will be sharing projects I've made featuring some of the awesome products in the new release!

I encourage you to check out her blog for lots more inspiration and information about the release!  Also, leave a comment there for your chance to win a prize of a $50 store credit!

My project today features the Just Write Die!

I chose to stitch this cute pencil die with felts, floss, and beads that are in the Autumn Color Story collection.  I added a bead dangle reminiscent of the days when our girls were in school.  It was actually a trendy thing to wrap floss around and around near the top of a pencil and add a dangle of beads to it!   Their decorated pencils were so fun and adorable!

Here's a graphic of the entire Autumn Color Story collection, part of the release available on August 24.

I sure hope you will go check out the Poshta Design blog and leave a comment there for your chance to win!

Thank you for stopping by today!!  I'll be back tomorrow with another project or two!

Sunday, August 18, 2024

May Your Heart Be Light Christmas Card

Today I'm sharing a holiday card that features Spellbinders Faux Embroidered Stockings die set!  I really love the somewhat unexpected sentiment that goes along with this too!

This was a quick and easy card to make with just a few supplies.  I added a panel embossed with the Vintage Ornaments 3D embossing folder to an A2 card base.

Then I die cut white cardstock with oval dies from my stash.  I glued the center oval to the card and popped up the outer frame with foam tape strips.

Next I die cut and assembled the Faux Embroidered Stockings I die cut from Fern, Crimson, and white cardstocks.  I die cut three of the branches to make the greenery fuller.  The little stocking hangers are die cut from matte silver cardstock.

The sentiment is from the Nichol's Needlework Sentiments stamp set.  After I stamped it in black ink, I die cut it with an oval shape die.

And just like that, I have another Christmas card ready for December!  I hope you've enjoyed this card and will check out the other awesome items in this collection.  Thank you for stopping by.  I hope you have a wonderful week!

Thank you for using my affiliate links to shop (never any additional cost to you)!

Saturday, August 17, 2024

Gorgeous Stenciled Butterfly Card in Autumn Colors

Happy Saturday!  Today I'm sharing this card I created for a reel over on my Instagram.  If you would like to see it, just click that link!  It features Altenew's gorgeous Bountiful Butterflies dies and coloring stencils.

I used one of my most favorite color combinations, blue and orange, on this card!  I used Altenew's inks and blending brushes to color through the Bountiful Butterflies stencils.  The Glacier Caves inks make a beautiful deep sky blue background!

Before I removed the stencil for the blue layer, I added water drops for that bokeh look.  When I finished stenciling, I trimmed the piece to 4-¼" x 4" and adhered it to an A2 card base.

Next I die cut a butterfly with a Bountiful Butterflies dies from vellum.  I used the Bountiful Butterfly stencil to color it in the same colors I used previously.  The inks take a bit longer to dry, so I set it aside while I finished other elements.

I die cut the Handwritten Hello shadow three times from white cardstock and glued the layers together.  I inked up a scrap piece of white cardstock with Sapphire ink and die cut the top Hello die from that and glued it to the layers.

I blended Sapphire ink and Marigold ink onto white cardstock and trimmed a narrow strip from each to glue at the top of the white space.  Then I glued the sentiment and vellum butterfly in place.

For a bit of sparkle I added some Clear Gem Sparkles to the card.

I absolutely love how this turned out with the vibrant orange/yellow butterflies and the deep blue background!  I hope you do too!  Thank you so much for stopping by.  

Thank you very much for using my affiliate links to shop (never any additional cost to you)!

Wednesday, August 14, 2024

Sending Warmest Wishes (And Dreaming of the Beach)

Hello crafty friends! With schools beginning and summer vacations taken, I thought how nice it would be to have one last trip to the beach! I'm dreaming of going to the beach with this Honey Bee Stamps Lovely Layers: At The Beach dies as the star of this card. Check out these details!

First I made the background layer for the card. I die cut the pieces of the Beach Break A2 Cover Plate dies. Then I used Distress Oxide inks and blender brushes to add the color through the Beach Break stencils. I used Mermaid Lagoon, Salty Ocean, Brushed Corduroy, and Antique Linen. I added Star Dust Stickles to the white portions of the waves and set it aside to dry.

Next I die cut various colors of cardstock (in list below) with the dies in the Lovely Layers: At The Beach Honey Cuts. I used three Copic markers (RV14, Y13, E02) to color the stripes on the flip-flops. I die cut the top layer of the umbrella three times from three different colors of cardstock. I added a bit of shading with blender brushes and coordinating inks. Then I used my scissors to trim the yellow and coral layers and adhered them to the base with glue.

This is a very easy Lovely Layers set to assemble. However, if you'd like you can download and print the helpful Layering Guide found just after the product description.

With all of the card elements complete, I used glue and foam dots to adhere them to the background layer.

I chose one of the awesome sentiments from the Sunkissed Summer stamp set. After I stamped it in black ink, I cut it out with the coordinating Sunkissed Summer die.

For a bit more sparkle and shine, I added gems from the Grab Your Passport Gem Stickers to the water and the umbrella. For the shine, I put Crystal Glaze on the sunglasses.

I hope you've enjoyed our last trip to the beach, because next week we dive into all things fall with the sneak peaks of the next fabulous Honey Bee release! Thank you so much for stopping by and be sure to subscribe to the blog for updates on the new release!

I so appreciate you using my affiliate links to shop (never any additional cost to you)!

Sunday, August 11, 2024

Silver, Gold, and White Poinsettia Christmas Card

Hello!   Today I'm on the blog at Brass & Bliss to share this beautiful poinsettia Christmas card with a stenciled background.

This card features the beautiful Large Stacked Poinsettia Die set with a gold, silver, and white Confetti Stencil background.

I added details to the Poinsettia petals with gold pigment ink.  First by swiping the crease of each petal over the ink pad and then by blending the ink in the centers of each layer.

The sentiment is from the Christmas Berry Delight stamp set and is heat embossed in gold to coordinate with the rest of the card.

The poinsettia is backed by a pretty gold and silver stenciled background I made with the Confetti Stencil.

Check out all of the detailed instructions over on the Brass & Bliss Blog!  Thanks so much for stopping by.  Have a fabulous, and crafty week!

Wednesday, August 7, 2024

Beach Themed Clear Acetate Card

Hello crafty friends! Have you ever made a card with a clear acetate base? Today I'm sharing how I made my clear acetate card featuring the beautiful Anchor of Hope stamps and coordinating dies!

I began by assembling the elements for the clear card base. First I stamped the image from the Anchor of Hope stamp set with Copic marker safe black ink. Then I used Copic markers to color it. Next I cut it out with the coordinating Anchor of Hope die. I die cut white cardstock with the same shell die three more times.

I chose a very light shade of coral cardstock and die cut the Netting A2 Cover Plate from it twice.

Next I stamped two sentiment from the Anchor of Hope stamp set in a coral color ink. I cut them out with the coordinating dies.

The card base is one of these pre-folded acetate A2 cards. First I added tiny drops of glue to the back of one of the A2 Netting die cuts. I placed it at an angle on the acetate card base and then trimmed off the overhang. Next I added dots of glue to the front of the other Netting die cut. I adhered this on the front inside of the card making sure to line it up with the Netting on the front. Again, I trimmed off the excess.

Next I glued the Copic colored shell image to the front. Then I glued another of the white shell die cuts on the inside back. To easily line up the shell die cut on the inside (to use for your message), add a bit of removable adhesive to the inside front shell. Next, place another shell die cut on this, face down. Add glue to the back of the shell and close the back acetate over it. Allow plenty of drying time and open the card, using an adhesive eraser to take off the temporary adhesive.

Here's a photo of the inside for a visual of the above directions. I glued the last shell die cut on the back of the card to hide the glue.

I used glue to adhere both of the sentiments to the front of the card.

I added a bit of sparkle with a Wink of Stella pen and some gems from the Grab Your Passport gem stickers.

This is really an easy card to make, and I hope I've inspired you to give it a try! If you have any questions, please be sure to drop it in the comments. Thank you for stopping by!

Thank you so much for using my affiliate links to shop (never any additional cost to you)!