Showing posts with label Bunch of Bouquets. Show all posts

Thursday, February 6, 2020

Spring Flowers Post Box Card | Honey Bee Stamps

Hello friends!  Is it cold and miserable where you are?  Well, I have a bright and cheerful card for you today!  I had so much fun using Honey Bee Stamps' awesome Post Box Card Base die to make this spring-time inspired card.


Steps for the card base:
  1. Die cut the Post Box card base and the hinge from patterned paper from the Great Outdoors 6x6 paper pad.  Die cut another post box from white Neenah 80# card stock.
  2. For the two additional pieces on the post box, I inked some white card stock with Evergreen Bough Distress Oxide using a foam ink blending tool.  I then die cut them out with dies in the set.
  3. Next I used stamps from Love Enclosed and stamped the sentiment, hearts and decorative corners with Versamark.  I heat embossed it with WOW Opaque Bright White embossing powder.

Embellishing the Post Box card:
  1. Next comes the fun part!  Die cut a bunch of flowers, stems and leaves from the Bunch of Bouquets Honey Cuts.  (Note: Before die cutting the yellow flowers, green stems and leaves, I used a few Copic markers to color the white card stock.)
  2. Using an embossing stylus from the Flower Shaping Essentials Kit, shape the flowers and leaves.
  3. Add yellow and white NUVO Crystal drops to the flower centers and set them aside to dry.
  4. Stamp an envelope from the Love Enclosed set in black ink and cut it out.  Tuck it into the mail slot adding some glue to hold it in place.
  5. Once the flower centers were dry, I used liquid glue to attach stems and leaves to some of them.  I adhered the stemmed flowers along the bottom and then used the Grass Border Honey Cut to cut out two strips of grass.  I colored the front and back of these strips with a Copic marker.  This will hide the Copic ink bleed through when the card is open.  Adhere one grass strip to the bottom front.
  6. Open the card and color any of the backs of stems that show.  Adhere the second grass piece on the inside of the card front.
  7. I totally forgot to stamp the inside sentiment before adding all the dimensional elements!  The Thanks A Bunch set is perfect for this as it also has coordinating dies for the sentiments.  I stamped it with black ink, die cut it, and adhered it with liquid glue.


To add a bit more cuteness, I stamped and Copic colored three birds from the Birds and the Bees set.  I used the coordinating Honey Cuts to die cut them.


I hope my card has brightened your day some.  Spring will be here before we know it!  Thank you very much for stopping by!  Stay crafty!


Supplies:
Honey Bee Stamps:

Other:

Thursday, August 8, 2019

Cottage Window Scene, Honey Bee Stamps

Hello!  It's my turn over on the Honey Bee Stamps blog today.I had so much fun last week with Honey Bee's 6x6 paper pads that I made another card that uses at least one sheet from each of the four pads!

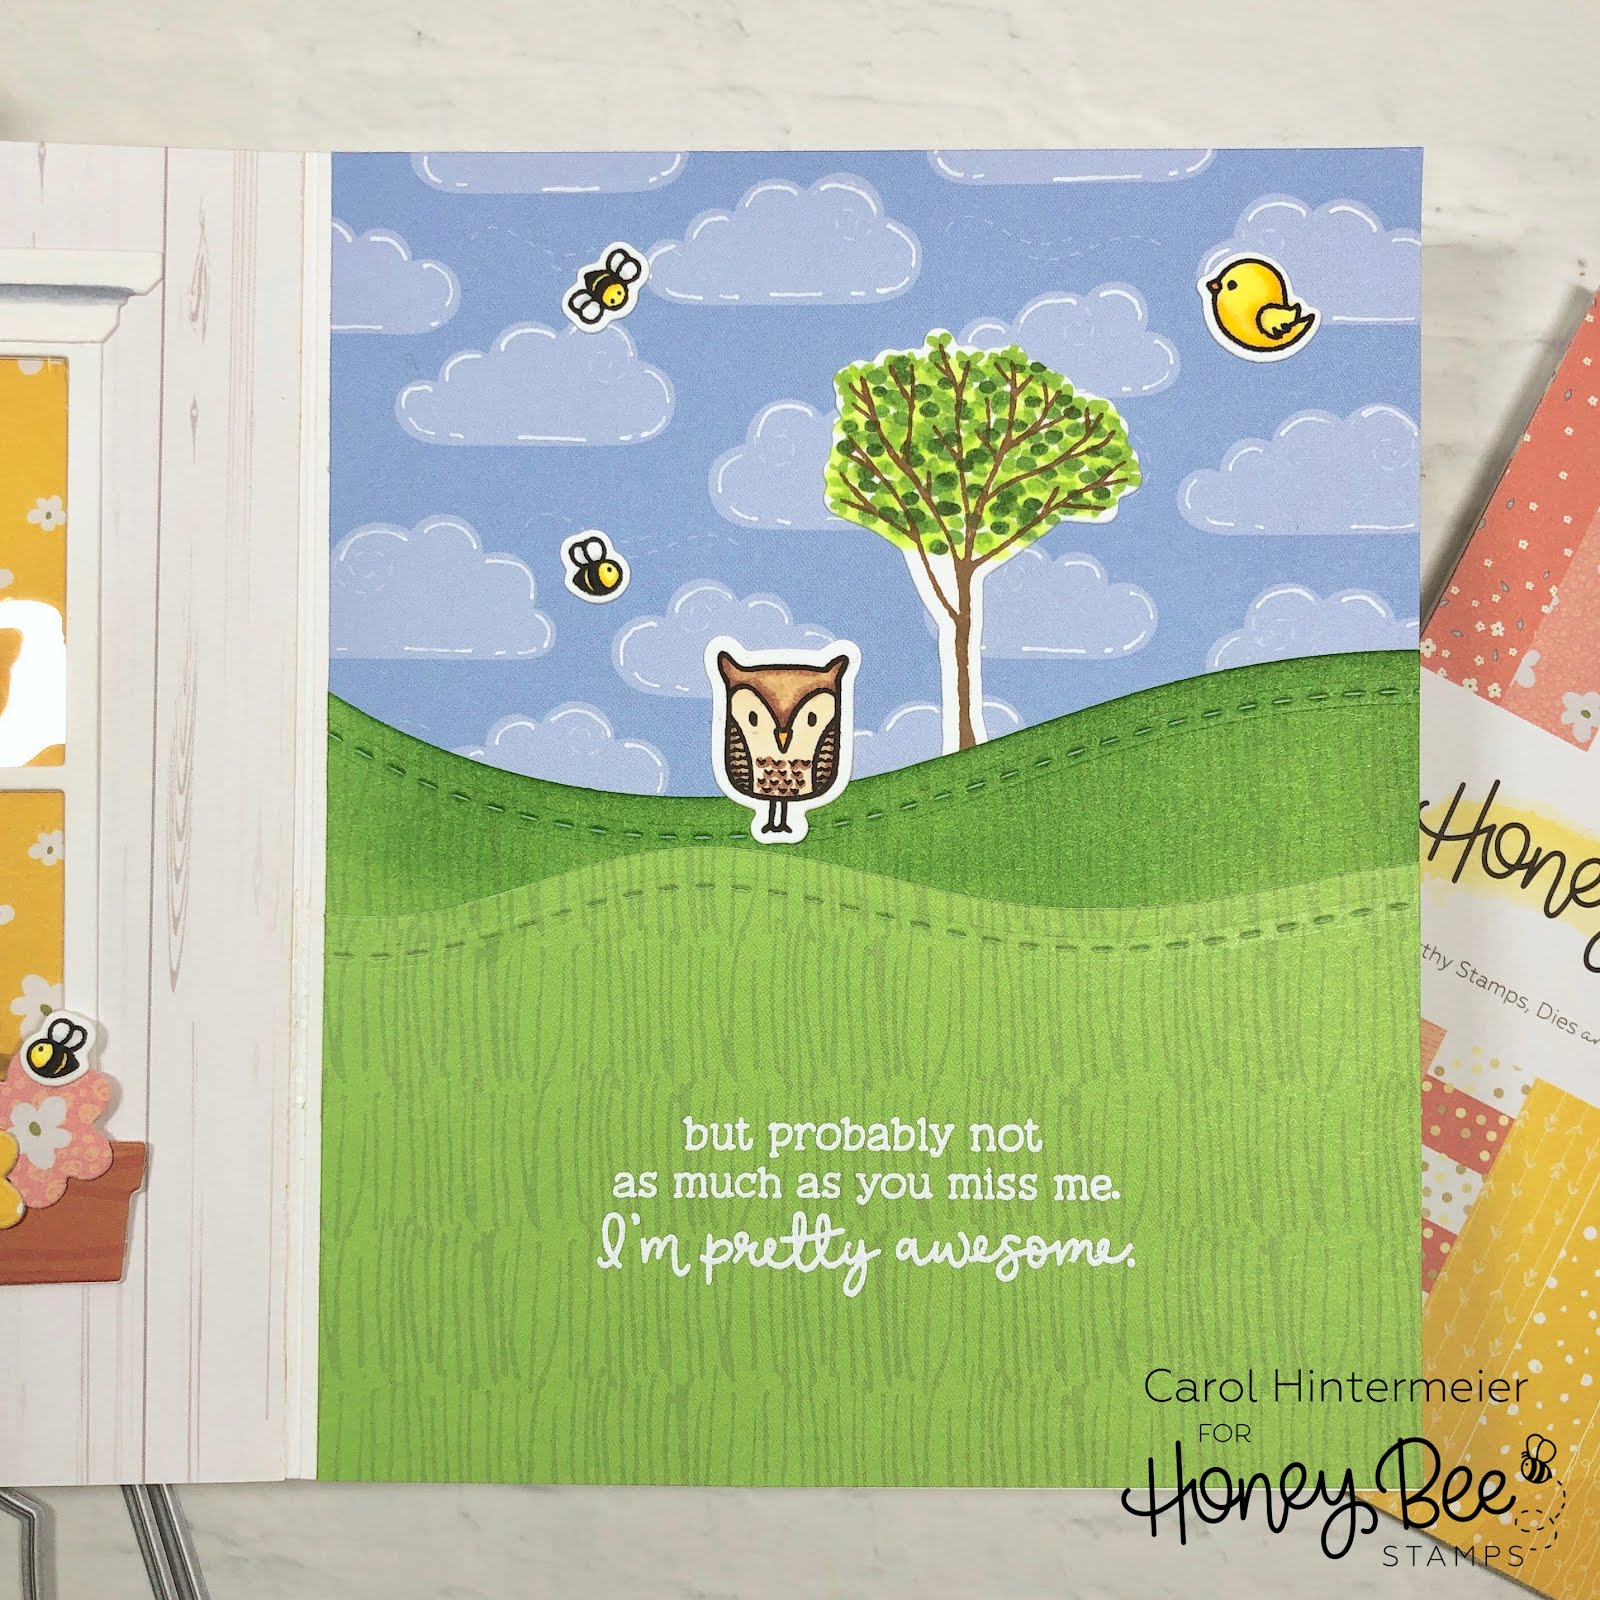
For this card, I used the Cottage Window Honey Cuts and left off the shutters and created a "looking from the inside out" window.  This cute little bunny is looking out the window at his owl friend leaving and missing him already!  That's my story!  Haha!


The patterned papers on the card front are from the Spring Fling pad.   I liked these two florals for the "wallpaper" and the curtains.   To have the curtains double sided, I die cut four of each; and since they are symmetrical, I could adhere them back to back. I stamped and Copic colored the bunny, owl, and tree that are from the Silent Night stamp set (yes, a Christmas set can also work anytime!)  The sentiment is from the Missing You stamp set, and I layered the sentiment onto a leftover strip of yellow paper.


Here is a look at the scene inside.  I layered a piece of acetate between the two window pieces and used a wood-look patterned paper from The Bee's Knees pad for the outside around the window.  I die cut the hills with the Hill Borders Honey Cuts from paper in the Over The Rainbow pad.  I lightly inked the hill in the back for some dimension.  The cloud paper is from Over The Rainbow.  I used a white gel pen to add some accent lines on the clouds.


Here you can see the cute little bunny's nose peeking through the window.  I mirror stamped him and just colored that tip that was showing.  For the flower box I used the Bunch of Bouquets Honey Cuts. I used three of the flower dies a die cut some of the flowers on a piece of paper from the Spring Fling pad.  The window box paper is from the Great Outdoors pad.


I just love this sentiment that's also from the Missing You set.  That surely would make anyone smile!  I stamped it in Versamark and heat embossed it with white embossing powder.  I didn't really plan on what size to make this card--somehow it turned out to be 6" x 5"!


Here are a couple different views of my card.


The two bees and the bird are from the Birds and The Bees stamps and Honey Cuts.


I totally love how this card turned out!  I hope you do too!  Thank you so very much for stopping by! Have a wonderful, crafty rest of your week!  Carol :)

Supplies:
Honey Bee Stamps products:
Other supplies:

Wednesday, August 22, 2018

Sending Hugs!

Thought I'd actually do a little blog post for this Honey Bee Stamps card I've posted on Instagram today!  I want to share a tip that will make creating with little die cuts like this a bit easier!


I'm sure those of you reading this know about the trick to use Press N Seal to press down onto your arranged pieces.  Well, these pieces are pretty small and there's quite a few of them to arrange.  They kept slipping and sliding when I was playing with ideas.  I finally thought to lay the Press N Seal sticky side up and stick my pieces in various places till I was happy with the arrangement.  (You can see how I taped the Press N Seal down so it wouldn't move.)  I then took a photo with my phone and referred to it when actually gluing them to the card panel!  This made it so much easier!


I used a stylus and a foam pad to shape the flowers and leaves for dimension.  I really love taking just plain white card stock and creating something bright and cheerful like this!


If you actually are reading here at the end, I thank you very much!  Have a wonderful day!

Carol :)

Supplies:
Honey Bee Stamps Honey Cuts:  Bunch of Bouquets; Grass Border
Honey Bee Stamps Cheerful Sentiments
Distress Oxide Ink colors:  
grass and leaves: Peeled Paint, Forest Moss
flower pots:  Fired Brick, Ages Mahogany, Iced Spruce, Hickory Smoke; Stormy Sky; Faded Jeans
flowers: Barn Door; Dusty Concord, Spiced Marmalade, Wild Honey, Mustard Seed, Fossilized Amber
Scrapbook Adhesives 3D foam squares
Versafine Onyx Black ink
Nuvo Crystal Drops:  Dandelion Yellow, Ripened Pumpkin
Neenah Solar White 100 lb. card stock